Safire GF-1070RDR User manual

GAS FIREPIT USER MANUAL
PIN CODE:2531CS-0167
! IMPORTANT
READ BEFORE USE
SAVE THESE
INS
TRUCTIONS
!
W
arning:
For
Outdoor
Use
Only.
If stored
indoors, detach and
!
W
arning:
If the
information
in this manual is not Read the
installation, oper
a
tion
followed exactly,
a fire or
explosion
and
maintenance
ins
tructions
may result
causing property damage,
thoroughly beforeinstallingor
personal injury
or loss of
lif
e
.
servicing
this
equipment.
Installation
and
service
mus
t
be Save these
instructions
for
futur
e
performed
by a
qualified installer,
reference.
If you are as
sembling
service agency
or gas
supplier.
this unit for
someone
else,
giv
e
this manual to him or her to
r
ead
Improper installation, adjustment,
and save for
future
r
ef
er
enc
e
.
alteration, service
or
maintenance can
cause
injury
or
property
damage
.
leave
cylinder outdoors.
DANGER
If you smell gas:
1. Shut offgas to the appliance.
2. Extinguish any open flame.
3. If odor continues, keep away
from the appliance and
immediately call your gas
supplier or fire department.
WARNING
Do not store or use gasoline or other
flammable vapors and liquids in the
vicinity of this or any other appliance.
An LP-cylinder not connected for use
should not be stored in the vicinity of
this or any other appliance.
Gas Supplies Sold
Separately
In the event of a blowback,
close the control valve and re-ignite
the appliance. If the problem
persists, please contact Safire (the
supplier)
!

Table of
Contents
Important
Safety
Information
3
Gas Dangers and
Warnings
5
Hose and R
egula
t
or
Assembly
and
Replacement
7
Parts
Lis
t
8
Assembly Instructions
9
Pre-Use
Instructions
13
Lighting
14
Care and
Cleaning
15
Helpful
Tips
16
Troubleshooting
17
! DANGER
CARBON MONOXIDE HAZARD
This appliance can produce carbon
monoxide which has no odor.
Using it in an enclosed space can kill you.
Never use this appliance in an enclosed
space such as a camper, tent, car or home.
SPECIFICATIONS
Product Name Gas Type
Gas Fire Pit LPG or Natural Gas
Model
No.
GF-1070RDR/1070SQR/910CDR/etc.
Heat
input
10 inch burner:12kW, 13inch burner:13.2kW.
2

Important
Safety
Information
! FIRE TABLE IS FOR OUTDOOR USE AND DECORATIVE PURPOSES ONLY
•WARNING Failure to
follow
the
dangers,
warning and
cautions
in this manual may result
in
serious
bodily injury
or death, or in a fire or an
explosion
causing damage to
pr
operty
.
•
WARNING
Improper installation, adjustment, alteration,
service or
maintenance
can
cause
injury or
property
damage. Read the installation, operating and
maintenance
ins
tructions
thoroughly before installing
or
servicing
this
equipment.
•Minimum Clearence from Unit to Combustible
Ma
t
erials
72”(182.9cm)
from the top; 48”
(121.9
cm) from all sides and back. Do not
loca
t
e
this
fir
e
table under any
overhead enclosur
e
.
IF YOU SMELL GAS
•Shut offgas supply to the fire
table
.
•Extinguish any open flame
.
•Do not try lighting any
applianc
e
.
•Do not touch any electrical switch; do not use any phone in your building.
•Immediately call your gas supplier from a neighbor’s
phone
.
•Follow the gas supplier’s instructions.
•If you cannot reach your gas
supplie
r
,
call the fire department.
•
Children
and
adults should
be
alerted
to the hazards of high surface
t
emper
a
tur
es and
be
kept
at a safe
distance while
fire table is in
use
.
•This
outdoor
fire table is NOT
to
be
operated
by
children. Young children should be
closely supervised
when in the
vicinity
of this
outdoor
fire
table.
•
Do not hang or
placeclothing
or
other flammable materials
on or near the gas fire
table
.
•
Any
guard
or
protective device removed
for
servicing the appliance shall
be
replaced
prior
to
operating
the
applianc
e
.
•
Installation and repair should
be
done
by a
qualified service person.
The
appliance should
be
inspected before
use and at
leas
t
annually
by a
qualified service
person.
More
frequent cleaning
may be
required
as
necessary.
It is
imperative
that the
control compartment, burners,
and
circulating
air
passageways
of the
appliance
are
kept
clean.
•Keep these instructions for future reference. Ifyou are assembling this unit for someone
else, give this manual to him or her to read and keep for future
reference.
•Do not use this unit for cooking.
•Do not pour water into the firetable.
•DO not use this outdoor fire table if any part has been under water.Immediately call a
qualified
service
technician
to
inspect
the fire table and to replace any part or
control
system and any gas
control which
has been under
water.
•This gas fire table and its individual shut-offvalve must be disconnected from the gas supply
piping
s
y
s
t
em
during
any pressure
testing
of that
s
y
s
t
em
at test pressures in excess of 29 mba r.
The
appliance
mus
t
be
isola
t
ed
from the gas
supply piping
s
y
s
t
em
by
closing
its individual manualshut-offvalve during any pressure testing of the gas supply
piping
3

Important
Safety
Information
(Continued)
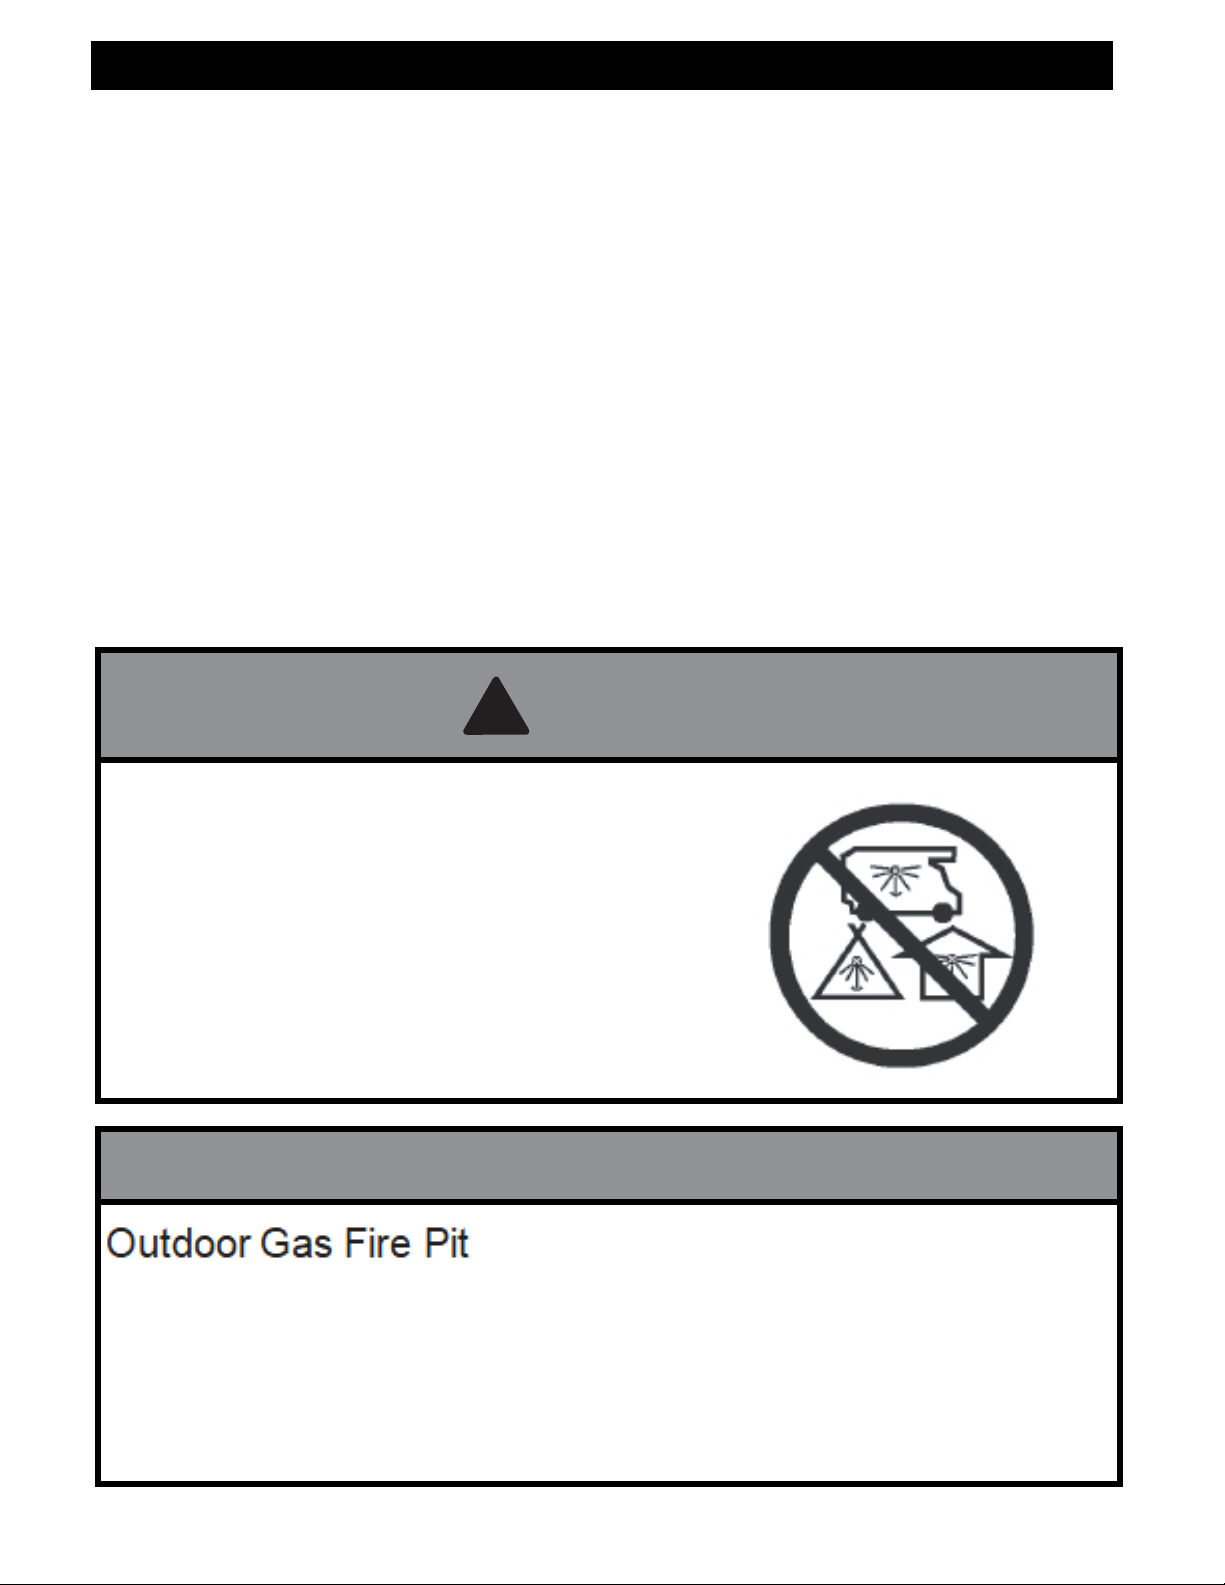
•This gas fire table must be used ONLY outdoors in a well-ventilated space and shall NOT
be
used inside a
building,
garage, or any other
enclosed
ar
ea.
•DO NOT use this outdoor gas fire table for indoor heating.TOXIC carbon monoxide fumes
can accumulate and cause asphyxiation.
•NEVER LEAVE this gas fire table unattended when in use
.
•Do NOT store or use gasoline or other flammable vapors and liquids within 25feet
(7.62m)
of
this or any
other
applianc
e
.
•Do NOT store any combustible materials in the base enclosure
.
•Never use a flame to check for gas leaks.
•The use of alcohol, prescription or non-prescription drugs may impair an individual’s ability
to
properly
assemble or safely
oper
a
t
e
this outdoor fire
table
.
• DO NOT use in an explosive atmosphere. Keep gas fire table area clear and free from
combustible materials, gasoline and other flammable vapors and liquids.
•This outdoor fire table is not to be installed or used in or on recreation vehicles and/or boats.
•Always use in accordance with all applicable local, state and national codes. Contact your
local
fire
department
for
details
on
outdoor burning.
•Use the same precautions you would with any open fire when using this outdoor fire table
.
•DO NOT burn solid fuels such
as:
wood, charcoal briquettes, lump charcoal, manufactured logs,
driftwood,
trash, leaves, paper,
cardboard, plywood, painted
or stained or pressure
tr
ea
t
ed
wood
in this
outdoor
fire
table
.
•DO NOT use this outdoor fire table until it is
COMPLETELY
assembled and all parts are securely
f
as
t
ened
and
tight
ened.
•DO NOT store another LP gas tank within
10
feet (3.05m) of this outdoor fire table while it is
in
oper
a
tion.
•DO NOT use this outdoor fire table near automobiles, trucks,vans or recreational vehicles.
•DO NOT use this outdoor fire table under any overhead structure or near any unpr
otect
ed
combustible constructions.
Avoid using near or under
overhanging
trees and
shrubs.
•Always use this outdoor fire table on a hard,level non-combustible surface such a
c
oncrete
,
rock or
s
t
one
.
An asphalt or
blacktop
surface may not be
acceptable
for this
purpose
.
•DO NOT wear flammable or loose clothing when operating this outdoor fire table.
•DO NOT use in
windy
c
o
n
d
i
ti
o
n
s
.
•Keep all
electrical
cords away from a hot
outdoor
fire
table
.
•Certain areas of this
outdoor
fire table when in use will
become
too hot to
to
u
c
h
.
Do not
t
o
u
c
h
hot
surfaces
until
t
h
e
unit has
cooled
unless you are
wearing protective
gear such as
i
n
s
u
l
a
ted
pot
holders
or
h
e
a
t
r
e
s
i
s
t
a
n
t
gloves or
mittens
to avoid
b
u
r
n
s
.
•DO NOT
attempt
to move or store this
outdoor
fire table until all parts are
c
ool
.
•DO NOT lean over this
outdoor
fire table when
lighting
or when in
u
s
e
.
•Use only the
r
e
g
u
l
a
t
o
r
and hose assembly
p
r
ovi
d
e
d
.
The
r
e
p
l
a
c
e
m
e
n
t
r
e
g
u
l
a
t
o
r
and
h
o
s
e
assembly shall be that
specified
by the manufacturer.
•DO NOT
attempt
to
d
i
s
c
o
nn
e
c
t
the gas
r
e
g
u
l
a
t
o
r
from the tank or any gas
fitting
while
t
h
e
outdoor fire table is in
u
s
e
.
•
Always
s
hu
t
offgas
supply
at the tank valve and
d
i
s
c
o
nn
e
c
t
regulator
from the tank when
th
e
fire table is not in
u
s
e.
•DO NOT sit on
t
h
e
fire table when the unit is in
o
p
e
r
a
ti
o
n
.
•DO NOT
throw
a
n
y
t
h
i
n
g
onto the fire when
t
h
e
unit is in
o
p
e
r
a
ti
o
n
.
•Lava rocks or fire glass are very hot; please keep
children
or pets at a safe
distance.
•It is
e
ss
e
n
t
i
a
l
to keep the
outdoor
fire table valve
c
o
m
p
a
r
t
m
e
n
t,
burners, and
circulating
a
i
r
passages clean.
In
s
p
e
c
t
outdoor
fire table
before
each
u
s
e
.
4

Important
Safety
Information
(Continued)
•Prior to fire table
operation,
check the hose for
evidence
of excessive abrasion or wear.
If
the hose is
damaged,
cracked or cut,
it
must be
replaced
before using the gas fire table.
The
hose assembly can only be
replaced
with a hose
assembly specified
by the
manufacturer.
•Before each use, remove the lava rocks. Examine the burner and its components. If dirty, clean with
a soft brush and soapy water
solution.
Also
examine
the area
around
the burner. Any dirt or
foreign material,
such as spider webs or nests in this area should be
removed.
If
it
is
evident
that the burner is
damaged,
the fire table must not be used. The burner
assembly
must
be
replaced.
•Place the hose out of the pathways where people may trip over it. Do not place the hose in
areas where
it
may be
subjected
to
accidental damage.
•The
appliance
should be limited such that
accessibility
to the flame is
minimized
if the
appliance
is not fitted with a
guard.
!
D
A
NGE
R
This
outdoor
fire
t
a
b
l
e
is for use with
L
PG
a
nd na
t
u
r
a
l gas only. The
conversion
to
o
r
attempted
use of
natural
gas in this
outdoor
fire table is
dangerous
and could result
in
serious
personal
injury, or
property damage.
ATTENTION:
Any
alteration
of the
outdoor
fire table that is not
specifically
directed
in the
operations
manual will void
manufacturer warranty.
LP GAS
Dangers And
Warnings
LP gas is flammable and hazardous if handled improperly. Become aware of the
characteristics
before
using any LP gas
product.
LP GAS
WARNINGS
•Cylinders must be stored outdoors in a well-ventilated area out of reach of children.
•Disconnected cylinders must have threaded valve plugs tightly installed and must not
be
stored
in a
building, garage
or any other
enclosed area.
•Never use a LP cylinder with a damaged body, valve, collar or
footing.
•Dented or rusted LP cylinders may be hazardous and should be checked by your
LP gas
supplier.
Before installation, ensure that the local distribution conditions (identification of the type of gas and pressure)
and the adjustment of appliance are compatible.
appliance shall be connected in accordance with national regulations
5

Propane (LP) Dangers And Warnings
(Continued)
•LP gas tank must be arranged for vapor withdrawal.
•The LP gas tank must have a tank collar to protect the tank valve.
•The LP gas tank should not be dropped or handled roughly.
•Tanks must be stored outdoors out of the reach of children. Do NOT store in a building,
garage, or any other
enclosed area.
•Never store your LP gas tank where temperatures can reach over 125
°
F.
•Do not store the LP gas cylinder in direct sunlight or near a source of heat or combustion.
•Never keep a filled LP gas tank in a hot car or car trunk.Heat will cause the gas pressure
to
increase, which may open the relief valve and allow gas to
escape.
•Place dust cap on valve outlet whenever the LP gas tank is not in
use.
Only install the type
of
dust cap on the LP gas tank valve outlet that is provided with the LP gas tank valve.
Other
types of caps or plugs may result in leakage of
propane.
a. Do not store a spare LP gas
cylinder
under or near this
appliance.
b. Never fill the LP gas
cylinder beyond
80%
full.
c. If the
information
in (a) and (b) is not
followed exactly,
a fire causing death or
serious
injury may
occur.
•LP gas cylinders should be filled only by a certified LP gas dealer.
•Use the regulator that it shall comply with the EN 16129.
pressure.
•Never attempt to attach this appliance to the self-contained LP gas system of a camper trailer,
motor
home or
house.
•Always use the pressure regulator and hose assembly provided with the appliance to
connect
to a LP gas
cylinder.
Never
connect
to an
unregulated
LP gas
supply.
•Hand turn the manualgas control valve.Never use tools. Ifthe valve will not turn by hand,do not try to
repair it. Call a
Certified
Gas Technician. The use of force or any self
attempted
repair may result
in a fire or
explosion.
Connecting your gas
cylinder:
Before
connection,
be sure that there is no debris caught in the head of the gas
cylinder, head
of the
regulator
valve or in the head of the burner and burner ports.
Connect regulator valve
and
hand-tighten firmly. Disconnect
the
propane cylinder
from the
regulator
valve when
the
fire table is not in use. DO NOT obstruct the flow of combustion air and ventilation air to the
burner.
Lava Rock
Warning:
1.
Do not light or use this
firetable
if lava rocks are wet. Ensure lava rocks are
completely
dry
before lighting.
Intense heat can cause wet lava rocks to
explode
and they could
hit
someone
causing injury.
2. Please keep away from the
firetable
for at least 20
minutes during
initial
start-up
as
lava
rocks could retain some
moisture
from
manufacturing
and
shipping.
6

Hose & Regulator Assembly And
Replacement
1.
a. If the burner valve is open prior to the LP gas
cylinder
service valve being
opened,
the
connection will interpret this free flow of gas to be a leak.
b. The connection safety feature will reduce gas flow from the regulator to the appliance to a
minimal
level.
c. Be sure that the
burner control
valve is closed prior to
opening
the LP gas
cylinder service
valve to ensure that the connection flow limiting device is not triggered mistakenly.
d. Ifthe connection flow limiting device is triggered mistakenly,close the LP gas cylinder
service valve and the burner valve, wait 10 seconds to allow the device to reset, open
the
cylinder
service valve, then open the burner valve and light the
fireplace
as per lighting
instructions.
2. Be sure to
protect
the hose from any hot surfaces. Serious
danger
may result if the
hose
contacts
any hot
surface.
3. Regular
maintenance
of the hose and
regulator:
a.
Inspect
the hose
before
each use of the fire table. If the hose shows signs of
cracks,
abrasions, cuts or damage of any kind, do not
operate
the
appliance.
Fix or replace the
hose
as
required before
using the
appliance.
Use only
replacement
parts from the
manufacturer.
b.
Inspect
the seal inside the v a l ve on the LP gas
cylinder
when
replacing
the
cylinder
or at
least once per year. If there is any
indication
of damage, have the seal
replaced
by a
certified gas dealer
before operating
the
appliance.
4. Do not use tools to
tighten
the
connection
nut onto the LP gas
cylinder service
valve. Hand
tighten only.
5. Be careful to not cross the threads on the connection when tightening the connection on to the
LP gas cylinder service valve.
6. “Leak Test” should always be performed after attaching the connection to the LP gas cylinder service
valve.(See “Checking for Leaks” section of this manualon page 12)
7. For the connection of the hose and regulator to the LP tank, refer to the “Connection” section
of the LP gas cylinder section above.
7

Parts
List
Item
Quantity
1
Table
1
2 LP Gas R
egula
t
or
and Hose
1
3 AAA
Ba
tt
ery
(Optional)
1
4 Lava Rock or Fire Glass (Optional)
1
bo
x
5 Vinyl C
ov
er
6 Tank Sea
t
7 Table Lid
(Optional)
1
(Optional)
1
(Optional)1
4
7
3
5
6
8

1
2
Assembly
Instructions
Install the AAA
battery
as
shown
in the
diagram below.
!
WARNING
Batteries
may
contain Mercury.
Do not put
it
into the fire or
trash.
Please
treat
it as
hazardous
waste and
recycle properly.
Place lava rock by hand. Do NOT dump bag out into tray to avoid
clogging
the
burner
with dust. Put Lava Rock or Fire glass inside and
around
the
burner
as shown. Make
sure
that you do not
block
the
igniter
box with lava rock to ensure
proper ignition.
9

1.
Place the tank seat on the
ground
and place a 20lb.
propane
tank into the tank seat
(5).
2.
Tighten
down the screw in the bottom of the tank seat to secure the propane
tank.
1 2
4
Connecting
the LP Gas
T
ank
Check to make sure there is no debris in
the
head of the LP gas tank or in the head of
the
r
egula
t
or
valve. Make sure you check
the
burner
and
burner
ports as
w
ell.
Connect
gas line to tank by
turning knob
clock
wise
.
Hand tighten
onl
y
.
Make sure that there are no kinks or bends
in
the hose and thatit is placed out of
an
y
pathways
where people will not trip on
it.
10

5
Disconnecting
the LP Gas
T
ank
Make sure the valve on the LP gas tank
is
OFF
.
Disconnect
by turning the knob counter
clockwise until it is
off
.
When using the
NATURAL
GAS as gas
supplies,
please ask the local professionals
to
install the
extension
pipe in
advance.
The thread of the end of gas inlet
connection
should be directly and tightly
connected
with the natural gas outlet of
extension
corrugated
pipe, and
carefully
check the leak before
use.
NOTE
Always
disconnect
the LP Gas tank when the fire table is not in
use.
Leaving the LP Gas tank
connected
could cause the excess
flow
safety device to
trip.
Technical data
Appliance name
GAS FIRE PIT
Model No.
GF-1070RDR/1070SQR/etc.
Burner type
10 inches round burner
13 inches round burner
Nominal heat input
12kW(946g/h)
13.2kW(1040g/h)
Serial number
2018121070RDR-01
Pin code
2531CS-0167
Electrical data
N/A
New weight
42 kg
GAS CATEGORY
GAS TYPE AND
PRESSURE
Injector size(mm)
DESTINATION COUNTRIES
10inch
bunrer
13inch
burner
I3+(28-30/37)
G30:(28-30)mbar/
G31:37mbar
1.74
1.86
BE, FR, IT, LU, IE, GB, GR, PT, ES, CY, CZ, LT, SK, CH, SI, LV
I3B/P(30)
G30, G31 or their
mixture: (28-30)
mbar
1.74
1.86
LU, NL, DK, FI, SE, CY, CZ, EE, LT, MT, SK, SI, BG, IS, NO, TR, HR,
RO, IT, HU, LV
I2H(20)
G20:20mbar
2.86
3.0
FR, IT, NL, DK, IE, GB, GR, ES, PT, AT, FI, SE, CZ, EE, HU, LV, LT, SK,
SI, IS, NO, CH, TR, BG, HR, RO.
I2E(20)
G20:20mbar
2.86
3.0
DE, LU, PL
Information of adjuster and assembly of exchangeable parts:
Safety valve & control knob: KSUN BS190
Stainless Burner : GB-FRR 1013/GB-FRR1318
Ignition device:DHLG-12
Manufacturer: EOS HOME DECOR Co.,Ltd.
Address: No.94 Yueken Road, Tianhe District, Guangzhou, Guangdong,China
11

Pre-Use
Instructions
Prior
to
each gas fire
table operation,
check the hose and valve for
evidence
of
excessive
abrasion
or
wear.
WARNING
Before using this
outdoor
fire table, make sure you have read,
understand and
are
following
all
information provided
in the
Important
Safety
Information section
of this
manual.
Failure to
follow
those
instructions
can cause death, serious
injury
or
property
damage
.
CHECKING FOR
LEAKS
Make a leak check
solution
by
mixing
1
part
dishwashing
soap
with
3 parts
water
in a spray
bottle.
Make sure
contr
ol
knob is “OFF.”Then, turn LP gas
tank
to “ON”at valve.
Spray leak
solution
on valve
connectionspaying particular
attention
to the areas
indica
t
ed
by
arro
w
s.
If any
bubbles appear
turn LP gas tank OFF,
r
ec
onnect
and
re-test.
If you
continue
to see
bubbles
after
several
attempts, disconnect
LP gas
source
.
If no
bubbles appear
after one
minute
turn tank
OF
F
,
wipe away
solution
and
pr
oc
eed.
Check for leaks at these locations
!
W
ARNING
-DO NOT use an open flame to
check
for
leaks.
-DO NOT smoke while
testing
the
unit.
-NEVER test the unit
indoors.
-Leak checks must be
preformed any
time the gas
cylinder
is
replaced.
Inspecting
This outdoor fire table must be inspected regularly to ensure that the product is safe to use and to extend
product life.
! WARNING DO NOT inspect this outdoor fireplace until the fire is COMPLETELY out.
1. Check the burner to make sure it is securely in place and that there is not excessive wear or damage.
2. Check the burn tube to make sure it is clear and free of insects, spider nests and other debris.
3. Check all gas connections for leaks.
4. Check ignition system to insure proper sparking.
5. Check components for any signs of damage, rust or excessive wear.
6. If damage to any component is detected, DO NOT operate until the proper repairs have been made.
WARNING DO NOT tamper with this appliance. This is DANGEROUS and will void the warranty. Any part
found to be faulty must be replaced with an approved part, confirmed by the manufacturer.
12

Lighting
In
s
tructions
!
WARNING
7
If burner flame goes out during
ope
ration,
immedia
t
ely
turn the control knob “OFF” and let
the
gas clear a
minimum
of 5
minu
t
es
before
a
tt
empting
to
re-light
the
fir
eplac
e
.
!
WARNING
Do not wear loose or flammable clothing while
lighting
fire
table.
Control panel with knob
Using the
igniter
1.
Read and
understand
all
operating instructionsbefore lighting.
2. Burner
control
knob must be in the “OFF”
position.
3.
Connect propane
(LP)
cylinder
(see above
pages).
4. Slowly open valve on LP gas
cylinder.
5. Push and hold
igniterbutton
to
cr
ea
t
e
sparks.
6. While
holding
the igniter button with one hand, use your
other
hand to push and turn the
control knob
to the “LOW”position to light the
burner.
7. Keep Burner
Control
Knob pressed in for 15-30 seconds after
ignition.
8.
Ifignition does not occur in 30 seconds, turn control knob to the “Off”position and turn gas offat
the source, wait 5 minutes until gas has cleared and repeat lighting procedure.
9. Adjust the flame to the
desiredheight
with the
control knob.
Using a Long Match or
Light
er
1.
Prior to
lighting,
use a shovel to move
the
lava rocks for access to the
burner.
2.
Wearing
hea
t
resistant
gloves,
position
the
burning
long
match
or
burning butane
lighter
near the side of the burner. DO
NOT
lean over the fire table while
lighting!
3. Turn
control
knob
counterclockwise
to
“LOW”.
4. Remove long
match/long butane
light
e
r
.
5. After lighting, use a shovel and heat
resistant gloves
to
carefully
move the lava rocks back into their
proper position.
6. Adjust the flame to the
desiredheight
with
the
control
knob
.
!
WARNING
When using this
method
to
light
your fire table use heat
resistant
gloves and
follow
the step by
step
instructions.
Failure to do so
could
result in severe
injury.
Please refer to the trouble shooting, and helpful tips sections
for
additional
support, beginning on page 17. 13

Care and
Cleaning
General Care and
Cleaning
This outdoor fire table should be cleaned regularly to ensure safe use and extend product life and need regular
servicing of the fire table
Debris from any source, or any soot formed shall require removal. Specific methods as below.
NOTE: After repeated use, a slight discoloration of the finishes may occur.
! WARNING
DO NOT attempt to clean this outdoor fireplace unless the fire is completely out and the unit is cool to the touch.
DO NOT use oven cleaner or abrasive cleaners as they will damage this product. DO NOT USE SOLVENTS while in
closed spaces or while smoking.
Table
Body
1. Wipe exterior surfaces with a mild dishwashing soap or baking soda, then rinse clean with water.
Stainless
Steel
1. For general cleaning use warm water, soap, ammonia, or detergent apply with a soft cloth or sponge.
2. For finger prints or smears use 3M Stainless Steel Cleaner and Polish, Arcal 20, Lac-O-Nu, Lumin Wash, O’Cedar
Cream
Polish, Stainless Shine, this will provide a barrier film to minimize fingerprints.*
3. For stubborn stains and discoloration use 3M Stainless Steel Cleaner and Polish, Allchem Concentrated
Cleaner,Samae, Twinkle, Cameo Copper Cleaner, Liquid Nu Steel, Copper’s or Revere Stainless Steel Cleaner,
apply using a soft cloth in the same direction of the polish lines.*
4. NOTE: Even the finest cleaning powders can scratch or burnish a mill-rolled finish. On polished finishes, rubbing or
wiping should be done in the direction of polish lines.
* Use of
proprietary names isintended only
to
indicate a type of cleaner and does not constitute an
e
n
d
o
rs
e
m
e
nt
.
Omission of any proprietary
cleanser does
not
imply
i
t
s
i
n
ade
qua
c
y
.
A
ll
products
s
h
o
u
l
d
be
u
s
e
d
in
s
t
ri
c
t
accordance
w
it
h
instructions o
n
p
acka
g
e
.
S
t
or
age
! WARNING
DO NOT move or store this fire table unless the fire is COMPLETELY out and is cool to the touch.
1. Turn gas OFF at tank connection. Remove tank and store in a cool, dry location outdoors, away from children.
2. Carefully remove rock filler and store components flat to protect them from breakage.
3. ALWAYS cover your outdoor fire table when not in use.
4. Store in a cool, dry location away from children and pets.
5. Any purpose-provided ventilation should be checked regularly to ensure that it free from obstruction
14

Helpful
Tips
If the burner will not light or stay lit, please
perform the following checks.
It is possible that the Excess Flow Safety Device has been tripped.
Turn the control knob to offand close the LP Gas tank valve. Disconnect the regulator. Turn the Control Knob
to “HIGH”. Wait a minimum of 5 minutes.
Turn burner control knob back to “OFF”. Reconnect the regulator and perform
a leak check at tank connection. Turn the LP Gas tank valve on slowly, wait 30
seconds and then light the outdoor fire table.
To ensure proper ignition make sure the igniter pin is properly positioned and connected.
The Igniter Pin must be 3 mm (1/8”) away from the burn tube. (Below Left)
The ignition wires must be fully inserted into the ignitor box. The ignitor box is located next to the control
valve under the unit.
Thermocouple
3mm
Igniter
Pin
If wires are
too
close,
or
tangled,they
could
short.
Make sure
they
are
spaced
apart from
each
other.
Make
sure
the
wires
are
fully
inserted
into
the
ignitor box.
Make sure that the pilot housing is unobstructed.
Clear any debris on top of the pilot housing and make sure there is no debris between the igniter pin,
thermocouple and the burner tube.
Pilot
Housing
Burner
T
ube
Do not
block
opening
CORRECT INCORRECT 15

T
r
oubleshooting
Problem: Burner will not light using
ignit
er
Please
review
the Helpful Tips on page 15 for common fixes to this
problem.
Possible Cause 1: Electrode and burners are wet.
-Wipe dry with cloth.
Possible Cause 2: Igniter battery is dead or backwards.
-Check that the AAA battery is inserted correctly in the igniter (see page 10) or replace the
battery. Make sure the plastic wrap on the battery has been removed.
Possible Cause 3: Igniter Pin cracked or broken - sparks at crack.
-PLS contact retailer for technical support.
Possible Cause 4: Bad Igniter
-PLS contact retailer for technical
support.
T
hermocouple
Igniter Pin
(Electrode)
Burner
Burner
Ports
Problem: Burner will not light with
mat
ch
Possible Cause 1: No Gas Flow
-Check if the LP gas tank is empty. If empty, replace and refill. If the propane tank
is not empty, refer to “P roblem: Sudden drop in gas flow” on the
following page.
Possible
Cause 2:
Coupling
nut and
regulator
not
fully
connect
ed.
-Turn
the
coupling
nut
about
one half to
three fourths
a turn, until
y
ou
feel a solid s
t
op
.
Do not use
t
ools,
tighten
by hand
only
.
Possible
Cause 3:
Obstruction
of gas
flo
w
.
-
Check
for bent or
kinked
hose
.
Possible
Cause 4:
Spider
webs or
insect
nes
t
in the
v
enturi.
- Clean the
v
enturi.
Possible
Cause 5:
Burner ports clogged
or
block
ed.
Coupling
Nut
Venturi
-Referenc
e “P
roblem:
Irregular flame
pattern”
on the
following
page. Clean
the
burner ports
as
described
ther
e
.
Pr
oblem: The
fir
eplac
e
emits a
lot
of
black smok
e
when in
use
Possible
Cause
1:
Hose
from
gas
fireplace
is
pinched.
-Make sure the hose is not
pinched between the
fire
table
and the
source
of the
gas.
Possible
Cause 2: Flame is
being obstructed
at
burner ports.
-Make sure
that
the gas
ports
on the
burner
are
fr
ee
Burner
Ports
of any lava
r
ocks
/fire
glass so that the flame can flow
naturally.
Possible
Cause 3:
Mixing chamber
of the
burn tube
is
blocked
or
obstructed.
-Clear out the
mixing chamber located before
the
Venturi.
16

T
r
oubleshooting
Problem: Sudden drop in gas flow, or a
reduced
flame
height
Possible
Cause
1:
Out of
Gas.
-Check
for gas in the LP gas
t
ank.
Possible
Cause 2: Excess
flow safety device
may have been
activ
a
t
ed.
-Turn control knob to “OFF”, wait 30 seconds and light outdoor fire table. If
flames are still too low, reset the excessive flow safety device by turning
off
the
control knob
and LP gas tank valve.
Disconnect regulator.
Turn
burner
control knob to “HIGH”. Wait at least 5 minutes. Turn burner control knob
off.
Reconnect regulator
and
perform
a leak
check
at tank
connection.
Turn
LP
gas tank valve on
slowly,
wait 30
seconds
and
then light outdoor
fire
table.
Problem:
Irregular
flame
pattern,
flame does not run the full length of the
burner
Possible
Cause:
Burner ports
are
clogged
or
block
ed.
-Clean
burner ports.
Do this by
inserting a
paperclip
into each of the
burner ports
t
o
ensure
they are not
clogged. WARNING:
Mak
e
sure
burner
is not on, and has had
sufficient
time
to
cool before touching
it.
Burner
Ports
Problem: Flame blow
out
Possible
Cause
1:
High or
gusting winds.
-Increase
flame to “HIGH”setting.
Possible
Cause 2:
Low
on LP
gas.
-Replace
or
refill
LP gas
tank.
Possible
Cause 3: Excess
flow valvetripped.
-Refer to
“Problem: Sudden
drop in gas
fl
o
w”
Problem: Flame seems to lose heat when burning in cold
weather
-
temperature
below
50
°
F
Possible
Cause
1:
Ice has
built
up on the
outside
of the LP gas tank
because
the
vaporization process
is
too lo
w
.
-Turn
the
control knob
and the LP gas
tank
to
“OF
F”. Replace
with a spare
LP
gas tank and
resume burning.
S
t
or
e
the spare LP gas tank in a well
v
entila
t
ed
area,
away
from
childr
en.
If these
trouble shooting s
t
eps
are unable
to resolve
the
pr
oblem,
PLS
contact
retailer
for
technical
support.
17
This manual suits for next models
2
Table of contents
Popular Outdoor Fireplace manuals by other brands

Firegear
Firegear LOF-2412HAWS-N Operating and maintenance instructions

hayneedle
hayneedle Beach House owner's manual

techo-bloc
techo-bloc MANCHESTER FOYER Installation guide and owner's manual

Blumfeldt
Blumfeldt 10030244 quick guide

Endless Summer
Endless Summer GAD16677SP owner's manual

Rosetta
Rosetta KODAH quick start guide

Suburban
Suburban VOYAGER SOP1001A Owner's operation and maintenance manual

BREEO
BREEO Y Series user guide

Outdoor Plus
Outdoor Plus BILLOW manual

Heat-N-Glo
Heat-N-Glo 7000TV Installer's guide

Epic Fire Design
Epic Fire Design Vulcan Fire Module VFM owner's manual

Outland Living
Outland Living 420 Series Assembly instructions