Sakar 28290 User manual

28290 / 28292 Digital Camera
Owner’s Manual
© 2007 Sakar International, Inc. All rights reserved.
Windows and the Windows logo are registered trade arks of Microsoft Corporation.
All other trade arks are the property of their respective co panies.

Table of Contents
Key Features .................................................................................................................................................4
What your digital ca era includes: ..............................................................................................................4
Co puter Syste Require ents for Windows..............................................................................................5
A Quick Look at your Digital Ca era ............................................................................................................6
Main Icons on the LCD Screen......................................................................................................................6
Preparing Your Ca era for Use....................................................................................................................7
Software Installation: Photags Express and WebCa Express....................................................................8
Ca era Operation........................................................................................................................................11
Lithiu Battery .....................................................................................12
Ca era Modes.............................................................................................................................................13
Transferring I ages to your PC...................................................................................................................15
Using Your Ca era as a Webca ..............................................................................................................21
Everything you need to get the ost of your photos and MORE................................................................27
Maintenance of Your Digital Ca era ........................................................................................................29
Technical Support........................................................................................................................................29
Sakar Warranty Card...................................................................................................................................30
Technical Specifications...............................................................................................................................31
Transferring I ages to your PC ……………………………………………………………………………….….…15
Using Your Ca era as a Webca ……………………………………………………………………………..…..20
Everything you need to get the ost of your photos and MORE ……………………………………………..…26
- -
2

Maintenance of Your Digital Ca era……………………………………………………………………………..…28
Technical Support ………………………………………………………………………………………………..…...28
Sakar Warranty Card ……………………………………………………………………………………………..…..29
Technical Specifications …………………………………………………………………………………………...…30
- -
3

Introduction
Thank you for purchasing the 28290 / 28292 Digital Ca era. Please read this anual carefully FIRST in
order to get the ost out of your digital ca era.
Key Features
•PC Ca resolutions 640 x480 pixels (VGA), 320 x240pixels (QVGA).
•PhoTags Express software for anaging and enhancing your photos, printing, sending photos by e- ails
and uch ore.
•WebCa Express software allows you to use your ca era as a Web Ca to create AVI videos or for
Video Conferencing and Instant Messaging.
What your digital camera includes
•Digital Ca era
•USB cable
•Strap
•PhoTags Express Software and ca era driver CD
•User Manual
- -
4

Computer System Requirements for Windows
•Windows 2000 and XP
•Pentiu II 300 MHz, MD Athion 300 MHz,or a Celeron 400MHz or higher
•128MB RAM
•100MB free hard drive space
•CD-ROM drive
•Available USB port
•16-bit Color display with 1024*768 resolution
- -
5

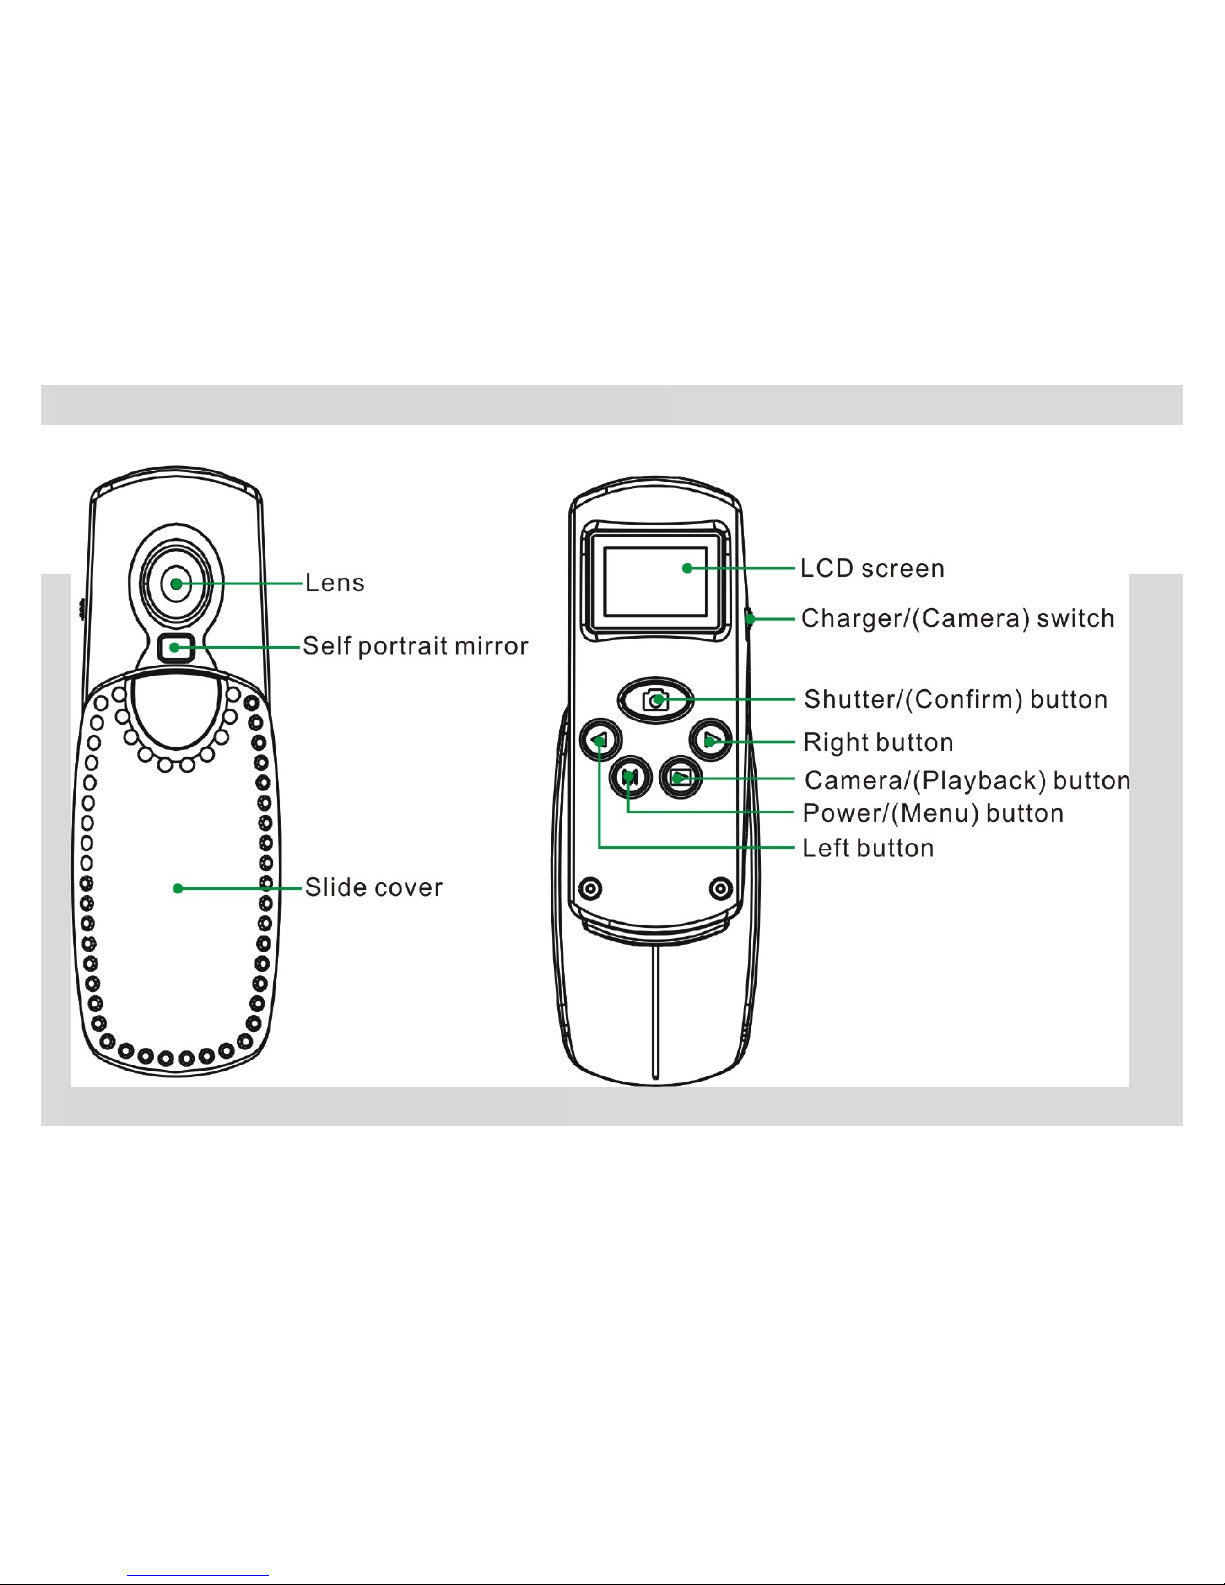
A Quick Look at your Digital Camera
Main Icons on the LCD Screen
- -
6

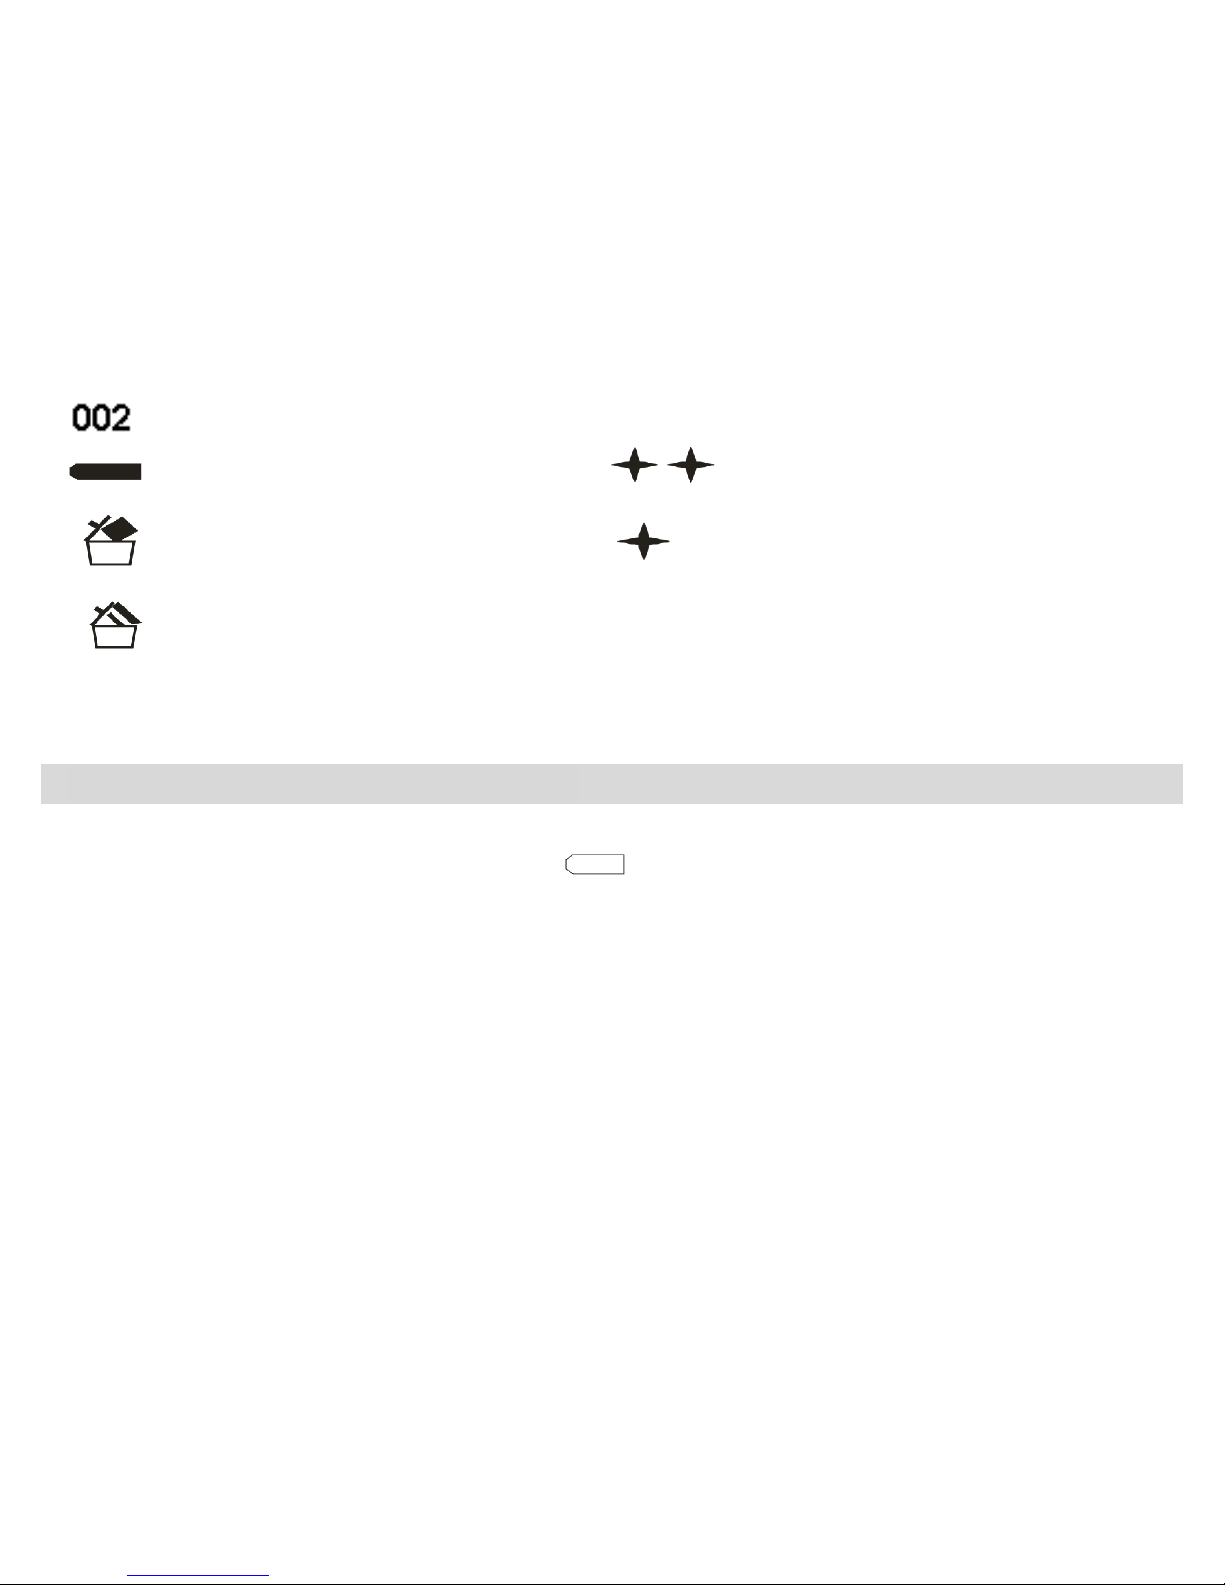
Re aining nu ber of photos available to shoot
Battery power lever High resolution (VGA)
Delete one photo Low resolution (QVGA)
Delete all photos
Preparing Your Camera for Use
Your ca era is powered by a built-in lithiu battery and is powered through USB connection to your PC. If
the ca era has insufficient battery power, the icon will flash on the LCD screen and the ca era will
auto atically turn off after sixty seconds.
To charge your ca era, slide the Charger/Ca era switch on the side of the ca era to Charger status and
then connect your ca era to your PC using the USB cable.
- -
7

Software Installation Photags Express and WebCam Express
NOTE Before atte pting to install the software, ake sure that you do not have the ca era’s USB cable
attached to your co puter. This will affect the install process and can cause a failed installation of the ca era
software and drivers.
Software & Camera Driver Installation
1. Insert the CD into your CD-Ro drive. Make sure that your ca era is not connected to the co puter.
2. Fro the CD Install screen that auto atically appears, choose a language fro the dropdown list.
eg. English, and then click the “OK” button
3. On the “Install your camera software” screen, select the ca era fro the dropdown list on the left and
then click the “Install” button to install the PhoTags Express software.
The WebCa Express software will be auto atically installed.
4. On the “PhoTags Express" screen, click the “Next” button.
- -
8

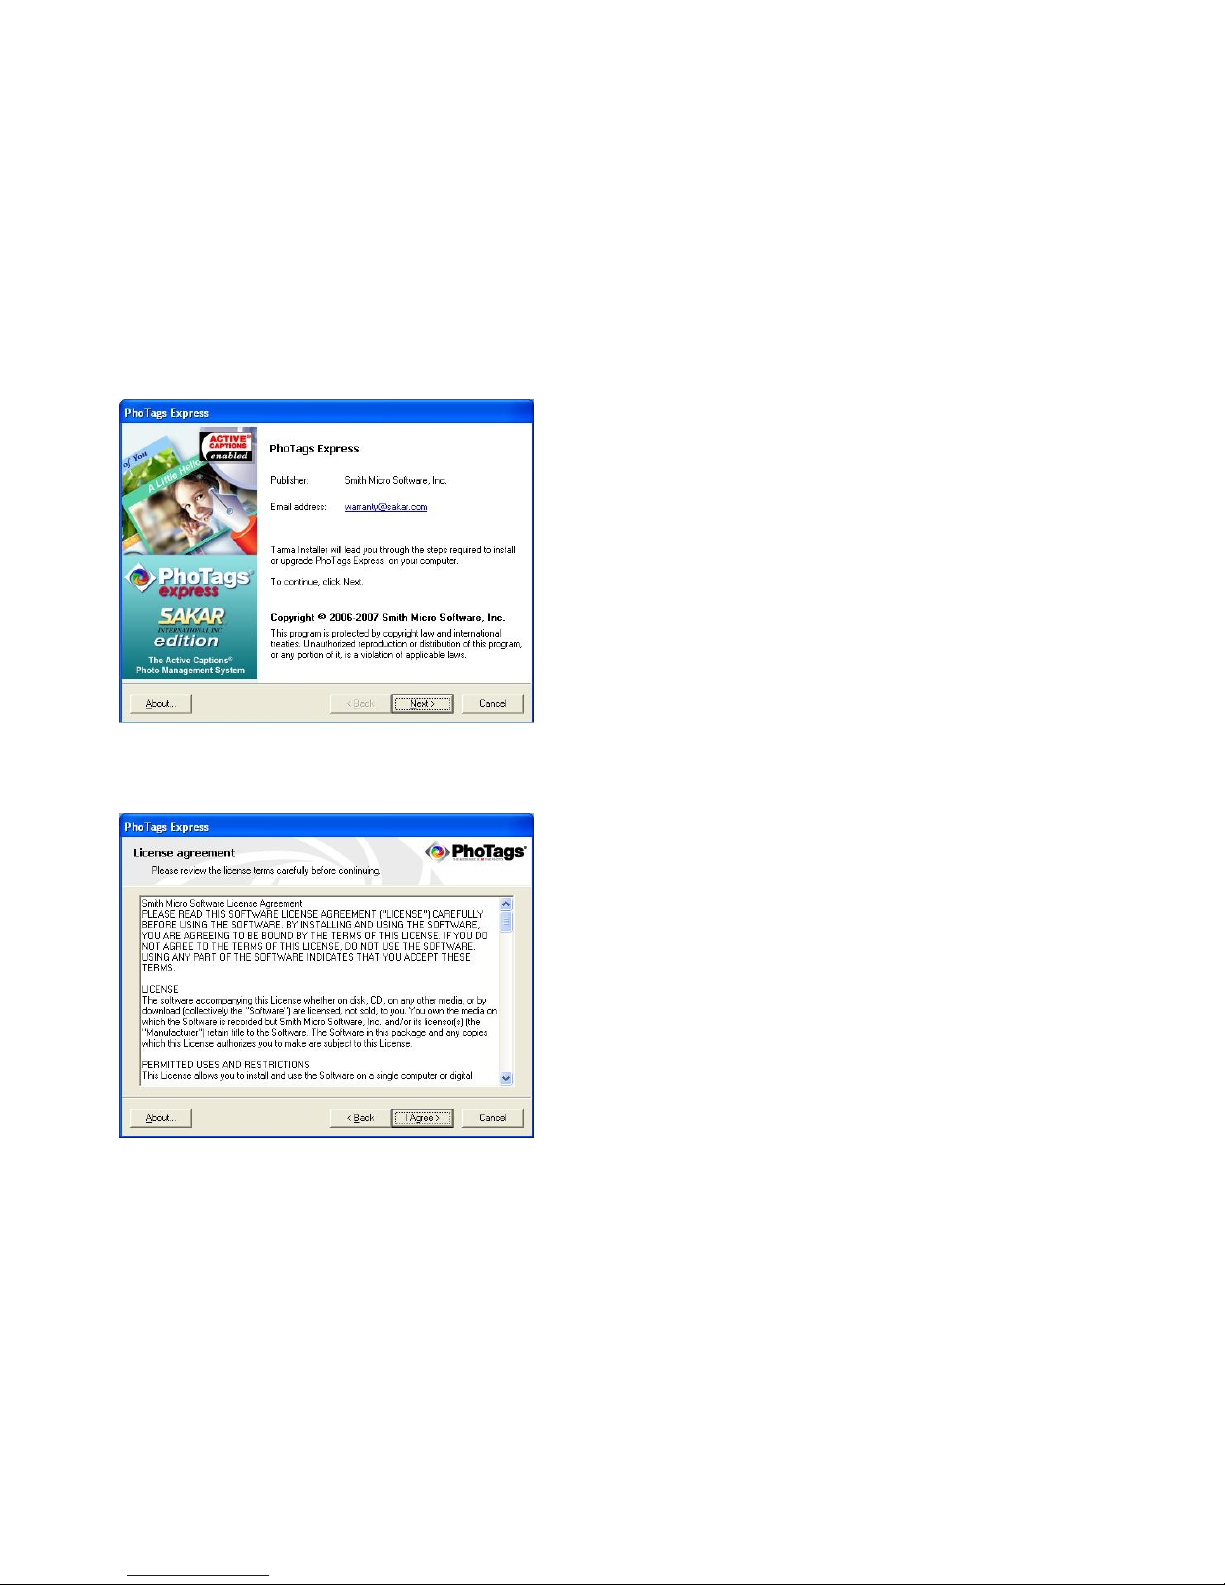
5. Please review the license ter s and click the “Agree” button to continue.
6. Let the “PhoTags Express” installer create the folder where the progra will be installed to, and then
click “Install”.
- -
9

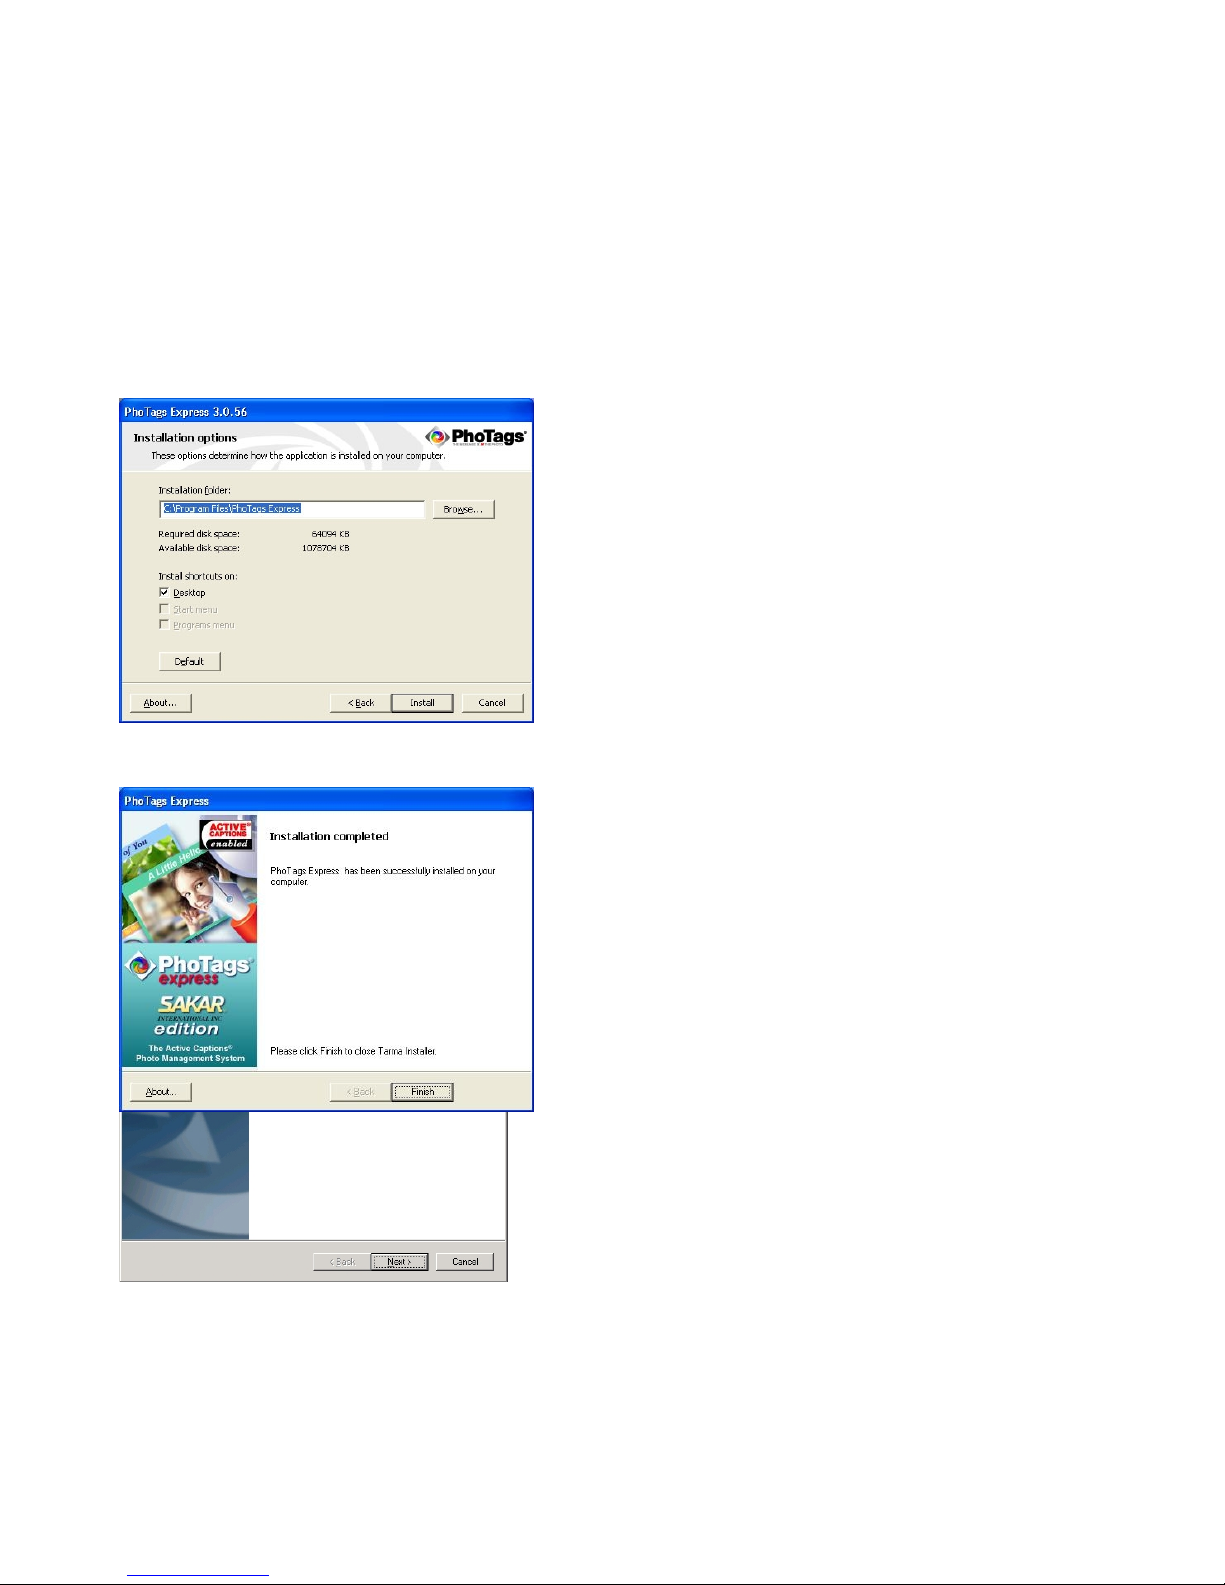
7. Click “Finish” to let the “PhoTags Express” installer finish the installation progra .
8. This will auto atically launch the Install shield for the Ca era driver. Click “Next” to continue.
- -
10

9. Once the driver has finished installing you will have to restart your co puter.
10. Congratulations!! You have successfully installed the “PhoTags Express”, the “WebCa Express”
software and the Ca era driver.
Camera Operation
- -
11

Power on
1. Slide the Charger/Ca era switch on the side of the ca era to Camera status.
2. Press the Power/Menu button once to turn on your ca era. The LCD screen will light up and the
ca era will sound a beep to confir that the ca era is on and ready for use.
Power off
1. Press and hold the Power/Menu button for about 2 seconds. The ca era will sound continuous
beeps and then switch off.
Note: the ca era will turn off auto atically if unused for 60 seconds, in order to conserve energy. Si ply
press the Power/Menu button to reactivate it.
Lithium Battery
Before using your ca era for the first ti e, charge your ca era’s battery. Once the battery is charged, ove
the Ca era/Charger selector to “Ca era” ode. Do not ove the selector back to “Charge” ode until you
have downloaded all your photos to your co puter and are ready to recharge the ca era. Switching to
Charge mode will erase all the photos on your camera.
To recharge your ca era’s battery, connect the ca era to your co puter with the USB cable and ove the
Ca era/Charger selector to “Charge” ode. When the batteries are recharging, the icon will flash on the
LCD screen. Once the batteries are fully charged. The icon will disappear. The ca era will function
nor ally while charging.
We reco end charging your ca era’s battery every 7 days or when you have used up the full e ory
capacity of the ca era.
- -
12

NOTE The camera batteries must be recharged for at least four hours on the first use.
In order to conserve battery power, if the ca era is not used for 60 seconds, the ca era will auto atically
enter energy save ode.
Camera Modes
Your ca era has two ain Modes: Ca era Mode and Playback
Mode.
Camera Mode
Take photo
Slide the cover to show the ca era lens. Ensure your ca era is
switched on and in Ca era status. You can co pose your shot
using the LCD screen.
Hold the ca era steady, and press the Shutter/Confir button to take your photo. There will be a short delay
while the ca era saves the photo to e ory.
Note: After each photo is shot, the nu ber of photos still available to shoot at the current resolution will be
displayed in the upper corner of the LCD screen. When the ca era e ory is full, the LCD screen will
display “000”. If you atte pt to take a photo while the e ory is full, the ca era will beep.
- -
13

Delete One Photo
1. Press the Power/Menu button repeatedly until the icon appears on the LCD screen.
2. Press the Shutter/Confir button within 3 seconds that the screen will flash and press Shutter/Confir
Button again to delete all photos in the Ca era e ory.
Delete All Photos
1. Press the Power/Menu button repeatedly until the icon appears on the LCD screen.
2. Press the Shutter/Confir button within 3 seconds 2 ti es delete all photos in the ca era e ory.
Set Photo Resolution
The photo resolution deter ines the quality of your photos and there you can choose either High or Low
resolution. High resolution represents high photo resolution and photos will be of better quality, while Low
resolution represents low photo resolution and photos will be of a lower quality. In High resolution only 24
photos can be stored in the ca era e ory, while in Low resolution the ca era can store 93 photos.
To define your desired photo resolution:
1. Press the Power/Menu button repeatedly until the icon appears on the LCD screen.
2. Press the Shutter/Confir button within 3 seconds to set High or Low ode.
Playback Mode
Ensure your ca era is switched on and in Playback status. Press the Ca era/Playback button to enter
the Playback ode.
- -
14

Note: in order to access Playback ode, there ust be photos in the ca era e ory. If there are no photos
in the ca era e ory you will not be able to access the Playback ode. You will need to take photos first in
order to view the afterwards in Playback.
Slide Show
I ediately upon entering the Playback ode, the ca era will begin showing the photos currently in
e ory in a slide show for at. Press either the Left or Right button to exit this showing.
Note: this function can only occur if there is ore than one photo in the ca era e ory.
Delete One Photo
You can delete the photo you are currently viewing as follows:
1. Ensure that you are in Playback ode.
2. Press the Left or Right button to ter inate the Slide show function.
3. Press the Shutter/Confir button. You will hear a continuous beeping voice.
4. Press the Shutter/Confir button again to delete currently viewed photo.
View Photos
1. Ensure that you are in Playback ode.
2. Press the Left or Right button to view photos individually.
Transferring Images to your PC
There are 2 methods to download the pictures taken with your camera
- -
15

Manual Photo Download
Get photos anually using “PhoTags Express”?
Use the “PhoTags Express” progra to i port the photos fro your ca era.
1. Plug one end of the USB cable into the USB slot on your ca era.
2. Plug the other end of the USB cable into a USB port on your co puter.
3. Your ca era will auto atically be turned on.
4. Be sure to wait until the ca era is recognized by your co puter.
Important For WinXP users - Do not open the software until you see the “Your new hardware is
installed and ready to use” pop-up box on the toolbar. If you do not see this message before you plug in
your camera, the camera will not function properly.
- -
16

Double-click the “PhoTags Express” icon that appears on your desktop to launch the
“PhoTags Express” progra .
Click on the “Get Photos” button on the Main Menu.
The “Get Photos Wizard - Device Selection” window will appear. Select the “913D ca era” driver fro the list
of Active Devices.
- -
17

1. Custom Copy
This ode is used to anually select the photos you wish to copy to your co puter.
a. Select the "Custo " copy ethod radial button. Click "Next" to continue.
b. Set the batch operations for the photos you are getting. Add Active Captions to
your pictures. With this feature, you can add a date, keywords and categories.
Click “Next” to continue.
- -
18

c. Choose where to place your photos. Click the “Finish” button to transfer the photos fro
your ca era to the co puter to the location you selected.
d. A download box will appear showing you the progress of the pictures
downloading to your co puter.
- -
19

All of the pictures you i ported will appear in the “Select photos” ain window.
2. Express Copy Method
Select the “Express” radial button option if you wish to have all the i ages transferred to the
PC without the option of Adding Active Captions to your pictures at this stage.
With this copy ethod you only choose where to place your photos.
Click the “Finish” button to transfer the photos fro your ca era to the co puter to the
location you selected.
For ore infor ation please refer to the Quick Start guide in PhoTags Express.
- -
20
This manual suits for next models
1
Table of contents
Other Sakar Digital Camera manuals

Sakar
Sakar 87480 User manual

Sakar
Sakar 98309v2 User manual

Sakar
Sakar 24280 User manual

Sakar
Sakar Wrist Cam Watch User manual

Sakar
Sakar 26480 User manual

Sakar
Sakar iConcepts 69052 User manual

Sakar
Sakar 14099 User manual

Sakar
Sakar 44090 User manual

Sakar
Sakar 57490 User manual

Sakar
Sakar 92045 User manual