manuals.online logo
Brands
  1. Home
  2. •
  3. Brands
  4. •
  5. Samsung
  6. •
  7. Camcorder
  8. •
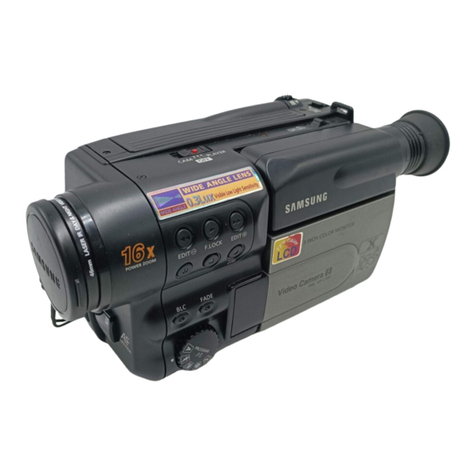
  9. Samsung Hi8 SC-L901 Owner's manual

Samsung Hi8 SC-L901 Owner's manual

Video Camcorder
8mm
COLOR LCD
I ENGLISH I
SCL901/L906/L907
HiWSCL901/L906/L907
Owner's Instruction Book
Before operating the unit, please read this instruction
book thoroughly, and retain it for future reference. E/,,ECTRONCS
I US PATENT 4415844
I ENGLISH I
Notices and Safety Instructions
_oY_,Tuj/[o_
/_ RISK OF ELECTRIC //_SHOCK
DO NOT OPEN
CAUTION:
TO REDUCE THE RISK OF ELECTRIC SHOCK, DO NOT
REMOVE COVER(OR BACK). NO USER SERVICEABLE
PARTS INSIDE, REFER SERVICING TO QUALIFIED
SERVICE PERSONNEL.
To prevent electricshock, match wide blade of plug
to wide slot and fully insert.
,_ This symbol is intendedto alert the user to the presenceof
uninsulateddangerousvoltage within the product's
enclosurethat may be of sufficient magnitudeto constitute
a risk offire or electric shock.
///_ This symbol is intendedto alert the userto the presenceof
important operatingand maintenanceinstructions in the
literature accompanyingthis product.
1. READINSTRUCTIONS:
All thesafetyand operatinginstructionsshould beread
beforethe CAMCORDERis operated.
2. RETAININSTRUCTIONS:
The safetyandoperatinginstructionsshouldbe retainedfor
future reference.
3. HEEDWARNINGS:
All warningsonthe CAMCORDERand in theoperating
instructionsshouldbeadhered to.
4. FOLLOWINSTRUCTIONS:
All operatingandmaintenanceinstructionsshould be
followed.
5. CLEANING:
UnplugthisCAMCORDERfrom thewalloutlet before
cleaning.
Donot use liquidor aerosolcleaners.
Usea dry clothusedfor dusting cabinets.
6. ATTACHMENTS:
Donot useattachmentsnotrecommendedby the
CAMCORDERproductmanufactureras they may be
hazardous.
7. WATERAND MOISTURE:
Donot use thisCAMCORDERnearwater;
for example, neara bathtub,wash bowl, kitchensink, laundry
tub, in awet basement,near aswimmingpool or lake.
8. ACCESSORIES:
Donot placethis CAMCORDERonan unstablecart, stand,
tripod, bracketortable. TheCAMCORDERmayfall, causing
serious injurytoa child or adult,and seriousdamageto the
unit.
Useonlywith a cart, stand,tripod, bracket,ortable
recommendedbythe manufactureror soldwith the
CAMCORDER.Any mountingof theunit shouldfollowthe
manufacturer'sinstructionsandshould usea mounting
accessory recommendedby the manufacturer.
A.An applianceand cartcombinationshouldbe movedwith
care.
Quickstops,excessiveforce and unevensurfaces may
causetheapplianceandcart combinationto overturn.
PORTABLECARTWARNING
(Symbolprovidedby RETAC)
I ENGLISH I
Notices and Safety Instructions
9, VENTILATION:
Slotsand openingsin the cabinet are providedfor
ventilationto ensure reliableoperationof the
CAMCORDERand to protectit from overheating.These
openingsmustnot beblockedor covered.Neverplace
yourCAMCORDERona bed,sofa, rug,or othersimilar
surface:on or neara radiatoror heatregister.
ThisCAMCORDERshould not beplaced in a built-in
installationsuchas a bookcaseor rackunless proper
ventilationis providedor themanufacturer'sinstructions
havebeenadhered to.
10. POWERSOURCES:
TheCAMCORDERshould be operatedonlyfromthe
typeof powersourceindicatedonthe label.
Ifyou are notsureofthe type ofpowersupply atyour
home,consultyour appliancedealer or local power
company.
ACAMCORDERis intendedto beoperatedfrombattery
power,or othersources, referto theoperating
instructions.
11. GROUNDINGOR POLARIZATION:
ThisCAMCORDER maybe equippedwith either a
polarized2-wireAC lineplug (a plug havingone blade
widerthanthe other)or a 3-wiregroundingtype plug,a
plughaving a third(grounding)pin.
Ifyou are unableto inserttheplugfully intothe outlet,try
reversingthe plug.Ifthe plugstill fails tofit, contactyour
electriciantoreplaceyouroutlet.Do not defeatthe safety
purposeofthe polarizedplug.
12.
13.
POWER-CORDPROTECTION:
Power-supplycords shouldberoutedso thatthey are not
likely to be walkedonor pinched by items placedupon or
againstthem, paying particularattentionto cordsor plugs,
convenientreceptacles, andthe pointwherethey exit
fromthe unit.
OUTDOORANTENNAGROUNDING:
If anoutsideantennaor cable systemis connectedtothe
CAMCORDER,be surethe antennaor cablesystemis
groundedto providesomeprotectionagainstvoltage
surgesand built-upstaticcharges,Section 810 ofthe
NationalElectricalCode,ANSI/NFPANo.70-1984,
provides informationwith respectto propergroundingof
themast andsupportingstructure,groundingofthe
lead-inwireandsupportingstructure,groundingof the
mastand supportingstructure,groundingof thelead-in
wireto anantenna dischargeunit,size ofgroundingto
conductors,locationof antenna-dischargeunit,
connectionto groundingelectrodesand requirementsfor
thegroundingelectrode.
See figure below.
[ENGLISH]
Notices and Safety Instructions
14. LIGHTNING:
Foradded protectionof thisCAMCORDERduring a
lightningstorm whenit isleft unattendedand unusedfor
longperiods oftime, unplugit from thewalloutlet and
disconnectthe antennaor cablesystem.
This will prevent damagetothe CAMCORDERdue to
lightningandpower-linesurges.
15. POWERLINES:
An outside antennasystemshould not belocated in the
vicinityof overheadpowerlines or otherelectriclightor
powercircuitswhere it can fallinto suchpower linesor
circuits.When installingan outsideantennasystem,
extreme careshould betakento keepfromtouching such
powerlinesor circuitsas contact withthem might befatal.
16.OVERLOADING:
Donot overloadwalloutletsand extensioncordsas this
can result in a riskof fire orelectricshock.
17.OBJECTS AND LIQUIDS:
Neverpushobjectsofany kindintothis CAMCORDER
throughopeningsas they may touchdangerousvoltage
pointsor short out a partthatcould result in afire or
electricshock.
Neverspill liquidsof any kindonto the CAMCORDER.
Shouldspillage occur,unplugunitand haveit checked by
a technicianbeforeuse.
19. DAMAGEREQUIRINGSERVICE:
UnplugthisCAMCORDERfrom thewalloutletandrefer
servicingtoqualifiedservice personnelunderthefollowing
conditions:
a. Whenthe power-supplycord or plugis damaged.
b. Ifany liquid has beenspilledonto, or objects have
fallenintothe CAMCORDER.
c. Ifthe CAMCORDERhas been exposedto rainor
water.
d. Ifthe CAMCORDERdoes notoperatenormallyby
followingthe operatinginstructions,adjustonlythose
controlsthat are coveredby the operatinginstructions.
Improperadjustmentof othercontrolsmay result in
damageand willoften requireextensiveworkby a
qualifiedtechnicianto restoretheCAMCORDERto its
normaloperation.
e. Ifthe CAMCORDERhas been droppedor thecabinet
has beendamaged.
f. Whenthe CAMCORDERexhibitsa distinctchangein
performance,this indicatesa needfor service.
20. REPLACEMENTPARTS:
When replacementparts are required,besure the service
technician has usedreplacementparts specifiedby the
manufacturerandhavingthe same characteristicsas the
originalpart.
Unauthorizedsubstitutionsmayresult infire, electric
shockor other hazards.
18.SERVICING:
Donot attemptto servicethis CAMCORDERyourself.
Opening or removingcovers mayexpose you to
dangerousvoltage orother hazards.
Referallservicing toqualifiedservicepersonnel.
21. SAFETYCHECK:
Uponcompletionof anyserviceor repairstothis
CAMCORDER,asktheservice technicianto perform
safetychecksto determinethat theCAMCORDERis in
safeoperatingorder.
Notices and Safety Instructions
22. Toprevent damagewhichmay resultin fireor shock
hazard,do notexposethisappliancetorainor moisture.
23. If thispowersupply is usedat 240Vac, a suitableplug
adaptershouldbeuse.
I ENGLISH I
NOTE TOCATVSYSTEM INSTALLER:
This reminderis providedto call the CATVsysteminstaller's
attentiontoArticle820-40of the NECthat providesguidelines
for propergroundingand, in particular,specifiesthat thecable
groundshall beconnectedto the groundingsystemof the
buildingas close tothe pointof cableentry as practical.
USER INSTALLERCAUTION:
Yourauthorityto operatethis FCC certifiedequipmentcould be
voided if you makechanges or modificationsnot expressly
approvedby this party responsiblefor complianceto part 15
FCC rules.
NOTE:
"Hg LAMP(S) INSIDE THIS PRODUCT CONTAIN
MERCURY AND MUST BE RECYCLED OR
DISPOSED OF ACCORDING TO LOCAL, STATE
OR FEDERAL LAWS"
00732M SCL901 SEA (1-19) 12/26/03 10:39 AM ¢7e 2
I ENGLISH I
Contents
Features ......................................................................................................................................................................................................................... 8
Descriptions
• Front View/Side View/Rear View ............................................................................................................................................................... 9, 10, 11
• OSD (On Screen Display) .................................................................................................................................................................................. 12
Accessories Supplied with the Camcorder .................................................................................................................................................................. 14
Remote Control (SCL906/L907 only) .......................................................................................................................................................................... 15
• Self Timer Recording ........................................................................................................................................................................................... 15
Adjusting the Hand Strap and Shoulder Strap ............................................................................................................................................................ 16
Attaching the Lens Cover ............................................................................................................................................................................................ 17
Lithium Battery Installation .......................................................................................................................................................................................... 17
Connecting the Power Source ..................................................................................................................................................................................... 18
• To use the AC Power Adapter ............................................................................................................................................................................. 18
• To use the Battery Pack ...................................................................................................................................................................................... 19
Using the Battery Pack ................................................................................................................................................................................................ 20
• Continuous Recording time table ........................................................................................................................................................................ 20
• Battery Level Display ........................................................................................................................................................................................... 21
Inserting and Ejecting a Cassette .............................................................................................................................................................................. 22
..... ..... _:
Making your First Recording ....................................................................................................................................................................................... 23
Hints for Stable Image Recording .............................................................................................................................................................................. 25
• Recording with LCD Screen ................................................................................................................................................................................ 25
• Recording with Viewfinder ................................................................................................................................................................................... 25
Adjusting the LCD ........................................................................................................................................................................................................ 26
Adjusting Focus of the VIEWFINDER ......................................................................................................................................................................... 27
Playing back a tape on the LCD ................................................................................................................................................................................. 28
• Adjusting the LCD during PLAY .......................................................................................................................................................................... 29
• Controlling the Sound from the Speaker ............................................................................................................................................................. 29
• Viewing a Still Picture .......................................................................................................................................................................................... 29
• Picture Search ..................................................................................................................................................................................................... 29
Zooming In and Out ..................................................................................................................................................................................................... 30
Digital Zoom ................................................................................................................................................................................................................ 31
EASY mode (for Beginners) ........................................................................................................................................................................................ 33
CUSTOM-Creating your own customized recording settings ...................................................................................................................................... 34
DIS (Digital Image Stabilizer, SCL906/L907 only) ....................................................................................................................................................... 35
MF/AF (Manual Focus/Auto Focus) ............................................................................................................................................................................ 36
BLC 37
00732M SCL901 SEA (1-19) 12/26/03 10:39 AM ¢7e 3
I ENGLISH I
Contents (continued)
Program AE (Automatic Exposure) ............................................................................................................................................................................. 38
DSE (Digital Special Effects) in CAMERA mode ......................................................................................................................................................... 40
Setting and Recording DATE/TIME ............................................................................................................................................................................. 42
Selecting and Recording a Title ................................................................................................................................................................................... 44
Fade In and Out .......................................................................................................................................................................................................... 46
Snap Shot (SCL906/L907 only) ................................................................................................................................................................................... 47
White Balance ............................................................................................................................................................................................................. 48
Selecting OSD Language ............................................................................................................................................................................................ 49
Demonstration ............................................................................................................................................................................................................. 50
Setting the Date/Title Color ......................................................................................................................................................................................... 51
Lighting Techniques ..................................................................................................................................................................................................... 52
To watch with LCD ...................................................................................................................................................................................................... 53
To watch with TV ........................................................................................................................................................................................................ 53
Various Functions in PLAYER mode ........................................................................................................................................................................... 55
Adjusting the LCD ........................................................................................................................................................................................................ 56
Setting the Speaker ON/OFF ...................................................................................................................................................................................... 56
DSE in PLAYER mode ................................................................................................................................................................................................ 56
Multi Playback (Using a PAL60 System) ..................................................................................................................................................................... 57
Transferring a Digital Image through a USB Connection ............................................................................................................................................ 58
Installing USB Media 2.0 Program .............................................................................................................................................................................. 59
Cleaning and Takingcare of the Camcorder ............................................................................................................................................... 62
• Cleaning the Viewinder ...................................................................................................................................................................... 62
• Cleaning the LCDPanel ....................................................................................................................................................................... 62
• Cleaning the VideoHeads .................................................................................................................................................................. 62
• Storing the Camcorder ......................................................................................................................................................................... 62
Self Diagnosis Display ................................................................................................................................................................................ 64
Checking ...................................................................................................................................................................................................... 65
Moisture Condensation ................................................................................................................................................................................ 67
00732M SCL901 SEA (1-19) 12/26/03 10:39 AM ¢7e 4
I ENGLISH I
Notices and Safety Instructions
Please rotatethe LCD screencarefully as illustrated•
Unintendedrotation maycause damage tothe inside of the hingethat connectsthe LCD screento the Camcorder.
1) LCD screen closed•
2) Standard recording by using the LCD screen•
3) Makinga recording by lookingat the LCDscreen fromthe top.
4) Makinga recording by lookingat the LCDscreen fromthe front.
5) Making a recording with the LCDscreen closed.
1)
2)
10o
4)
5)
90°
•_ Do not let the LENS point toward the sun.
Direct sunlight can damage the CCD (Charge Coupled Device)•
00732M SCL901 SEA (1-19) 12/26/03 10:39 AM ¢7e 5
I ENGLISH I
Notices and Safety Instructions
1) Do not placethe camcorderso thatthe viewfinder is r
pointing towards the sun. |1 X X X
Direct sunlight can damagethe inside of the viewfinder.
Be carefulwhen placingthe camcorderunder sunlight or
by a window.
2) Do not pickupthe camcorder bytheviewfinder.
3) Unintendedrotation may cause damage to the viewfinder.
for example:
• When you take the camcorderfrom coldtemperatureoutside to warm
temperatureinside during the winter.
• When you take the camcorderfrom cooltemperature insideto hot
temperatureoutside during the summer.
1) Asudde_ise in atmospherictemperature may cause condensationto form insidethe __k__]
2) If the "DEW([]_ )" protectionfeature is activated, leavethecamcorder ina dry,
warm roomwith thecassette compartmentopened and the battery removed.
3) If the "DEW([]_ )" protectionfeature is activated unexpectedly,and you wantto
override it, detach, then reinstall the battery pack and lithiumbattery.
Please make sure that the condensationhas disappeared completely.(see page 67) []
00732M SCL901 SEA (1-19) 12/26/03 10:39 AM ¢7 e 6
IENGLISH I
Notices and Safety Instructions
÷ Make sure that the battery packis charged before recordingoutdoors.
÷ To preservebattery power, keepyour camcorderturned off when you are not operating it.
÷ When your camcorder is in CAMERAmode, if it is left in STANDBYfor morethan 5 minutes without operation,
it will automaticallyturn off to protectagainst unexpectedbattery discharge.
÷ Itis a good ideato use the viewfinder insteadof the LCDwhen recordingfor a long time because the LCD usesmore
battery power.
÷ Make sure that the battery packis fitted firmly into place.
Dropping the battery pack might damage it.
÷ When the battery reachesthe endof its life, pleasecontact your local dealer.
The batteries haveto be dealt with as chemical waste.
Keep the LITHIUM BATTERYout of the reach of children. Should the battery be swallowed,
consulta doctor immediately.
÷ The lithium battery maintainsthe CLOCKfunction, TITLE, CUSTOMfunction andpreset contents memory;
even if the battery packor AC power adapter is removed.
÷ The lithium battery for the camcorderlasts about 8~10 months undernormal operationfrom time of installation.
÷ When the lithium battery becomesweak or dead, thedate/time indicatorflashes about 5seconds when youset the power
switch to CAMERA.When this occurs, replacethe lithium battery with type CR2025. (see page 17)
WARNING:
LITHIUM BATTERY MUST BE RECYCLED OR DISPOSED Y
OF PROPERLY.
00732M SCL901 SEA (1-19) 12/26/03 10:39 AM ¢7e 7
I ENGLISH I
Notices and Safety Instructions
_ • _ • _ ,• _ _ , '_<_'_I_• _ !__ _i__!_!_!_!_!_!_!_!_!_!_!_!_ i
1) TheLCDScreenismanufacturedbyusing highprecisiontechnology.
However,theremaybesometinyspecks(red, blueor greenincolor)that appearon the ,,_
LCDScreen.Thesespecksarenormaland donotaffecttherecordedpicturein anyway. "'~_
2) Whenusingthe LCDScreenoutdoorsindirectsunlght, it maybe difficulttoview.ifthisoccurs,usethe viewfinder. ___
3) TheLCDScreen'sOSDisturnedoffwhen theLCDisplacedin the forwarddirection.
÷ Itis veryimportantto adjustthehandstrapfor betterrecording.(seepage16)
÷ Do notinsertyourhandinthehandstrapforcibly,thebucklemay bedamaged.
_ _r ,_ _
÷ Toensurenormalrecordingandclearpicture,cleanthevideoheads.Whenplayingbackthepictures,iftheyare noisyorhardly
visible,thevideoheadsmaybedirty.Ifthishappens,cleanthevideoheadswitha drytypecassettecleaner.
÷ Do notusea wettypecassettecleaner.It maydamagethevideoheads.(seepage62)
÷ Toprotectagainsttapeand head-drumwear,yourcamcorderwill automaticallyturnoff if it is leftin STANDBYmodewithout
operationformorethan5 minutes.
00732M SCL901 SEA (1-19) 12/26/03 10:39 AM ¢7e 8
ENGLISH]
Getting to Know Your Camcorder
Yourcamcorderhasmanyfeaturesfor recordingand playingback.
Youcan selecttheappropriateOSD LanguageamongEnglish,French,Spanish.
The SnapShotfunctionletsyou recordan objectatastandstillfora limitedtime inCameramode.(see page47)
Whenyou recorda subjectwiththelightsourcebehindthesubjector asubjectwithalightbackground,usethe BLCfunction.
(seepage37)
The DSEenablesyou togiveacreativelooktoyour filmsby addingvariousspecialeffects.(seepage40)
The ProgramAE enablesyouto adapttheshutterspeedand aperturetothetypeof scenetobefilmed.(see page38)
The DIScompensatesforunstableimagescausedby handshake,particularlyathighmagnification.(seepage35)
Zoomingisa recordingtechniquethat letsyouchangethesizeofthesubjectinthepicture.
Formoreprofessionalrecordings,usethezoomfunction.(see page30)
Zooms morethan22x areperformeddigitally.(seepage 31)
The macrofunctionallowsyoutorecordyoursubjectatcloserange.
You haveto adjustthe zoomfullywide formacrorecording.(see page30)
This modeenableseventhebeginnertoeasilymakearecording.(seepage33)
PAL60isa specialoutputsignalformatwithwhichaPALTV canbe usedtoviewataperecordedbyan NTSCrecorder.
00732M SCL901 SEA (1-19) 12/26/03 10:39 AM ¢7e 9
I ENGLISH I
Getting to Know Your Camcorder
1.
2.
3.
4.
5.
2.REC SEARCH _(REW)
3.LIGHT
(PLAY/STILL)
6.
13.VIDEO LIGHT
1.LENS
9. Remote Senso_
8.MIC
4. RECSEARCH _(FF)
5. DAT_TIME(STOP)
7. EVF
10. LCD
11. CUSTOM
12. EASY
Lens (see page 68)
RECSEARCH_(REW)
RECSEARCH_ works inSTANDBYmode.(seepage24)
REWworksin PLAYERmode.(see page55)
LIGHT(PLAY/STILL)(seepage 54)
PLAY/STILLworksin PLAYERmode.
LIGHTworksin CAMERAmode.(SCL906/L907only)
Thebuilt-invideolightturns onwhenLIGHTis pressed.
Itenablesrecordinginlow-lightconditions.
RECSEARCH_ (FF)
RECSEARCH_ worksinSTANDBYmode.(seepage24)
FF worksinPLAYERmode.(seepage55)
DATE/TIME(STOP)
DATEFIIMEworksinCAMERAmode.(seepage42)
STOPworksinPLAYERmode.(seepage54)
6. TAPEEJECT(seepage22)
Use whenejectingthetape.
7. EVF(Electronic Viewfinder)
8. MIC
MICworksinCAMERAmode.
9. Remote Sensor(SCL906/Lg07only)
10.LCD (seepage26)
11.CUSTOM
CUSTOMworks inCAMERAmode.
12.EASY
EASYworks inCAMERAmode.
13.VIDEOLIGHT(SCL9061L907only)
/
00732M SCL901 SEA (1-19) 12/26/03 10:39 AM _e I0
IENGLISHI
Getting to Know Your Camcorder
24. BLC MENU ON/OFF
23. FADE 15. ENTER (MF)
20. SPEAKER _16. UP/DOWN Dial (VOLUME)
22. LCD Open _17. S-VIDEO out
18. P.AE
19. DSE
21, Lithium Battery
14.MENU ONIOFF(seepage26)
MENU ON/OFFworksin CAMERAand PLAYERmode.
15.ENTER(MF)(seepage26)
ENTERworksin MENUmode.
MFworks inCAMERAmode.(seepage36)
16. UP/DOWN dial (VOLUME)
UP/DOWN dial works inMENU mode. (see page 26)
VOLUME works in PLAYER mode. (see page 56)
17.S-VIDEOout(see page54)
18.PROGRAMAE (seepage38)
PROGRAMAE (AutoExposure)worksinCAMERAmode.
19. DSE (see page 40)
DSE works in CAMERA and PLAYER mode.
20. SPEAKER (see page 56)
Speaker works in PLAYER mode.
21. Lithium Battery (see page 17)
22. LCD open
23. FADE (see page 46)
FADE works in CAMERA mode.
24. BLC (see page 37)
BLC works in CAMERA mode.
00732M SCL901 SEA (1-19) 12/26/03 10:39 AM _e II
I ENGLISH I
Getting to Know Your Camcorder
25. ZOOM
36. BATTERYEJECT
27. Hooksforshoulderstrap_
28. AUDIONIDEO Out
32. START/STOP
35. Battery
38. Recharging Indicator
34. DC Jack
31. POWER Switch
26. CASSETTE Compartment
(SCL907only)
MIC
(SCL906/L907only)
P
30. Hand Strap
25.ZOOM(seepage30)
26.CassetteCompartment
27. Hooksfor ShoulderStrap(seepage 17)
28.AUDIONIDEOout(seepage53)
29.LENSCap
30.HandStrap(seepage16)
31.POWERSwitch(seepage18)
- CAMERA:Selecttorecord.
- OFF: Selecttoturnoffthecamcorder.
- PLAYER:Selectto playback.
32.STARTISTOP(see page23)
START/STOPworksin CAMERAmode.
33. External MIC (see page 68) (SCL906/L907 only)
34. DC Jack (see page 18)
35. Battery Pack Compartment (see page 19)
36. BATTERY EJECT
37. SNAP SHOT/D.ZOOM
SNAP SHOT works in CAMERA mode.
(SCL906/L907 only, see page 47)
D.ZOOM works in CAMERA mode.
(SCL901 only, see page 32)
38. Recharging Indicator (see page 19)
39. USB Jack (SCL907 only) (see page 61)
00732M SCL901 SEA (1-19) 12/26/03 10:39 AM _e 12
I ENGLISH I
Getting to Know Your Camcorder
÷ Youcanturnthe OSDon/offby settingthe Displaymenuon/off.
÷ TheTITLE,DATE/TIME,EASYand CUSTOMfunctionscan beoperatedevenaftertheOSDisturnedoff.
÷ TheOSD isdisplayedin the viewf]nderandtheLCDScreen.
a.
b.
C.
d.
e.
f.
g.
h.
i.
Zoom position(seepage30)
Indicateszoomposition.
DIS(SCLg06/Lg07only) (seepage 35)
IndicatesDISisactivated.
Batterylevel (see page21)
Indicatesthepowerleftinthebattery.
Manual Focus (see page 36)
Indicates manual focus is on.
Auto Focus is not displayed.
BLC (seepage 37)
IndicatesBLCisactivated.
ProgramAE (seepage38)
IndicatesProgramAE modeisactivated.(_],_, _, _:_,_)
Selfrecordwaitingtimer.(SCL906/L907only) (seepage15)
Indicates10secondtimer.
Self record recordingtimer.(SCL9061L907only)(seepage 15)
(30secondsorEND).
Date(seepage42)
Indicatesthedateoftherecording.
ba t sq
00732M SCL901 SEA (1-19) 12/26/03 10:39 AM _e 13
I ENGLISH I
Getting to Know Your Camcorder
j. Time(seepage42)
Indicatesthetime youarerecording.
k. Title (seepage 44)
Indicatesthe recordedtitleyou haveset.Itis superimposedonthescene.
I. Selfdiagnosis(seepage64)
(TAPE!,TAPEEND!,PROTECTION!)Checkstheoperationofthe Camcorder.
m. DSE (DigitalSpecialEffect)(seepage40)
Indicatesthe DSEmodeisactivated.
Theoperationmodesare STROBE,SEPIA,B&W,NEG.,MIRROR,ART,MOSAIC,16:9(WIDE)andCINEMA.
n. WhiteBalancemode(seepage48)
IndicatestheWhiteBalancemodeisactivated.
TheWhiteBalancemodesareAUTO,INDOOR(-_:) andOUTDOOR(-:.o:-).
o. Tapecounter
Indicatesamountofthetapeused.
p. Operation mode
Indicatesthe operationmode isactivated.
Theoperationmodesare STBY,RECe, STOP,PLAY( I_ ),FF(_), REW(<< ), EJECT.
q. Hi8 (see page 54)
Indicatesyouareusing Hi8tapewhenrecordingor playingback.
r. DEW ([_) condensation(see page67)
Monitorsthe moisturecondensation.
s. Digital zoom (see page31)
Indicatesdigitalzoomisactivated.
t. Snap Shot(SCL906/L907only) (seepage 47)
Indicatesthetime leftduringSnapShotRecording.
u. Zero return (SCLg061Lg07only) (see page55)
Indicatesthatthezero returnisactivated.
v. PBDSE (seepage56)
ShowsthatthePB DSEmodeis active.
w. VOLUME (seepage 56)
x. EASY&CUSTOM
Showswhentheeasyor custommodeisactive.
y. LIGHT(SCL9061L907only)
ShowswhentheLightisswitchedon.
z. Remocon ( ((<_ OFF)(SCLg06/Lg07only)
Indicatesthe remoconoffmode isactivated.
/
00732M SCL901 SEA (1-19) 12/26/03 10:40 AM _e 14
IENGLISHI
Getting to Know Your Camcorder
Makesurethatthefollowingbasicaccessoriesaresuppliedwithyourcamcorde_.
1. ACPowerAdapter.(AA-E8TYPE)(see page18)
2. ACcord. (seepage18)
3. BatteryPack.(seepage 19)
4. AudioNideoCable.(seepage53)
5. Shoulderstrap.(seepage 17)
6. InstructionBook.
7. RemoteControl.(see page15)(SCL906/L907only)
8. LithiumBatteryfor RemoteControl.(seepage15)
(SCL906/L907only)
LithiumBatteryforClock.(TYPE:CR2025,seepage 17)
9. SoftwareCD(SCL907only)
10.USB Cable(SCL907only)
11.USBAUDIOCable(SCL907only)
12.LensCover
13.S-VIDEOcable.(seepage54)
Note: Optionalaccessoriesmaybeincludedwiththecamcorder,depending
onthe countryinwhichit is purchased.
1. AC Power Adapter
(AA-E8 TYPE)
AD44-00090A
4. AUDIONIDEO Cable
AD39-40200A
7. Remote Control
AD59-00062A
10. USB Cable
AD39-00073A
AD39-00076A
5. Shoulder Strap
AD72-00054A
<Lithium Batteries
AD43-10130H
'H. USB AUDIO Cable
AD39-0009SA
3, Battery Pack
AD43-00065A
6, Instruction Book
AD46-00060A
12 Lens Cover
AD97-08362A
AC39-42001Z
00732M SCL901 SEA (1-19) 12/26/03 10:40 AM _Te 15
I ENGLISH I
GeRing to Know Your Camcorder
1. Start/Stop (see page 23)
2. Self Timer
3. Still (see page 55)
4. WIDE (see page 30)
5. TELE (see page 30)
6. Display (see page 12)
7. I_ (Play) (see page 54)
8. _ (FF) (see page 55)
9. <.,I (REW) (see page 55)
10. • (Stop) (see page 54)
11. Counter Reset (see page 55)
12. Zero Return (see page 55)
RemoteControlBatteryI_stallati_
÷ Youmust insertor replacethisbatterywhen:
-Youpurchasethecamcorder.
-The remotecontroldoesn't work.
÷ Insert LithiumBattery,followingthe + and - markings.
÷ Be carefulnotto reversethe polarityofthe battery.
S_!f_im_ Recording;
÷ TheSelf Timerfunction on the remotecontrol allowsyou to start andstop recordingautomatically.
Example:Recordingyourself
÷ Twooptions areavailable
WAIT-10S/SELF-30S:wait 10 seconds,followedby 30seconds ofrecording.
WAIT-10S/SELF-END:wait 10 seconds,followed by recordinguntilyou pressthe START/STOPbutton again.
00732M SCL901 SEA (1-19) 12/26/03 10:40 AM _e 16
I ENGLISH I
Preparing
1. Set powerswitchto CAMERAmode.
2. Press Self Timer button until the appropriate indicator is displayed on the LCD:
• WAIT-10S/SELF-30S
• WAIT-10S/SELF-END
3. PressSTART/STOPbuttonto startthetimer.
:Afterwaitingfor 10seconds,recordingstarts.
:Ifyou haveselectedSELF-30S,recordingstopsautomaticallyafter30seconds.
:Ifyou haveselectedSELF-END,pressSTART/STOPagainwhenyouwishto
stoprecording.
Note: Whenrecordingwith thetimer,youcan pressSTART/STOPbuttonagainto
cancelthefunction. 3
÷ Itisvery importanttoadjustthehandstrap forbetterrecording.
÷ The handstrapenablesyouto:
- Holdthe camcorderin astable,comfortableposition.
- PresstheZoomandthe redRecordbuttonwithouthavingtochangethepositionofyour hand.
1. Pullopenthe HandStrapcoverand releasetheHandStrap,adjustitslengthand
stickit backontothe Hand Strapcover.
2. ClosetheHandStrapcoverbackupagain.
÷ The ShoulderStrapallowsyou tocarryyour camcorderwithcompletesafety.
1. Inserteachendofthestrap intothehooksonthe camcorder.
2. Putthe endofeachstrapthroughthebuckle,adjustthelengthof thestrap,thenpull
it tightinthe buckle.

Other manuals for Hi8 SC-L901

1

This manual suits for next models

2

Other Samsung Camcorder manuals

Samsung SC-L901 Setup guide

Samsung

Samsung SC-L901 Setup guide

Samsung VP-D99I Owner's manual

Samsung

Samsung VP-D99I Owner's manual

Samsung SC-D455 Owner's manual

Samsung

Samsung SC-D455 Owner's manual

Samsung SC-DC163 Owner's manual

Samsung

Samsung SC-DC163 Owner's manual

Samsung VP-D23 User manual

Samsung

Samsung VP-D23 User manual

Samsung HMX-W200RN User manual

Samsung

Samsung HMX-W200RN User manual

Samsung SC-MX10 User manual

Samsung

Samsung SC-MX10 User manual

Samsung SC-DX200 User manual

Samsung

Samsung SC-DX200 User manual

Samsung VP-D353 User manual

Samsung

Samsung VP-D353 User manual

Samsung SC-D463 Owner's manual

Samsung

Samsung SC-D463 Owner's manual

Samsung VP-DX205(i) User manual

Samsung

Samsung VP-DX205(i) User manual

Samsung VP-D455 User manual

Samsung

Samsung VP-D455 User manual

Samsung VP-M2050SB Owner's manual

Samsung

Samsung VP-M2050SB Owner's manual

Samsung SCD86 Owner's manual

Samsung

Samsung SCD86 Owner's manual

Samsung SC-DX205 User manual

Samsung

Samsung SC-DX205 User manual

Samsung SC-D6040 Owner's manual

Samsung

Samsung SC-D6040 Owner's manual

Samsung VP-D963 Owner's manual

Samsung

Samsung VP-D963 Owner's manual

Samsung VP-MX10 User manual

Samsung

Samsung VP-MX10 User manual

Samsung VP-D5000i Owner's manual

Samsung

Samsung VP-D5000i Owner's manual

Samsung VP-L900 Installation guide

Samsung

Samsung VP-L900 Installation guide

Samsung SM-C200 Gear 360 User manual

Samsung

Samsung SM-C200 Gear 360 User manual

Samsung VP-M2100B Owner's manual

Samsung

Samsung VP-M2100B Owner's manual

Samsung HMX-E10BN User manual

Samsung

Samsung HMX-E10BN User manual

Samsung VP-D190MSI Owner's manual

Samsung

Samsung VP-D190MSI Owner's manual

Popular Camcorder manuals by other brands

Audiovox 1287078 manual

Audiovox

Audiovox 1287078 manual

Sony HANDYCAM CX550V operating guide

Sony

Sony HANDYCAM CX550V operating guide

JVC GZ-HM330SEK Basic user's guide

JVC

JVC GZ-HM330SEK Basic user's guide

Sony DSR-250 Brochure & specs

Sony

Sony DSR-250 Brochure & specs

JVC GR-DVL320 instructions

JVC

JVC GR-DVL320 instructions

Insignia NS-DV720P user guide

Insignia

Insignia NS-DV720P user guide

Panasonic NV-GS250 operating instructions

Panasonic

Panasonic NV-GS250 operating instructions

Sony HDR-CX220/S Brochure & specs

Sony

Sony HDR-CX220/S Brochure & specs

Panasonic AG-DVX100B user guide

Panasonic

Panasonic AG-DVX100B user guide

Coleman CVW9HD instruction manual

Coleman

Coleman CVW9HD instruction manual

JVC GZ-MG26E instructions

JVC

JVC GZ-MG26E instructions

Sony Handycam CCD-F33 user manual

Sony

Sony Handycam CCD-F33 user manual

Panasonic Palmcorder Palmsight PV-L659 operating manual

Panasonic

Panasonic Palmcorder Palmsight PV-L659 operating manual

RCA CC-285 owner's manual

RCA

RCA CC-285 owner's manual

Insignia NS-DV720P Quick setup guide

Insignia

Insignia NS-DV720P Quick setup guide

Optronis CP70-1HS-M/C-1900 user manual

Optronis

Optronis CP70-1HS-M/C-1900 user manual

Panasonic Palmcorder PV-A207 user guide

Panasonic

Panasonic Palmcorder PV-A207 user guide

MallinCam Signature user manual

MallinCam

MallinCam Signature user manual

manuals.online logo
manuals.online logoBrands
  • About & Mission
  • Contact us
  • Privacy Policy
  • Terms and Conditions

Copyright 2025 Manuals.Online. All Rights Reserved.