manuals.online logo
Brands
  1. Home
  2. •
  3. Brands
  4. •
  5. Samsung
  6. •
  7. Laptop
  8. •
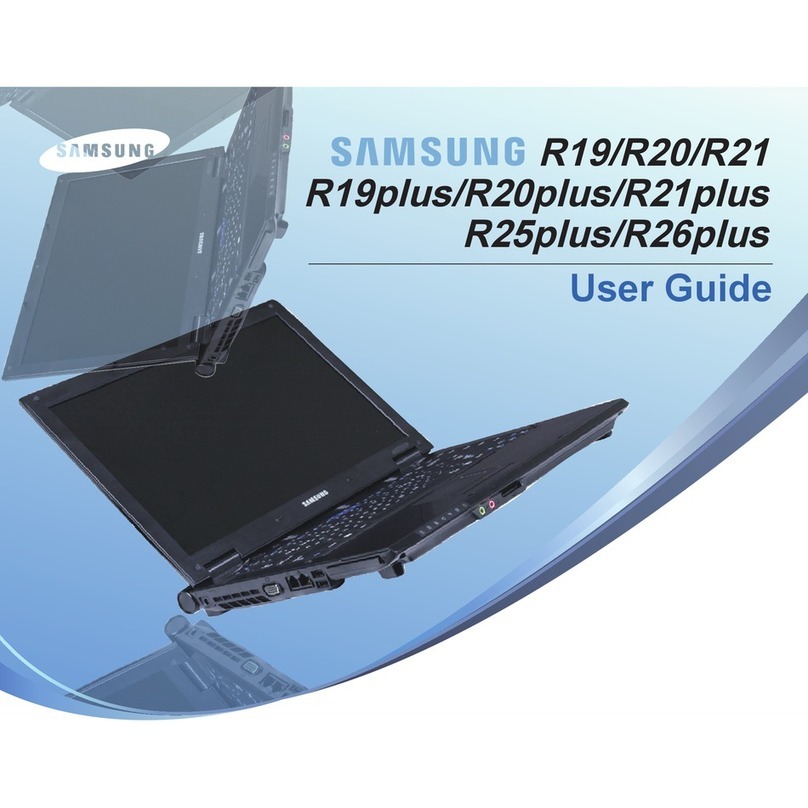
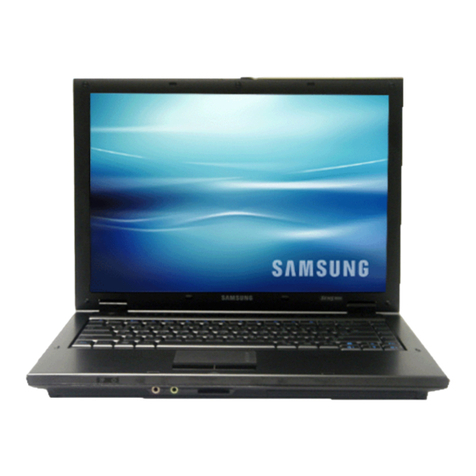
  9. Samsung NEON User manual

Samsung NEON User manual

Contents
Table des matières / Inhalt / Contenido
1
Contents / Table des matières / Inhalt / Contenido Turn on the computer / Allumer l’ordinateur / Computer einschalten / Encender el equipo
Turn on the computer
Allumer l’ordinateur / Computer einschalten / Encender el equipo
Windows Registration Enregistrement de Windows
2
Windows Registration / Enregistrement de Windows / Windows-Registrierung / Registro de Windows
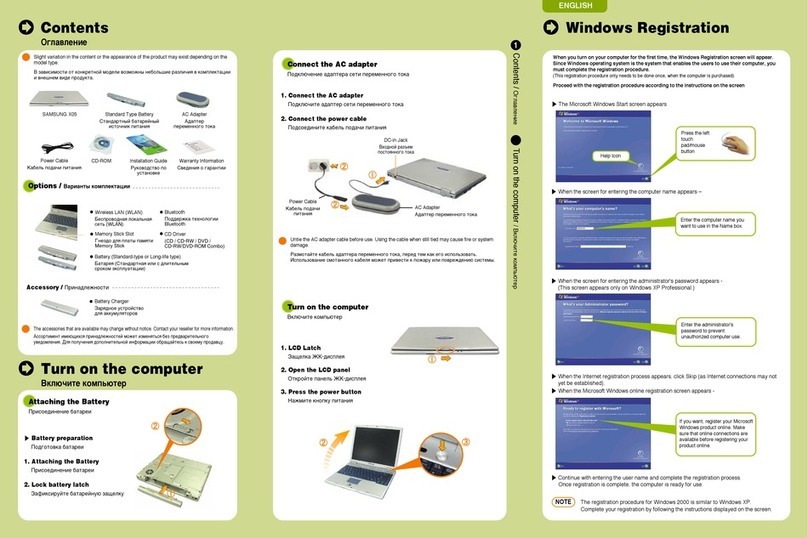
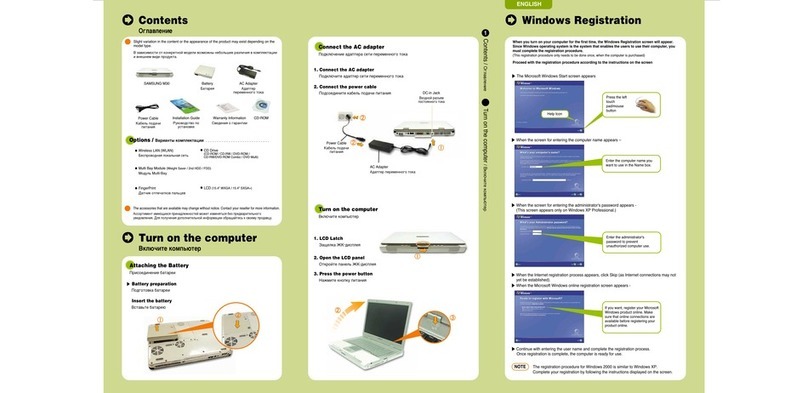
When you turn on your computer for the first time, the Windows Registration screen will appear. Since
Windows operating system is the system that enables the users to use their computer, you must complete
the registration procedure.
FRANÇAISENGLISH
CD Installation Guide
Guide d’installation
Installationshandbuch
Guía de instalación
Warranty Information
Information de Garantie
Garantie Informationen
Información de garantía
Power Cable
cordon d’alimentation
Netzkabel
Cable de alimentación
The items included in the package may vary depending on your selection of the optional items. Some
items may be replaced with similar products and the color of some items may differ from that in this
document.
Les éléments contenus dans le coffret peuvent varier selon les options sélectionnées. Certains éléments peuvent avoir
été remplacés par des produits similaires et la couleur de certains éléments peut être différente de celle illustrée dans
le présent document.
Die Komponenten in diesem Paket können je nach den von Ihnen gewählten optionalen Komponenten variieren. Einige
der Komponenten werden möglicherweise durch ähnliche Produkte ersetzt, und die Farbgebung einiger Komponenten
kann von der Darstellung in diesem Dokument abweichen.
Los elementos incluidos en el paquete pueden variar según la selección de los elementos opcionales. Es posible que
se sustituyan algunos elementos con productos similares y el color de algunos elementos puede diferir del mostrado en
este documento.
Optional items have to be additionally purchased. / Les éléments en options doivent être achetés séparément.
Optionale Komponenten müssen zusätzlich erworben werden. / Los elementos opcionales se adquieren por separado.
When using the power cable, insert the power cable completely into the AC adapter.
Insérez complètement le câble d'alimentation dans l'adaptateur secteur.
Bei Anschluss über ein Netzkabel stecken Sie den Kabelstecker vollständig in das Netzteil.
Cuando utilice el cable de alimentación, insértelo completamente en el adaptador de CA.
Attaching the Battery
Mettre en place la pile / Einlegen des Akkus / Acoplamiento de la batería
Connect the AC adapter
Raccorder l’adaptateur CA / Wechselstromadapter anschließen / Conectar el adaptador de CA
1. Connect the AC adapter
Raccorder l’adaptateur CA / Wechselstromadapter anschließen /
Conectar el adaptador de CA
2. Connect the power cable
Raccorder le cordon d’alimentation / Netzkabel anschließen /
Conectar el cable de alimentación
Turn on the computer
Allumer l’ordinateur / Computer einschalten / Encender el equipo
1. Open the LCD panel
Ouvrir le panneau LCD / LCD-Anzeige aufklappen /
Abrir el panel LCD
2. Press the power button
Appuyer sur le bouton de mise en marche / Netztaste drücken /
Pulsar el botón de encendido
Options /
Optionen / Opciones
Basic Items /
Eléments livrés de série / Hauptkomponenten/ Elementos básicos
󳥰󳥰󳥰
󳥰
External CD Drive
Lecteur de CD externe
Externes CD-Laufwerk
Unidad externa de CD
(CD-RW/DVD-ROM Combo Drive or
DVD Multi Drive)
Long-life Battery
Batterie longue durée
Akku für längere Betriebszeit
Batería de larga duración
The Welcome to Microsoft Windows
message appears.
The How should dates and currencies
appear? message appears.
Select your location, language and keyboard and
then click .
The What time zone are you in? message
appears.
Select your time zone and click .
The End User License Agreement
message appears.
Select and click .
The What's your computer's name?
message appears.
For example, enter [Samsung].
To skip this, click the button.
The Help protect your PC message
appears.
Select a configuration and then click .
The What is your Administrator password?
message appears. (When Windows XP
Professional is being installed.)
Enter the Administrator password and click .
To set the password later, click the button.
The Is this computer in a domain?
message appears. (When Windows XP
Professional is being installed.)
When your computer is not connected to a network
or you are not sure about this option, select [No,
don’t make this computer part of a domain.] and
then click .
The Checking your Internet connectivity
message appears.
After a while, the screen in step 10 appears. If your
computer is not connected to the Internet, click the
button. The screen for step 11 will appear.
The How will this computer connect to the
Internet? message appears.
Select a connection method and then click .
If your computer is not connected to the Internet,
click the button.
The Ready to register with Microsoft?
message appears.
Select a configuration and then click .
The Who will use this computer? message
appears.
For example, enter [Your name].
The Thank you! message appears.
Click . The Windows registration process
is completed. Now you can use your computer.
Move the (cursor) over the
button by using the
touchpad with your finger.
Click the left touchpad button.
For information about how to use the
touchpad, refer to [Help].
1
2
Lors du premier démarrage de l’ordinateur, l’écran d’enregistrement de Windows apparaît. Étant donné
que Windows est un système d’exploitation permettant d’utiliser l’ordinateur, vous devez effectuer la
procédure d’enregistrement pour pouvoir utiliser votre ordinateur.
Le message Bienvenue sur Microsoft
Windows s’affiche.
Le message Comment afficher les dates et
monnaies ? s’affiche.
Indiquez votre emplacement géographique, langue
et clavier, puis cliquez sur le bouton .
Le message Choisissez un fuseau horaire
s’affiche.
Indiquez votre fuseau horaire et cliquez sur
.
Le message Contrat de Licence Utilisateur
Final s’affiche.
Sélectionnez et cliquez sur .
Le message Quel nom donner à votre
ordinateur ? s’affiche.
Par exemple, tapez [Samsung].
Pour sauter cette étape, cliquez sur le bouton
.
Le message Comment protéger votre PC
s’affiche.
Sélectionnez une configuration et cliquez sur
.
Le message Quel est votre mot de passe
administrateur ? s’affiche. (Avec Windows XP
Professionnel.)
Entrez le mot de passe de l’administrateur et cliquez
sur . Pour indiquer le mot de passe
ultérieurement, cliquez sur le bouton .
Le message L’ordinateur appartient-il à un
domaine ? s’affiche. (Avec Windows XP
Professionnel.)
Si votre ordinateur n’est pas en réseau ou si vous n’êtes
pas sûr de la réponse, sélectionnez [Non, ne pas faire
de cet ordinateur un membre d’un domaine.] et cliquez
sur .
Le message Vérification de la connexion
Internet s’affiche.
Au bout d’un moment, l’écran de l’étape 10 s’affiche. Si
votre ordinateur n’est pas connecté à Internet, cliquez
sur le bouton . L’écran de l’étape 11 s’affiche.
Le message Comment connecter l’ordinateur
à Internet ? s’affiche.
Sélectionnez une méthode de connexion et cliquez sur
. Si votre ordinateur n’est pas connecté à
Internet, cliquez sur le bouton .
Le message Prêt pour l’enregistrement auprès
de Microsoft ? s’affiche.
Sélectionnez une configuration et cliquez sur .
Le message Qui sera le principal utilisateur de
l’ordinateur ? s’affiche.
Par exemple, tapez [Votre nom].
Le message Merci s’affiche.
Cliquez sur . Le processus d’enregistrement
Windows est terminé. Vous pouvez maintenant utiliser
votre ordinateur.
Placez le (curseur) sur le
bouton en
déplaçant votre doigt sur le
Touchpad.
Cliquez sur le bouton gauche
du Touchpad.
Pour toute information sur le fonctionnement
du Touchpad, consultez l’[Aide].
1
2
SAMSUNG Q30 AC Adapter
Adaptateur CA
Wechselstromadapter
Adaptador de CA
Standard Battery
Batterie standard
Standardakku
Batería estándar
①①
②②
▶Battery preparation
Insertion de la pile / Akkuvorbereitung /
preparación de la batería
1. Attaching the Battery
Mettre en place la pile / Einlegen des Akkus /
Acoplamiento de la batería
2. Lock battery latch
Verrouiller le loquet /
Akkuverriegelung schließen /
Bloquear retén de la batería
②②
②②
Power Cable
cordon d’alimentation
Netzkabel
Cable de alimentación
AC Adapter
Adaptateur CA /
Wechselstromadapter /
Adaptador de CA
DC-in Jack
①①
①①
②②
Windows-Registrierung Registro de Windows
Useful Functions / Fonctions utiles / Hilfreiche Funktionen / Características prácticas
Useful Functions
Fonctions utiles / Hilfreiche Funktionen / Características prácticas
3
DEUTSCH ESPAÑOL
For more information, refer to the User Guide PDF file.
Pour des informations complémentaires, voir le fichier PDF du Guide de l’utilisateur. / Weitere Informationen finden Sie in der
Benutzerhandbuch-PDF-Datei. / Si precisa más información, consulte el archivo PDF del Manual en línea.
󳥰󳥰󳥰
Installation Guide
Guide d’installation / Installationshandbuch / Guía de instalación
SAMSUNG Q30
Checking Contents
Vérification du contenu
Überprüfen des Inhalts
Comprobación del contenido
Turning On Your Computer
Mise en marche de l’ordinateur
Einschalten des Computers
Encendido del ordenador
Windows Registration
Enregistrement de Windows
Windows-Registrierung
Registro de Windows
Start your computer, and click Start > All Programs > Samsung > User’s
Guide > User’s Guide to read the User Guide PDF file.
Démarrez votre ordinateur et cliquez sur Démarrer > Tous les programmes > Samsung > User’s
Guide > User’s Guide pour afficher le fichier PDF du Guide de l’utilisateur.
Starten Sie den Computer, und klicken Sie auf Start > Alle Programme > Samsung > User’s Guide
> User’s Guide, damit die Benutzerhandbuch-PDF-Datei angezeigt wird.
Encienda el equipo y haga clic en Inicio > Todos los programas > Samsung > User’s Guide >
User’s Guide para leer el archivo PDF de la Guía del usuario.
The image shown on the cover may differ from the product.
L’illustration de la couverture peut être différente du produit.
Die Abbildung auf dem Deckblatt kann vom Produkt abweichen.
El producto podría ser diferente de la imagen mostrada en la cubierta.
Wenn Sie den Computer das erste Mal einschalten, wird der Bildschirm für die Windows-Registrierung
angezeigt. Da Windows das Betriebssystem ist, das den Betrieb des Computers erst ermöglicht, müssen
Sie vor der Verwendung des Computers eine Registrierung durchführen.
Die Willkommenseite von Microsoft
Windows wird angezeigt.
Die Meldung Wie sollen Datumsangaben
und Währungen angezeigt werden? wird
eingeblendet.
Wählen Sie den gewünschten Standort, Ihre
Sprache und die zugehörige Tastatur aus, und
klicken Sie dann auf .
Die Meldung Wählen Sie Ihre Zeitzone aus.
wird eingeblendet.
Wählen Sie die gewünschte Zeitzone aus, und
klicken Sie auf .
Der Endbenutzer-Lizenzvertrag wird
eingeblendet.
Klicken Sie auf und
anschließend auf .
Die Meldung Wie lautet der Name des
Computers? wird eingeblendet.
Geben Sie zum Beispiel [Samsung] ein.
Zum Überspringen dieser Option klicken Sie auf die
Schaltfläche .
Die Meldung Mehr Sicherheit für Ihren PC
wird eingeblendet.
Wählen Sie eine Konfiguration aus, und klicken Sie
dann auf .
Die Meldung Geben Sie ein
Administratorkennwort an. wird
eingeblendet. (Unter Windows XP Professional)
Geben Sie das Administratorkennwort ein, und
klicken Sie dann auf . Wenn Sie das
Kennwort erst später festlegen möchten, klicken Sie
auf die Schaltfläche .
Die Meldung Geben Sie die Domäne für den
Computer an. wird eingeblendet. (Unter Windows
XP Professional)
Wenn der Computer nicht mit einem Netzwerk
verbunden ist und Sie sich bei dieser Option nicht sicher
sind, wählen Sie [Nein, dieser Computer ist kein Mitglied
in einer Domäne.] und klicken dann auf .
Die Meldung Die Internetverbindung wird
überprüft. wird eingeblendet.
Nach einiger Zeit wird der Bildschirm für Schritt 10
angezeigt. Wenn der Computer nicht mit dem Internet
verbunden ist, klicken Sie auf die Schaltfläche
. Daraufhin wird der Bildschirm für Schritt 11
angezeigt.
Die Meldung Auf welche Weise möchten Sie
eine Verbindung mit dem Internet herstellen?
wird eingeblendet.
Wählen Sie eine Verbindungsart aus, und klicken Sie
dann auf . Wenn der Computer nicht mit dem
Internet verbunden ist, klicken Sie auf die Schaltfläche
.
Die Meldung Möchten Sie Ihre Windows-
Version bei Microsoft registrieren? wird
eingeblendet.
Wählen Sie eine Konfiguration aus, und klicken Sie
dann auf .
Die Meldung Benutzer auf diesem Computer
wird eingeblendet.
Geben Sie zum Beispiel [Ihren Namen] ein.
Die Meldung Vielen Dank! wird eingeblendet.
Klicken Sie auf . Die Windows-
Registrierung ist damit abgeschlossen. Nun können Sie
den Computer verwenden.
Bewegen Sie den
(Mauszeiger) mithilfe des
Touchpads zur Schaltfläche
.
Drücken Sie die linke
Touchpad-Taste.
Weitere Information über die Verwendung
des Touchpads finden Sie in der [Hilfe].
1
2
Cuando encienda el ordenador por primera vez, aparecerá la ventana de registro de Windows. Ya que el
sistema operativo de Windows es el sistema que permite a los usuarios utilizar el ordenador, debe
completar el formulario de registro.
Aparece el mensaje Microsoft Windows.
Aparece el mensaje ¿Cómo deben
aparecer las fechas y las divisas?
Seleccione su ubicación, idioma y teclado y
después haga clic en .
Aparece el mensaje Zona horaria en la que
se encuentra.
Seleccione la zona horaria y haga clic en
.
Aparece el mensaje Contrato de licencia
para el usuario final.
Seleccione y haga clic en .
Aparece el mensaje ¿Qué nombre tiene su
equipo?
Escriba, por ejemplo, [Samsung].
Para omitir este paso, haga clic en el botón
.
Aparece el mensaje Help protect your PC
(Ayuda para proteger el PC).
Seleccione una configuración y después haga clic
en .
Aparece el mensaje ¿Cuál es su
contraseña de administrador? (Si se está
instalando Windows XP Professional.)
Escriba la contraseña del administrador y haga clic
en . Si desea configurar la contraseña
posteriormente, haga clic en el botón .
Aparece el mensaje ¿Está este equipo en
un dominio? (Si se está instalando Windows XP
Professional.)
Si el ordenador no está conectado con una red o si
no está seguro de esta opción, seleccione [No, no
deseo que este equipo sea parte de un dominio.] y
haga clic en .
Aparece el mensaje Comprobación de su
conexión a Internet.
Al cabo de unos instantes aparece la pantalla en el
paso 10. Si su ordenador no está conectado con
Internet, haga clic en el botón . Aparece la
pantalla con el paso 11.
Aparece el mensaje ¿Cómo se conectará
este equipo a Internet?
Seleccione un método de conexión y después haga
clic en . Si su ordenador no está
conectado con Internet, haga clic en el botón
.
Aparece el mensaje ¿Está listo para
registrarse con Microsoft?
Seleccione una configuración y después haga clic en
.
Aparece el mensaje ¿Quién usará este
equipo?
Escriba, por ejemplo, [Su nombre].
Aparece el mensaje Gracias.
Haga clic en . El proceso de registro de
Windows ha terminado. Ahora ya puede usar este
ordenador.
Mueva con el dedo (cursor)
sobre el botón
mediante la almohadilla táctil.
Haga clic en el botón
izquierdo de la almohadilla
táctil.
Si desea información sobre cómo usar la
almohadilla táctil, consulte la [Ayuda].
1
2
Enjoying your home theater (5.1 channel sound)
Effet home theater / Verwendung des Heimkinos / Uso del sistema de cine doméstico
Connect the 5.1 channel speakers to the S/PDIF port to enjoy live surround sound. /
Raccorder les haut-parleurs du canal 5.1 au port S/PDIF pour bénéficier d’un son surround particulièrement vivant. /
Schließen Sie für den Live-Raumklang die 5.1-Lautsprecher an den S/PDIF-Anschluss an. /
Conecte los altavoces 5.1 al puerto S/PDIF para poder disfrutar del sonido envolvente.
Portability /
Portabilité / Tragbares Modell / Portabilidad
Ultra slim design for optimal portability.
Ultra fin pour une portabilité optimale.
Ultraschlanke Ausführung bietet optimalen Tragekomfort.
Diseño ultra delgado para conseguir una portabilidad óptima.
12.1” Wide LCD /
Ecran LCD 12,1 pouces /
12.1-Zoll LCD-Breitbildmonitor / Pantalla LCD de 12,1”
12.1” wide LCD for comfortable viewing.
Ecran LCD 12,1 pouces pour une meilleure visualisation.
12.1-Zoll-LCD-Breitbildmonitor mit komfortabler Anzeige.
Pantalla LCD de 12,1” para conseguir una cómoda visualización.
Memory Card Slot /
Logement pour Carte moiré /
Speicherkarten-Steckplatz / Ranura de la tarjeta de memoria
You can easily move and save your data using a Memory
Stick, SD or MMC card.
Vous pouvez déplacer et enregistrer vos données en toute
simplicité à l’aide d’un Memory Stick ou d’une carte SD ou MMC.
Einfaches Verschieben und Speichern von Daten auf einem
Memory Stick, einer SD-Speicherkarte oder einer MMC-Karte.
Puede transportar y guardar fácilmente los datos mediante un
Memory Stick, una tarjeta SD o MMC.
CF Card Slot /
Logement pour carte CF /
CF-Steckplatz / Ranura para la tarjeta CF
You can view photographs saved on a CF card taken with
your digital camera.
Vous pouvez visionner des photos prises avec votre appareil
numérique et enregistrées sur une carte CF.
Anzeige von Fotos, die mit einer digitalen Kamera aufgenommen
und auf einer CF-Karte gespeichert wurden.
Puede ver fotos guardadas en una tarjeta CF tomadas con su
cámara digital.
Other manuals for NEON

1

This manual suits for next models

1

Other Samsung Laptop manuals

Samsung X65 User manual

Samsung

Samsung X65 User manual

Samsung NP500R5L-M03US User manual

Samsung

Samsung NP500R5L-M03US User manual

Samsung NP-P40 User manual

Samsung

Samsung NP-P40 User manual

Samsung Sens Q20 Series User manual

Samsung

Samsung Sens Q20 Series User manual

Samsung OSLO R70 Series User manual

Samsung

Samsung OSLO R70 Series User manual

Samsung Laptop User manual

Samsung

Samsung Laptop User manual

Samsung SM-W767VZAAVZW User manual

Samsung

Samsung SM-W767VZAAVZW User manual

Samsung SM-W737Y User manual

Samsung

Samsung SM-W737Y User manual

Samsung NP20 User manual

Samsung

Samsung NP20 User manual

Samsung HABANA NP-P50 Series User manual

Samsung

Samsung HABANA NP-P50 Series User manual

Samsung NP-R40P User manual

Samsung

Samsung NP-R40P User manual

Samsung NP680Z5E Quick start guide

Samsung

Samsung NP680Z5E Quick start guide

Samsung NP-R20 series User manual

Samsung

Samsung NP-R20 series User manual

Samsung NP950XED Assembly instructions

Samsung

Samsung NP950XED Assembly instructions

Samsung Galaxy Book Flex 15 User manual

Samsung

Samsung Galaxy Book Flex 15 User manual

Samsung NP-R40 User manual

Samsung

Samsung NP-R40 User manual

Samsung NV20 - Digital Camera - Compact User manual

Samsung

Samsung NV20 - Digital Camera - Compact User manual

Samsung X60 User manual

Samsung

Samsung X60 User manual

Samsung NQ25 User manual

Samsung

Samsung NQ25 User manual

Samsung NT270E5KI User manual

Samsung

Samsung NT270E5KI User manual

Samsung NP-R25  (Vista) User manual

Samsung

Samsung NP-R25 (Vista) User manual

Samsung 300E4A User manual

Samsung

Samsung 300E4A User manual

Samsung P30 User manual

Samsung

Samsung P30 User manual

Samsung Odyssey User manual

Samsung

Samsung Odyssey User manual

Popular Laptop manuals by other brands

Toshiba Qosmio X505-SP8018 Specifications

Toshiba

Toshiba Qosmio X505-SP8018 Specifications

Asus A550DP E-manual

Asus

Asus A550DP E-manual

Asus U5F Hardware user manual

Asus

Asus U5F Hardware user manual

Dell Latitude 5320 Service manual

Dell

Dell Latitude 5320 Service manual

jp.ik ClassMate PC LEAPT304 quick guide

jp.ik

jp.ik ClassMate PC LEAPT304 quick guide

HP Mini 5101 overview

HP

HP Mini 5101 overview

Clevo C4100 Service manual

Clevo

Clevo C4100 Service manual

MGA Entertainment 272205 quick start

MGA Entertainment

MGA Entertainment 272205 quick start

HP 500 - Notebook PC user guide

HP

HP 500 - Notebook PC user guide

Fujitsu E8420 - LifeBook - Core 2 Duo 2.26 GHz user guide

Fujitsu

Fujitsu E8420 - LifeBook - Core 2 Duo 2.26 GHz user guide

Asus B53J-A1B Specifications

Asus

Asus B53J-A1B Specifications

Sony VAIO VPCCW23FX/P Specifications

Sony

Sony VAIO VPCCW23FX/P Specifications

Asus E1887 Hardware user manual

Asus

Asus E1887 Hardware user manual

Toshiba Satellite M70-340 specification

Toshiba

Toshiba Satellite M70-340 specification

Dell Latitude 7290 quick start guide

Dell

Dell Latitude 7290 quick start guide

MSI Gaming GT75 user manual

MSI

MSI Gaming GT75 user manual

Lenovo V200 Üzemeltetési és hibajavítási kézikönyv

Lenovo

Lenovo V200 Üzemeltetési és hibajavítási kézikönyv

HP Compaq nc6000 Software overview

HP

HP Compaq nc6000 Software overview

manuals.online logo
manuals.online logoBrands
  • About & Mission
  • Contact us
  • Privacy Policy
  • Terms and Conditions

Copyright 2025 Manuals.Online. All Rights Reserved.