Sangean HDT-1 User manual

381QA0S-A
HD RadioTM Component Tuner
User Manual
20060929_HDT-1_381QA0S-A_«Ê-±.p65 2006/10/19, ¤U¤È 02:161

HD Radio™ Technology Manufactured Under License From iBiquity Digital Corporation.
iBiquity Digital and the HD Radio and HD logos are registered trademarks of iBiquity Digital
Corporation. HD RadioTM is a trademark of iBiquityDigital Corporation. U.S. and Foreign Patents.
20060929_HDT-1_381QA0S-A_GB.p65 2006/10/19, ¤U¤È 02:464

2
IMPORTANT SAFETY INSTRUCTIONS
1. Read these instructions.
2. Keep these instructions.
3. Heed all warnings.
4. Follow all instructions.
5. Do not use this apparatus near water.
6. Clean only with dry cloth.
7. Do not block any ventilation openings. Install in accordance with
the manufacturer’s instructions.
8. Do not install near any heat sources such as radiators,
heat registers, stoves, or other apparatus (including amplifiers)
that produce heat.
9. Protect the power cord from being walked on or pinched
particularly at plugs, convenience receptacles, and the point
where they exit from the apparatus.
10. Only use attachments/accessories specified by
the manufacturer.
11. Use only with the cart, stand, tripod, bracket, or table specified
by the manufacturer, or sold with the apparatus. When a cart is
used, use caution when moving the cart/apparatus combination
to avoid injury from tip-over.
12. Unplug this apparatus during lightning storms or when unused for
long periods of time.
13. Refer all servicing to qualified service personnel. Servicing is
required when the apparatus has been damaged in any way,
such as power-supply cord or plug is damaged. liquid has been
spilled or objects have fallen into the apparatus, the apparatus
has been exposed to rain or moisture, does not operate
normally, or has been dropped.
14. To Reduce the Risk of Fire or Electric Shock, Do not Expose
This Appliance To Rain or Moisture.
15. The Shock Hazard Marking and Associated Graphical Symbol is
provided on the bottom panel of unit.
16. Apparatus shall not be exposed to dripping or splashing and no
objects filled with liquids, shall not be placed on the apparatus.
20060929_HDT-1_381QA0S-A_GB.p65 2006/10/19, ¤U¤È 02:465
3
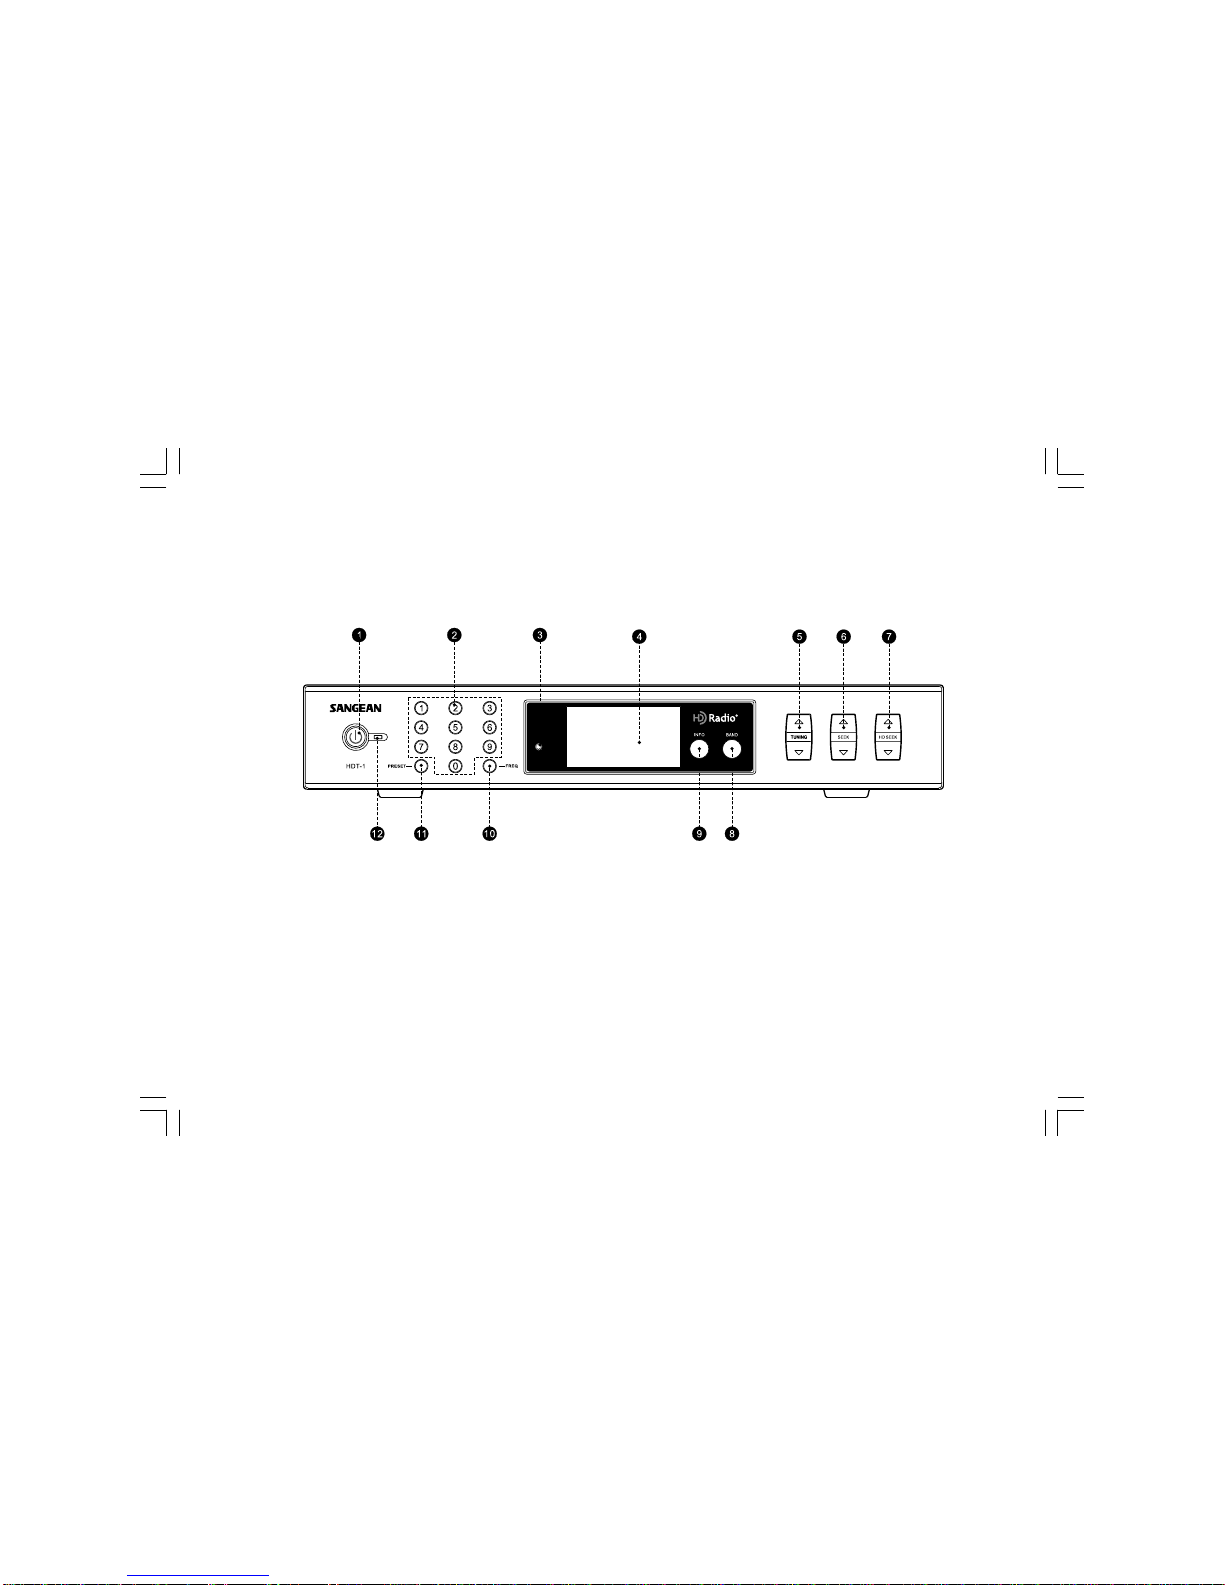
Main Unit Controls
(Front)
1.
2.
3.
4.
5.
6.
Standby on/off button
Number keys
Remote Control sensor
LCD display
Tuning Control button
Seek button
HD Radio seek button
Band button
Information button
Direct frequency station recall
Preset button
Standby LED indicator
7.
8.
9.
10.
11.
12.
20060929_HDT-1_381QA0S-A_GB.p65 2006/10/19, ¤U¤È 02:466

4
Main Unit Controls
(Rear)
13.
14. External FM antenna socket
External AM loop antenna socket Line Out socket
AC power cord socket
15. 16.
17.
20060929_HDT-1_381QA0S-A_GB.p65 2006/10/19, ¤U¤È 02:467

5
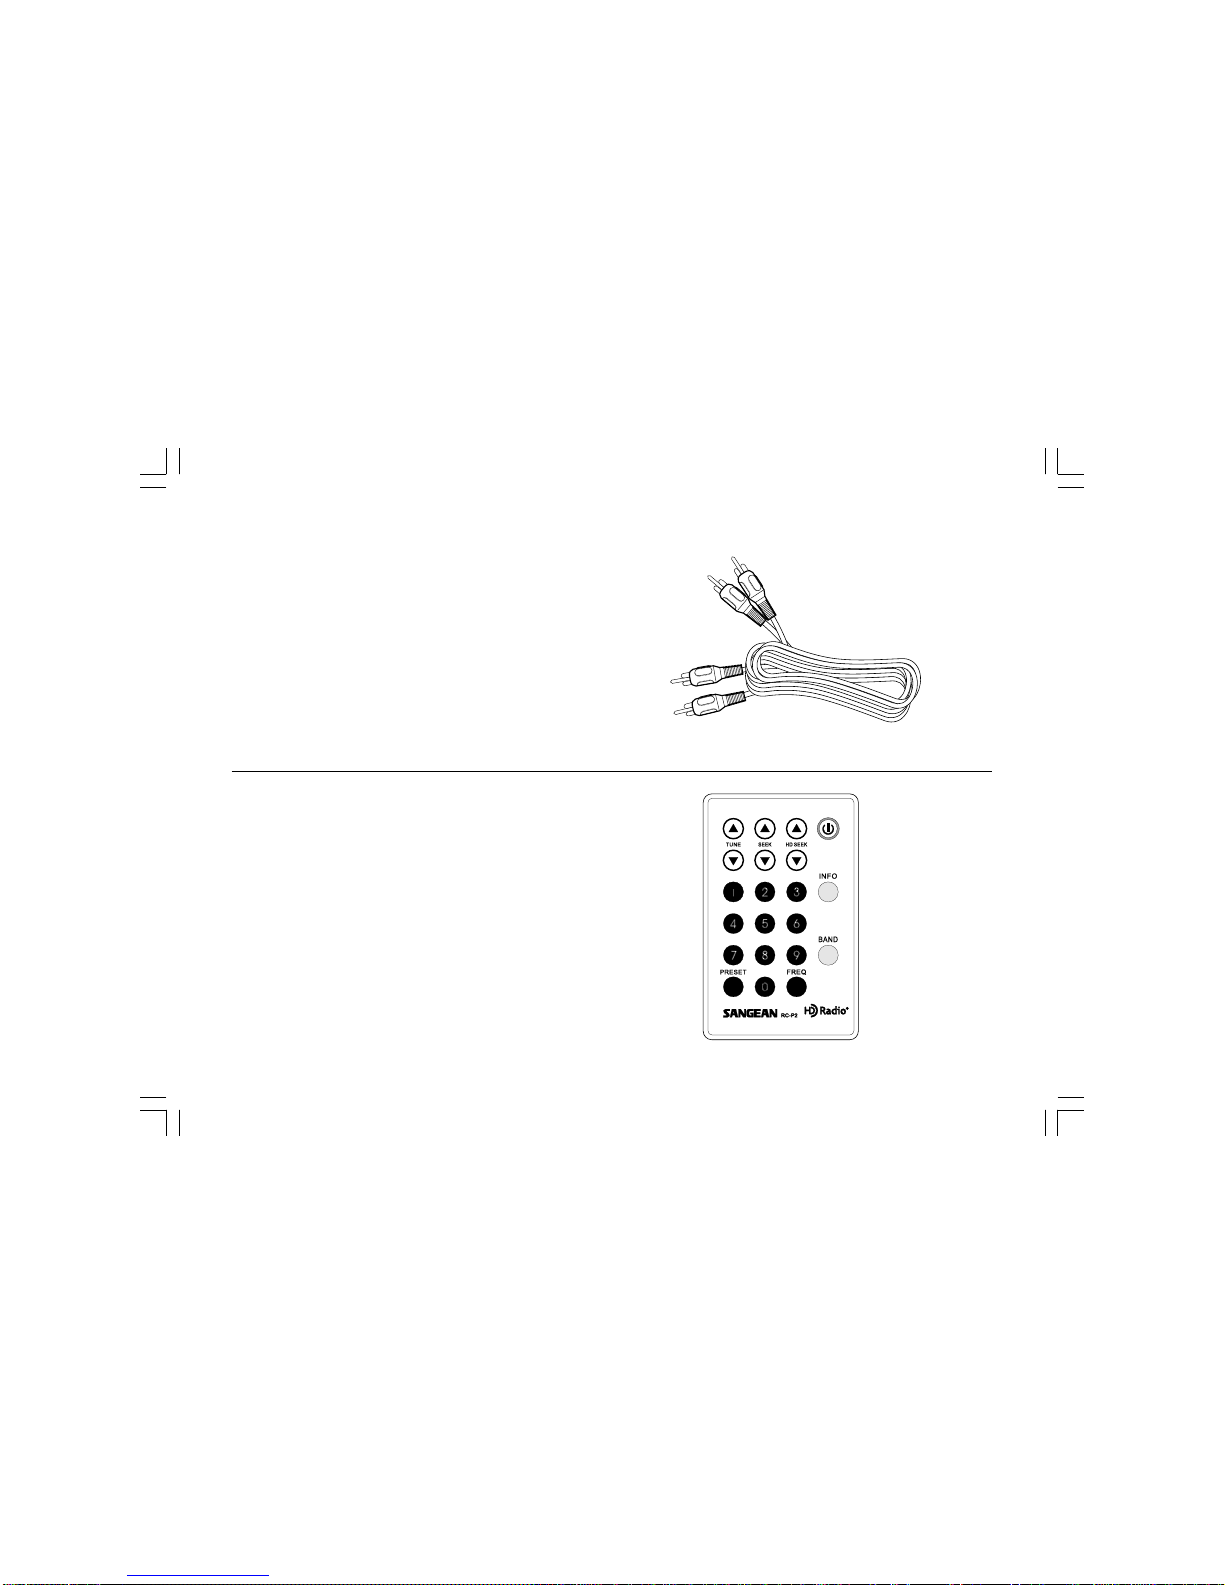
Remote Control
A.
B.
C.
D.
E.
Standby on/off button
Information button
Mode selection
Band button
Direct frequency station recall
Preset button
Tuning Control
Seek button
HD Radio Seek button
F.
G.
H.
I.
20060929_HDT-1_381QA0S-A_GB.p65 2006/10/19, ¤U¤È 02:468

6
Accessories
Detachable power cord x 1
FM Dipole antenna x 1
AM loop antenna x 1
20060929_HDT-1_381QA0S-A_GB.p65 2006/10/19, ¤U¤È 02:469
7
RCA type audio cable x 1
Remote control unit x 1
Instruction manual x 1
Warranty card x 1
20060929_HDT-1_381QA0S-A_GB.p65 2006/10/19, ¤U¤È 02:4610

8
Getting started
First find a location for your new HD Radio component tuner.
1. Plug the AC power cord into the socket located on the rear,
ensuring that the plug is pushed fully into the socket.
Plug the other end of the AC power cord into a wall socket and
switch on the wall socket if needed.
2. Connect the FMDipole into FM antenna terminal.
Setting the clock
Clock setting can be done when the tuner is in Standby ( power off )
1. Press and hold INFO button for approx. 2 seconds until display
flashes “clock set “ to enter Clock Set mode.
2. Press Tuning UP or Down button to select AM or PM.
3. Press number keys to set required clock time.
4. Press INFO button again to complete clock time set.
e.g. to set 9.45 AM
a. press INFO to enter clock set mode.
b. press Tuning UP to get AM.
c. Press 0,9,4,5.
d. Press INFO again to complete clock time set.
Display will appear ERROR if the input is incorrect.
3. Connect theAM loop antenna into AM antenna terminal.
4. Connect the LINE OUT socket of tuner and LINE IN socket
of the AV system with supplied RCA type audio cable.
Make sure channels ( R and L ) are correctly connected.
Important:
The AM loop antenna should be located at least 50 cm away
from the tuner to avoid possible interference.
20060929_HDT-1_381QA0S-A_GB.p65 2006/10/19, ¤U¤È 02:4611

9
Radio Controls
To turn the radio on, press the Standby button. Pressing the Standby
button again will put the unit into standby. In standby,
the tuner will display the time, dim the backlight and standby
LED will be on.
Selecting the radio band
Press the BAND button to select the appropriate band. At each press
of the BAND button, the band switches from AM1 AM2 FM1 FM2.
When you switch from one band to another, the radio will return to
the last tuned station used in the band.
20060929_HDT-1_381QA0S-A_GB.p65 2006/10/19, ¤U¤È 02:4612
Other manuals for HDT-1
5
Table of contents
Other Sangean Tuner manuals

Sangean
Sangean PR-D4BT User manual

Sangean
Sangean WFR-1 - DATASHEET 3 User manual

Sangean
Sangean HDT-1 User manual

Sangean
Sangean MMR-99 User manual

Sangean
Sangean HDT-1X User manual

Sangean
Sangean HDT-1 User manual

Sangean
Sangean HDT-1 User manual

Sangean
Sangean U4 DBT User manual

Sangean
Sangean EUPHONIC 45X User manual
Popular Tuner manuals by other brands


MFJ
MFJ MFJ-928 instruction manual

NAD
NAD C 445 owner's manual

Sony
Sony ST-SA5ES operating instructions

Sirius Satellite Radio
Sirius Satellite Radio SC-FM1 user guide

Antique Automobile Radio
Antique Automobile Radio 283501B Installation and operating instructions

Monacor
Monacor PA-1200R instruction manual


