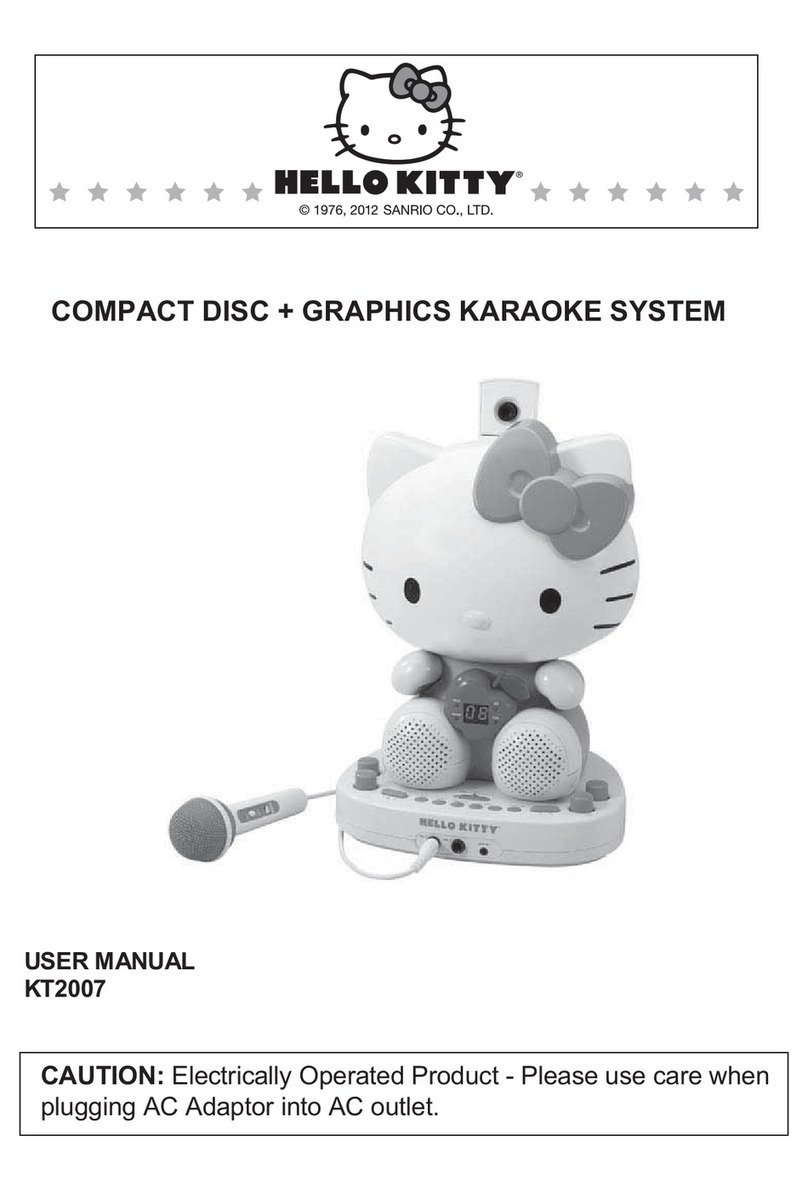
Sanrio Hello Kitty KT2003 User manual

CD KARAOKE SYSTEM / CD PLAYER
USER MANUAL
KT2003
PLEASE READ THIS MANUAL COMPLETELY BEFORE OPERATING THIS
UNIT AND RETAIN THIS MANUAL FOR FUTURE REFERENCE.

IMPORTANT SAFETY INSTRUCTIONS
1. The apparatus and AC/DC adaptor shall not be exposed to dripping and splashing and that no objects filled with
liquids, such as vases, shall be placed on the apparatus and AC/DC adaptor.
2. The mains plug of the AC/DC adaptor is used as the disconnect device. The power adaptor should always
remain readily operable and should not be obstructed OR should be easily accessed during intended use.
3. To completely disconnect the apparatus from supply mains, the mains plug of the AC-DC adaptor shall be
disconnected from the mains socket completely.
4. Minimum distance of 4 inches (10cm) around the apparatus and AC/DC adapter should be made available for
sufficient ventilation.
5. The ventilation should not be impeded by covering the ventilation openings with items, such as newspapers,
table-clothes, curtains, etc. ;
No naked flame sources such as lighted candles should be placed on the apparatus.
6. Attention should be drawn to environmental aspects of battery disposal.
7. The apparatus and AC/DC adaptor should be used in moderate climates.
8. Battery (battery pack or battery installed) shall not be exposed to excessive heat such as sunshine, fire or the
like.
9. The rating plate of the apparatus is located on its back enclosure.
CAUTION FOR LITHIUM BATTERY: Danger of explosion if battery is incorrectly replaced. Replace only with the
same or equivalent type.
COMPLIANCE WITH FCC REGULATIONS
This device complies with Part 15 of the FCC Rules. Operation is subject to the following two conditions:
(1) This device may not cause harmful interference, and
(2) This device must accept any interference received, including interference that may cause undesired operation.
This equipment has been tested and found to comply with the limits for a Class B Digital Device, pursuant to Part 15 of
the FCC Rules. These limits are designed to provide reasonable protection against harmful interference in a residential
installation. This equipment generates, uses and can radiate radio frequency energy and, if not installed and used in
accordance with the instructions, may cause harmful interference to radio communications. However, there is no
guarantee that interference will not occur in a particular installation. If this equipment does cause harmful interference to
radio or television reception, which can be determined by turning the equipment off and on, the user is encouraged to try
to correct the interference by one or more of the following measures:
- Reorient or relocate the receiving antenna.
- Increase the separation between the equipment and receiver.
- Connect the equipment into an outlet on a circuit different from which the receiver is connected.
- Consult the dealer or an experienced radio technician for help.
This Class B digital apparatus complies with Canadian ICES-003
WARNING
Changes or modifications to this unit not expressly approved by the party responsible for compliance could void the
user’s authority to operate the equipment.
Periodically check for damage if damaged properly repair the CD player before use.
Adult supervision is recommended.
WELCOME TO THE WORLD OF HELLO KITTY
We have taken great care to make sure that this unit was in perfect working order when it left our factory. It has been
designed to give you many years of enjoyment and trouble free operation. Read this manual before operating this
unit to become familiar with its features and obtain the performance that will bring you continued enjoyment for many
years.
For future reference, record the serial number in the space provided.
Model Number: KT2003
Serial Number: __________________________________________
Table of Contents Page No
CAUTION …………………………………………………………………………………………………..1
PRECATIONS FOR DISCS …………………………………………………………………………….. 2
WARNING ………………………………………………………………………………………………….2
FUNCTIONS AND CONTROLS …………………………………………………………………………3
PREPARATION ……………………………………………………………………………………………5
BASIC OPERATION ………………………………………………………………………………………6
COMPACT DISC PLAYER OPERATION ……………………………………………………………….6
CD KAROKE OPERATION ……………………………………………………………………………….8
CARE AND MAINTENANCE ……………………………………………………………………………..8
TROUBLESHOOTING GUIGE …………………………………………………………………………...9
SPECIFICATIONS …………………………………………………………………………………………9
LIMITED WARRANTY AND SERVICE …………………………………………………………………10
CAUTION
CLASS 1 LASER PRODUCT
CLASS1 LASERPRODUCT
APPAREIL LASERDECLASSE1
PRODUCTO LASER DE CLASE 1
CAUTION
INVISIBLE LASER RADIATION
WHEN OPEN AND INTERLOCKS
DEFEATED.
AVOID EXPOSURE TO BEAM
This product contains a low power laser device.
Follow the advice below for safe operations.
ON PROTECTION AGAINST LASER ENERGY EXPOSURE
•As the laser beam used in this compact disc player is harmful to the eyes, do not attempt to disassemble the
casing.
•Stop operation immediately if any liquid or solid object should fall into the cabinet.
•Do not touch the lens or poke at it. If you do, you may damage the lens and the player may not operate properly.
•Do not put anything in the safety slot. If you do, the laser diode will be ON when the CD door is still open.
•If the unit is not to be used for a long period of time, make sure that all power sources are disconnected from the
unit. Remove all batteries from the battery compartment, and unplug the AC-DC adaptor from the wall outlet.
Make it a practice to remove the AC-DC adaptor by grasping the main body and not by pulling the cord.
•This unit employs a laser. The use of controls or adjustment or performance of procedures other than those
specified here may result in exposure to hazardous radiation.
ON PLACEMENT
•Do not use the unit in places, which are extremely hot, cold, dusty or humid.
•Place the unit on a flat and even surface.
•Do not restrict the airflow of the unit by placing it in a place with poor ventilation, by covering it with a cloth or by
placing it on a carpet.
ON CONDENSATION
•When left in a heated room where it is warm and damp, water droplets or condensation may form inside the unit.
•When there is condensation inside the unit, the unit may not function normally.
•Let it stand for 1 to 2 hours before turning the power on, or gradually heat the room up and dry the unit before use.
Should any trouble occur, remove the power source and refer servicing to qualified personnel.
1

PRECAUTIONS FOR DISCS
HANDLING DISC
¾To keep the disc clean, do not touch the play sides of the disc.
¾Do not attach paper or ape to the disc.
¾Keep the disc away from direct sunlight or heat sources.
¾Store the disc in a disc case after playback.
CLEANING DISC
¾Before playback, wipe the disc with a clean cloth from the center outwards.
¾Do not use any type of solvent such as thinner, done by qualified service personnel.
CLEANING
¾Use a soft cloth moistened with a little neutral detergent to wipe the cabinet, panel and controls.
Never use abrasive paper, polishing powder or solvent like alcohol, gasoline, benzene, commercially available
cleaners or anti-static spray.
WARNING
PLEASE TAKE GOOD NOTE OF THE FOLLOWING INSTRUCTION
Read the instruction manual before you attempt to use the unit.
Consult your dealer or service personnel if you have questions about the installation or operation of the unit.
MAKE SURE
¾This unit was design use battery or AC adaptor (not included) rated DC 9V 800mA. Using others voltage could
cause the unit to malfunction or catch fire. Make sure all electrical connections (including extensions and inter
connectors) are properly made.
¾Turn unit OFF before unplugging it from power source.
¾Protect system from dust, moisture, water and other liquids.
DO NOT
¾Expose to temperatures above 35° C (95° F).
¾Place system near heaters or in areas subjected to direct sunlight.
¾Place system where there is poor air circulation.
¾Place system near TVs, speakers and other objects that generate strong magnetic fields.
¾Clean with strong chemical agents.
¾Add grease or oil components, running mechanisms, etc. CD player is designed to be maintenance-free.
¾Attempt to service this system yourself. Take to an approved service center if repairs are necessary.
¾Operate system if it is not working normally or has been damaged in any way. Turn unit off, unplug it from the
power source and consult service personnel.
¾Remove any fixed cover. This will increase the chance of electrical shock.
¾Leave system unattended when in use.
¾Listen to the headphone at high volume.
¾Obstruct vents on unit.
¾Push object into any holes, slots or openings on unit.
¾Allow children to operate unit without adult supervision.
2

ABOVE ALL
¾NEVER let anyone, especially children, push anything into holes, slots or any other openings in the case this could
result in a fatal electric shock.
¾NEVER guess or take chances with electrical equipment of any kind.
¾It is better to be safe than sorry!
Note: If the unit was used in a room with energy saving lamps (Fluorescent) erratic operation may occur.
FUNCTIONS AND CONTROLS
TOP SIDE RIGHT SIDE LEFT SIDE
3
2
1
3
REAR SIDE BOTTOM SIDE
3

TOP VIEW (OPENED TOP COVER) MIC HANDSET
TOP SIDE
1. Handle 3. Top Cover
2. Top Cover Release (OPEN / CLOSE)
RIGHT SIDE
4. MIC 2 Input Jack 6. DISCO LIGHT Switch
5. MIC 2 VOLUME Knob
LEFT SIDE
7. POWER Switch 9. MIC 1 Input Jack
8. MIC 1 VOLUME Knob
REAR SIDE
10. Phones Jack 11. DC Input Jack
BOTTOM SIDE
12. Battery Cover 13. Battery Cover Screw
MIC HANDSET
14. MIC Switch
TOP VIEW (OPENED TOP COVER)
15. DISCO LIGHT 22. ■STOP Button
16. MIC Slot 23. PLAY / PAUSE Button
17. CD Door OPEN 24. MASTER VOLUME
18. LCD Display 25. RANDOM Button
19. CD Door 26. REPEAT1/ALL Button
20. SKIP + Button 27. PROGRAM Button
21. SKIP – Button
4

PREPARATION
POWER SOURCE
This STEREO CD PLAYER operations on 6 “C” size (UM-2) batteries (Not included) or from an AC-DC 9V adaptor
(Not included).
A. BATTERY INSTALLATION
1. Turn over the unit and remove the Battery Cover Screw (13) to open the Battery Cover (12).
2. Install 6 “C” (UM-2) size batteries into the compartment, according to the polarity diagram on the bottom of unit.
3. Close the Battery Cover (12) and assemble the Battery Cover Screw (13).
To Install or Remove Batteries
REMOVE: Turn screw counterclockwise to open.
TIGHTEN: Turn screw clockwise to close.
BATTERY PRECAUTIONS
Follow these precautions when using battery in this device:
1. Use only the size and type of battery specified.
2. Be sure to follow the correct polarity when installing the battery as indicated in the battery
compartment. Reversed battery may cause damage to the device.
3. Do not mix different types of batteries together (e.g. alkaline, rechargeable and standard
(carbon zinc) or old batteries with fresh ones.
4. If the device is not to be used for a long period of time, remove the battery to prevent damage
or injury from possible battery leakage.
5. Do not try to recharge battery that is not intended to be recharged they can overheat and
rupture (Follow battery manufacturer’s directions).
6. Do not dispose of batteries in fire, batteries may leak or explode.
B. AC OPERATION
This unit may also be used with an AC adaptor (not included). When the AC adaptor is connected to the DC Input
Jack (11), the batteries are automatically disconnected. Please make sure to use an AC adapter with a rating of 9
Volts DC, 800mA with the following polarity.
If you are using a universal adapter with an output polarity switch or polarized plugs, be sure to set the polarity to “+”
HAND MIC INSTALLATION
1. Insert the MIC Stand into the MIC slot (16).
2. Insert the Hand MIC into the MIC Stand as shown.
3. Plug in MIC 1 into the MIC 1 Input Jack (9).
4. Plug in MIC 2 into the MIC 2 Input Jack (4).
5

BASIC OPERATION
To Turn ON the unit
Slide the POWER (7) switch to the “ON” position to turn ON the unit.
To Turn OFF the unit
Slide the POWER (7) switch to the “OFF” position to turn OFF the unit.
To LISTEN TO THE HEADPHONES
You can use headphones (not included) to listen in privacy. Insert the headphones 3.5mm plug into the PHONES (10)
Jack. Use corresponding adaptors (specialist shops) if you have different plugs. The speakers will automatically
switch off when the headphones are being used.
NOTE: To protect your hearing, follow these guidelines when you use headphones.
¾Turn the volume to counterclockwise before you begin listening. After you begin listening, adjust the volume to a
comfortable sound level.
¾Do not listen at extremely high volume level. Extended high volume listening can lead to permanent hearing loss.
¾Once you set the volume, do not increase it. Overtime, your ears adapt to the volume level, so a volume level that
does not cause discomfort might still damage your hearing.
MASTER VOLUME (24) Knob
Maximum: Turn clockwise to increase the sound level.
Minimum: Turn counterclockwise to decrease the sound level.
COMPACT DISC PLAYER OPERATION
Note: This player plays not only commercial CDs but also self-compelled CD-R / RW discs.
Do not attempt to play CD-ROM, CDI, VCD, DVD or other computer program/games CD.
LOADING COMPACT DISC
1. Slide the Top Cover Release (2) to open top cover.
2. Raise the CD Door OPEN (17) upward to open the CD Door (19).
3. Load a disc with label side upwards onto the black rotor fitted with 3 retaining bearings until
locked, push down the CD Door (19) to close.
PLAYING COMPACT DISC
1. Slide the POWER (7) switch to “ON” position to turn ON the unit. The CD Player will start reading the TOC
automatically.
2. Press PLAY/PAUSE (23) to start playback.
3. Press the ■STOP (22) button to terminate playback.
4. Slide the POWER (7) switch to the “OFF” position to turn OFF the unit.
NOTE: If no disc or damaged disc was loaded, “00” will be shown on LCD Display (18).
If the loaded disc contains 18 tracks, “18” will be shown on LCD Display (18).
PLAY / PAUSE (23) button
TO PLAY:
Press once after loading disc to start playback and “f” appears in the LCD Display (18).
TO PAUSE:
Press once during playback to suspend playback and “f” and the “track no.” blink in the LCD Display (18).
TO RESUME:
Press once during pause, playback continues and “f” and the “track no.” stop blinking in the LCD Display (18).
6

SKIP + (20) and SKIP - (21) button
■STOP (22) button Press to terminate playback.
REPEAT 1/ALL (26) button
REPEAT 1: Press once to playback the current track repeatedly and “ ” blinks in the LCD Display (18).
REPEAT ALL: Press twice to playback all the tracks on the disc repeatedly and “ALL” appears steadily in the
LCD Display (18).
Disable: Press repeatedly until above indicator disappears from the LCD Display (18).
RANDOM (25) button
Enable: Press the RANDOM (25) button once in stop mode to start playback track randomly. “RDM” appears in the
LCD Display (18).
Disable: Press the RANDOM (25) button again to resume normal playback. “RDM” disappears from the LCD
Display (18).
PROGRAMMING CD
The CD player enables program up to 20 programmed tracks in a sequence of your choice.
1. In stop mode press the PROGRAM (27) button, The Program Indicator, “PROG” , appears and blinks. Program
No. “01” appears briefly and then changes to “00” and blinks in the LCD Display (18) to prompt for input.
2. Press the SKIP + (20) or SKIP- (21) button to select the desired track to be programmed.
3. Press the PROGRAM (27) button to enter your selection. The Program No. will advance to “02” and change to
“00” and blink for next input.
4. Repeat steps 2 and 3 to program other tracks into the memory.
NOTE:
The first programmed will be replaced automatically when you enter over 20 tracks.
The player will exit the program mode if no button is pressed in 30 seconds.
5. Press PLAY / PAUSE (23) button in program mode to start playback the programmed tracks in sequence.
“PROG” lights steadily on LCD Display (18).
CLEARING PROGRAMMED TRACKS
•In stop mode, slide the POWER Switch (9) to “OFF” or
•Open the CD door by lifting the CD Door.
Note on CD-R / RW discs
i. Because of non-standardized format definition / production of CD-R / RW, playback quality & performance are
not guaranteed.
ii. The distributor and retailer are not responsible for the playability of CD-R/RW because recording conditions such
as PC performance, writing software, media ability, etc.
iii. Do not load an un-recorded CD-R / RW disc. It will take over 30 seconds to read the disc. The disc may be
damaged if you try to open the CD door while reading the disc.
7

CD KARAOKE OPERATION
This unit provided funny feature similar to ENJOYING KARAKOE function
1. Plug in the MIC Handset into the Input Jack MIC 1 (9) or MIC 2 (4) or both.
2. Slide the MIC Switch (14) to the “ON” position. You can now sing together with your favorite artists.
3. Adjust MIC 1 VOLUME (8) or MIC 2 VOLUME (5) Knob to your desired level,
NOTE:
To avoid feedback, do not turn the MIC VOLUME to the maximum position and leave the MIC Handset far away from
the speaker.
MIC 1 VOLUME (8) and MIC 2 VOLUME knob (5)
Maximum: Turn clockwise to increase the MIC input level.
Minimum: Turn counterclockwise to decrease the MIC input level.
DISCO LIGHT Switch (6)
ON : DISCO Light without flashing effect.
FLASH : DISCO Light with blinking effect.
OFF : Shut off the light.
CARE AND MAINTENANCERE AND MAINTENANCE
COMPACT DISC CARE
i. Treat the disc carefully. Handle the disc only by its edges. Never allow your fingers to come in contact with the
shiny, unprinted side of the disc.
ii. Do not attach adhesive tape, stickers etc., to the disc label side.
iii. Clean the disc periodically with soft, lint-free, dry cloth. Never use detergents or adhesive cleaners to clean the
disc. If necessary, use a CD cleaning kit.
iv. If disc skips or gets stuck on a section of the disc, it is probably dirty or damaged (scratched).
v. When cleaning the disc, wipe in straight lines from the center of the disc to the edge of the disc. Never wipe in
circular motions.
vi. To remove a disc from its storage case, press down on the center of the case and lift the disc out, holding it
carefully by the edges.
vii. Fingerprints and dust should be carefully wiped off from the disc's recorded surface with a soft cloth. Unlike
conventional records, compact disc has no grooves to collect dust and microscopic debris. So gently wiping
with a soft cloth should remove most particles.
CLEANING THE UNIT
i. To prevent fire or shock hazard, disconnect your unit from the AC power source when cleaning.
ii. If the cabinets become dusty, wipe them with a soft dry dust cloth. Do not use any wax or polish sprays on the
cabinets.
iii. If the front panel becomes dirty or smudged with fingerprints it may be cleaned with a soft cloth slightly
dampened with a mild soap and water solution. Never use abrasive cloth or polished as these will mar the finish
of your system.
CAUTION: Never allow any water or other liquids to get inside the system while cleaning.
8

TROUBLESHOOTING GUIDE
SPECIFICATION
CD Player
Playback System -------------------------------- Top Load CD mechanism
Memory Program -------------------------------- 20 Tracks
Audio Section
Power Output -------------------------------------- 2 x 500mW
Headphone Impedance ------------------------ 8 – 32 ohms
Speakers -------------------------------------------- 8 ohms, 3” full range x 2
General
Power Source ------------------------------------ DC 9V, UM-2 / “C” SIZE batteries x 6 (not included)
AC adaptor (not included) DC 9V, 800mA
Dimension (Inch) --------------------------------- UNIT: 15 (W) x 3.8 (H) x 10.7 (D)
MIC: 1.9 (DIA) x 6 (L)
ACCESSORIES:
Instruction Manual -------------------------------- 1 pc
MIC Hand Set ---------------------------------------2 pcs.
MIC Stand ------------------------------------------- 2 pcs.
9

90 DAY LIMITED WARRANTY AND SERVICE
VALID IN CANADA ONLY
SPECTRA MERCHANDISING INTERNATIONAL, INC. warrants this unit to be free from
defective materials or factory workmanship for a period of 90 days from the date of original
customer purchase and provided the product is utilized within Canada. This warranty is not
assignable or transferable.
This warranty is valid only in accordance with the conditions set forth below:
1. The warranty applies to the SPECTRA product only while:
a. It remains in the possession of the original purchaser and proof of purchase is
demonstrated.
b. It has not been subjected to accident, misuse, abuse, improper service, usage
outside the descriptions and warnings covered within the user manual or non-
SPECTRA approved modifications.
c. Claims are made within the warranty period.
2. This warranty does not cover damage or equipment failure caused by electrical wiring not
in compliance with electrical codes or SPECTRA user manual specifications, or failure to
provide reasonable care and necessary maintenance as outlined in the user manual.
3. Warranty of all SPECTRA products applies to residential use only and is void when
products are used in a nonresidential environment or installed outside of Canada.
For information on returning a product for warranty service, please contact SPECTRA first at
1-800-777-5331 or by email at custserv@spectraintl.com for return authorization and
instructions. When contacting SPECTRA, please provide your contact information, the
product model number, place and date of purchase, and a description explaining how the unit
is defective.
Our obligation under this warranty is the repair or replacement of the defective unit or any
part thereof, except batteries, when it is returned to the SPECTRA Service Department or a
SPECTRA designated affiliate, accompanied by proof of the date of original consumer
purchase, such as a duplicate copy of a sales receipt.
You must pay all applicable shipping charges, duties, taxes or fees required to return the
product for warranty service. If the product is repaired or replaced under warranty, the return
charges will be at SPECTRA’s expense. There are no other express warranties other than
those stated herein.
In some cases the model you have may be discontinued, and SPECTRA reserves the right to
offer alternative options for repair or replacement.
To register your product, visit the link below to enter your information.
http://www.spectraintl.com/canadian-product-registration.html
Printed in China
10
Table of contents
Other Sanrio Karaoke System manuals
Popular Karaoke System manuals by other brands

Radio Shack
Radio Shack 32-1167 owner's manual

Pyle
Pyle PWMA337BT user manual

Wonky Monkey
Wonky Monkey WM SP-BT3000 User instructions

Modern Electronics Factory
Modern Electronics Factory JT1098 user guide

Singing Machine Kid's
Singing Machine Kid's SMK1010 instruction manual

The Singing Machine
The Singing Machine SML283 instruction manual