SANTA CRUZ MY18 Nomad User manual

SANTA
CRUZ
BICYCLES
Cable Routing Procedure
MY18 Nomad
Copyright Santa Cruz Bicycles 2017

ENGLISH
2
TABLE OF CONTENTS
SAFETY INSTRUCTIONS............................................................................... 3
CABLE ROUTING............................................................................................. 3
INTRODUCTION ..........................................................................................................................3
TOOLS AND SUPPLIES..............................................................................................................3
REAR DERAILLEUR ROUTING ..................................................................... 4
REAR BRAKE ROUTING................................................................................. 8
FRONT BRAKE ROUTING ............................................................................. 11
DROPPER POST ROUTING - HYDRAULIC-ACTUATED REMOTE....... 12
DROPPER POST ROUTING - CABLE-ACTUATED REMOTE................. 14
MAINTENANCE SCHEDULE......................................................................... 18
CLEANING.....................................................................................................................................18
WARRANTY....................................................................................................... 19
LIFETIME FRAME AND FORK WARRANTY...........................................................................19
LIFETIME BEARING WARRANTY.............................................................................................19
FILE A WARRANTY CLAIM........................................................................................................19
LIMITATIONS, EXCLUSIONS, AND DISCLAIMERS..............................................................19

ENGLISH
3
SAFETY INSTRUCTIONS
WARNING
Special tools and knowledge are necessary for the service of your bicycle. For your safety, only an authorized
dealer should install, adjust, or service the frame or the components. Special tools and parts may be required to
complete this service. Make sure to set up a maintenance schedule with your dealer to keep your bicycle safe
and performing its best. Consult your dealer if you have any questions or concerns about proper setup and
riding your bike. Stop riding immediately and consult your dealer if you suspect any problems with your bicycle.
For current service instructions, part numbers, and technical information, visit www.santacruzbicycles.com,
Please contact your local Santa Cruz Bicycles® distributor or dealer for questions and orders. Information
contained in this publication is subject to change at any time without prior notice. The appearance of your
product appearance may dier from the images contained in this publication.
Adhere to all torque and sizing specifications for press fits and thread fits. Over-tightening can damage
threads or cause parts to fail. Using the wrong size part can cause parts to fail and may cause a crash,
which can result in serious injury and/or death.
You must register your bicycle in order to make a warranty claim (see the instructions on the Warranty page).
Always wear safety glasses and personal protective equipment, such as latex or nitrile gloves when
servicing Santa Cruz Bicycles products.
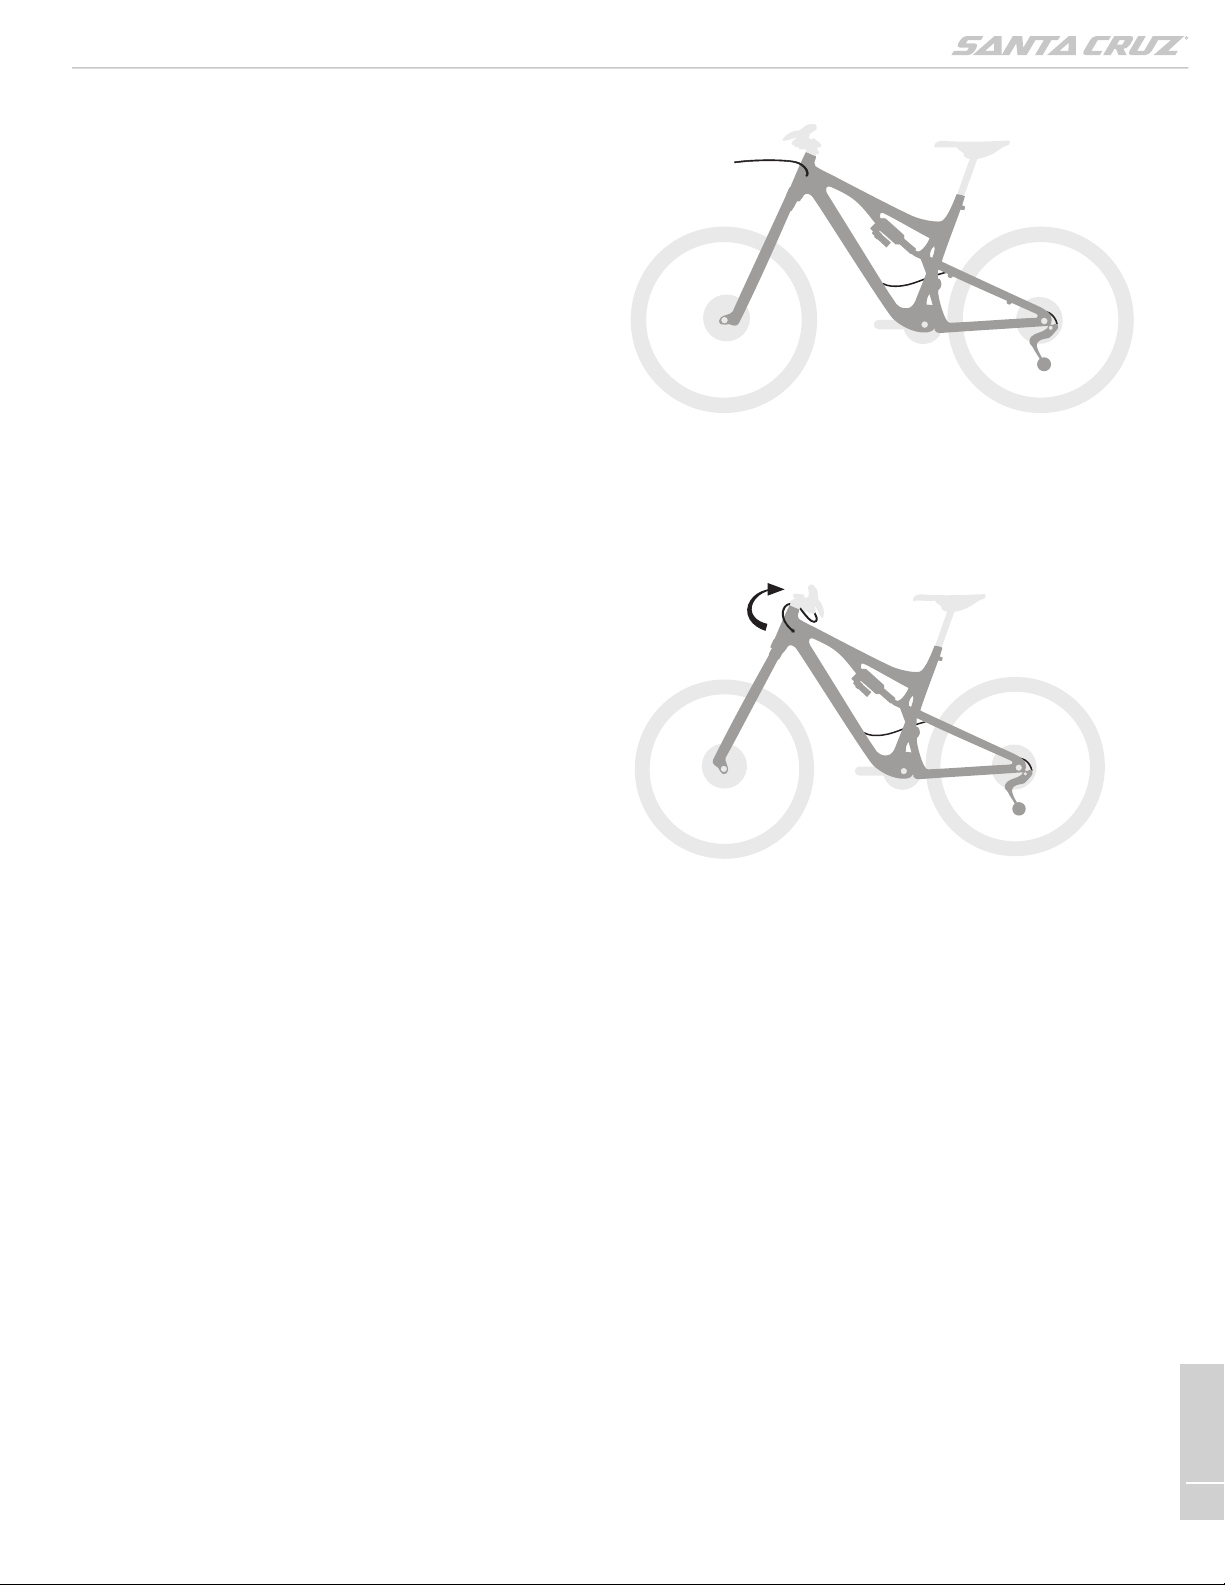
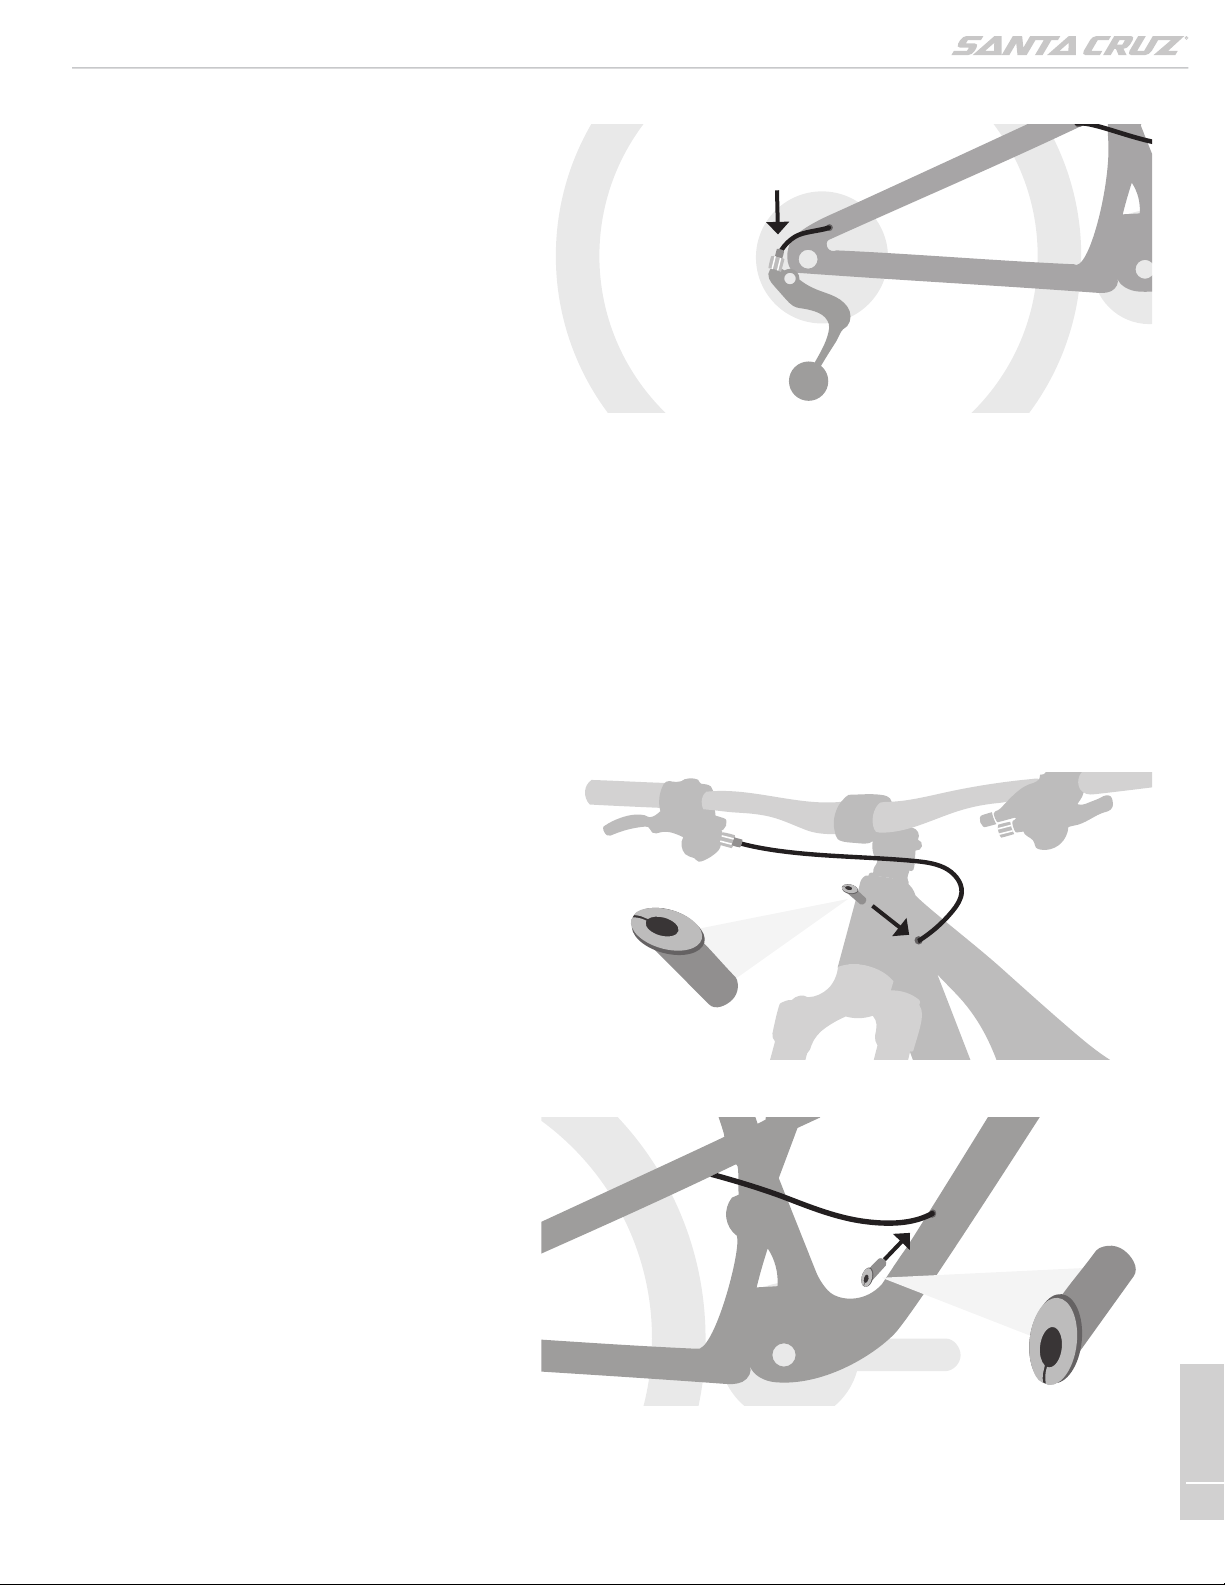
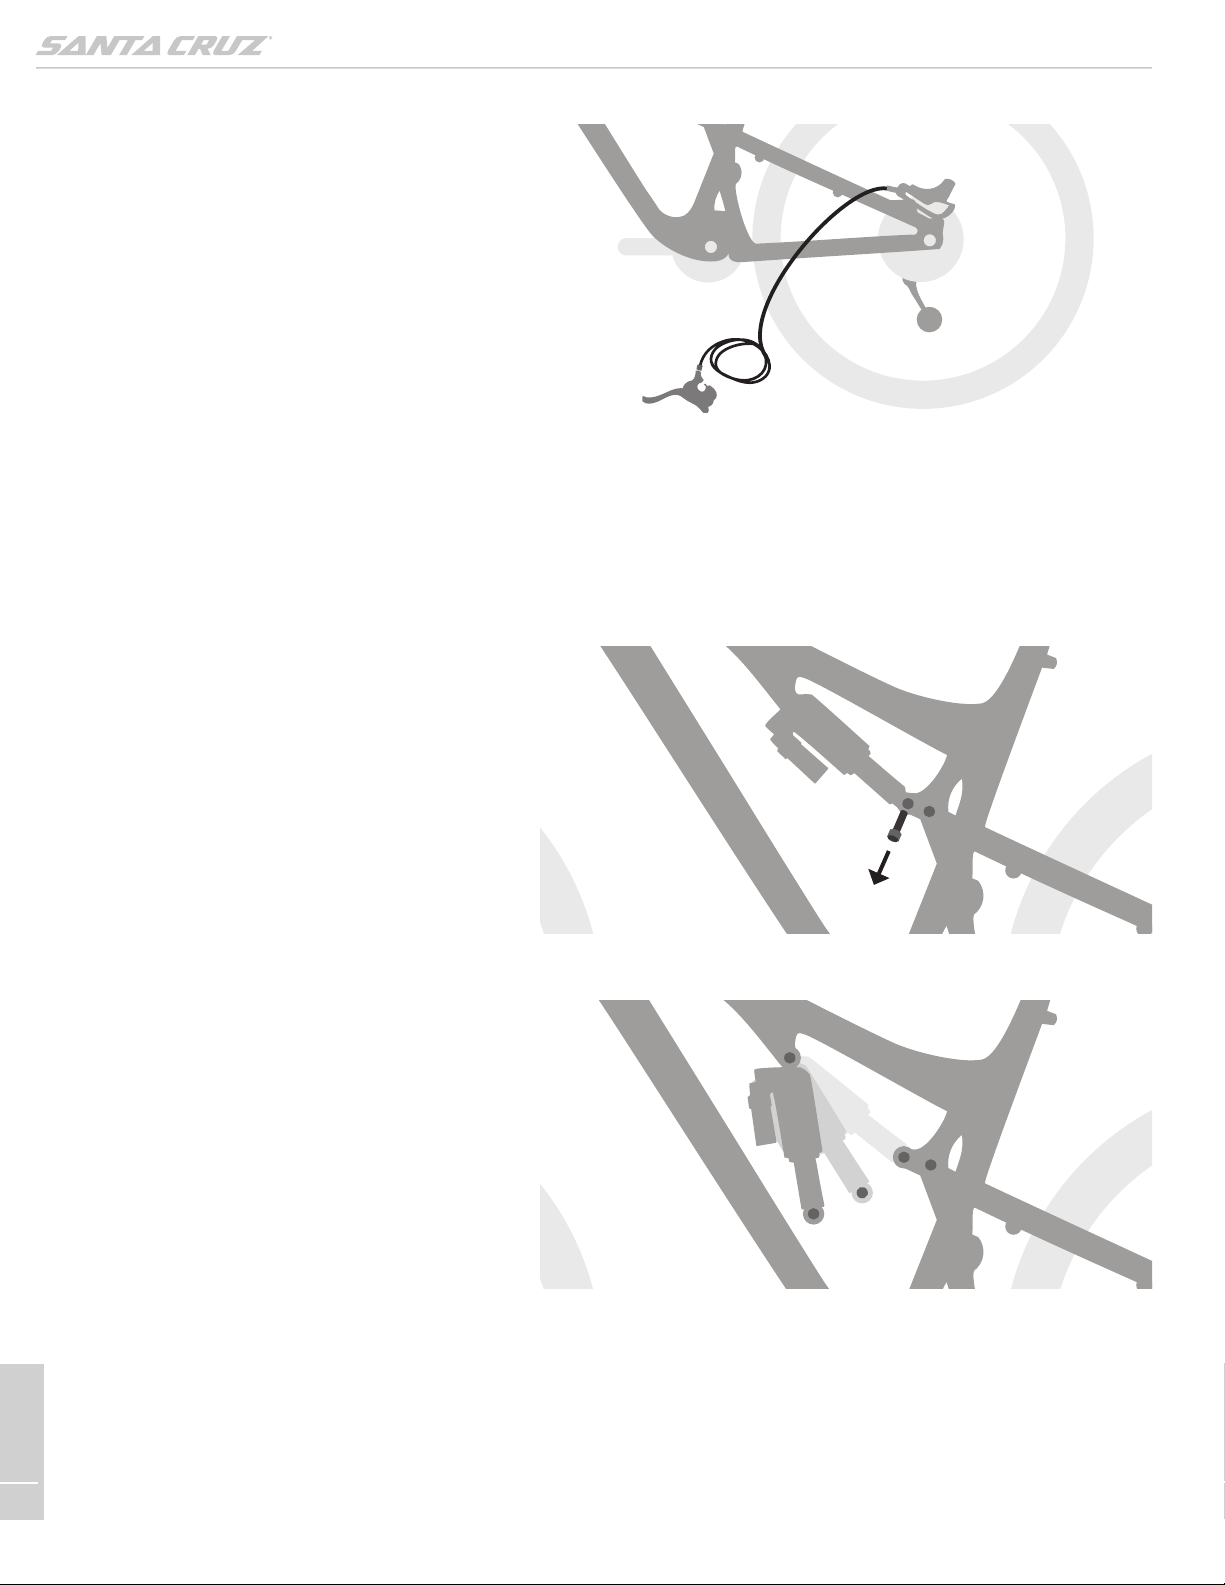
CABLE ROUTING
INTRODUCTION
We recommend checking your cables, housing, and hydraulic lines for signs of wear before each
ride. Replace these wear items after every 100-150 hours of riding, depending on your riding style
and riding conditions. This service applies to MY18 Nomad (carbon only).
TOOLS AND SUPPLIES
• Safety glasses
• Latex or nitrile gloves
• Pick
• Hex wrenches
• Zip ties
• Pliers
• Cable cutters
• Brake line
• Cable housing
• Silicon bike spray

ENGLISH
4
1. Install your rear derailleur and shifter
according to your manufacturer’s
instructions (not pictured).
2. Determine the correct length of cable
housing. Push one end of the housing into
the access port at the back end of the
seat stay until it exits the access port at the
front end of the seat stay.
Tip: Use a pick to help guide the cable
housing out of the front access port.
3. Install the grommet onto the cable housing
and into the access port.
Tip: use a flathead screwdriver to help
install the grommet.
REAR DERAILLEUR ROUTING

ENGLISH
5
4. Route the housing into the downtube
access port until it exits the non-drive
side access port at the head tube. There
should be a gentle bend in the housing
from the seat stay to the downtube.
5. Make sure the housing is long enough to
allow the handlebar to rotate 180 degrees
to each side without pulling the housing
from the rear derailleur cable stop or
the shifter.
6. Use a cable cutter to cut the housing to
the correct length (not pictured).
Tip: use pliers to round out the housing
after the cut, as oval-shaped housing can
apply unwanted friction on the cable. You
may also use a pick inserted inside the
housing to round the hole.

ENGLISH
6
7. Install a ferrule onto the both ends of
the housing.
8. Slide the cable into the housing until it
exits at the rear derailleur. Make sure the
housing and ferrule are seated in the
shift lever.

ENGLISH
7
9. Seat the ferrule and housing into the cable
stop of the rear derailleur.
10. Install the cable into the rear derailleur
according to your manufacturer’s
instructions (not pictured).
11. Apply a small amount of silicon bike spray
to the outside of the two rubber grommets
and install them into the access ports.

ENGLISH
8
1. The rear brake line is already connected
to the lever and caliper. Install the caliper
according to your brake manufacturer’s
instructions.
2. Use a 6 mm hex wrench to loosen and
remove the shock mounting bolt of the
upper link. Set the shock down out of
the way.
Tip: place a rag between the shock and
the frame to prevent scratches.
REAR BRAKE ROUTING

ENGLISH
9
3. Pull up on the rear triangle to move the
frame into its travel until there’s room to
fit the lever through the seat tube and the
non-drive side rear triangle.
Make sure to route the line on the inside
of the seat stay.
4. Reattach the shock to the upper link. Use
a 6 mm hex wrench to tighten the shock
mounting bolt to 15.8 N.m (140 in-lb).
5. Install the brake lever to the handlebar
according to your brake manufacturer’s
instructions.

ENGLISH
10
6. Use zip ties to attach the brake line to the
anchors of the non-drive side down tube
and seat stay. Create a gentle bend from
the anchor of the downtube to the anchor
of the seat stay.
7. Make sure the line is long enough to
allow the handlebar to rotate 180 degrees
to each side. Conversely, make sure
the housing is not so long that there
is unwanted slack. If the line needs
to be shortened, consult your brake
manufacturer’s instructions for more
information.

ENGLISH
11
1. The front brake line is already connected
to the lever and caliper. Consult your
brake manufacturer’s instruction for
installation information.
2. Install the lever and caliper according to
your brake manufacturer’s instructions
(not pictured).
3. Attach the brake line to the fork according
to your brake manufacturer’s instructions
(not pictured).
4. Make sure the line is long enough to allow
the handlebars to rotate 180 degrees to
each side. Conversely, make sure the line
is not so long that there is unwanted slack.
If the line needs to be shortened, consult
your brake manufacturer’s instructions for
more information.
FRONT BRAKE ROUTING

ENGLISH
12
1. Disconnect the hydraulic line from the
remote to the seatpost according to your
dropper post manufacturer’s instructions
(not pictured).
2. Install the remote onto the handlebar
according to your manufacturer’s
instructions (not pictured).
3. Push the end of the line into the drive side
access port until it exits the top of the
seat tube.
4. Reconnect the line to the seatpost
according to your dropper post
manufacturer’s instructions (not pictured).
DROPPER POST ROUTING - HYDRAULIC-ACTUATED REMOTE

ENGLISH
13
5. Set the approximate seat height.
6. Make sure the housing is long enough to
allow the handlebar to rotate 180 degrees
to each side.
7. Apply a small amount of silicone bike
spray to the outside of the rubber
grommet to install it into the access port.

ENGLISH
14
1. Determine the correct length of cable
housing. Push one end of the housing into
the drive side access port until it exits the
top of the seat tube.
2. Install the remote and seatpost according
to your seatpost manufacturer’s
instructions (not pictured).
3. Set the approximate seat height.
DROPPER POST ROUTING - CABLE-ACTUATED REMOTE

ENGLISH
15
4. Make sure the line is long enough to allow
the handlebar to rotate 180 degrees to
each side.
5. Use a cable cutter to cut the housing to
the correct length (not pictured).
Tip: use pliers to round out the housing
after the cut, as oval-shaped housing can
apply unwanted friction on the cable. You
may also use a pick inserted inside the
housing to round the hole.
6. Install ferrules onto each end of the
housing, if applicable for your dropper
post. Consult your manufacturer’s
instructions.

ENGLISH
16
7. Slide the cable into the housing until it
exits at the seatpost.
8. Make sure the housing and ferrule (if
applicable) are seated in the remote.
9. Install the cable and housing according to
your seatpost manufacturer’s instructions
(not pictured).

ENGLISH
17
10. Apply a small amount of silicon bike spray
to the outside of the rubber grommet to
install it into the access port.

ENGLISH
18
MAINTENANCE SCHEDULE
Bicycle service requires special knowledge and tools and should be
performed by a professional bicycle mechanic. This user manual is to be used
in conjunction with the manuals supplied by the component manufacturers.
If you did not receive the manual provided by the component manufacturer,
download the materials o the Internet or contact your local dealer. Consult
your local dealer to create a maintenance plan and refer to this Maintenance
Schedule as a guide for frequent inspection, service, and replacement of parts.
BEFORE EVERY RIDE WEEKLY MONTHLY EVERY 3 MONTHS ANNUALLY
Check the frame and fork for
signs of stress: scratches,
cracks, dents, deformation
or discoloration. Inspect the
chainstay guard and ensure
it is correctly and securely
attached
Check that all bolts are
tightened to proper torque
specifications. Make sure
to include pedals and any
accessories or luggage
carriers.
Check the shifter and brake
cables for wear
Inspect the drivetrain for wear Annual servicing at your
dealer: overhaul service
and inspection of frame,
suspension, and all other
components. Repair, service,
and/or replace parts
as needed
Check that the wheels
are true
Check the rims and spokes
for damage
Check that the bottom
bracket is tightened to proper
torque specifications
Inspect the crank arms
and pedals
Clean and lubricate all parts
as recommended by your
component manufacturer’s
instructions or consult
your dealer
Check the tire pressure Clean the bicycle Check that the headset is
adjusted correctly
Top o grease ports in frame
lower links, if applicable
Check for service instructions
and intervals for your frame at
www.santacruzbicycles.com
Check the brakes, including
brake pads and brake lines
Check the tires for damage
and wear
Check that the chain is
tensioned correctly
Check tire sealant levels
Check that both wheels are
secure
Clean dust seals on
suspension
Inspect suspension parts
for wear
Check that the handlebar and
stem are correctly positioned
and inspect for signs of stress:
scratches, cracks, dents,
deformities, and discoloration
Check the chainstay guard
and bottom bracket guard (if
applicable) for wear
Check that the suspension
settings are at your
preferences
Check that the lighting system
and reflectors are in good
working order
Check that the saddle
and seatpost are correctly
positioned and tightened
Check for smooth
shifting operation
Lubricate the chain
This list provides some guidelines, but is not to be considered a complete inspection. Following these guidelines will help maintain the performance of your
bicycle and prevent more serious problems from arising. It is important to remember that service intervals can vary depending on climate, trail conditions and
riding frequency. For service instructions for your specific components, visit the manufacturer’s website. If you detect any problems with your bike, and you are
not able to repair them, take your bike to your authorized dealer for service.
CLEANING
Clean your bicycle with a soft, moist cloth and bicycle cleaner or a solution of dish soap and water. Do not use
industrial solvents or harsh chemicals that can damage the paint or moving parts. Do not use high-pressure
water. Every three months, clean and polish the frame finish. Some finishes do not require polish. If you are
not certain, consult your retailer.

ENGLISH
19
LIFETIME FRAME AND FORK WARRANTY
Santa Cruz Bicycles will repair or replace at its option any frame or rigid fork made by Santa Cruz
Bicycles it determines to be defective in materials or workmanship. The warranty will be in eect for
the lifetime of the frame or rigid fork and is available only to the original, registered owner. In order to
confirm that you are the original owner, please register using our Warranty Registration Form at the
time of purchase. Notwithstanding the foregoing, frames purchased prior to May 1, 2015 are covered
under the previously-existing warranty for five years from the original date of purchase.
LIFETIME BEARING WARRANTY
Santa Cruz Bicycles pivot bearings are warranted for life to the original owner of the bike. The return
process is simple: fill out the Warranty Bearing Replacement Form, upload a copy of your purchase
receipt, and we’ll get a new set of bearings out to you within 48 hours!
HANDLEBARS
Santa Cruz carbon handlebars are warranted against defects in materials and workmanship for a
period of five years from the original date of purchase.
NO-FAULT REPLACEMENT
Santa Cruz Bicycles will make replacement frame parts available to the original, registered owner
at a reduced charge in the event of a crash or other non-warranty situation for the life of the bike.
FILE A WARRANTY CLAIM
Something not right? Use our Warranty Claim Form to file a warranty claim. We’ll do everything we
can to get you back to riding as fast as possible.
If you have any other questions, or would like to follow up on a warranty claim, contact our Warranty
Department.
LIMITATIONS, EXCLUSIONS, AND DISCLAIMERS
The sole remedy available under the foregoing express warranty and all implied warranties is the
repair or replacement of defective parts with those of equal or greater value, as determined by
Santa Cruz Bicycles in its sole discretion. The warranty does not cover labor costs, custom finishes,
normal wear and tear, or damage from commercial use. The warranty is void if the part is modified
from its original condition in any manner or used outside normal intended use, as determined by
Santa Cruz Bicycles in its sole discretion. The warranty for damage arising from accidents, crashes
and other impacts is limited to oered replacement at a reduced charge as set forth above.
THE FOREGOING WARRANTY IS THE SOLE AND EXCLUSIVE WARRANTY OFFERED BY SANTA
CRUZ BICYCLES. TO THE MAXIMUM EXTENT PERMITTED BY APPLICABLE LAW, ALL OTHER
EXPRESS AND IMPLIED WARRANTIES (INCLUDING WITHOUT LIMITATION THE WARRANTIES OF
MERCHANTABILITY AND FITNESS FOR A PARTICULAR PURPOSE) ARE HEREBY DISCLAIMED. TO
THE MAXIMUM EXTENT PERMITTED BY APPLICABLE LAW, IN NO EVENT SHALL SANTA CRUZ
BICYCLES OR ANY OF ITS OWNERS, OFFICERS, EMPLOYEES, REPRESENTATIVES, AGENTS, OR
AFFILIATES (OR ANY OF THEIR RESPECTIVE SUCCESSORS OR ASSIGNS) BE RESPONSIBLE OR
OTHERWISE LIABLE FOR ANY DIRECT, INCIDENTAL OR CONSEQUENTIAL DAMAGES ARISING
FROM THE PURCHASE, USE, OR OWNERSHIP OF ITS PRODUCTS, INCLUDING WITHOUT
LIMITATION DAMAGES FOR PERSONAL INJURY, PROPERTY DAMAGE, OR ECONOMIC LOSSES,
WHETHER BASED ON CONTRACT, WARRANTY, NEGLIGENCE, PRODUCT LIABILITY, OR ANY
OTHER THEORY.
Some states and countries do not allow some or all of the foregoing exclusions or limitations, so
they may not apply to you. If any portion of the foregoing warranty (or the exclusions or limitations
thereto) is deemed invalid or unenforceable pursuant to applicable law, it shall be deemed modified
so as to be valid and enforceable to the maximum extent consistent with such law. This warranty
gives you specific legal rights, and you may also have other rights which vary from state to state and
country to country.
To print the forms mentioned above and to view the most current warranty information please visit
http://www.santacruzbicycles.com/en-US/warranties.
WARRANTY

ENGLISH
20
NOTES
Table of contents
Other SANTA CRUZ Bicycle manuals