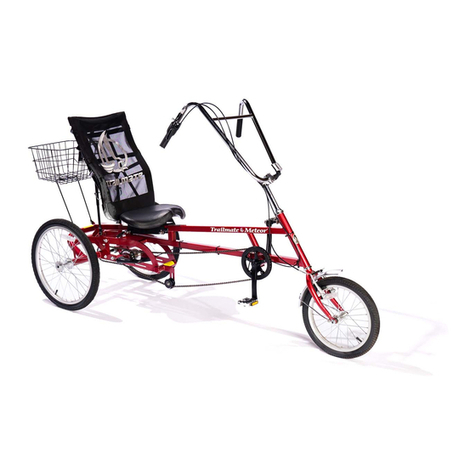
TRAILMATE Worker User manual

TRAILMATE WORKER
OWNER'S MANUAL


DESOTO / WORKER
ASSEMBLY INSTRUCTION
Remove all parts from the frame and wheel cartons.
Check air pressure and inflate tires to 35 psi. Make
sure tires are properly seated on rims.
1. Frame Assembly
Slide front frame (25) into rear frame (12) with
transmission box open side down, as far as possible.
Install four 3/8” carriage bolts (21) through the slots in
the sides of the transmission box from the outside
inward. Be sure the square shoulders of the bolts seat
into each slot. Install flange nuts (23); do not tighten
at this time.
2. Front Fender and Wheel
Attach front fender(30) to fork (39) thru “l” bracket
using bolt(32), washer (33), and nut (31)Install front
wheel (37) in the slots in the fork. Install washer & nut
on other side. Hand tighten at this time. Install Brake
Caliper using Lock Washer & Screw. Attach lower
end of Cable (36) to Caliper (61).
Check that the wheel is centered between the fork
blades and close the axle locking lever.
3. Pedals
To install pedals (18), screw the pedal marked “R” into
the right side of the crank in a clockwise direction.
Install the left pedal (marked “L”) by turning in a
counter-clockwise direction. Use a 9/16” open-end
wrench to tighten.
4. Chain
Install drive chain (24) over front and rear sprockets
and join together with connecting link (29). Install
connecting link, and spring clip, using pliers. Slide the
frame section apart, evenly, until the chain is tight
(approximately 3/4” total up and down chain
movement at middle is permissible) and securely
tighten all four rear frame bolts. Rotate the pedal
several times to check that the chain is running freely.
-KEEP FINGERS CLEAR!
If binding is encountered, the chain may have to be
loosened until the binding is eliminated. Chain
binding is usually the result of a sprocket
misalignment. Repositioning the sprocket on the
rear axle, or re-squaring the trike rear to the front
frame section can correct this.
5. Chain Guard
To install chain guard (17), place over chain and
slide rear of guard under top of transmission box.
When the plastic screw grommet (19) on the rear of
the guard is lined up with the slotted hole in the side
of transmission box, secure with screw (16). Before
tightening it is necessary to line up the holes in the
front mounting bracket. Remove and reinstall
screw (44) and tighten. Tighten the rear screw. Turn
the pedals to make sure the chain does not rub on
the chain guard. If the chain rubs, adjust the back
or front mounting bracket to obtain clearance.
6. Western Saddle Seat
To install western saddle seat (10), secure sissy bar
(22) to the two 5/16” studs on the underside of the
seat. The sissy bar should be installed so the top
curves to the rear of the trike.
Remove the seat-mounting bracket (48) (it is
loosely installed on the seat post) and install on the
two remaining studs on the bottom of the seat. You
will need to use a 1/2” socket wrench to reach the
nut. Secure the seat mounting bracket and seat to
the seat post (45) using any of the four sets of holes
with the
1-1/2” long screw (47) and nut (11). NOTE: The
four sets of holes in the seat-mounting bracket will
determine the distance from the handlebar. You
may have to reposition later. Attach the sissy bar
long slotted holes to the two tabs welded to the axle
housing. Install carriage bolts (21) and attach nuts
(23). DO NOT tighten at this time.
Seat Adjustment
Install seat post clamp(46) to the frame seat mast.
Install the seat post (45) with seat (10) attached and
raise seat to desired height. DO NOT expose more
than 6-1/2” of seat post. Pull up on back of seat
until level. Tighten seat post clamp and sissy bar
bolts securely. NOTE: The four sets of holes in the
seat-mounting bracket allow 3-1/4” front/back
adjustment to the handlebar. Reposition height &
front back setting for rider’s maximum comfort.

DESOTO /WORKER
Assembly Instructions
7. Handlebar
Slide the handlebar (41) through the clamp on the stem
(43) with the portion containing the long bolt to the
rear of handlebar. Install clear reflector. Install the
stem into the fork (39) until the line marked on the
stem is not visible. Align handlebar to the fork as it
faces straight ahead and tighten bolt in stem firmly.
DO NOT over tighten; this can damage the fork tube.
CAUTION: Check that head set (40) is tight.
DO NOT over tighten, however, as this can damage
the fork bearings. Fork assembly should rotate freely.
Slide handbrake lever onto right side of handlebar and
tighten lightly. Slide hand grips (42) on handlebar until
they bottom out. A small amount of soapy water inside
the grip will make installation much easier. NEVER
use oil or other lubricants! Slide handbrake lever
against grip, adjust position and secure tightly.
8. Platform
Place platform (3) onto rear frame, center between the
rear wheels and immediately behind the sissy bar.
Using sheet metal screws (1) and washers (2), secure
the basket to the two holes in the rear frame crossover
tube and two rear holes in the top of the transmission
box. Tighten screws with a 3/8” socket wrench.
9.
Place the Safety Flag (4) in flag holder on the
platform frame.
10. Final Check
Review the instructions, check connecting bolts and
screws for tightness, and readjust the seat and
handlebar as necessary.
2


MAINTENANCE
AND INSPECTION
REGULAR MAINTENANCE: Bi-Monthly
1. Keep all painted parts cleaned and waxed for a long-lasting luster.
2. Spray all chro e parts with reco ended protective spray coating (LPS-1, WD-40, etc.).
When spraying with protective coatings, it is reco ended that you let parts set overnight so
the coating will penetrate.
3. Lubricate the following:
a. Pivot points at top and botto of seat
b. Axle shafts
c. Inside bearings of both pedals
d. Chain – turn pedal crank forward and spray freely
4. When storing over prolonged periods, turn upside down to prevent flat spots fro occurring on
the tires. If stored outside, cover to protect finish and oving parts.
PREVENTATIVE MAINTENANCE: Every Six Months
These are services that should be perfor ed by your local bicycle shop. A fee ay be charged.
1. Check tires for wear, ri cuts, and valve core align ent (usually caused by i proper air
pressure).
2. Check wheels for cracks and align ent.
3. Check brakes for proper operation.
4. Clean and repack all bearings and adjust all cones.
5. Check for worn bearings, cones, and cups.
6. Check chain for adjust ent and clean as needed.
7. Check for loose bolts and nuts.
INSPECTION
Check the following, as it applies to your cycle, on a regular basis:
1. Coaster brake – Make sure the brake engages, by pedaling backwards.
2. Wheels – Check wheels for align ent.
3. Pedals – Inspect pedal bearings and ake sure pedal is tightly attached to crank.
4. Handle grips – Replace worn or loose grips.
5. Chain – Check for proper tightness. Replace da aged chain i ediately.
6. Seat – Adjust seat for rider co fort and safety.
7. Tires – Keep tires inflated to the reco ended tire pressure, as indicated on the tire’s
sidewall.
8. Chain guard – Replace da aged or issing chain guard i ediately.
9. Fra e – Replace da aged fra e i ediately.
Trail ate Owner’s Guide

1851 67th AVE East
Sarasota, Fl 34243
Tel:(941) 755-5511
Fax: (941) 758-5141
Visit us @www.trailmate.com
For service or to order
replacement parts
please contact your
local Trailmate dealer.
DESOTO-WORKER
This is a recreational unit, not designed for excessive
speeds or misuse.
Do not brake or turn at high speeds. This may cause cycle
to roll over. Careless operation may cause rider to lose
control and result in serious injury.
Things to know before riding your cycle:
1. Know your local bicycle laws and wear a helmet.
2. Do not exceed the recommended weight limit of 400 lbs.
3. No more than one rider at one time.
4. Do not stand on unit.
5. Be sure to install safety flags.
6. Wear light-colored clothing and protective gear.
7. Do not ride at night.
8. Children must be supervised by an adult at all times.
Table of contents
Other TRAILMATE Bicycle manuals
TRAILMATE
TRAILMATE FUN CYCLE User manual

TRAILMATE
TRAILMATE DESOTO HAULER User manual

TRAILMATE
TRAILMATE FUN CYCLE User manual

TRAILMATE
TRAILMATE DOUBLE JOYRIDER User manual
TRAILMATE
TRAILMATE banana peel User manual
TRAILMATE
TRAILMATE Desoto Classic User manual

TRAILMATE
TRAILMATE Desoto Hauler User manual

TRAILMATE
TRAILMATE Mini Peel User manual
TRAILMATE
TRAILMATE JUNIOR LOW RIDER User manual
TRAILMATE
TRAILMATE JOYRIDER User manual

