Optibike Argon User manual

Opbike Argon
This is the Owners Manual for the Optibike Argon
Electric Bicycle. The Manual provides basic
information required to ride the bike. t is
recommended that you always ride your electric bike
with a helmet and observe all traffic regulations.
The maintenance information in this manual requires
a basic understanding of using common tools. f you
do not have the experience required to perform these
operations, you should take your bike to a Certified
Bicycle Ship for Maintenance and repairs.
Failure to perform the repairs and maintenance
correctly can result in death or injury.
NOTE: We strongly urge you to read this Manual in
its entirety before your first ride.
!"

Night Riding
Riding a bicycle at night is much more dangerous than riding during the
day.
A bicyclist is very difficult for motorists and pedestrians to see.
Therefore, children should never ride at dawn, at dusk or at night.
Adults who chose to accept the greatly increased risk of riding at dawn, at
dusk or at night need to take extra care both riding and choosing
specialized equipment which helps reduce that risk.
You must use active lights when riding at night. This means a headlight and
taillight. t is also recommended that you ride with a reflective coat or vest.
Special Electric Bike Riding Tips
•Electric bikes travel faster than conventional bikes.
•Car drivers may think you are going slower than you are and
pull out in front of you.
•This may happen when they pull out from a side street or have
just passed you and are turning right.
•Be Aware!
•Be Courteous to pedestrians and other cyclists.
•Use Hand Signals
"

E-Bike Classification
E-Bike laws vary by state. The most popular and latest laws are the three
Class classifications.
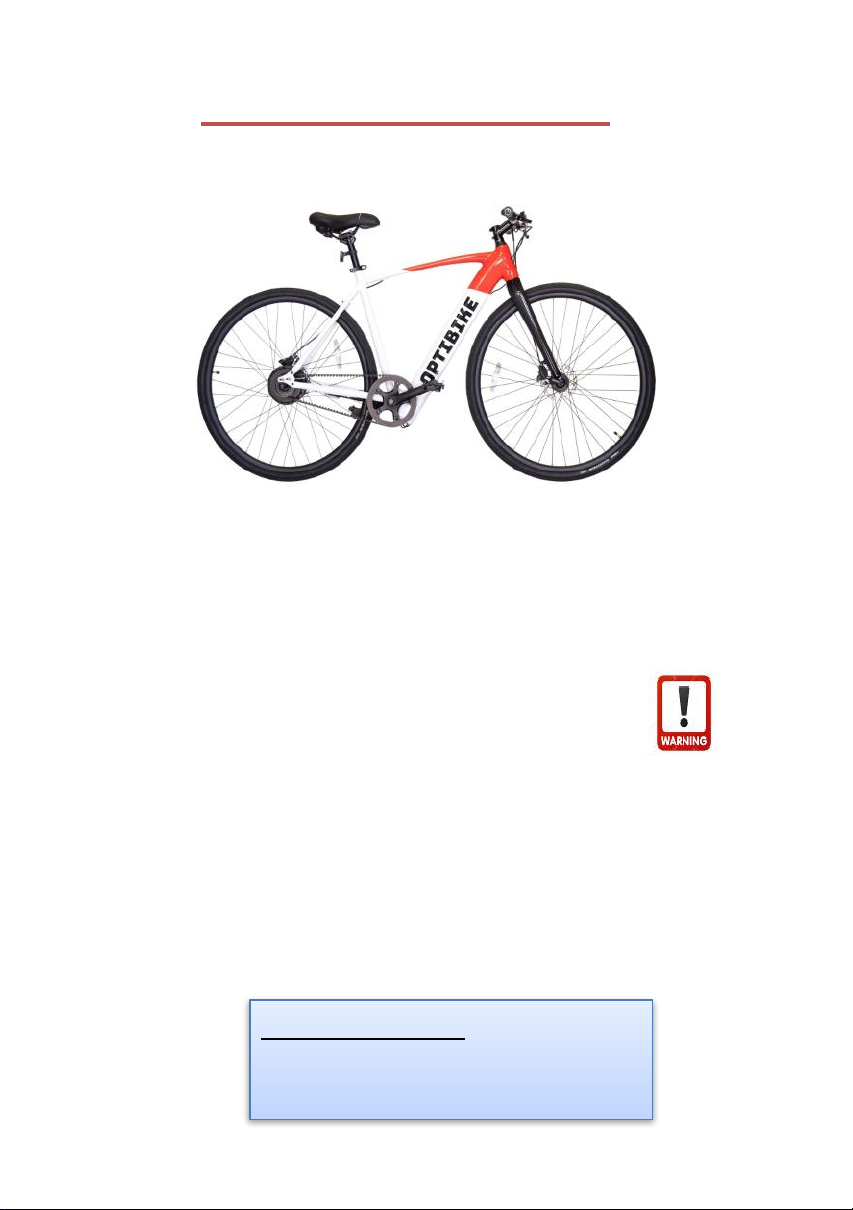
By default the Optibike Argon is a Class 2 E-Bike ith a max speed
of 20MPH, and both Pedelec and Throttle control.
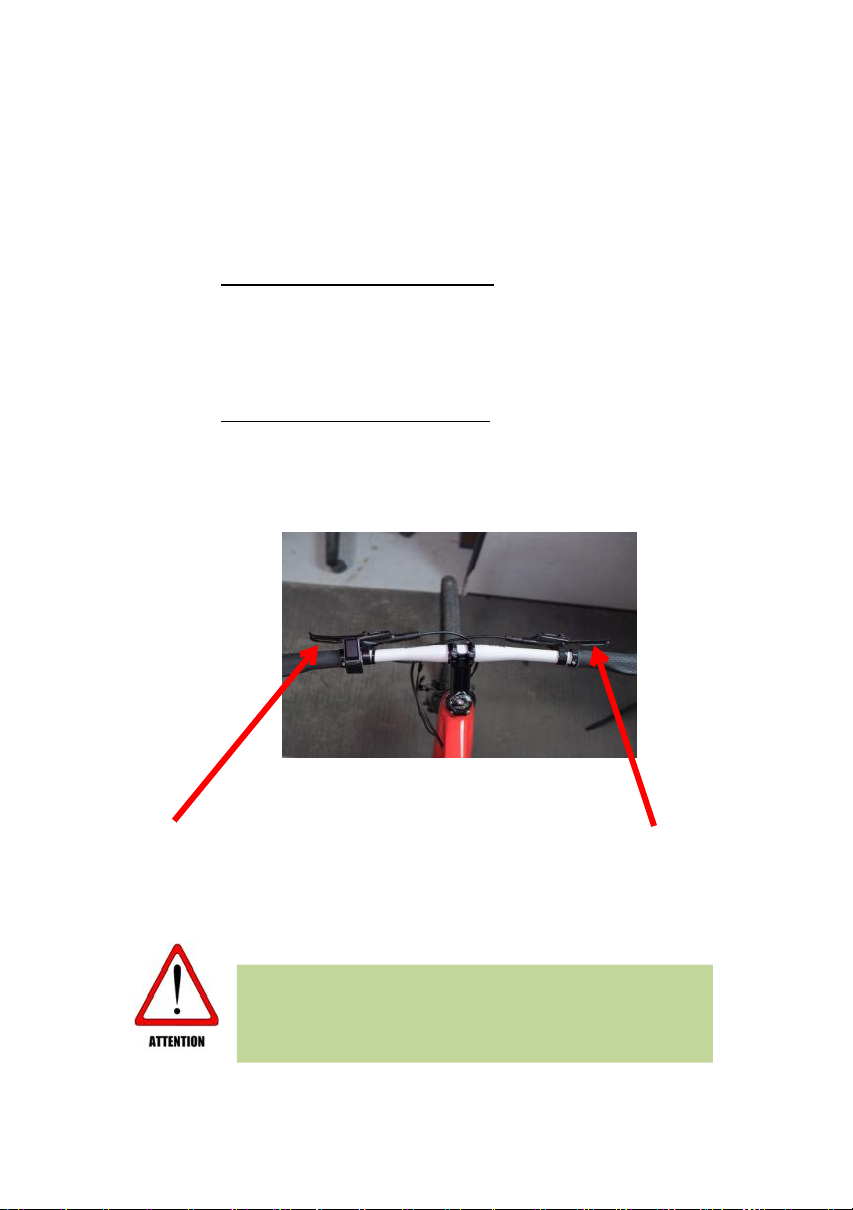
The Argon can easily be changed to a Class 1 E-Bike ith only
Pedelec control, by disconnecting and removing the throttle from the
bike.
Latest State E Bike Classicaons
# #$% %
&'
()' "* %
" ()' "* &'
()' "+* &'%
"*
%,
"-"+*
.///%
%/%
!"
Before You Ride Each Time
•Check the tires for proper inflation and damage (45-60
psi is a good pressure).
•Be sure the brakes are in good working order and
adjusted.
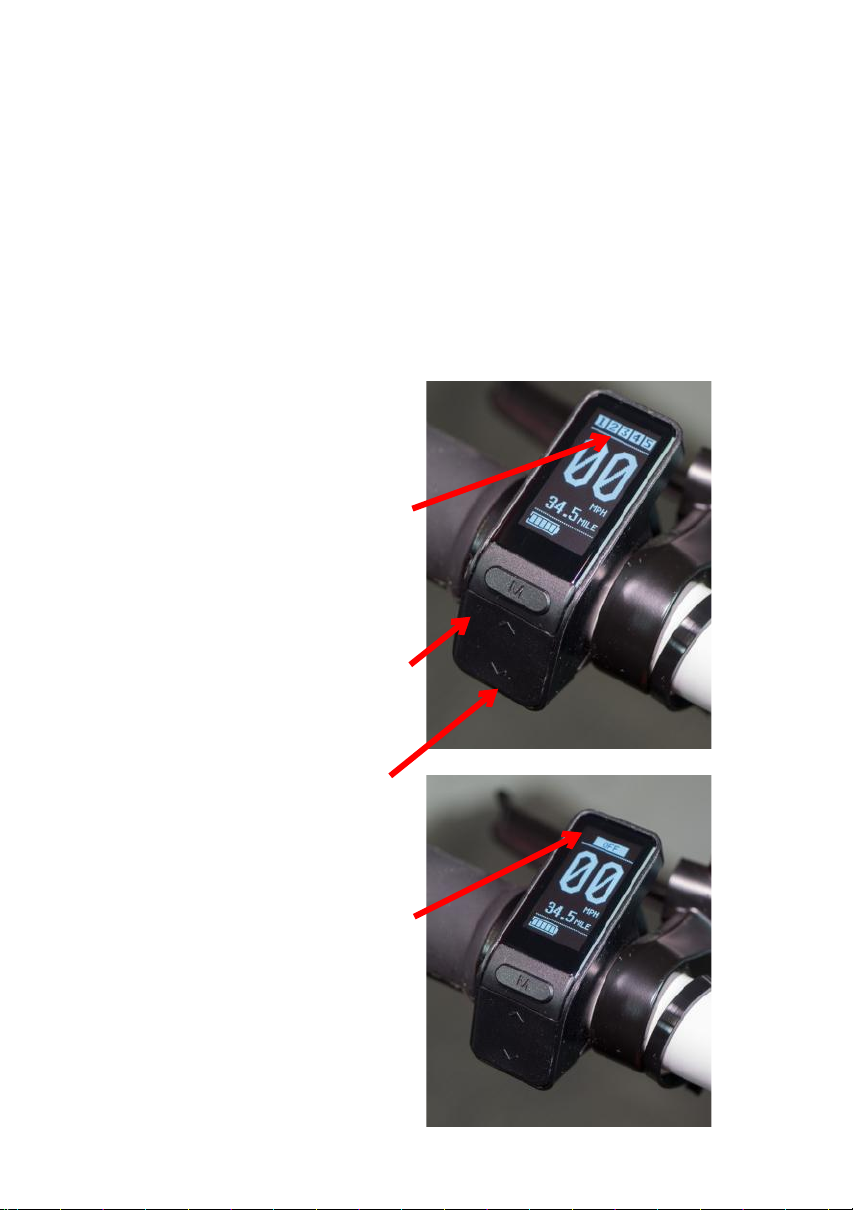
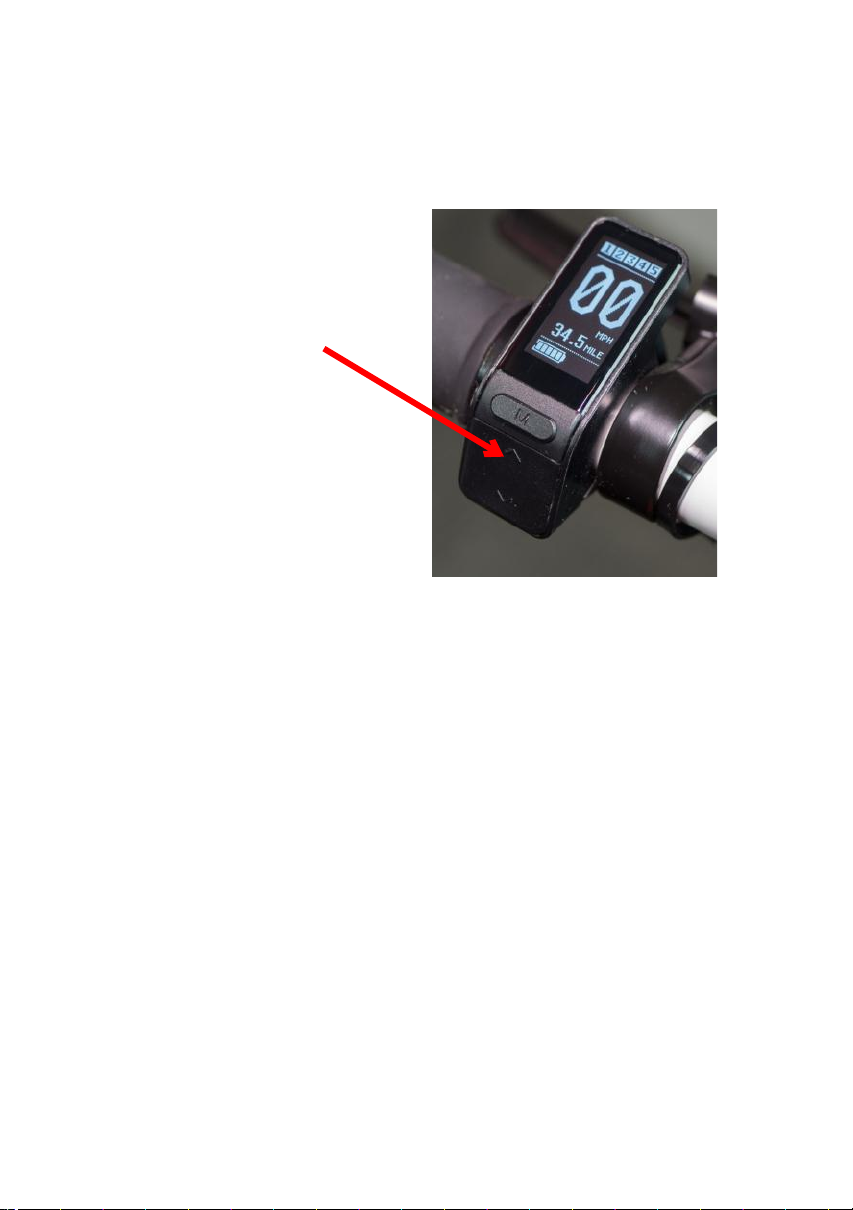
•Check the battery charge level using the display.
•Each 100 miles of riding, check all bolts on the bike.

Riding Gear
The following riding gear is recommended:
Properly fitted helmet
Bicycle Gloves
Eye Protection
Bright Clothing
n areas with rapidly changing weather conditions, be sure to bring
extra clothing.
t is highly recommended that you carry the following tools and
spares:
Spare inner tube
Tire changing levers
Basic tool kit
Tire pump
A water bottle for hydration is also a good idea.
Use Sun Screen if riding in sunny areas.

Ho to Turn the Bike On and Off
To Turn On
Press the orange button on front
end of display until display
turns on.
To Turn Off
Press the orange button on front
end of display until display
turns off.
Display will also turn off after a
few minutes of non use.
)
Ho to Adjust Height of Seat
Caution! Do not extend seat post beyond maximum extension mark.
f the seat post is still not high enough at maximum extension, a
longer seat post is required.
The height of the seat can easily be adjusted by loosening
the over center clamp on the frame.
Over Center Clamp

Ho to Read the Display
Power Assist Level
Speedometer
Trip Odometer
Battery Charge con
0
The Argon LCD display mounted to the handlebar
provides information to the rider. This is where you turn
the bike on and off, check battery level and change
power levels.
Ho to Check the Charge Level of the Battery
The battery charge level is shown on the bottom of the
display by the Battery con (see above)
There are 5 segments on con. Each segment equals 20% of
the battery charge.
When climbing hills the charge level may reduce due to high
power drain from battery. When done climbing, the charge
level will return to previous level.

Ho to Engage the Motor
The power on the Argon is controlled by the dual sided torque sensor
in the bottom bracket. The dual sided torque sensor means that when
you apply pressure to either pedal, the bike will accelerate.
To engage the motor, simply begin pedaling. To increase the power,
pedal harder.
The Argon has a speed limit of 20 MPH. The motor will no longer
assist after 20 MPH.
(
Ho to Change the Po er Assist Level
The Argon has 5 Power Assist
Levels.
The assist levels (1-5) are shown
on the top of the display.
1 is the lowest assist level and 5
is maximum.
To increase the Power Assist
level, push the UP Button on the
keypad.
To reduce the level, push the
DOWN button on keypad.
To have no Assist, keep pushing
the DOWN button until OFF is
displayed.

Ho to Turn the Headlight on and off
The Argon comes with a headlight that is powered by the main battery,
and is controlled from the display.
+
To toggle the
headlight, press
and hold the UP
arrow on the
display.

Ho to Reset Trip Distance to Zero
Step 1: Hold the orange button until
the bike turns on and release. Then
wait at least 15 seconds.
Step 2: Hold the MENU button
until CLEAN appears at top of
screen.
Step 3: Press the MENU button
again and “CLEAN DATA” screen
will appear with YES and NO.
Step 4: Press MENU button to
confirm YES. This will reset trip
data to zero.
!
You can reset the trip distance, average speed and max
speed to zero.

Ho to Use the Brakes
•Like regular bicycles the Argon has front and rear brakes.
•The brakes are hydraulic disk brakes and offer great stopping
ability.
•The rear brake is on the right side and should always be used
first.
•The rear brake helps stabilize the bike.
•The front brake is on the left side and should always be used
after the rear brake has been applied.
•The front brake accounts for 75% of the stopping ability.
Always apply the rear brake first. Stopping
ability is reduced in wet or slippery conditions.
n these conditions, plan for extra time to stop.
Front Brake Rear Brake

Ho to Charge the Battery
•Remove the cap from
the charge port on the
left side of frame
•Plug the charger into the
wall socket. (A standard
15 amp wall plug is
fine)
•Plug the Charger into
the bike charge port.
•The LED on the charger
will turn red while
charging, and green
once finished.
The temperature of room and battery must be above 35F.
f the battery has been stored in a room that is below
35F, then it should be put in a room above 50F for
several hours prior to charging.
Do not leave charger plugged into bike if charger is
disconnected from the wall plug.
The charger should be disconnected from the bike within
24 hours of finishing charging.
Charging the battery when it is under 35F will damage the
battery and void the warranty.
Only use the Optibike supplied charger.

What the Charger LED Indicates
•When the charger is
first plugged into the
wall, the LED will turn
on green.
•When the charger is
plugged into the bike,
the LED on charger
will turn from green to
a red. Red indicates
charging.
•When the charging is
complete, the LED will
turn to Green.
"
Argon Charge Times 37 volt 1 AH Ba"ery
&/
(1
&
1
&
$%% " ) (

Care of the Frame
2/%%
34,
,
35%
/
Battery Storage
f you need to store your bike without use for more than a
month, you should follow the steps below to maximize the
lifespan of your battery
Li-ion batteries are best stored between 30% and 80% charge.
Riding the bike a few miles before storage is the best way to do
this.
f you are able to, check the battery level every month or two,
and if it is very low (below 30%), or the bike doesn’t turn on at
all, place on the charger for 2-3 hours.
The battery must be above 32F or 0C before charging, to
prevent damage to the battery.
t is OK to store your bike in an area that is cold. Colder
storage temperature will prolong the life of the battery.
Do not store below -4F or -20C

Front Wheel Removal
Step 1: Place the bike on a
stand so the front wheel does
not have weight on it.
Alternatively, turn the bike
upside down.
Step 2: Grasp the over center
clamp lever on left side. Pull
the lever away from the bike
Step 3: While holding wheel,
loosen the nut on right side of
axle until wheel falls out of
the fork .
The Argon front fork uses a Quick Release Front Axle with
over center clamp.
3,46
&%%4.,
7%%4
/%

Front Wheel Installation
Step 1: nsert the wheel in
fork so the disk is inside the
brake pads.
Step 2: Slide the axle into fork
Step 3: Tighten the axle nut a
few turns. Close the over
center clamp. t should be snug
to close. f not, tighten nut
another turn and check again.
When over center clamp
tightness is correct, it should be
difficult to push and almost
touch the fork. (See Picture)
)
Over Center Clamp must be tight.
f brake pads do not have a gap, use a clean
screw driver to gently move them apart.

Rear Wheel Removal
Step 1: Remove the right
and left Rubber Axle Nut
Covers
Step 2: Cut the cable tie
on the motor wire near
hub
Step 3: Pull the motor
wire apart at connector.
This can take some
effort.
Step 4: Use a 19mm
wrench and loosen the
left and right axle nuts a
few turns. The wheel
may drop out at this
point, so be ready and
hold onto it.
0

Rear Wheel Removal
Step 5: Drop wheel
Step 6: Slide the Belt
off the rear sprocket
.
(

Rear Wheel Installaon
Step 1: Hold the wheel under
the dropouts and slide belt
over sprocket.
Step 2: Slide the axle into the
dropouts. Be sure the anti
rotation washer has small
edge to the bottom, as in
picture. Be sure disk is
inserted between the brake
pads.
Step 3: Use a 19mm wrench
to lightly tighten the two axle
bolts.
Step 4: Place bike on the
ground and push down on
frame to be sure axle is fully
inserted in drop outs. Fully
tighten the two axle bolts
with 19mm wrench.
+

Rear Wheel Installaon
Step 5: nstall the axle nut
rubber covers.
Step 5: Connect the motor
wire together. Be sure to
align the arrows on
connectors before pushing
together.
Step 6: nstall tie wrap on
motor wire.
!

Adjusting Belt Tension
Step 1: f belt needs to be
adjusted, loosen the two pinch
bolts on either side of frame
with a 4mm Allen wrench.
Loosen about 1 turn each
Step 2: Use a 2mm Allen
wrench to adjust belt tension.
Turn clockwise to increase belt
tension. Turn counter clockwise
to loosen belt tension.
Adjust both left and right sides
evenly.
After adjusting belt, squish belt
together to tension it and then
check tension again.
Step 3: After tension is correct,
tighten the four pinch bolts
evenly.
"
The toothed belt on the Argon is mostly maintenance free. t
does not require lubrication. From time to time it may need to
have the tension adjusted.
Table of contents
Other Optibike Bicycle manuals