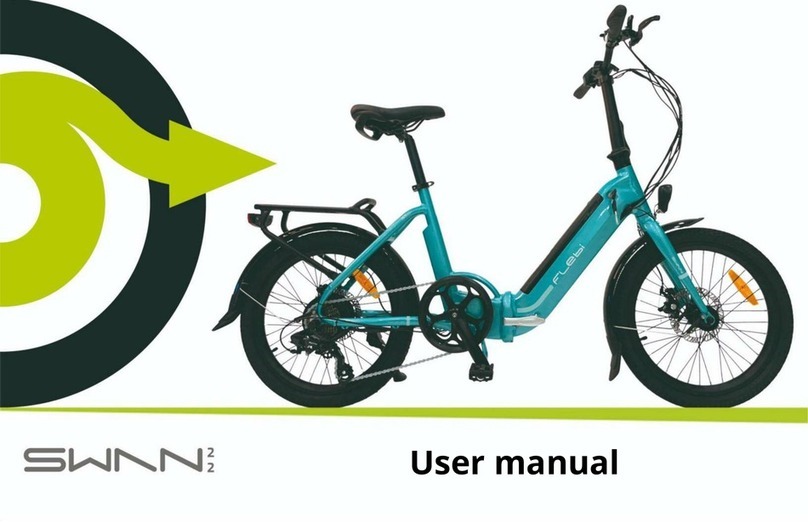
Flebi EOLO User manual

User’s Manual

Índice
Unpacking and assembly
1. Contents of the box
2. Install handlebars
3. Packed in original box
Setting up
4. Adjusting the handlebars
5. Adjusting the saddle
6. Disc brake adjustment
7. Shift adjustment
8. Wheel adjustment
9. Tyre inflation
Electrical operation
10. Battery removal/insertion
11. Installing extendable battery
12. Recharging the battery
13. EN067 / DZ41 TFT Full colour display
operation
14. Throttle operation (optional)
Folded & unfolded
15. Unfolding the bike
16. Folding the bike
17. Opening / closing the frame
18. Folding / unfolding of the pedals
19. Handlebar folding mechanism

Unpacking and assembly
Contents of the box
The assembly of your Flebi Eolo is very easy!
The Flebi Eolo is equipped with a 36 V / 250
W motor and reaches a maximum speed of
25 km/h.
- Take the bike out of the box
- Remove the guards
- Put away the battery keys
- Unfold the bike
- Install the handlebars
- Fit the seat post on the frame
- Check the adjustment of wheels, brakes
and gears
- Check tyre pressure
- Connect the battery
Check the contents of the box:
- Flebi Eolo bike, battery in seat post, safety
keys.
- Battery charger 1Video: https://youtu.be/uZVlWrVPy14
If you want, you can discover your new Flebi Eolo virtually in
this video: https://youtu.be/caN1wSCklY8

Unpacking and assembly
Install handlebar
To install the handlebar and the
telescopic seatpost that allows height
adjustment, simply insert it into the
handlebar stem following the guides you
will find.
Once inside, bring it up to the mark and
tighten the locking key firmly.
2Video: https://youtu.be/LGLZHCgfDFo

Unpacking and assembly
Packed in original box
In case you have to repack your bike in its
original box to send it to Flebi service, we
recommend that you follow the steps below to
protect it as well as possible and avoid bumps
and scratches during transport:
- Cover the parts with guards
- Remove the seat post and remove the
handlebar assembly.
- Fold the bike
- Put it in the box
- Place the cork fixing the front wheel
- Place the pedal on a guard
- Move the front folding lever inwards
3Video: https://youtu.be/uZVlWrVPy14

Setting up
Adjusting the handlebar
You can adjust the height of the
handlebars to suit your height. To do this,
open the telescopic lock and place the
stem in the desired position, taking care
not to exceed the safety mark. Then
tighten the lock firmly so that it does not
move.
You can also use this same adjustment to
correct slight deviations in the direction of
the bike. Open the lock, turn the
handlebars to the left or right to find the
correct alignment, and retighten the lock.
4Video: https://youtu.be/2KdjO_pHqMk

Setting up
Adjusting the saddle
You can also adjust the saddle height to
suit your height. To adjust the hardness
you must tighten the thread according
to your taste. Make sure it is not too
loose or the seat post will move.
To change the angle of the saddle, you
can use a number 13 spanner to set the
saddle angle. Remember to tighten it
well.
5Video: https://youtu.be/3bP7nY1_of0

Setting up
Disc brake adjustment
CAUTION: The Eolo brakes are fully adjusted
at the factory and no adjustments are
necessary unless they loosen with use.
To adjust the mechanical disc brake, first
loosen the bolts on the frame to allow some
movement of the caliper.
Next, you will have to act on the pad
adjuster on the inner side of the pad.
Finally, you must press the brake to tighten
the cable and thus compress the caliper on
the disc to align, without loosening the brake
cable.
6Video: https://youtu.be/2HQfyaYo0aw

Setting up
Shift adjustment
CAUTION: the Eolo shifts come fully
adjusted from the factory and no
adjustments are necessary unless they
become loose with use.
If you notice that it does not change gear
cleanly, adjust the derailleur with the chain
on the smallest sprocket, adding or
removing tension as needed. This can also
be done directly on the shifter.
The Eolo features 7-speed derailleurs and
shifters that ensure fast and precise upshift
and downshift performance.
7Video: https://youtu.be/2HQfyaYo0aw
Speeds:
1. for hills
2. minor slopes
3. intermediate speed
4. for normal riding
5. intermediate speed
6. for downhill
7. for more favourable descents

Setting up
Wheel adjustment
CAUTION: the wheels of the Eolo are fully
adjusted from the factory and no adjustments
are necessary unless they become loose with
use.
Front wheel: to install the front wheel, you must
check if there is any blocking element in the
brake pads, lift the wheel and place it taking into
account the alignment of the brake disc inside
the caliper. In the video we explain it step by
step.
Rear wheel: to remove it, we recommend turning
the bike upside down to work more comfortably
(be careful with the display and levers). Place the
derailleur on the smallest sprocket, loosen the
nuts (key number 18), unplug the motor cable
(pay attention to the video) and release the
wheel. To put it back on, follow the opposite
order. In the video we explain it step by step.
8
Videos:
Front wheel: https://youtu.be/u--ZoDodOMU
Rear wheel engine: https://youtu.be/Z7hujY9nXpE

Setting up
Tyre inflation
To check the amount of air in the tyres,
remember that the Eolo carries between 2
and 4 bar of pressure, so it is advisable to use
an inflator with a pressure gauge.
To inflate the tyres you must remove the cap,
put the inflator with pressure gauge to check
the exact pressure and put the cap back on.
We recommend that you check the pressure
every two weeks.
9Video: https://youtu.be/WqIKTUUACfM

Electrical operation
Battery removal/insertion
The Eolo's factory-fitted 10Ah battery is
located in the seat post. It can be
removed to be recharged outside the
bike, or replaced by another one very
easily, as it is the seat post.
And, additionally, you can buy:
●15Ah seatpost battery (which
replaces the factory one)
●6.4Ah extendable bottle battery (to
be added to the one you have in
the saddle)
10
Video: https://youtu.be/DY-mQMuvxM0

Electrical operation
Installing extendable battery
The extendable 6.4Ah bottle battery is
added to the one you have installed in
the saddle, so you can't use both at the
same time.
It can be removed to be recharged
outside the bike, or easily replaced by
another one, as it is the seat post.
11
Video: https://youtu.be/dK3OUjj8mig

Electrical operation
Recharging the battery
The Eolo battery can be recharged while
mounted in the frame, as it does not
need to be removed as it is housed in
the seat post. This can be done by
uncovering the cover to access the
connector.
You must plug the charger into the
mains, and the charger connector into
the battery connector.
The LED light on the charger will remain
red while it is charging. Once it is fully
charged, (about 4 hours), it will turn
green.
12
Video: https://youtu.be/BH8gwW8imMg

Electrical operation
EN067 / DZ41 TFT Full colour
display operation
The display is operated by pressing the
power button in the centre of the display.
To operate the bike, you must switch on the
battery.
Once switched on, you will have several fields:
speed, motor charge, battery, assistance
levels (5), etc.
To start the electric assistance, you just have
to pedal and the motor will assist you with
the selected level of assistance (use the +/-
buttons to move between them).
To turn on the headlight, long press on the
assist up button.
13
Video: https://youtu.be/qJZVZ6GmbHQ
In addition, you can purchase the DZ41
TFT Full Colour Display.

Electrical operation
Throttle operation (optional)
The throttle on the Eolo has the same
function and installation as on other
Flebi bikes.
Unlike the PAS (Pedal Assist System), the
throttle operates the motor without the
need to pedal.
For the trigger-type throttle to work, the
display must be switched on and the
assistance level set to 0.
From this state, you must press the -
button to remove any assistance level.
The throttle is then operational and will
work by pressing the trigger.
Video: https://youtu.be/v3EkLS2K82s 14
The throttle is an option that we install at
the user's own risk, as this mode of
operation is not compatible with the
European standard EN15194 that regulates
electric bicycles.

Folded & unfolded
Unfolding the bike
The steps to deploy your Flebi Eolo are
as follows:
- Open the frame and pay attention
to the mechanism
- Lift the handlebar stem, close the
folding lever and insert the lock.
- Lift the seat post and connect the
battery if it is not already
connected.
- Unfold the pedals
Video: https://youtu.be/0QXFvLFAtaE 15

Folded & unfolded
Folding the bike
The steps to fold your Flebi Eolo are as
follows:
- Leave the left pedal forward
- Lower the saddle to find the
support
- Operate the frame locking
mechanism
- Pay attention to the magnets that
help lock the folding of the bike.
- Lift the stem off the handlebars,
close the folding lever and insert
the safety catch
- Fold the pedals
Video: https://youtu.be/0QXFvLFAtaE 16

Folded & unfolded
Opening / closing the frame
To open or close the frame, you only
have to remove the latch in case of
opening and put it on in case of closing.
And release the folding lever outwards
to open it, and press it inwards to close
it.
Video: https://youtu.be/JeGYup-mW0I 17

Folded & unfolded
Folding / unfolding of the
pedals
To fold or unfold each Wellgo pedal,
press the knob outwards and, at the
same time, fold the pedal inwards
(folded) or outwards (unfolded) until you
feel the block.
Video: https://youtu.be/-_fBRnSFPPM 18
Table of contents
Other Flebi Bicycle manuals
Popular Bicycle manuals by other brands
Ninety One
Ninety One MERAKI ULTRA quick start guide
Element
Element SURFACE 604 owner's manual

Greenway Home Products
Greenway Home Products 8965105 instruction manual

Lacros
Lacros Scamper S200 user manual
HP Velotechnik
HP Velotechnik Scorpion fs and Operating instruction and service instructions

Kettler
Kettler PIXPRO PZ42 user manual
