10 11
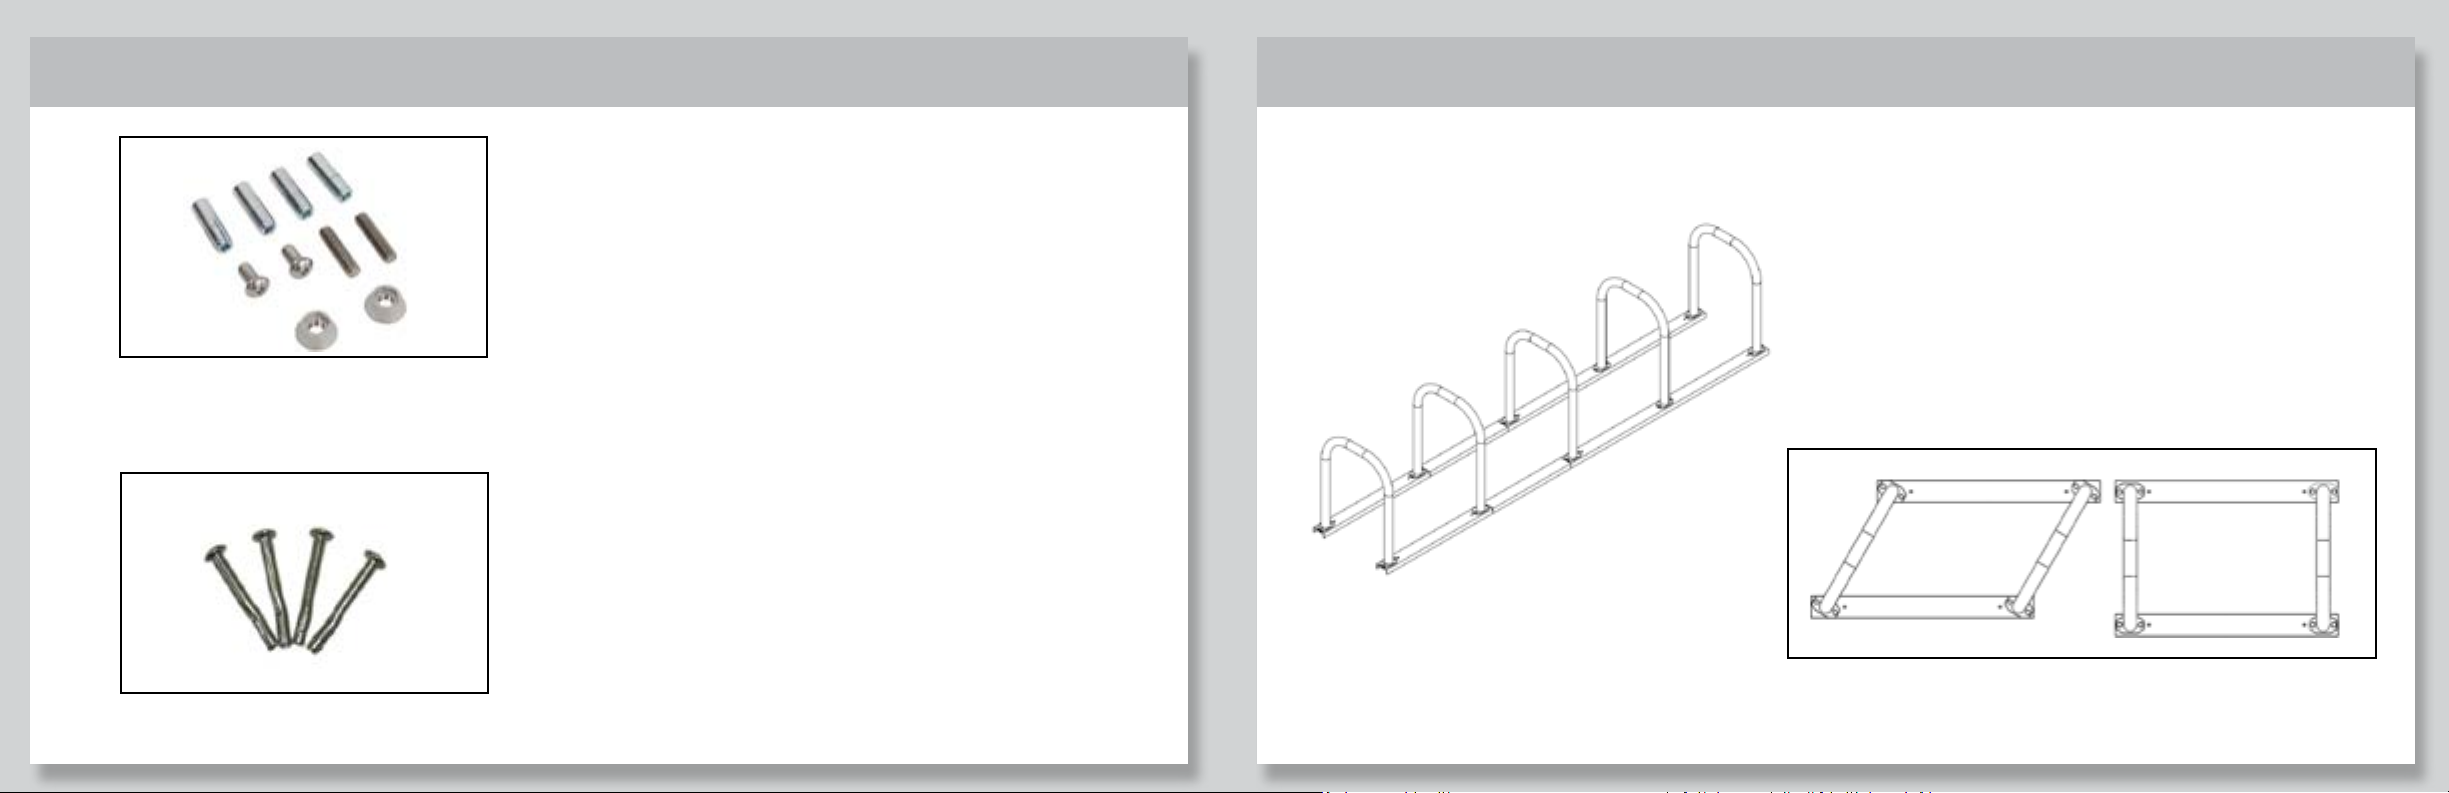
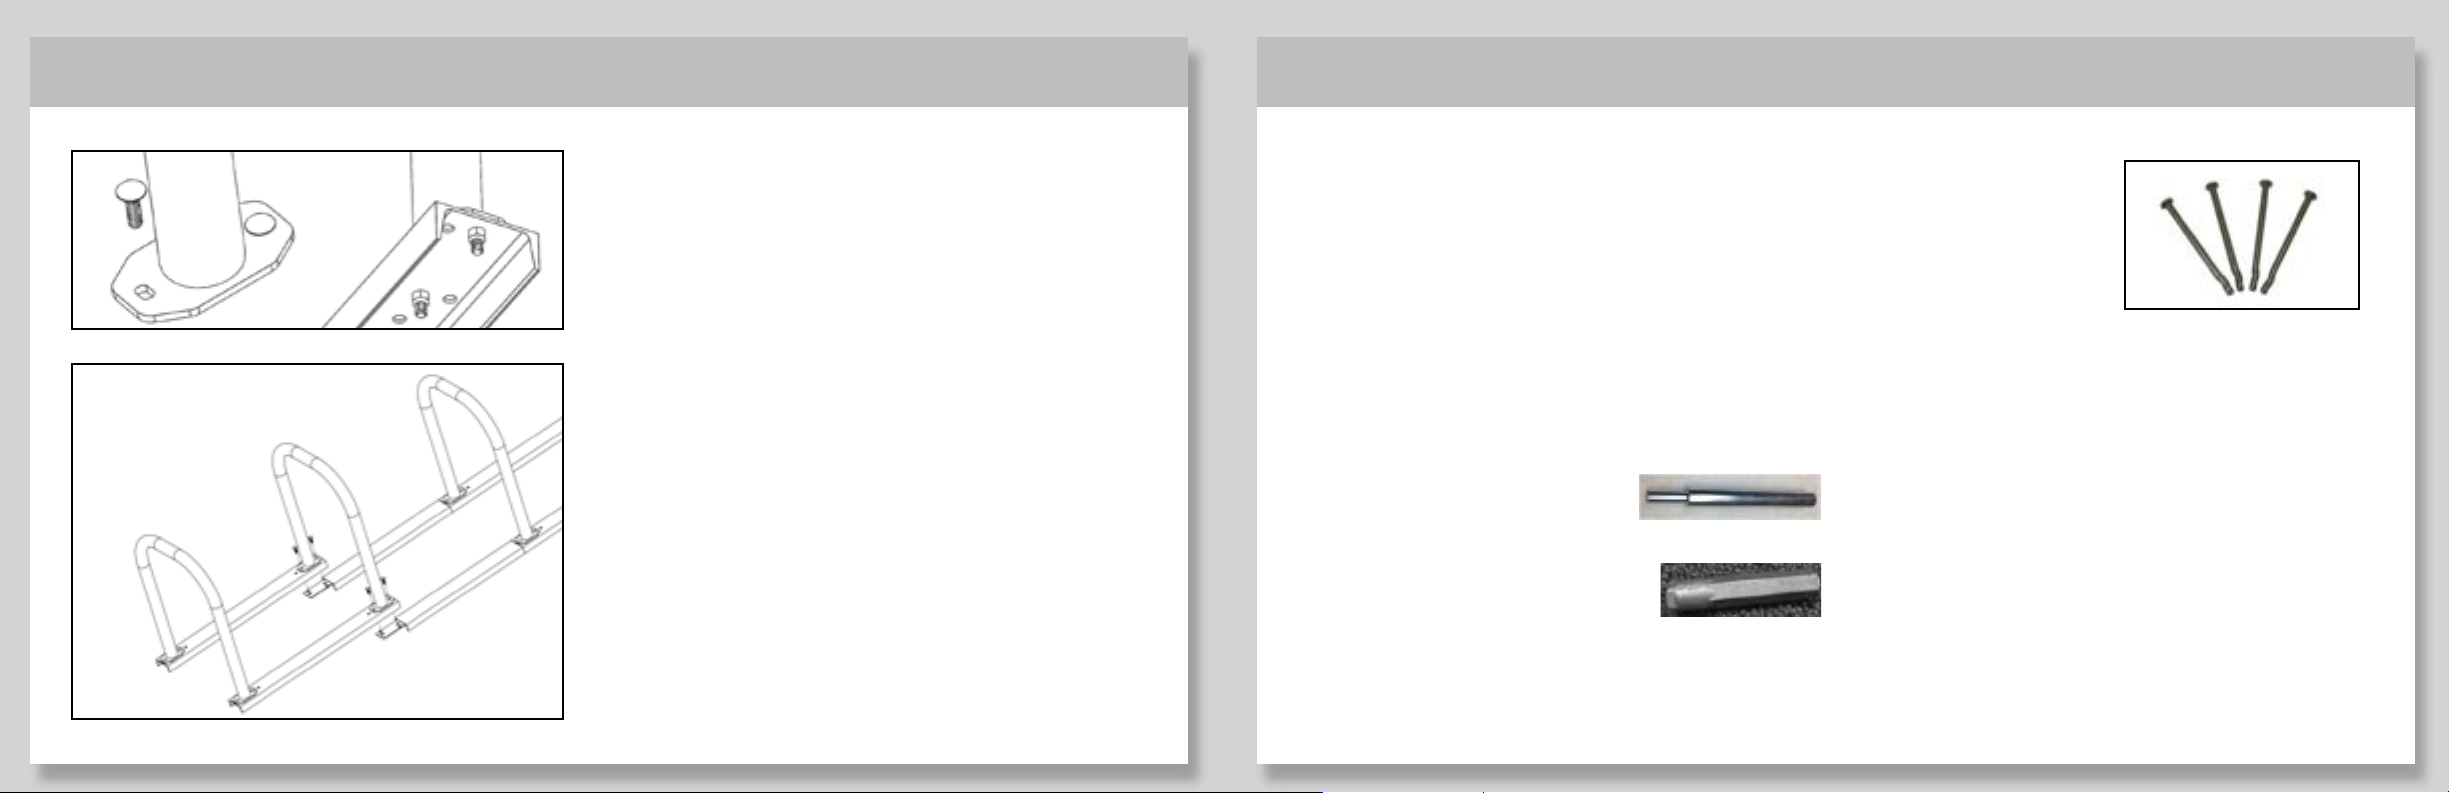
3. Place carriage bolts through the dock flanges and
tighten the nut underneath finger tight.
4. If you are assembling an 8, 10 or 12-bike corral, you will
need to connect the rails with the corral joiner.
The carriage bolts for these locations will pass through
the dock flange, the rail, and the joiner tab.
5. When all docks are assembled onto the rails, verify they
are aligned and parallel.
6. Go back and tighten the nuts using a 9/16” socket.
7. It is not required to anchor the corral. However, there
are anchoring holes at all 4 corners of the corral to allow
anchoring to a variety of surfaces. Proceed to the
next section of the manual for the various anchoring
methods.
4. If you are assembling a 10 or 12 bike corral, you will need to connect the rails with the corral joiner. The carriage bolts for
these locations will pass through the dock flange, the rail, and the joiner tab.
5. When all docks are assembled onto the rails, verify they are aligned and parallel.
6. Go back and tighten the nuts using a 9/16” socket.
7. It is not required to anchor the corral. However, there are anchoring holes at all 4 corners of the corral to allow anchoring
to a variety of surfaces. Proceed to the next section of the manual for the various anchoring methods.
Corral Installation
Corral Installation
A. Permanent Mount Installation (Model #6259 - Sold Separately)
1. Determine desired location of unit.
2. Using a 3/8” masonry drill bit, drill through the rail and into the concrete 6-1/4”.
3. Blow the hole clean of dust and other material.
4. Drive spike through the rail and into hole, until head of spike is seated on the flange mount.
B. Temporary Mount (P/N 29173) & Temporary Secure Mount (P/N 29172) Installation - Sold Separately
Tools Needed for Installation (Sold by Saris)
• Anchor Set Tool P/N 25683
• Saris Security Socket P/N 31424
(only needed for temporary
secure installation)
A. Temporary Mount (P/N 28879) & Temporary Secure Mount (P/N 26270)-Sold Separately
Circle dock Temporary Mount (P/N 29164) & Temporary Secure Mount (P/N 29163)-sold separately
Tools Needed for Installation (Sold by Saris)
•Anchor Set Tool P/N 25683
•Penta Security Socket P/N 25680 (only needed for temporary secure installation)
Tools Needed for Installation (Installer Provides)
•Tape Measure
•½” Masonry Drill Bit Drill (Hammer drill recommended)
•Hammer
•3/8” drive ratchet
•Marker or Pencil
•7/32” hex key
•Level
*DO NOT THROW AWAY THE PENTA SOCKET AFTER COMPLETING THE INSTALLATION. YOU WILL NEED IT TO REMOVE THE
EQUIPMENT IF THAT IS NECESSARY.
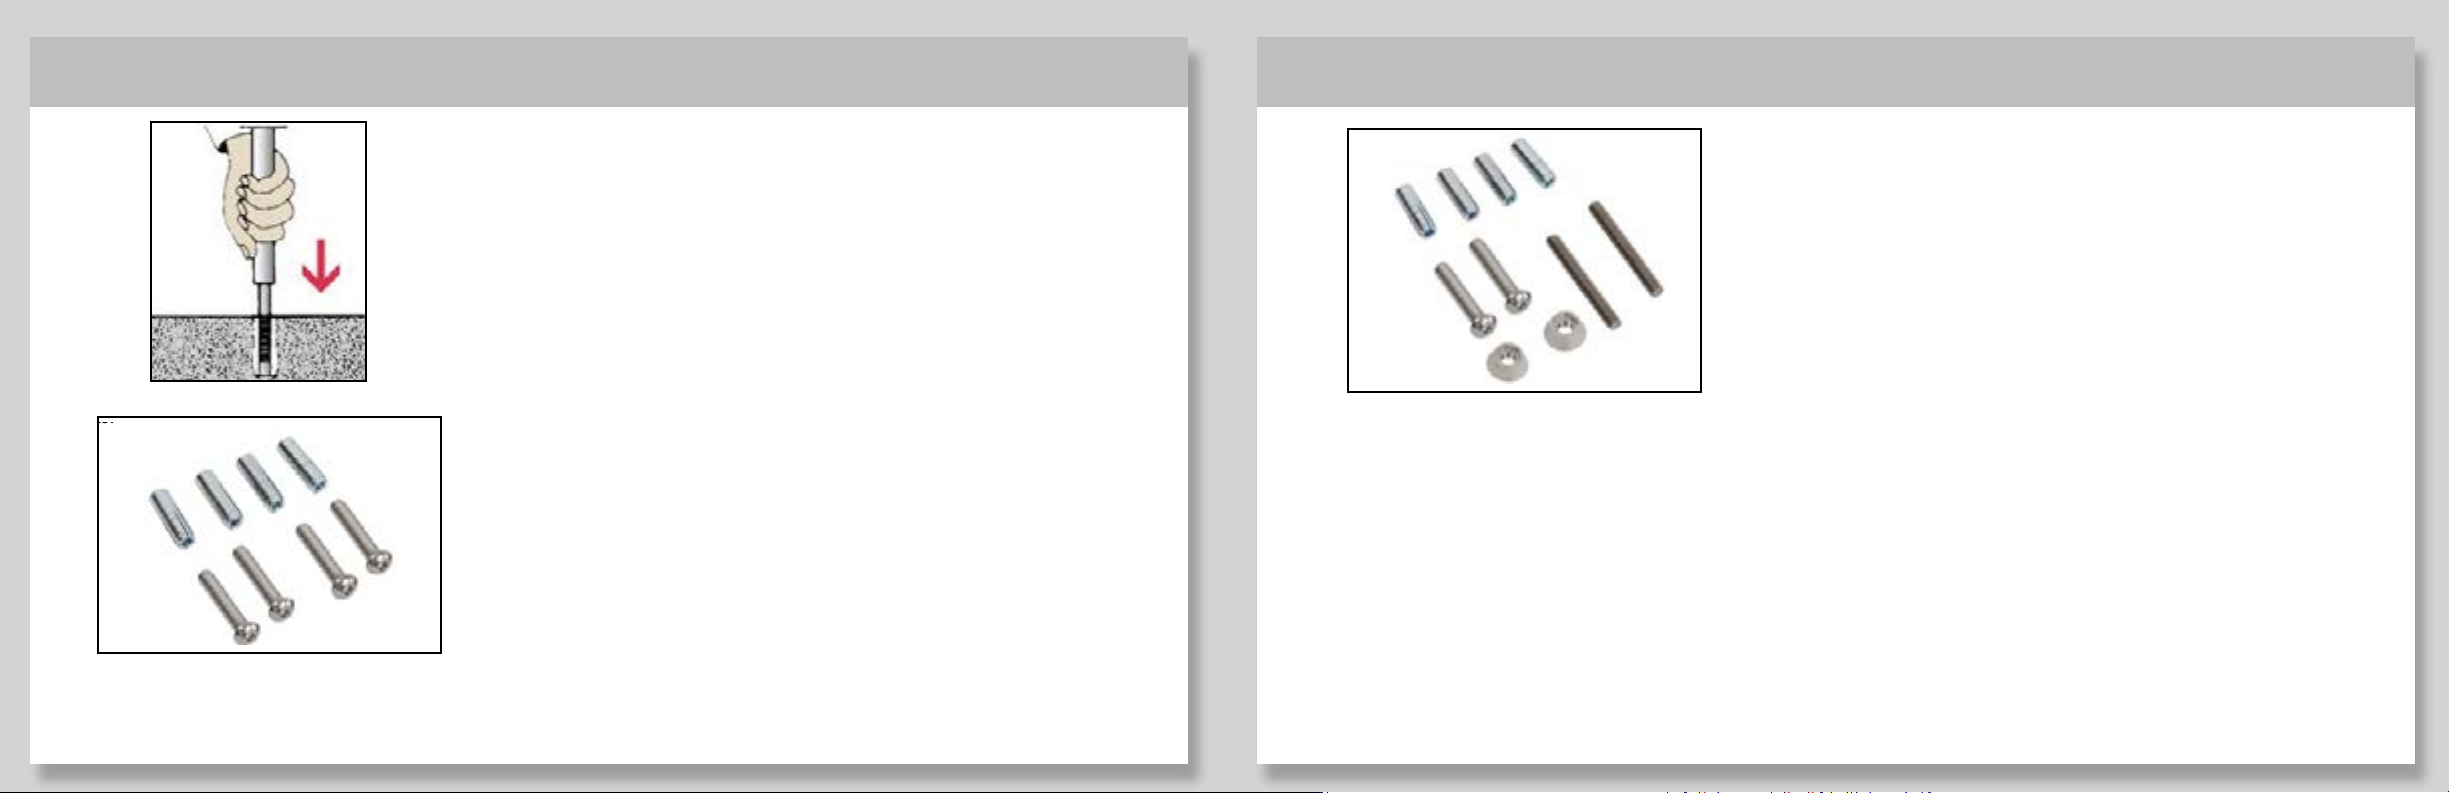
1. Place the rack in the desired location (see setbacks document). Use a marker or pencil to outline the holes of the flange onto the
base material. We recommend checking the hole locations after each new anchor is placed. Ensure the holes are at least 6”
away from any cracks in the base material.
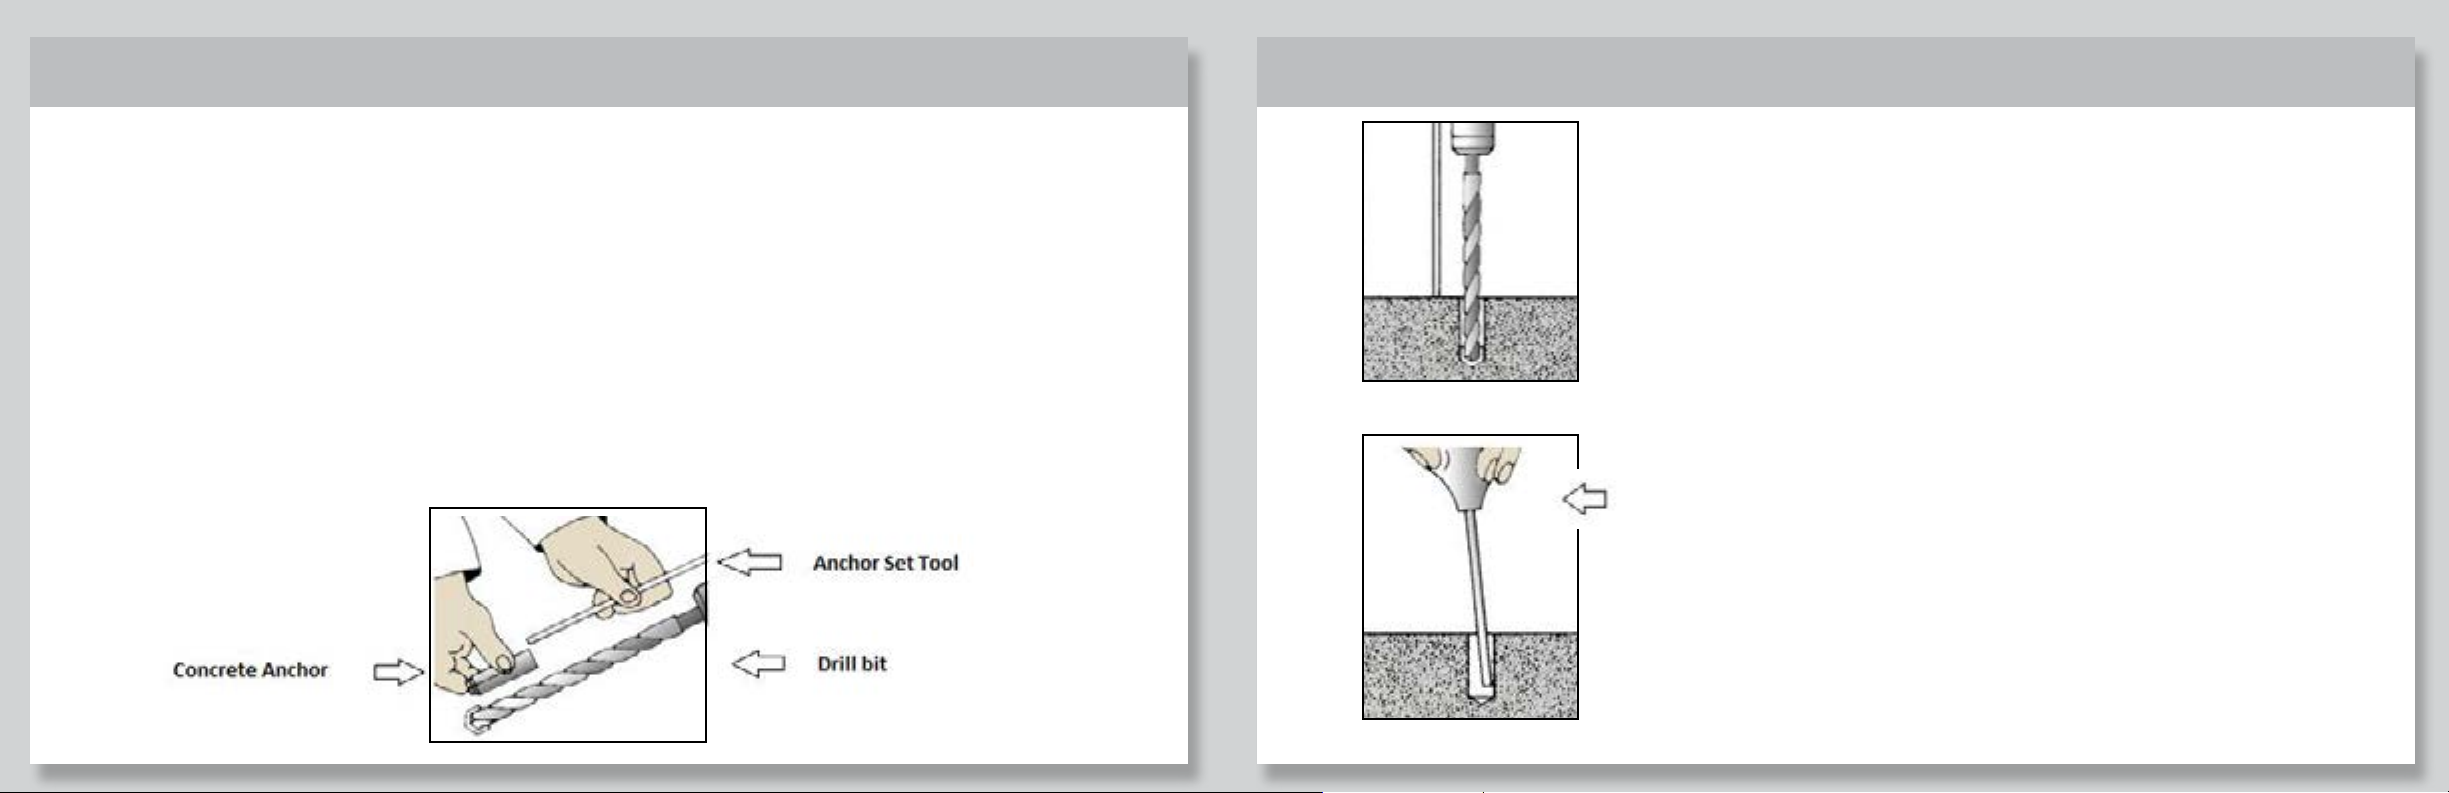
2. The concrete anchor (a.k.a “drop in anchor”) is a female anchor designed for use in solid concrete only and cannot be used in
brick or block base material. The anchor size is designated by the inside diameter of the anchor. The diameter of the hole to be
drilled is the same size as the outside diameter of the anchor which is ½”.
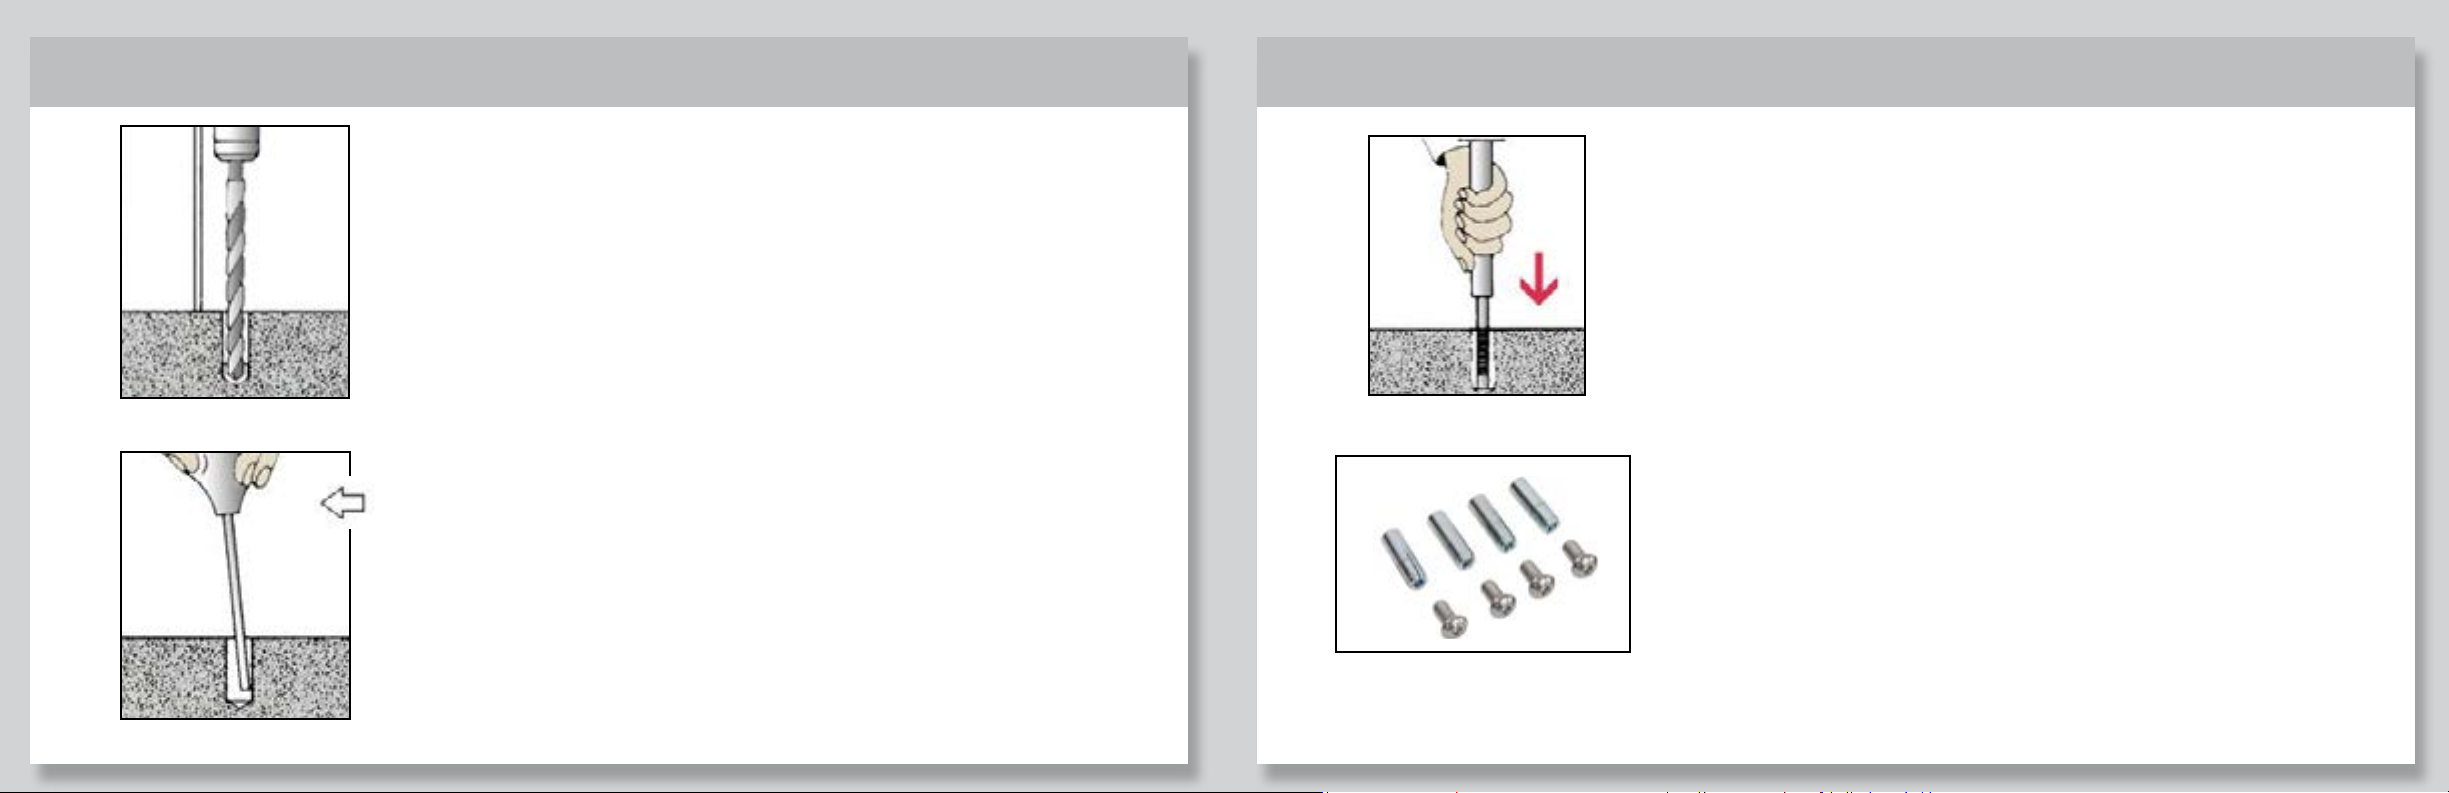
3. When fastening to solid concrete with a drop in anchor, a hole must first be drilled into the concrete. A hammer drill should be
used as it will drill the best quality hole. Once the bit is inserted into the hammer drill, the depth of the hole to be drilled can
easily be set by using the depth gauge on the drill or by wrapping the bit with tape at the required depth. We recommend a drill
depth of 1-5/8” deep so that the anchor just sets down flush with the surface.
4. Before starting to drill the hole, it is important that eye and ear protection are used. Make sure the hammer drill is in the
hammer mode and start drilling your hole. Continue drilling until the tape on the bit or the drill gauge meets the base material-
this means that the required depth has been reached.
A. Temporary Mount (P/N 28879) & Temporary Secure Mount (P/N 26270)-Sold Separately
Circle dock Temporary Mount (P/N 29164) & Temporary Secure Mount (P/N 29163)-sold separately
Tools Needed for Installation (Sold by Saris)
•Anchor Set Tool P/N 25683
•Penta Security Socket P/N 25680 (only needed for temporary secure installation)
Tools Needed for Installation (Installer Provides)
•Tape Measure
•½” Masonry Drill Bit Drill (Hammer drill recommended)
•Hammer
•3/8” drive ratchet
•Marker or Pencil
•7/32” hex key
•Level
*DO NOT THROW AWAY THE PENTA SOCKET AFTER COMPLETING THE INSTALLATION. YOU WILL NEED IT TO REMOVE THE
EQUIPMENT IF THAT IS NECESSARY.
1. Place the rack in the desired location (see setbacks document). Use a marker or pencil to outline the holes of the flange onto the
base material. We recommend checking the hole locations after each new anchor is placed. Ensure the holes are at least 6”
away from any cracks in the base material.
2. The concrete anchor (a.k.a “drop in anchor”) is a female anchor designed for use in solid concrete only and cannot be used in
brick or block base material. The anchor size is designated by the inside diameter of the anchor. The diameter of the hole to be
drilled is the same size as the outside diameter of the anchor which is ½”.
3. When fastening to solid concrete with a drop in anchor, a hole must first be drilled into the concrete. A hammer drill should be
used as it will drill the best quality hole. Once the bit is inserted into the hammer drill, the depth of the hole to be drilled can
easily be set by using the depth gauge on the drill or by wrapping the bit with tape at the required depth. We recommend a drill
depth of 1-5/8” deep so that the anchor just sets down flush with the surface.
4. Before starting to drill the hole, it is important that eye and ear protection are used. Make sure the hammer drill is in the
hammer mode and start drilling your hole. Continue drilling until the tape on the bit or the drill gauge meets the base material-
this means that the required depth has been reached.
A. Permanent Mount Installation (Model #6259 - Sold Separately)
1. Determine desired location of unit.
2. Using a 3/8” masonry drill bit, drill through the rail and into the concrete 4-1/4”.
3. Blow the hole clean of dust and other material.
4. Drive spike through the rail and into hole, until head of spike is seated on the flange mount.
B. Temporary Mount (P/N 29173) & Temporary Secure Mount (P/N 29172) Installation -Sold Separately
Tools Needed for Installation (Sold by Saris)
•Anchor Set Tool P/N 25683
•Penta Security Socket P/N 25680 (only needed for temporary secure installation)
Tools Needed for Installation (Installer Provides)
•Tape Measure
•½” Masonry Drill Bit Drill (Hammer drill recommended)
•Hammer
•3/8” drive ratchet
•Marker or Pencil
•7/32” hex key
•Level
*DO NOT THROW AWAY THE PENTA SOCKET AFTER COMPLETING THE INSTALLATION. YOU WILL NEED IT TO REMOVE THE
EQUIPMENT IF THAT IS NECESSARY.
1. Place the rack in the desired location (see setbacks document). Use a marker or pencil to outline the holes of the flange onto the
base material. We recommend checking the hole locations after each new anchor is placed. Ensure the holes are at least 6”
away from any cracks in the base material.
2. The concrete anchor (a.k.a “drop in anchor”) is a female anchor designed for use in solid concrete only and cannot be used in
brick or block base material. The anchor size is designated by the inside diameter of the anchor. The diameter of the hole to be
drilled is the same size as the outside diameter of the anchor which is ½”.
3. When fastening to solid concrete with a drop in anchor, a hole must first be drilled into the concrete. A hammer drill should be
used as it will drill the best quality hole. Once the bit is inserted into the hammer drill, the depth of the hole to be drilled can
easily be set by using the depth gauge on the drill or by wrapping the bit with tape at the required depth. We recommend a drill
depth of 1-5/8” deep so that the anchor just sets down flush with the surface.
4. Before starting to drill the hole, it is important that eye and ear protection are used. Make sure the hammer drill is in the
hammer mode and start drilling your hole. Continue drilling until the tape on the bit or the drill gauge meets the base material-
this means that the required depth has been reached.
Tools Needed for Installation (Installer Provides)
• Tape Measure
• ½” Masonry Drill Bit Drill
(Hammer drill recommended)
• Hammer
• 3/8” drive ratchet
• Marker or Pencil
• 7/32” hex key
• Level