Satelec Acteon Mini LED III Supercharged User manual

User’s manual • Manuel d’utilisation • Manual de uso
Benutzerhandbuch • Manuale d’uso • Handleiding voor de gebruiker
Manual de utilização • Användningshandbok • Εγχειρίδιο χρήσης
III
MLED III Supercharged U2 V5:Mise en page 1 22/02/2010 12:47 Page 1

2
ENGLISH 3
FRANÇAIS 19
ESPAÑOL 35
DEUTSCH 51
ITALIANO 67
NEDERLANDS 83
PORTUGUÊS 99
SVENSKA 115
ΕΛΛΗΝΙΚΆ 131
MLED III Supercharged U2 V5:Mise en page 1 22/02/2010 12:47 Page 2

I – INTRODUCTION 6
II – WARNINGS 6
III – DESCRIPTION 8
IV – INSTALLATION/STARTUP 10
V – ROUTINE OPERATION 10
VI – CONFIGURATION 11
VII – INTERLOCKS 11
VIII – MAINTENANCE 11
IX - TROUBLESHOOTING 12
X – ELECTROMAGNETIC COMPATIBILITY 14
XI – DISPOSAL AND RECYCLING 17
XII – LIABILITY 17
XIII – ACCESSORIES 17
XIV - REGULATIONS 18
XV – SYMBOLS AND ABBREVIATIONS 18
ENGLISH
SUMMARY
3
MLED III Supercharged U2 V5:Mise en page 1 22/02/2010 12:47 Page 3

4
Fig. 1
Handpiece (1)
Handpiece holder (9)
Battery (8)
Charging base (11)
AC power adapter (12)
(Not shown)
MLED III Supercharged U2 V5:Mise en page 1 22/02/2010 12:47 Page 4

5
Fig. 2
Light guide (2)
ON/OFF button (3)
LCD screen (5)
Mode selection button (6)
Power verification
window (10)
Two-color LED (4)
Time selection button (7)
MLED III Supercharged U2 V5:Mise en page 1 22/02/2010 12:47 Page 5

I – INTRODUCTION
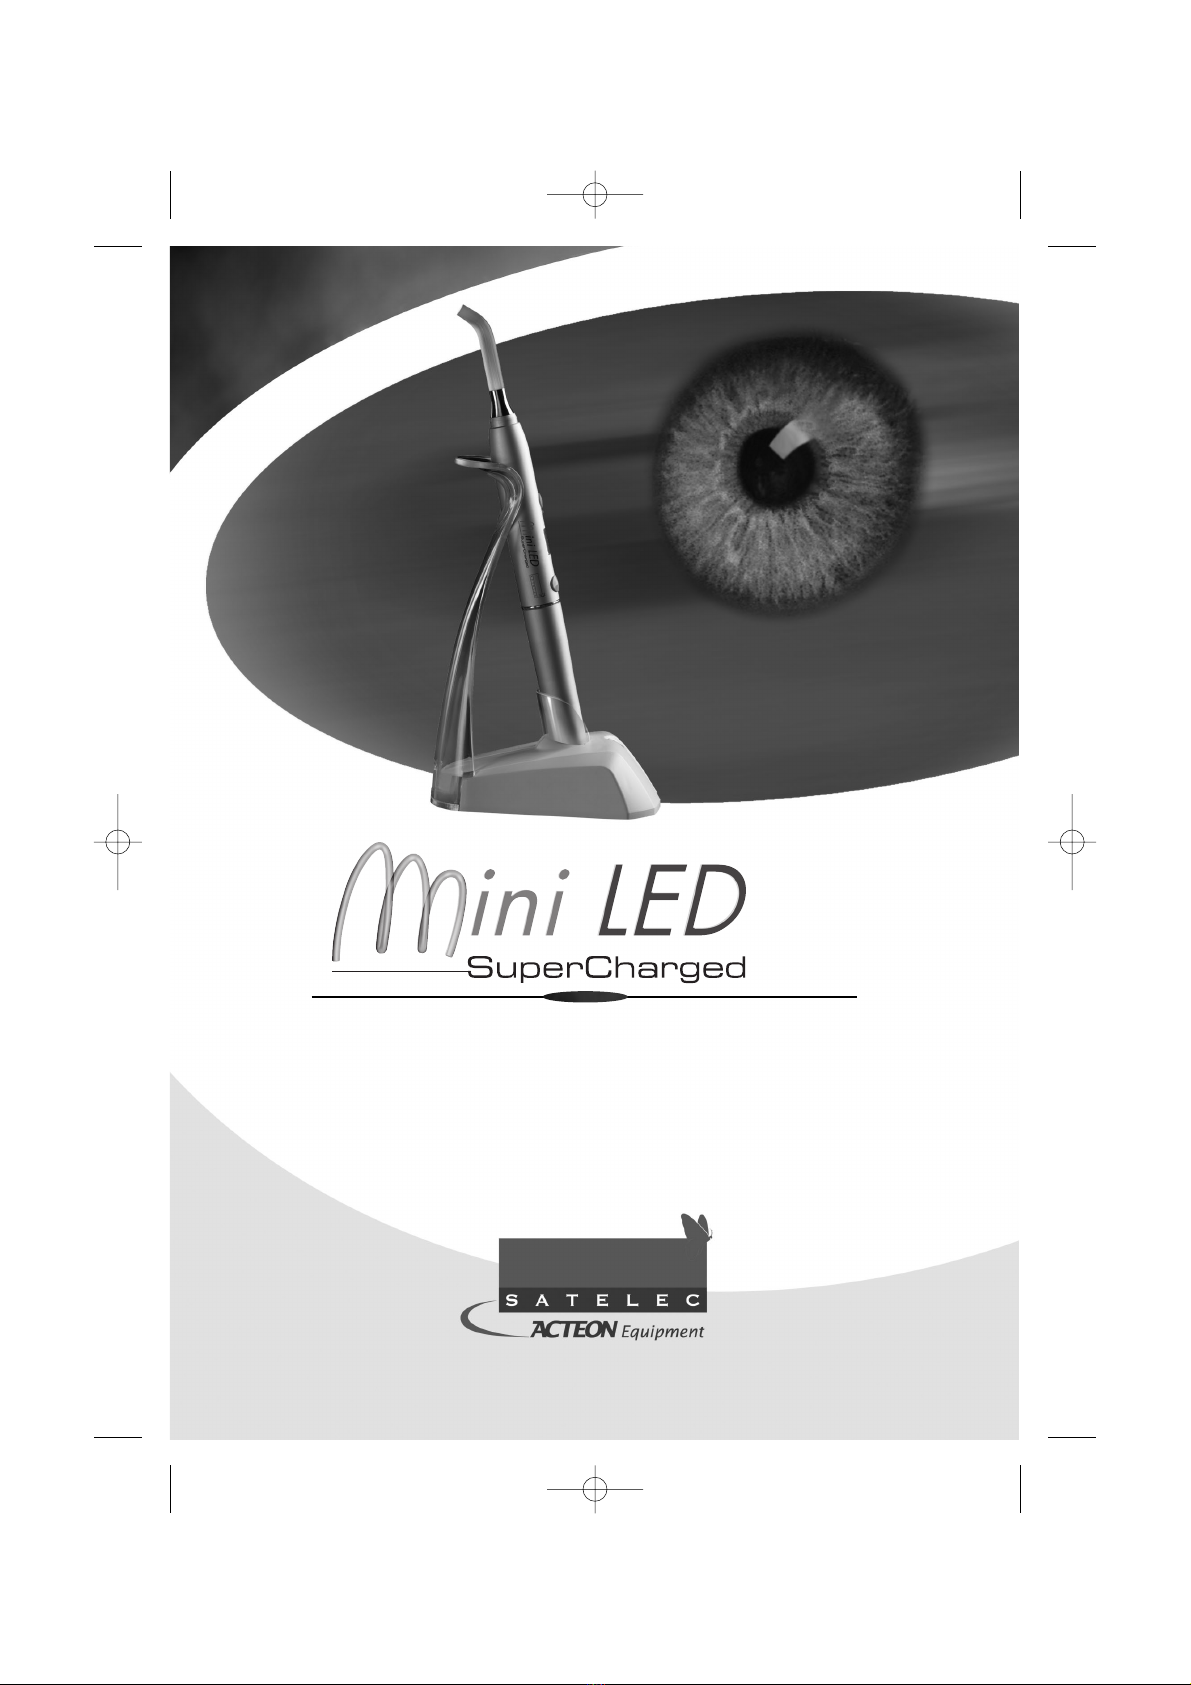
You have just taken possession of your Mini LED
SuperCharged unit, congratulations.
Created by SATELEC®, the Mini LED SuperCharged is a
photopolymerizer allowing dental care to be given using
the suitable light guide supplied with the unit.
To take full advantage of the technology of this product,
we request that you read carefully the chapter covering
all safety recommendations.
The manufacturer’s warranty is applicable only if these
indications relating to the unit’s operation and safety
have been correctly applied. All of these safety
measures require a sound knowledge of dentistry,
photopolymerization and of the specific instructions
regarding the operation of the Mini LED SuperCharged
given in this operating manual.
Sections with the symbol are points to which we
would like to attract your attention.
II – WARNINGS
United States Federal Law restricts on its
territory the use of this unit exclusively to trained,
capable and qualified dental healthcare professionals,
or under their control.
To reduce the risk of accidents, it is imperative to
comply with the following precautions:
Users of the unit
Use of the Mini LED SuperCharged is limited exclusively
to trained dental healthcare professionals, apt and
qualified in the usual context of their activity.
If you have received this unit in error, contact the unit’s
supplier to arrange for its return.
Interactions/contraindications
Do not use on persons currently suffering from, or that
have suffered from in the past, photo-biological
reactions (including solar urticaria or erythropoietic
protoporphyria) or on persons undergoing treatment
using photosensitizing medications (including
methoxsalen or chlortetracycline).
Any person, practitioners or patients who have
previously suffered from a retina or lens condition or
who have undergone eye surgery, in particular cataract
surgery, must consult their ophthalmologist before using
this unit.
Even in the event of agreement, it is strongly
recommended to be prudent as the light intensity may
cause accidents.
It is particularly recommended to continuously wear
protective glasses suited to the use of equipment
emitting radiation of wavelengths less than 500 nm.
The light radiation produced by this type of equipment
can be dangerous and must never be directed towards
the eyes, even if the practitioner or the patient is
wearing protective glasses suited to the use of
equipment emitting radiation of wavelengths less than
500 nm.
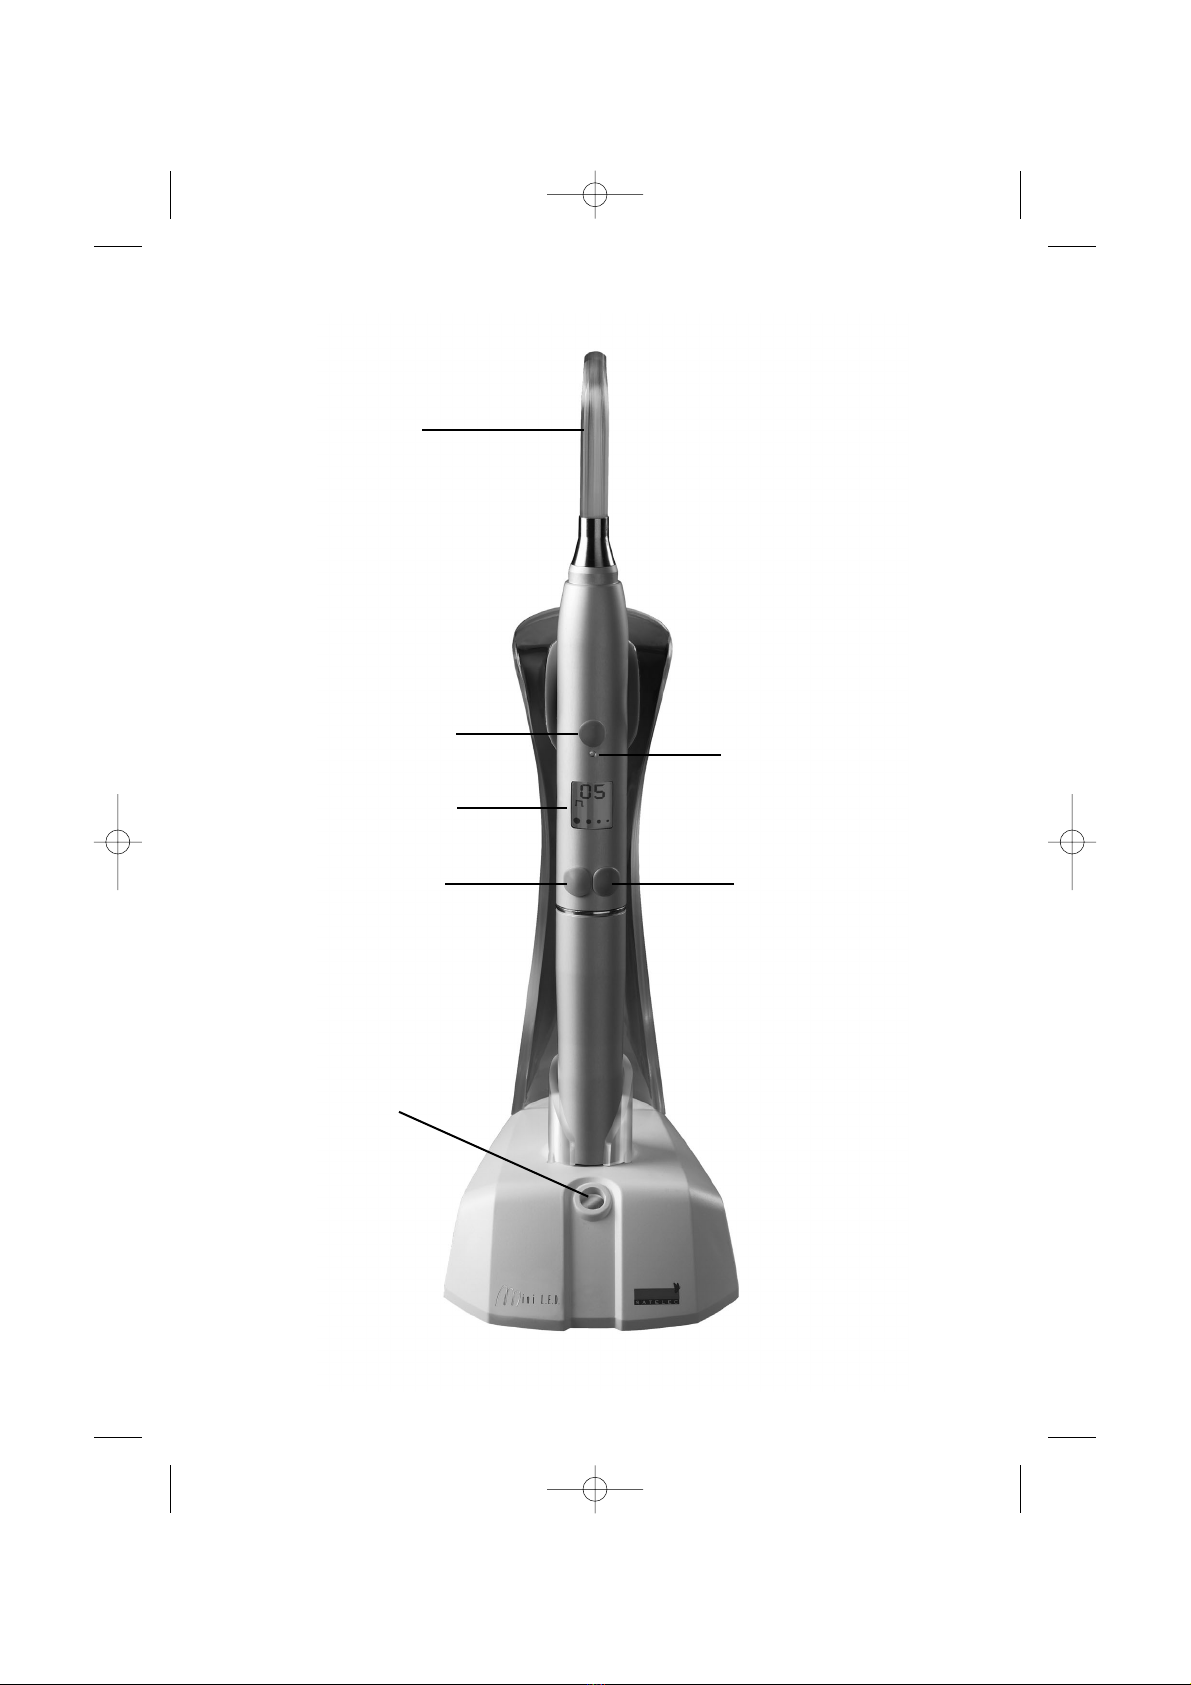
The lighting produced by this lamp must be directed
only at the part to be treated in the oral cavity.
The equipment must not be used if the patient and/or
the operator has a pacemaker or any other active
implant (cochlear implant…).
The equipment has not been designed to withstand
shocks from an electrical defibrillator.
The unit complies with current electromagnetic
compatibility standards, nevertheless, the user shall
ensure that any electromagnetic interference does not
create an additional risk (presence of radiofrequency
emitters, electronic equipment…).
Overexposure to light radiation of the pulp and
soft tissues can result in the release of heat and can
result in injury to the patient.
To use your equipment in the best possible
conditions, it is important to comply with the
specifications given in sections II - WARNINGS
Equipment users and V – ROUTINE USE.
As far as possible, avoid the accumulation of heat due
to a dental dam.
To avoid a sensation of heat, it is recommended to
separate cycles by 10 seconds for polymerization
times of 10 seconds or less, and by 30 seconds for
polymerization times greater than 10 seconds.
Connection to AC power supply
Ensure that your equipment is connected to the AC
power supply by an authorized dentistry installation
technician.
Do not tilt the unit at an angle of greater than 5°.
Before connecting the unit, check that the AC voltage is
compatible with that indicated on the AC power adapter
allowing lamp charging.
A different voltage would result in damage to the unit
and could injure the patient and/or the user.
The AC power supply used to power the unit must
comply with the applicable standards of your country.
6
MLED III Supercharged U2 V5:Mise en page 1 22/02/2010 12:47 Page 6

7
Any fluctuation of the voltage of the ac power supply or
electromagnetic field, noncompliant with the
applicable limits, may affect the unit’s operation.
The device is intented to be connected to a separate
power supply (FRIWO FW7660M/12), which is seen as
part of the device.
The plug of the power supply is intented to serve as
disconnected device, the socket-outlet shall be
installed near the equipment and shall be easily
accessible.
Unit operation
Do not use the unit if it appears to be damaged or
defective.
Do not use the unit if the light guide is damaged (injury
hazard…).
Before each use, check that light intensity is compliant
(see section 3.1 TECHNICAL DESCRIPTION) using the
power verification window on the charging base.
When handling the AC power adapter and/or the battery
disconnected from the handpiece, avoid contact with
the patients or other persons.
Do not touch the accessible battery and charging base
connectors (bump contacts).
To disconnect the ac power supply adapter, grip the AC
adapter plug and hold the wall socket.
During dental care, the Mini LED SuperCharged must not
be connected to its charging base.
In the event that the unit is not in use or stored, or in
the case of a prolonged absence, disconnect the AC
adapter from the ac power supply and remove the
battery from the body of the unit to protect it from a
slow and detrimental discharge.
Do not exert excessive pressure on the unit’s LCD
screen.
Do not change the battery during use.
Do not short-circuit the battery.
Do not short circuit the charging bump contacts on the
charging base.
Do not incinerate the battery (risk of explosion).
Environment
Do not immerse and do not use outside.
Do not place the unit close to a heat source.
The use of solvents, detergents or flammable
substances can result in damage or even short-circuits.
Ensure that the power cord connecting the AC adapter
to the charging base does not prevent persons from
moving freely.
The unit must be stored in its original packaging, in an
appropriate place, without danger for persons.
For unit transportation, unscrew the battery and
protect the light guide from any unexpected shocks.
Any condensation inside electrical equipment can be
dangerous.
If the lamp must be transported from a cold place to a
warm place, it must not be used immediately, but only
after reaching the ambient temperature.
Never insert or try to insert metallic objects into the
equipment to avoid an electric shock or short-circuit
hazard.
The unit is not designed for operation in the presence of
anesthetic gas or any other flammable gas.
Do not expose the unit to water mist or water splashing.
The unit is not designed for operation close to ionizing
radiation.
Maintenance
Before and after each use, it is essential that the unit
be disinfected with the products recommended by
SATELEC.
Before each use, it is essential that a cleaned and
disinfected rigid protection shield be used.
Before each intervention, it is essential that a cleaned,
disinfected and sterilized light guide be used.
Before each intervention, check the integrity of the unit
and its accessories.
Accessories
Do not use accessories other than those supplied by
SATELEC.
The manufacturer refuses to accept any responsibility if
damaged parts or accessories are not replaced
exclusively by those supplied by the manufacturer. In
particular, the use of light guides, ac adapters or
batteries other than those supplied by the manufacturer
may be dangerous for the patient and the user.
Repair
Do not perform equipment repairs or modifications
without the prior authorization of SATELEC.
In the event of an anomaly, immediately disconnect the
unit’s base and ensure that nobody can use the lamp
before verification by the manufacturer or the supplier.
This anomaly may be due to noncompliance with safety
rules or because of technical damage to the unit.
In the event of an anomaly, contact the supplier of the
unit rather than just any repairer, which may return
your unit in a hazardous state for both you and your
patients.
www.acteongroup.com
Email: [email protected]
MLED III Supercharged U2 V5:Mise en page 1 22/02/2010 12:47 Page 7

8
III – DESCRIPTION
3.1 PHYSICAL DESCRIPTION
The Mini LED SuperCharged includes the following
components:
- Handpiece (fig.1-1).
- Lithium-ion battery (fig.1-8).
- Multi-fiber light guide, 45° curve, Ø 7.5 mm,
sterilizable (fig.2-2).
- Charging base with handpiece holder (Fig. 1-9 and 11).
- AC adapter (FRIWO FW7660M/12) (fig.1-12).
- The rigid protection shield.
- Accompanying documentation.
On option:
Multi-fiber opalescent light guide, 45° curve, Ø 5.5 mm,
sterilizable.
kit of 5 Flexible protective shields, sterilizable.
3.2 TECHNICAL DESCRIPTION
The Mini LED SuperCharged is equipped with a Light-
Emitting Diode (LED) that emits blue visible light of a
wavelength between 420 and 480 nm for the
photopolymerization of dental materials.
- LCD (Liquid Cristal Display) screen (Fig.2-5)
The LCD screen is backlit and allows the display of the
different pieces of information required by the user.
The LCD comprises, from top to bottom:
- Display of time counter for polymerization light
emission time, expressed in seconds.
- A pictogram indicating the Fast, Pulse, and Stepped
menus.
- Display of the battery charge level status (battery being
most charged when all of the pictogram’s round symbols
are displayed and the least charged when all of the
round symbols have disappeared from the LCD screen).
- Control buttons (fig. 1 - 3/6/7)
The handpiece comprises three buttons:
- An ON/OFF button (fig.2-3) to start or stop the
polymerization cycle.
- Left button (fig.2-6) for selecting modes.
- Right button (fig. 2-7) for selecting the exposure time.
- Types of modes
You can choose three types of modes by pushing the left
button (fig. 2-6):
- Exposure times
Once the mode has been selected, you can choose the
exposure time by pushing the right button (fig.2-7):
- Fast-Cure mode (full power):
- 3 seconds (show 03) ;
- 4 seconds (show 04) ;
- 5 seconds (show 05) ;
- 10 seconds (show 10) ;
- Pulse-Cure mode:
- 5 shots of 1 second (full power with emission of 5
successive one second flashes with a rest of period of
250 ms between flashes) - (show 05);
- 10 shots of 1 second (full power with emission of 10
successive one second flashes with a rest of period of
250 ms between flashes) - (show 10) ;
- Step-Cure mode:
- 6 seconds progressively and 3 seconds at full power
(show 09) ;
- 10 seconds progressively and 5 seconds at full power
(show 15).
- Types of warnings
An audible alarm (beep) is triggered at the start of
polymerization.
- Charge time
Battery charge time is about 3 hours.
- Battery charge level indicator
When only one element of the pictogram remains (the
one farthest to the right on the LCD screen), two beeps
warn you that there are about 500 seconds of
polymerization remaining.
The operator is then invited to return the Mini LED
SuperCharged to the charging base.
When the battery is completely discharged, the LCD
screen displays the message “Lb” (Low battery) and no
Time counter
Fast-Cure, Pulse-Cure, Step-Cure Menus
Battery charge indicator
Pictogram Modes
Fast-Cure mode
Pulse-Cure mode
Step-Cure mode
MLED III Supercharged U2 V5:Mise en page 1 22/02/2010 12:47 Page 8

round symbols are shown, the handpiece then beeps 4
times and the LED indicator light becomes red.
- Indicator light
The handpiece comprises 1 two-color indicator light
(fig.2-4) located on the ON/OFF button.
When the unit detects a fault (see section IX
Troubleshooting), the indicator light becomes
continuously red. In all other cases, it remains
continuously green (except when the handpiece is
placed in standby mode, in which case the indicator
light goes out).
- Charging base
The charging base, including the translucent handpiece
holder (fig.1-9), which also serves as a verification
indicator, is used to recharge the battery.
Place the charging base on a hard and stable surface,
with an inclination of no more than 5°.
The translucent handpiece holder base (fig.1-9) flashes
three times (red, green, blue) and beeps when
connected to ac power.
Place the lamp on the holder ensuring that there is good
contact between the bump contacts and the accessible
connectors under the battery.
Two beeps confirm that the lamp is correctly positioned
on its holder.
The translucent holder base lights up, with a blue color,
and starts flashing, indicating that the battery is
charging.
The battery is completely charged when the
translucent holder base stops flashing and the blue
light remains lit continuously.
A power level verification window is integrated in the
charging base.
This power level verification window allows you to
precisely check if your lamp, equipped with its light
guide, is sufficiently powerful.
The input window of the verification system is located
on the front of the holder (fig.2-10).
- Power level verification window
The procedure for using the power level verification
window is as follows:
Program the lamp for 3-second Fast mode.
Insert the light guide into the handpiece after having
checked that it is intact and clean.
In the same way, first check that the power level
verification window is intact and clean.
Place the extremity of the light guide flat against the
power level verification window (fig.2-10) and activate
your Mini LED SuperCharged.
According to the power level detected, the translucent
handpiece holder base (fig.2-9) will become green in
the case of a compliant power level or red if the power
is insufficient.
In the event of the power being insufficient, please
refer to chapter IX TROUBLESHOOTING.
- technical specifications
Model name: Mini LED SuperCharged
Medical category: IIa according to the
european directive
93/42/CEE
Dimensions without light guide:
Weight: 160 g
Dimensions: Ø24 x 201 mm
Operation: Continuous operation
Protection:
Category: Type B
Protection: 5 AT FU1 fuse (non
accessible) 125 V
Protection index: IPX0
AC power adapter:
Input voltage: 100 V AC to 240 V AC
Frequency: 50 Hz to 60 Hz
Output voltage: 12 V DC
Output current: 0.8 A
Category: II
Protection index: IP 41
Reference FRIWO FW7660M/12
Charging base:
Input voltage: 12 V DC
Protection: 3 AT F1 fuse (non
accessible) 125 V
Category: Continuous operation
Protection index: IPX0
Battery:
Type: Lithium-Ion
Dimensions: 88 x Ø24 mm
Capacity: 2300 mAh
Optical specifications:
- LED for polymerization:
Wavelength range: 420 - 480 nm
9
MLED III Supercharged U2 V5:Mise en page 1 22/02/2010 12:47 Page 9

Central wavelength: 455 – 465 nm
Intensity: 2000 mW/cm² ± 10% for
an active fiber diameter
of 7.5 mm
Maximum exposure time: 15 seconds (show 15)
Temperatures:
Operation: +10°C to +40°C
Storage: -20°C to +70°C
Humidity:
Operation: 30% to 75%
Storage: 10% to 100%
condensation included
Atmospheric pressure 700hPa to 1060hPa
IV – INSTALLATION/STARTUP
4.1 UNPACKING THE UNIT
On reception of the unit, look for any damage that may
have occurred during transportation.
If necessary, contact your supplier.
4.2 RECOMMENDATIONS
Check that the environmental conditions have been
complied with (ambient temperature between 10°C and
40°C and humidity between 30% and 75%).
4.3 INSTALLATION
Ensure that the unit is not installed adjacent to
or on top of any other equipment.
Do not place the power cord in a cable feedthrough or
cable cover.
Remove the protective caps from the handpiece, screw
the battery onto the handpiece and insert the sterilized
light guide into the handpiece.
Ensure that the light guide is properly inserted,
confirmed by a click.
Ensure that all the segments of the LCD screen are
present once the battery has been properly screwed
down.
Place the base on a hard and stable surface that is not
inclined by more than 5°.
Connect the AC adapter after ensuring that the voltage
indicated corresponds to the electrical installation
available in the dental practice.
Two audible beeps confirm that the lamp has been
correctly placed on its holder.
The translucent holder base lights up in blue and starts
flashing, indicating that the battery is charging.
As soon as the battery is charged, the translucent holder
base stops flashing and the blue light remains
illuminated continuously.
4.4 OPERATING FOR THE FIRST TIME
Before operating, it is essential that the sterilizable
accessories (light guide and protective shield) be
sterilized and that the unit base be disinfected (see
chapter concerning maintenance).
4.5 MODES AVAILABLE
The Mini LED SuperCharged has three modes you can
choose by pushing the left button (Fig.2-6) :
- Fast-Cure,
- Pulse-Cure,
- Step-Cure.
4.6 EXPOSURE TIMES AVAILABLE
In these modes, you can choose different exposure
times.
By pushing the right button (fig.2-7), you can select the
following combinations:
- Fast-Cure mode:
- 3 seconds (show 03) ;
- 4 seconds (show 04) ;
- 5 seconds (show 05) ;
- 10 seconds (show 10) ;
- Pulse-Cure mode:
- 5 shots of 1 second (full power with emission of 5
successive one second flashes with a rest of period of
250 ms between each flash) - (show 05);
- 10 shots of 1 second (full power with emission of 10
successive one second flashes with a rest of period of
250 ms between each flash) - (show 10) ;
- Step-Cure mode:
- 6 seconds progressively and 3 seconds at full power
(show 09) ;
- 10 seconds progressively and 5 seconds at full power
(show 15).
V – ROUTINE OPERATION
The Mini LED SuperCharged is normally placed on its
holder. The first time you plug it into the battery it will
10
MLED III Supercharged U2 V5:Mise en page 1 22/02/2010 12:47 Page 10

activate in the Menu Fast-Cure and the exposure time of
3 seconds.
Your Mini LED SuperCharged is ready to operate once the
menu and the exposure time has been selected.
Place the light guide as close as possible to the surface
of the material to be polymerized, without touching it
as this may adversely affect the quality of the
polymerization. The use of a transparent strip is
recommended.
The polymerization starts by pushing on the ON/OFF
button. The setting will be confirmed by an audible
signal (beep).
A countdown on the LCD screen shows you how much
time remains.
When the polymerization cycle is completed, the time
that was applied is displayed.
You can press the ON/OFF button at any time to
interrupt the current polymerization cycle.
After 5 minutes without use, the unit goes into standby
mode (low consumption). The green indicator light and
the LCD screen backlighting switch off.
The unit can be taken out of standby mode by simply
pressing one of the three buttons (which will not
activate that function when coming out of standby
mode).
VI – CONFIGURATION
6.1 STARTUP
On startup, the unit performs an automatic test
sequence (auto-check).
The device automatically recalls the settings used for
the previous dental treatment.
6.2 MODES
The Fast, Pulse and Stepped modes are selected using
the left button (fig.2-6) on the handpiece.
6.3 EXPOSURE TIMES
The exposure times are selected by pressing the right
button (fig.2-7).
VII – INTERLOCKS
The Mini LED SuperCharged is equipped with a system
for the detection of possible unit operation anomalies.
7.1 EXCESSIVE TEMPERATURE
During intensive use, an excessive temperature may be
detected and the screen then displays the letters “OH”
(Over Heat), the audible warning (beep) sounds 4 times
and the indicator light (two-color LED) becomes red.
It is then recommended that the user leaves the
handpiece to cool for a few minutes, until the indicator
light becomes green again and the screen once again
displays the selected time cycle.
7.2 BATTERY CHARGE LEVEL
When the LCD screen displays the last remaining round
battery charge indicator, the audible alarm (beep)
sounds twice.
You then have about 500 seconds remaining before the
unit becomes completely discharged. It is then
recommended, if possible, to charge the battery for
further use.
When the battery becomes completely discharged, the
letters “Lb” (Low Battery) are displayed on the screen,
the audible alarm (beep) sounds 4 times and the
indicator light (two-color LED) becomes red.
The user must return the handpiece to its charging base
to recharge the unit’s battery (see chapter 4.3
INSTALLATION).
VIII – MAINTENANCE
Before conducting any maintenance on the Mini
LED SuperCharged, check that:
- The Mini LED SuperCharged is not on its charging
base.
- The battery has been unscrewed from the
handpiece.
- The charging base has been disconnected from the
AC supply.
11
MLED III Supercharged U2 V5:Mise en page 1 22/02/2010 12:47 Page 11

Before cleaning the handpiece, insert the protective
cap in the place of the light guide, supplied to ensure
that liquid does not enter the handpiece.
Avoid using cleaning and disinfection products
containing flammable agents (or other corrosive
agents such as acetone, chlorine or bleach).
Otherwise, ensure that the product completely
evaporates and that there are no combustibles on the
unit and its accessories before operation.
Do not use abrasive products to clean the unit.
Do not immerse the unit.
Never use ultrasound cleaning, whether for the Mini
LED SuperCharged or its accessories.
None of the accessories are delivered in a sterilized
state.
Only the light guide and the flexible protective shield
are sterilizable.
Before sterilization, check the cleanliness of your
autoclave and the quality of the water used.
After each sterilization cycle, immediately remove
the items from the autoclave to reduce the risk of
corrosion of metallic parts.
It is necessary to leave the sterilized items to cool
down to the ambient temperature and dry before re-
using them.
It is recommended to sterilize the items identified as
sterilizable by Satelec individually in the sterilization
bags foreseen for this purpose.
To maintain the sterile and aseptic state of
accessories, make sure that they are kept in
hermetically-sealed bags or containers suited to use
in dentistry.
The maintenance and/or sterilization instructions
that follow must be applied before each use of the
unit.
8.1 – Pre-disinfection/cleaning
Clean and disinfect the body, light guide, flexible shield
and rigid protection shield, and the charging base of the
Mini LED SuperCharged using ready-to-use
cleaning/disinfecting wipes based on alcohol,
amphoteric disinfectant and biguanide (refer to the
manufacturer’s instructions) for at least two minutes.
Leave the product to act for at least 15 minutes.
Use wipes with CE marking, or compliant with any
standard that may be required by national regulations.
8.2 - Drying
Dry using a clean, single-use, non-woven cloth to
remove any liquid traces.
8.3 - Packing
Pack in single-use sterilization bags or sleeves compliant
with the requirements defined in the EN ISO 11607-1
standard, or compliant with any standard that may be
required by national regulations.
8.4 - Sterilization
The optic fiber and the flexible protective shield for the
Mini LED SuperCharged must be sterilized individually in
an autoclave according to the following parameters:
- Autoclave: Type B compliant with the EN 13060
standard.
- Sterilization temperature: 134°C.
- Sterilization steady state: 18 minutes.
- Pressure: 2 bar minimum.
CAUTION: Not all autoclaves can reach 134°C. Not all
autoclaves perform a pre-depressurization. For further
information on the applicable sterilization instructions,
consult the autoclave manufacturer.
8.5 - Storage
After this, store the sterilized items in a dry, dust-free
place.
Before re-use, in the event of nonconforming packaging
integrity, re-package and re-sterilize according to the defined
protocol.
IX - TROUBLESHOOTING
In the event of a problem, before contacting the after-
sales service of SATELEC or the supplier:
- Ensure that the base is correctly connected to the AC
supply to ensure that the battery is charged normally.
If the Mini LED SuperCharged s holder is not lit despite
being correctly connected, contact the after-sales
service of SATELEC or the supplier.
- Check that at least one of the four round battery
charge level indicators is visible on the LCD screen
before pressing the ON/OFF button.
- In the event of a faulty battery (see VII – INTERLOCKS)
an automatic interlock system will prevent the unit
from operating. If this is the case, recharge the
battery by placing the lamp on its holder or by using a
second fully-charged battery.
- Intensive use of the lamp can result in high
temperatures inside the unit. If this happens, an
automatic interlock system prevents the unit from
operating (see VII – INTERLOCKS). Leave the unit at
rest for a few minutes to allow it to cool down.
- After each use, check that there is no composite
12
MLED III Supercharged U2 V5:Mise en page 1 22/02/2010 12:47 Page 12

residue adhering to the light guide. If this is the case, immediately remove the residues and check that the surface
of the light guide has not been damaged. If damage is visible, replace the light guide as the lamp’s power could be
significantly reduced.
- Under normal conditions of use, the lamp’s power does not vary if the battery is properly charged. Consequently, it
is not necessary to check power as with ordinary polymerization lamps. Nevertheless, in case of doubt, check its
power using your light guide.
- The battery located at the bottom of the handpiece can be replaced by unscrewing it.
- After removing the light guide, check that the LED is clean and undamaged. If necessary, clean it using a medical-
quality dry air jet (free from compressor oil).
- During verification of the power level of the handpiece, if the translucent handpiece holder base is red, check if
the LED, light guide and verification window are clean.
- In the event of dust being present, clean using a dry air jet.
- If the problem persists or if the light guide or the verification window are damaged, the lamp must be returned to
the after-sales service.
In the event of an anomaly, contact the supplier of the unit rather than just any repairer, which may return
your unit in a hazardous state for both you and your patients.
The technical service of your supplier is at your disposal for any technical problems encountered on your unit.
13
MLED III Supercharged U2 V5:Mise en page 1 22/02/2010 12:47 Page 13

X - ELECTROMAGNETIC COMPATIBILITY
Warning: The charger power cord must be kept apart from those of any nearby devices.
Mini LED SuperCharged requires special precautions to be taken with regard to electromagnetic compatibility. It must
be installed and prepared for use as described in chapter 3.
Certain types of mobile telecommunication devices such as mobile telephones are likely to interfere with the Mini
LED SuperCharged. The recommended separation distances in this paragraph must therefore be complied with.
The Mini LED SuperCharged must not be used near or on top of another device.
Anomaly observed Possible causes Solutions
No operation
(LCD screen off)
Battery completely discharged Recharge battery
Battery defective Return to SATELEC after-sales department
MiniLED defective Return to SATELEC after-sales department
No operation
(LCD screen on) MiniLED defective Return to SATELEC after-sales department
Light power defect
or no light power
LED defective and/or dirty Check cleanliness of verification window and/or
Return to SATELEC after-sales department
MiniLED defective Return to SATELEC after-sales department
Defective buttons Return to SATELEC after-sales department
Light guide defective and/or dirty Clean light guide and/or Return to SATELEC after-
sales department
Reflector defective or dirty Clean reflector (dry air jet) and/or Return to
SATELEC after-sales department
Charger does not operate
AC power wall outlet defective Contact your electrician
AC power adapter defective Return to SATELEC after-sales department
Light and/or audible alarms defective Return to SATELEC after-sales department
Contact failure on Jack connector socket Return to SATELEC after-sales department
Fuse defective Return to SATELEC after-sales department
Dysfunction of power
level verification
Indicator light defective Return to SATELEC after-sales department
Light guide defective and/or dirty Clean light guide and/or Return to SATELEC after-
sales department
LED defective and/or dirty Clean LED (dry air jet) and/or Return to SATELEC
after-sales department
Reflector defective and/or dirty Clean reflector (dry air jet) and/or Return to
SATELEC after-sales department
Window defective and/or dirty Clean window and/or Return to SATELEC after-
sales department
14
MLED III Supercharged U2 V5:Mise en page 1 22/02/2010 12:47 Page 14

If this cannot be avoided, its operation under the conditions of use must be checked beforehand.
The use of accessories other than those specified or sold by SATELEC as replacement parts may have the consequence
of increasing the emissions or decreasing the immunity of the Mini LED SuperCharged.
10.1 - Electromagnetic emissions
The Mini LED SuperCharged is intended for use in the electromagnetic environment specified in the table below. The
user and/or installer must ensure that the Mini LED SuperCharged is used in such an environment.
10.2 - Magnetic and electromagnetic immunity
The Mini LED SuperCharged is intended for use in the electromagnetic environment specified in the table below.
The user and/or installer must ensure that the Mini LED SuperCharged is used in such an electromagnetic
environment.
10.3 - Electromagnetic immunity / mobile radiofrequency equipment
The Mini LED SuperCharged is intended for use in the electromagnetic environment specified in the table below.
The user and/or installer must ensure that the device is used in such an electromagnetic environment.
Immunity test IEC 60601 test level Compliance level Electromagnetic environment - guidance
Magnetic field at 50Hz.
IEC61000-4-8 3A/m 3A/m The intensity of the magnetic field should be equivalent to that of
a typical commercial or hospital environment (hospital, clinic).
Electrostatic discharge
(ESD)
IEC 61000-4-2.
± 6KV contact
± 8KV air
± 6KV contact
± 8KV air
Floors must be wood, concrete, cement or tiled.
If floors are covered with synthetic material (carpet, etc.), the
relative humidity must be at least 30%.
Electrical fast transients
IEC 61000-4-4.
± 2KV for power supply
lines
± 2KV for power supply
lines
Power quality should be that of a typical commercial or hospital
environment.
Surges
IEC 61000-4-5.
± 1KV differential mode
± 2KV common mode
± 1KV differential mode
± 2KV common mode
Power quality should be that of a typical commercial or hospital
environment.
Voltage dips, short
interruptions and voltage
variations
IEC 61000-4-11.
<5% UTT(>95% dip in UT)
for 0.5 cycles.
40% UT(60% dip in UT) for
5 cycles
70% UT(30% dip in UT) for
25 cycles
<5% UT(>95% dip in UT) for
250 cycles
<5% UT(>95% dip in UT) for
0.5 cycles.
40% UT(60% dip in UT) for 5
cycles
70% UT(30% dip in UT) for
25 cycles
<5% UT(>95% dip in UT) for
250 cycles
Power quality should be that of a typical commercial or hospital
environment.
If the use of the Mini LED SuperCharged requires continued
operation during a power cut, it is recommended that the
product be powered from a separate power supply (UPS, etc.).
Emission test Compliance Electromagnetic environment - guidance
RF emission - CISPR 11. Group 1
Class B
Mini LED SuperCharged uses RF energy for internal operation. Therefore, its radiofrequency emissions
are very low and are not likely to cause any interference in nearby equipment.
Mini LED SuperCharged is suitable for use in all establishments, including domestic establishments and
those directly connected to the public low voltage power supply network that supplies buildings used for
domestic purposes.
15
MLED III Supercharged U2 V5:Mise en page 1 22/02/2010 12:47 Page 15

Note 1: At 80 MHz and 800 MHz, the higher frequency range applies.
Note 2: These specifications may not be applicable in all situations. Electromagnetic propagation is affected by
absorption and reflection from structures, objects and persons.
(a): The electromagnetic field strengths of fixed radiofrequency emitters, such as base stations for mobile telephones
(cellular/cordless), mobile radios, amateur radios, AM/FM radio broadcasts and TV broadcasts cannot be
determined exactly by theory. To assess the electromagnetic environment due to fixed radiofrequency emitters,
an electromagnetic environment measurement must be made. If the measured radiofrequency field strength in
the immediate environment where the product is used exceeds the compliance level specified above, the
performance of the product must be tested to verify whether it conforms to the specifications. If abnormal
performance is observed, additional measures may be necessary, such as reorienting or relocating the product.
(b): In the 150 kHz to 80 MHz frequency range, the electromagnetic field strengths must be less than 3 V/m.
10.4 - Recommended separation distances
The Mini LED SuperCharged is intended for use in an electromagnetic environment in which radiated radiofrequency
disturbances are controlled.
The Mini LED SuperCharged user and/or installer can help prevent electromagnetic interference by maintaining a
minimum distance between portable and mobile radiofrequency communications equipment (emitters) and the Mini
LED SuperCharged, according to the maximum output power of the equipment, as recommended in the table below.
Note 1: At 80 MHz and 800 MHz, the higher frequency range applies.
Note 2: These specifications may not be applicable in all situations. Electromagnetic propagation is affected by
absorption and reflection from structures, objects and persons.
Immunity test IEC 60601 test level Compliance level Electromagnetic environment - guidance
Portable and mobile radiofrequency communications devices must not be used near the Mini LED SuperCharged (including its cables) at a distance
less than that recommended and calculated according to the frequency and power of the emitter.
Conducted disturbance,
radiofrequency fields.
IEC61000-4-6
3 V/m
150 KHz to 80 MHz 3 V/m Recommended separation distance:
d = 1.2
Radiated radiofrequency
electromagnetic field.
IEC61000-4-3
3 V/m
80 MHz to 2.5 GHz 3 V/m
d = 1.2 80MHz to 800MHz.
d = 2.3 800MHz to 2.5GHz.
Where P is the maximum power rating of the emitter in watts (W)
according to the manufacturer's specifications and d is the
recommended minimum separation distance in meters (m).
The electromagnetic field strengths of fixed radiofrequency emitters, as determined by an electromagnetic environment measurement (a), must be
less than the compliance level in each frequency range (b).
Interference may occur near equipment marked with the symbol below:
Rated max. power
of the emitter (W)
Separation distance in meters (m) according to emitter frequency
150 KHz to 80 MHz
d = 1.2
80 MHz to 800 MHz
d = 1.2
800 MHz to 2.5 GHz
d = 2.3
0.01 0.12 m 0.12 m 0.23 m
0.1 0.38 m 0.38 m 0.73 m
11.2 m 1.2 m 2.3 m
10 3.8 m 3.8 m 7.3 m
100 12 m 12 m 23 m
For emitters rated at max. power not listed above, the recommended separation distance d in meters (m) can be estimated using
the equation applicable to the frequency of the emitter, where P is the max. power rating of the emitter in watts (W) according
the manufacturer.
16
MLED III Supercharged U2 V5:Mise en page 1 22/02/2010 12:47 Page 16

10.5 - Cable lengths
XI - DISPOSAL AND RECYCLING
As electrical and electronic equipment, the device must be disposed of according to a specialized procedure for
collection, pick-up and recycling or destruction (in particular on the European market, with reference to Directive
2002/96/EC of 27/01/2003).
When your device reaches the end of its life, we consequently recommend that you contact your dental equipment
dealer (or, failing this, the nearest ACTEON GROUP office, the list of which is given in chapter 16), for information on
how to proceed.
XII – LIABILITY
The manufacturer is not liable if:
- the manufacturer's installation recommendations have not been followed (supply voltage, electromagnetic
environment, etc.);
- repairs have been performed by persons not authorized by the manufacturer;
- the device has been used in an electrical installation which does not comply with current standards;
- the device has been used in a way which is not stipulated in this Manual;
- accessories other than those supplied by SATELEC have been used;
- the instructions in this document have not been followed.
The manufacturer reserves the right to modify the unit and/or the Operating Manual without notice.
XIII – ACCESSORIES
The following accessories are available for the Mini LED SuperCharged:
- Opalescent light guide Ø 7.5 mm : Ref. F02648
- Opalescent light guide Ø 5.5 mm(option) : Ref. F02652
- Flexible protective shield x 5 (option): Ref. F61507
- Rigid protection shield: Ref. F05213
- AC power supply: Ref. F05216
- Handpiece: Ref. F05215
- Battery: Ref. F05211
Cables and
accessories
Maximum
length Complies with:
charger power
cord <3m
RF emission, CISPR 1 - Class B
Immunity to magnetic fields: IEC61000-4-8.
Immunity to electrostatic discharge: IEC61000-4-2
Immunity to electrical fast transients/bursts: IEC61000-4-4
Immunity to surges: IEC61000-4-5
Immunity to voltage dips, short interruptions and voltage variations:
IEC61000-4-11
Immunity to conducted disturbances induced by radiofrequency fields: IEC61000-4-6
Immunity to radiated radiofrequency electromagnetic fields: IEC61000-4-3
17
MLED III Supercharged U2 V5:Mise en page 1 22/02/2010 12:47 Page 17

XIV - REGULATIONS
This medical device is classified as class IIa according to
European Directive 93/42/EEC.
This equipment is manufactured in compliance with the
current IEC 60601-1 standard.
This equipment has been designed and manufactured
according to an ISO 13485-certified quality assurance
system.
XV – SYMBOLS AND ABBREVIATIONS
Note:
Technical personnel of the Satelec authorized dealer
network can obtain from ACTEON Group on request all
the information they need for repair of the parts of the
curing light that Satelec has identified as repairable.
SYMBOL DEFINITION
Alternating current
Direct current
Follow operating
instructions
“ON”/“OFF”
(pushbutton)
Type B
Class II
CE marking
18
MLED III Supercharged U2 V5:Mise en page 1 22/02/2010 12:47 Page 18

I – INTRODUCTION 22
II – AVERTISSEMENTS 22
III – DESCRIPTION 24
IV – INSTALLATION / MISE EN SERVICE 26
V – UTILISATION COURANTE 27
VI – CONFIGURATION 27
VII – SECURITES 27
VIII – ENTRETIEN 28
IX - DEPANNAGE 28
X – COMPATIBILITE ELECTROMAGNETIQUE 30
XI – ELIMINATION ET RECYCLAGE 33
XII – RESPONSABILITE 33
XIII – ACCESSOIRES 33
XIV - REGLEMENTATION 34
XV – SYMBOLES ET ABREVIATIONS 34
FRANÇAIS
SOMMAIRE
19
MLED III Supercharged U2 V5:Mise en page 1 22/02/2010 12:47 Page 19

20
Fig. 1
Pièce à main (1)
Support de Pièce à main (9)
Batterie (8)
Socle de charge (11)
Adaptateur secteur (12)
20
MLED III Supercharged U2 V5:Mise en page 1 22/02/2010 12:47 Page 20
Table of contents
Languages:
Other Satelec Acteon Dental Equipment manuals
Popular Dental Equipment manuals by other brands

B.A. International
B.A. International BA Ultimate LED Instructions for use

Carestream DENTAL
Carestream DENTAL RVG 142 user guide

DentalEZ
DentalEZ everLight EVLCE Installation, operation & care manual

Woodpecker
Woodpecker Endo Motor instruction manual

T&S
T&S B-2250 Installation and maintenance instructions

EMS
EMS AIR-FLOW MASTER Perio Operation instructions