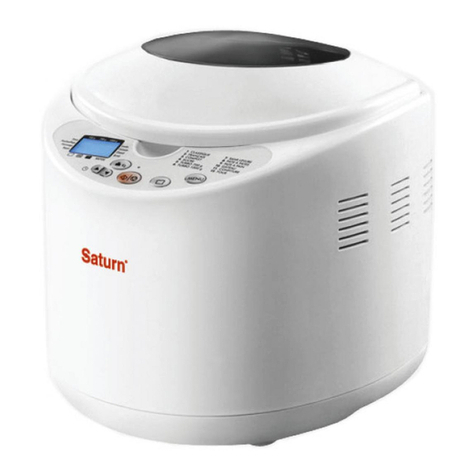
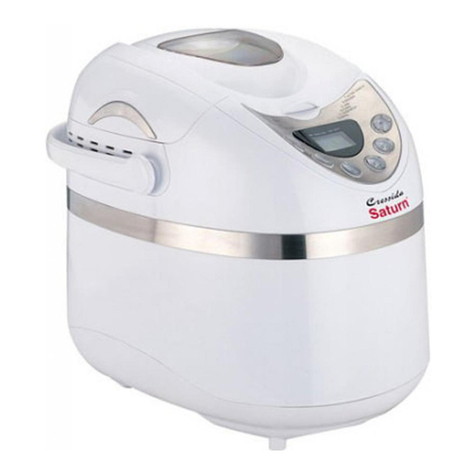
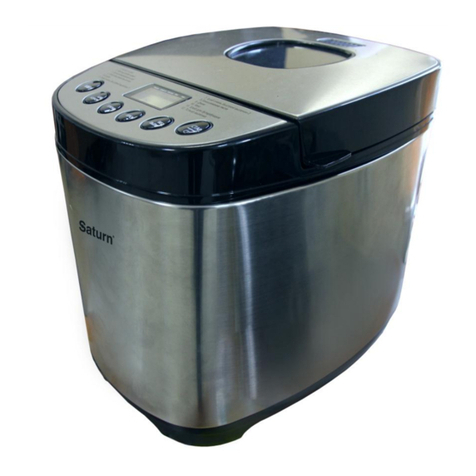
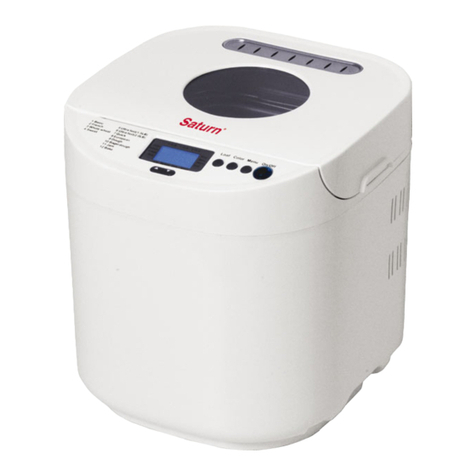
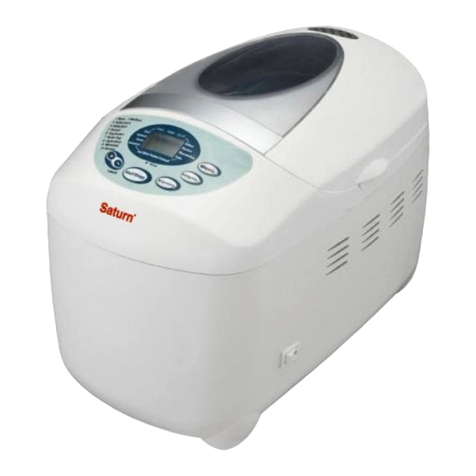
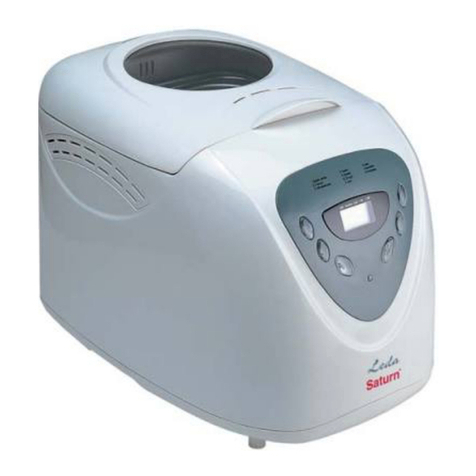
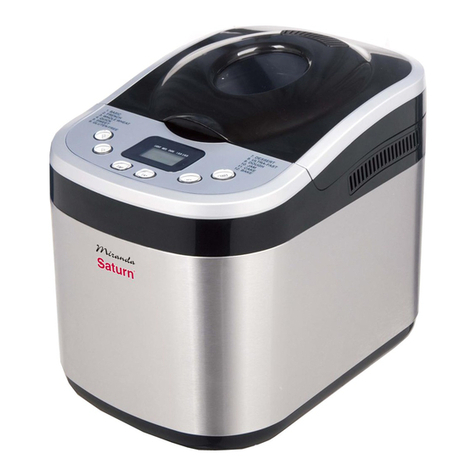
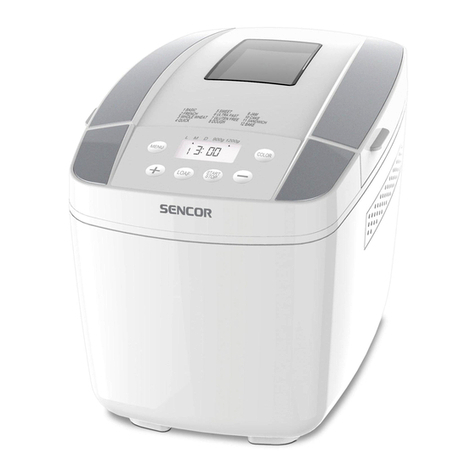
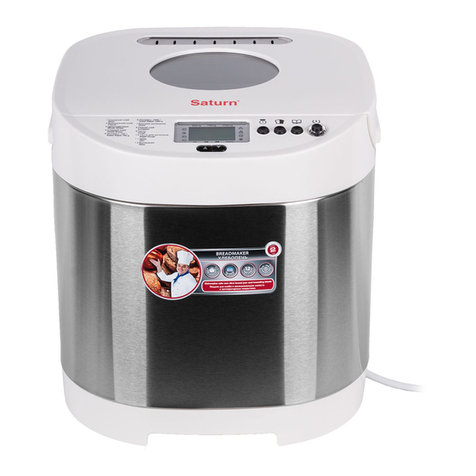
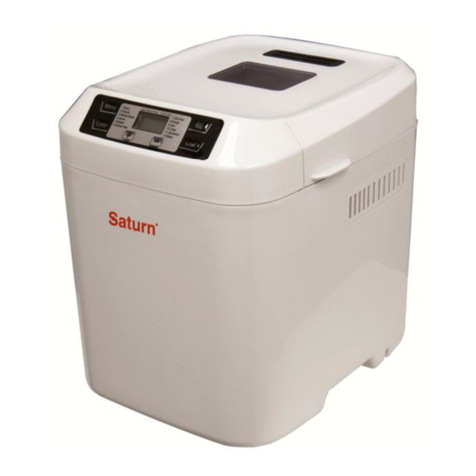
Saturn ST-EC0126 User manual


ST-EC0126
BREAD MAKER
ХЛЕБОПЕЧЬ
ХЛІБОПІЧ
НАН ПІСІРГІШ


3
GB
BREAD MAKER
Dear Buyer!
We congratulate you on having
bought the device under trade
name “Saturn”. We are sure that
our devices will become essential
and reliable assistance in your
housekeeping.
Avoid extreme temperature
changes. Rapid temperature
change (e.g. when the unit is
moved from freezing temperature
to a warm room) may cause con-
densation inside the unit and a
malfunction when it is switched
on. In this case leave the unit at
room temperature for at least 1.5
hours before switching it on.
If the unit has been in transit,
leave it indoors for at least 1.5
hours before starting operation.
READ ALL INSTRUCTIONS BEFORE
USING THIS PRODUCT.
IMPORTANT SAFEGUARDS
When using electrical appliances,
basic safety precautions should
always be followed including the
following:
1. Read all instructions before using.
2. Before using the device, make sure
that technical characteristics of the
mains in your premise comply with the
characteristics, stated by the manufac-
turer. The device should be connected
only to the grounded-type plug.
3. Do not touch hot surfaces. Use han-
dles or knobs. Wear oven mitts when
using unit. Allow to cool before cleaning
unit.
4. Unplug from outlet when not in use or
cleaning. Allow to cool before putting on
or taking off parts.
5. Do not immerse unit into water or
other liquid.
6. Close supervision is necessary when
unit is used near children. Not intend for
use by children.
7. This appliance is not intended for use
by persons with reduced physical, sen-
sory or mental capabilities, or lack of
experience and knowledge, unless they
have been given supervision or instruc-
tion concerning use of the appliance by
a person responsible for their safety.
The device is not recommended to be
used by children under 14 y.o.
8. Do not put anything else on cord.
When you are out or in travel, remove
plug from wall outlet.
9. Do not operate any appliance with a
damaged cord or plug or after the appli-
ance malfunctions, or has been dam-
aged in any manner. Return appliance to
the nearest authorized service facility
for examination, repair or adjustment.
10. Avoid contact with moving parts.
11. The use of accessory attachments
not recommended by the appliance
manufacturer may cause injuries.
12. Do not use outdoors. This appliance
is intended for household use only.
13. Do not let cord touch hot surfaces.
Do not put veil or other flammable ma-
terial on surface.
14. Do not place on or near a hot gas or
electric burner, or in a heated oven.
15. Use bread maker at 2 inch away
from wall or other units.
16. When plug or unplug, be careful,
don’t touch plug blade.
- Service life –5 years.
- Before putting into operation shelf life
is unlimited.

4
OVERVIEW
11
12
13
1. Viewing window
2. Kneading paddle
3. Bread pan
4. Handle of the bread
pan
5. Drive shaft
6. Baking chamber
7. Display
8. Control panel
9. Air vents
10. Heating elements
11. Measuring cup
12. Measuring spoon
13. Hook
CONTROL PANEL
Display

5
Timer
Preheat
Knead
Reset
Light
Medium
Dark
Rapid
End
Rise
Bake
Warm
The display window shows the selected
weight, the menu number, the remaining
time, the selected crust colour, the working
process (Preheat, Knead, Rest, Rise, Bake,
Warm and End) and error codes.

6
Buttons
This button is used to set
your selected program
from 1 to 13.
Press this button to select
the basic program.
This bread size button is
used to select small
(500g), regular (750g) or
large (1000g) bread size
(certain programs only).
This colour button is used
to select your desired crust
colour (level of browning).
You can choose between
Light, Medium, Dark and
Rapid browning.
This Start/Stop button is
used to start and stop the
selected program.
To START a program,
pressthis button and you
will hear a beep. The two
dots (:) will flash on the
display. The program will
start.
To STOP a program, press
this button for about 2
seconds and you will hear
a beep, indicating that the
program has been
switched off.
/
You can use these two
buttons to select the
desired operating time up
to 15 hours (15:00). The
time is set in increments
of 10 minutes.
BEFORE FIRST USE
Carefully unpack the bread maker and
remove all packaging materials.
Wash the bread pan, kneading paddle,
measuring cup, spoon and hook in warm
soapy water. Rinse and dry thoroughly.
OPERATION
1. Place the appliance on a dry, flat
and stable surface.
2. Open the lid and lift out the bread
pan by the handle.
It is important that the pan is filled with
ingredients outside the appliance so that
any accidental spillage will not be ignit-
ed by the heating elements.
3. Attach the kneading paddle to
the drive shaft.
Position the kneading paddle on the
drive shaft and then push it on.
4. Measure ingredients.
It is extremely important to measure
each liquid and dry ingredient properly
or it could result in a poor baking result.
The ingredients must also be added into
the bread pan in the order in which they
are given in each recipe.
Any liquid should be measured with the
supplied measuring cup or spoon. Ob-
serve the level of the measuring cup at
eye level.
Dry measurements must be done by
gently spooning ingredients into the
measuring cup and then once filled,
level it off with a knife. Do not add
more than required or to pack it
down tightly into the cup as it will
affect the recipe.
When measuring
small amounts
of dry or liquid
ingredients, use
the supplied
measuring
spoon. Meas-
urements must
be level, not
heaped, as this
could affect the
recipe.
5. Place the ingredients into the
bread pan.
Ensure the ingredients are put into
the bread pan in the exact order
given in the recipe, for example:
First, liquid ingredients at
room temperature or as
specified in the recipe.
Second,
dry ingredients. Add the flour gently and
make sure it is evenly distributed over
the liquid. If you tip it onto the liquid
too fiercely, the liquid may seep up
through the flour and affect the action
of the yeast. This is particularly im-
portant if you are using the time delay.

7
Last, yeast. The yeast must be
kept separate from the wet
ingredients and salt be-
cause the liquid ingredients
will prematurely activate
the yeast. Create a small
hole in the dry ingredients
using your finger or a spoon
and place the yeast in the
hole. Make sure the yeast is
fresh –check the use-by
date.
Ensure the ingredients
are at room temperature
unless otherwise stated.
Water should be cold unless
the recipe states otherwise.
6. Insert the bread pan into the
baking chamber.
Press down on the rim until it snaps
securely into place.
7. Close the lid and plug the appli-
ance into the mains socket.
The appliance will beep and the dis-
play will show the 1st menu and the
standard time.
8. Repeatedly press the menu but-
ton to select the desired pro-
gram.
Each time this button is pressed, the
appliance will beep and the program
number (1 to 13) will appear on the
display.

8
Program Descriptions
Program
Total program time
Light
Medium
Dark
Rapid
500g
750g
1000g
500g
750g
1000g
500g
750g
1000g
500g
750g
1000g
1 Basic
For white and
brown bread,
also for bread
containing
herbs and
raisins.
3:25
3:30
3:35
3:25
3:30
3:35
3:25
3:30
3:35
2:14
2:19
2:2
4
2 French
For light
weight bread
such as French
bread which
has a crisper
crust and light
texture. The
preparation
time is longer.
4:10
4:15
4:20
4:10
4:15
4:20
4:10
4:15
4:20
2:35
2:40
2:4
5
3 Whole
wheat
For bread
containing
significant
amounts of
whole wheat.
This program
takes longer
preheating
time to allow
the grain to
soak up the
water and
expand. It is
not recom-
mended to use
the delay timer
as this can
produce poor
results.
4:05
4:10
4:15
4:05
4:10
4:15
4:05
4:10
4:15
2:35
2:40
2:4
5
4 Low
carb
For low-carb
bread.
3:10
3:15
3:20
3:10
3:15
3:20
3:10
3:15
3:20
2:42
2:47
2:5
2
5 Fast bake I (1:20)
For a 750g white bread in a reduced time period. Bread baked on this
program can be shorter and the texture is moister.
6 Fast bake II (1:55)
For a 1000g white bread in a reduced time period. Bread baked on this
program can be shorter and the texture is moister.
7 Quick (2:10)
For white bread that is required in a shorter time. Bread baked on this
program is usually smaller with a dense texture.
8 European (3:25)
For European style bread like focaccia and raisin pumpernickel.
9 Dough (1:30)
This program only makes the dough and will not bake the final bread.
Remove the dough and shape it to make bread rolls, pizza, etc.
10 Gluten-free (2:45)
For bread using gluten-free flours. This program has a longer rising time.
11 Jam (1:05)
For making jam from fresh fruits.
12 Bake (1:00)
This program is bake only and can be used to increase the baking time on
selected programs. This is especially useful to help prepare jam.
13 Favourite bread (3:25)
This program allows you to create your own bread making processes.

9
9. Repeatedly press the colour but-
ton to select the desired
crust colour.
This bread maker is preset for medi-
um crust colour.
10. Repeatedly press the bread size
button to select 500g,
750g or 1000g.
This bread maker is preset to
1000g.
11. If you want to delay the time,
select the delay time as de-
scribed in the next section “Us-
ing the Timer”.
Skip this step if you want the
bread maker to start immediately.
12. Press the start/stop button
to start the selected
program.
The two dots (:) will flash on the
display.
The remaining time will countdown
on the display.
13. This bread maker will automati-
cally proceed through each
step of the bread making pro-
cess.
The steam will escape through the
air vents during baking. This is
normal.
14. When the program is completed,
you will hear 10 beeps and the
display will show “0:00”.
15. Press the start/stop button
for about 2 seconds to
turn off the appliance.
If you do not turn off the bread
maker, the keep warm function will
be activated. The bread will be au-
tomatically kept warm for 60
minutes (except dough and jam
programs) and then the appliance
will shut off.
For best results, it is recom-
mended to remove the bread im-
mediately after the program is
completed.
16. Unplug the appliance from the
mains socket after use.
17. Open the lid and remove the
bread pan by handle using ov-
en gloves.
Remember that the bread pan
and your bread are both very
hot! Be careful not to place them
either on a tablecloth, plastic sur-
face, or other heat-sensitive sur-
faces which may scorch or melt.
18. Turn the bread
pan upside
down and gen-
tly shake the
bread onto a
cooling rack.
19. Leave the bread
to cool.
Sometimes the kneading paddle
may remain in the bread. If it
does, allow the bread to cool and
then use the supplied hook to re-
move the paddle from the base of
the bread. Take care as the knead-
ing paddle will be very hot.
Always remove the kneading pad-
dle before slicing the bread.
20. Slice and store bread.
Use an electric knife or a sharp
knife with a serrated blade for
even slices.
Since homemade bread has no
preservatives so it should be eaten
within 2-3 days of baking. If you
are not eating it immediately, wrap
in foil or place in a plastic bag and
seal.
Crispy, French-style bread will
soften on storage so it is best to be left
uncovered until sliced.
If you wish to freeze your
bread for longer storage, place sliced
bread in a tightly covered container in
the freezer.
USING THE TIMER
If you are using the bread
maker in hot or humid weather with
a delay time longer than 2 hours,
there will be a danger of the bread
rising too quickly. To prevent this
from happening, slightly reduce the
liquid and increase the salt.
Do not use the timer if your recipe
includes fresh eggs, milk or other
ingredients may spoil.
10
The yeast must always be kept
away from the liquid and the salt
when using the timer.
Your bread maker has a built in timer
that allows you to delay operation for up
to 15 hours. The timer cannot be used
on certain programs such as Rapid I,
Rapid II, Quick, Dough, Gluten-free,
Jam and Bake programs.
1. Follow steps 1 to 10 of the section
“Operation” above.
2. Decide when you want your bread to
be ready and calculate the difference in
time between now and then.
For example, it is 8:30pm and
you want your bread ready at 7am
on the following day.
The difference is 10 1/2 hours.
3. Repeatedly press /
until “10:30” appears on the
display.
4. Press the start/stop button to
begin the timer.
The two dots (:) will flash.
The bread will be ready for you
at 7am.
POWER FAILURE BACKUP SYSTEM
Your bread maker is equipped with a
power failure backup system.
If the power is interrupted, for example,
by a temporary power cut, your bread
maker will keep the program in its
memory for up to 7 minutes. If the
power is restored within 7 minutes, your
bread maker will carry on the program
where it left off.
Favorite bread program
The Favorite bread program consists of
15 programmable steps. You can pro-
gram each step and control precisely
what your bread maker will do.
Once you have created your own pro-
gram, it will stay in your bread maker’s
memory until you change it by repro-
gramming it.
1. To enter this Favorite bread pro-
gram, repeatedly press until
the display shows 13 and default
time 3:25.
2. Press and hold for about 2
seconds to set this program.
3. Repeatedly press the menu button
to selected the step you
want to program.
4. When programing the desired step,
you can repeatedly press /
to select the desired val-
ue.
5. Press and hold for about 2
seconds until your bread maker
beeps. Your program has been en-
tered into your bread maker’s
memory.
6. Press to start the program.
The table shows what we will set for
each of the 15 steps for our program.
Step
Program
process
Default
time/temp
erature
Time
range
you
can
set
1
Preheat
0 min
0-60
min
2
Knead1
10 min
0-10
min
3
Rest
5 min
0-30
min
4
Knead4
30 min
0-30
min
5
Rise1
30 min
0-90
min
6
Knead5
10 sec
0-59
sec
7
Rise2
30 min
0-90
min
8
Knead6
0 sec
0-59
sec
9
Rise3
40 min
0-90
min
10
Bake
60 min
0-90
min
11
Warm
60 min
0-60
min
12
Rise1
25°C
20°C-
50°C
13
Rise2
30°C
20°C-
50°C
14
Rise3
35°C
20°C-
50°C

11
15
Bake
135°C
70°C-
160°C
CLEANING AND MAINTENANCE
Unplug the appliance from the mains
socket and allow it to cool down
completely before cleaning.
Before the first use and after every
use, clean each part thoroughly.
Periodically check all parts before
assembly.
Do not use any sharp instruments or
abrasive or chemical cleaning
agents.
Never immerse the appliance in
water or any other liquid.
To clean the appliance and control
panel, wipe with a clean damp cloth
and dry before storing.
Wash the bread pan, kneading pad-
dle, measuring cup and spoon in
warm soapy water. Rinse and dry
thoroughly. Do not use metal tools
in the bread pan –always use plastic
spatulas, etc.
If the kneading paddle is difficult to
remove from the drive shaft, fill the
bread pan with warm water and al-
low it to soak for approximately 30
minutes. This will loosen the paddle
and then it can then be easily re-
moved for cleaning.
To clean the baking chamber, re-
move any bread crumbs by tipping
them out or wiping them away with
a slightly damp cloth or clean pastry
brush.
Before the appliance is packed away
for storage, ensure that it has com-
pletely cooled down, is clean and
dry, and the lid is closed.
Surfaces in contact with food should be
cleaned regularly to avoid cross contam-
ination from different types of food, the
use of warm clean water with a mild
detergent is advisable when dealing
with surfaces that come into contact
with food.
Correct food hygiene practises should
always be followed at all times to avoid
possibility of food poisoning /cross con-
tamination.
TROUBLESHOOTING
Problem
Possible
Cause
Possible
Solution
The crust
is too
The bread
has been
Remove the
bread from
thick.
kept warm
for too
long, and it
has dried
out.
the bread
pan shortly
after the
end of
baking
time.
The in-
gredients
are not
evenly
mixed
and/or
baked
properly.
Incorrect
programm
e selected
Select the
correct
program.
The dough
is too thick
to be
kneaded
properly.
Add
sufficient
water.
The mo-
tor makes
sound but
the dough
is not
being
kneaded.
The bread
pan has
not been
fitted
properly,
or the
dough is
too stiff to
be knead-
ed.
Check that
the bread
pan has
been fitted
properly.
Always take
care when
weighing
out the
ingredients
for the
dough.
The bread
is too
small.
No yeast or
the yeast
is not
working
properly.
Make sure
that the
conditions
are right for
the yeast.
The
dough
rises
above the
bread
pan.
Too much
yeast
and/or
water
added
Reduce the
quantity of
moisture
and/or
yeast.
The bread
collapses
while it is
baking.
Too much
water or
yeast
makes the
dough too
soft and
weak.
Reduce the
quantity of
moisture
and/or
yeast.
When
cutting
the
bread,
the centre
is found
to be
hollow.
Too much
water
and/or
yeast add-
ed, no salt
added
Reduce the
quantity of
moisture
and/or
yeast, and
add more
salt.
Powder
remains
in the
bread
pan.
Too little
water
added
Add more
water.
The dis-
play
shows
“E00” or
“E01”.
The tem-
perature in
the appli-
ance is too
low or too
high to
meet the
working
Switch off
the appli-
ance and
open the lid
to remove
the bread
pan. Allow
the appli-

12
tempera-
ture of the
selected
program.
ance to
return to
the room
tempera-
ture. Insert
the bread
pan and
close the
lid. Switch
on the
appliance
again and if
this error
still exists,
please
contact the
after-sales
service.
The dis-
play
shows
“EEE” and
you hear
continu-
ous
beeps.
The tem-
perature
sensor is
open cir-
cuit.
Contact the
after-sales
service.
The dis-
play
shows
“HHH”
and you
hear
continu-
ous
beeps.
The tem-
perature
sensor is
short cir-
cuit.
Contact the
after-sales
service.
Specifacation
Power: 650 W
Rated Voltage: 220-240 V
Rated Frequency: 50 Hz
Rated Current: 3 А
Net weight: 4.20 kg
Gross weight: 4.65 kg
Set
BREAD MAKER 1
INSTRUCTION MANUAL WITH
WARRANTY BOOK 1
MEASURING CUP 1
MEASURING SPOON 1
HOOK 1
PACKAGE 1
ENVIRONMENT FRIENDLY DISPOSAL
You can help protect the
environment!
Please remember to respect
the local regulations: hand in
the non-working electrical
equipment to an appropriate
waste disposal center.
The manufacturer reserves the right
to change the specification and
design of goods.
RU
ХЛЕБОПЕЧКА
Уважаемый покупатель!
Поздравляем Вас с приобретением
изделия торговой марки “Saturn”.
Уверены, что наши изделия будут
верными и надежными помощни-
ками в Вашем домашнем хозяй-
стве.
Не подвергайте устройство резким
перепадам температур. Резкая
смена температуры (например,
внесение устройства с мороза в
теплое помещение) может вы-
звать конденсацию влаги внутри
устройства и нарушить его работо-
способность при включении.
Устройство должно отстояться в
теплом помещении не менее 1,5
часов.
Ввод устройства в эксплуатацию
после транспортировки произво-
дить не ранее, чем через 1,5 часа
после внесения его в помещение.
МЕРЫ ПРЕДОСТОРОЖНОСТИ
При использовании электрических
приборов необходимо всегда соблю-
дать основные меры безопасности, а
именно:
1. Прочитайте всю инструкцию перед
эксплуатацией.
2. Перед использованием убедитесь,
что технические характеристики Ва-
шей сети совпадают с характеристи-
ками, указанными производителем.
Прибор следует включать только в
заземленную розетку.
3. Не прикасайтесь к горячим поверх-
ностям прибора. При эксплуатации
устройства пользуйтесь прихватками.
Перед очисткой устройства подожди-
те, пока оно остынет.
4. Отключайте хлебопечь от сети,
когда не пользуетесь устройством или
чистите его. Прежде чем устанавли-
вать или снимать детали, подождите,
пока устройство остынет.
5. Не погружайте устройство в воду
или другую жидкость.
6. Необходим тщательный контроль,
когда во время работы устройства
рядом находятся дети.
7. Данный прибор не предназначен
для использования лицами с ограни-
ченными физическими, чувствитель-
ными или умственными способностя-
ми, а также лицами, не имеющими

13
опыта и знаний, если они не находят-
ся под наблюдением или не получили
инструкции по использованию прибо-
ра от лица, ответственного за их без-
опасность. Не рекомендуется исполь-
зовать прибор детям в возрасте до 14
лет.
8. Следите, чтобы шнур питания не
свисал с края стола и не касался ост-
рых углов и горячих поверхностей. Не
ставьте какие-либо предметы на шнур
питания.
9. Запрещается использовать устрой-
ство, если его комплектующие детали
(сетевой шнур, штепсельная вилка и
пр.) повреждены. Не пытайтесь ре-
монтировать устройство самостоя-
тельно. Обратитесь в ближайший
авторизованный сервисный центр для
квалифицированного осмотра и ре-
монта.
10. Избегайте контакта с подвижными
деталями устройства.
11. Использование дополнительных
принадлежностей, не рекомендован-
ных производителем устройства,
может привести к травмам.
12. Не пользуйтесь хлебопечью вне
помещения. Данное устройство пред-
назначено только для использования
в быту.
13. Следите, чтобы шнур питания не
прикасался к горячим поверхностям.
Не накрывайте хлебопечь и не
кладите легковоспламеняющиеся
материалы на ее поверхность.
14. Не ставьте устройство на горячую
газовую плиту, электрическую плиту,
в нагретую духовку или рядом с ни-
ми.
15. Размещайте хлебопечь на расстоя-
нии 5 см от стены или других предме-
тов.
16. При включении или выключении,
будьте осторожны, не прикасайтесь к
контактам штепсельной вилки.
- Срок службы – 5 лет.
- До введения в эксплуатацию срок
хранения неограничен.
11
12
13
1. Смотровое окошко
2. Замешивающие лопа-
сти
3. Поддон для хлеба
4. Ручка поддона для
хлеба
5. Вал привода
6. Камера для выпекания
7. Дисплей
8. Панель управления
9. Воздуховыпускные от-
верстия
10. Нагревательные эле-
менты
11. Мерный стакан
12. Мерная ложка
13. Крючок

14
Панель управления
Дисплей
Таймер
Предварительный
нагрев
Замешивание
Пауза
Светлый
Средний
Темный
Быстрый
Завершение
Подход теста
Выпекание
Подогрев
На окошке дисплея отображается
выбранный вес, номер програм-
мы меню, время до окончания
программы, выбранный цвет
поджаривания корочки, цикл
процедуры приготовления
(Preheat Предварительный
нагрев, Knead Замешивание, Rest
Пауза, Rise Подход теста, Bake
Выпекание, Warm Подогрев и
End Завершение) и коды ошибок.

15
Кнопки
Кнопка используется для
выбора программы от 1
до 13.
Для выбора основной
программы нажмите эту
кнопку.
Эта кнопка размера бу-
ханки используется при
выборе небольшого
(500г), среднего (750 г)
или большого (1000 г)
размера буханки (только
определенные програм-
мы).
Эта кнопка цвета корочки
используется для выбора
нужного цвета обжарива-
ния корочки (уровень
обжаривания). На выбор
три опции: Light Светлый,
Medium Средний, Dark
Темный и Rapid browning
Быстрое обжаривание.
Кнопка Start/Stop
(Старт/Стоп) использует-
ся для запуска и оста-
новки выбранной про-
граммы.
Чтобы запустить про-
грамму, нажмите на эту
кнопку –послышится
звуковой сигнал. На дис-
плее будут мигать две
точки (:). Программа
запустится.
Чтобы остановить про-
грамму, нажимайте на эту
кнопку в течение 2 се-
кунд – послышится зву-
ковой сигнал, указываю-
щий, что программа вы-
ключена.
/
Чтобы выбрать нужное
время включения хле-
бопечки (до 15 часов)
(15:00), можно исполь-
зовать эти две кнопки.
Время устанавливается
с шагом в 10 минут
ПЕРЕД ПЕРВЫМ
ИСПОЛЬЗОВАНИЕМ
Распакуйте хлебопечку и снимите все
упаковочные материалы.
Вымойте поддон для хлеба, замеши-
вающие лопасти, мерный стакан, лож-
ку и крючок в теплой мыльной воде.
Ополосните и тщательно высушите.
ЭКСПЛУАТАЦИЯ
1. Установите хлебопечку на
сухую, ровную и устойчивую по-
верхность.
2. Откройте крышку и поднимите
поддон для хлеба с помощью руч-
ки.
Важно, чтобы поддон для хлеба
наполнялся ингредиентами вне хлебо-
печки таким образом, чтобы случай-
ное проливание не привело к возго-
ранию от нагревательных элементов.
3. Прикрепите замешивающую
лопасть к приводному валу.
Установите замешивающую лопасть на
приводной вал и нажмите на нее.
4. Измерение ингредиентов.
Очень важно измерять должным обра-
зом все жидкие и сухие ингредиенты,
в противном случае это может приве-
сти к плохим результатам выпечки.
Также добавляйте ингредиенты в
поддон для хлеба в том порядке, в
котором они приведены в каждом
рецепте.
Все жидкости должны измеряться с
помощью мерного стакана или ложки
(входит в комплект). Уровень мерного
стакана определяется на глаз.
Измерение сухих ингредиентов долж-
но выполняться аккуратно в мерном
стакане, после наполнения уровень
следует выровнять. Не добавляйте
больше, чем требуется и не утрамбо-
вывайте плотно ингредиенты, так как
это повлияет на рецепт.
При измерении
небольших коли-
честв сухих или
жидких ингреди-
ентов, используй-
те мерную ложку,
которая идет в
комплекте. Изме-
рения должны
быть не с горкой,
так как это может
повлиять на
рецепт.
5. Поместите ингредиенты в под-
дон для хлеба.
Убедитесь, что ингредиенты помеще-
ны в поддон для хлеба в точном по-
рядке, указанном в рецепте, напри-
мер:
Жидкие ингредиенты должны иметь
комнатную температуру, или как ука-
зано в рецепте.

16
Сухие ингредиенты. Медленно добав-
ляйте муку и убедитесь, что она рав-
номерно распределяется по жидкости.
Если быстро насыпать ингредиенты,
мука может впитать жидкость и по-
влиять на дрожжи. Особенно это важ-
но, если вы используете функцию
таймера задержки.
Дрожжи.
Дрожжи должны храниться отдельно
от влажных ингредиентов и соли, так
как жидкие ингредиенты будут преж-
девременно активировать дрожжи.
Сделайте пальцем небольшое углуб-
ление в муке и добавьте туда дрожжи.
Следите за тем, чтобы
дрожжи не касались жидкости или
соли. Убедитесь, что дрожжи свежие -
проверьте срок годности.
Убедитесь, что ингредиенты имеют
комнатную температуру. Вода должна
быть холодной (если в рецептах не
указано другое).
6. Вставьте поддон для хлеба в
емкость для выпекания.
Нажимайте на край, пока поддон не
станет на место.
7. Закройте крышку и включите
прибор в розетку.
Прибор подаст звуковой сигнал и на
дисплее появится первое меню и
стандартное время.
8. Повторно нажимайте кнопку
меню
,чтобы выбрать нужную
программу.
При каждом нажатии этой кнопки,
хлебопечка подаст звуковой сигнал и
на дисплее появится номер программы
(от 1 до 13).

17
Описание программ
Программа
Общее время программы
Светлый
Средний
Темный
Быстрый
500г
750г
1000г
500г
750г
1000г
500г
750г
1000г
500г
750г
1000г
1 Основной
хлеб
Для белого хлеба и
хлеба с отрубями, а
также для хлеба,
содержащего травы
и изюм.
3:25
3:30
3:35
3:25
3:30
3:35
3:25
3:30
3:35
2:14
2:19
2:24
2 Французский хлеб
Для хлеба с легким
весом, такого как
французский хлеб,
который имеет
хрустящую корочку
и легкую структуру.
Время приготовле-
ния – больше.
4:10
4:15
4:20
4:10
4:15
4:20
4:10
4:15
4:20
2:35
2:40
2:45
3 Цельнозерновой хлеб
Для приготовления
хлеба, содержащего
значительное коли-
чество цельнозер-
новой пшеницы. Эта
программа занимает
больше времени
предварительного
нагрева, чтобы дать
зерну впитать воду и
расширяться. Не
рекомендуется
использовать тай-
мер задержки, так
как это может
привести к плохим
результатам.
4:05
4:10
4:15
4:05
4:10
4:15
4:05
4:10
4:15
2:35
2:40
2:45
4.
Низкоуглеводный
хлеб
3:10
3:15
3:20
3:10
3:15
3:20
3:10
3:15
3:20
2:42
2:47
2:52

18
5. Экспресс 750 г. (1:20)
Для 750 г. белого хлеба с уменьшенным периодом приготовления. Хлеб,
приготовленный по этой программе, может быть меньше по весу с более
влажной структурой.
6. Экспресс 1000 г. II (1:55)
Для 1000 г. белого хлеба с уменьшенным периодом приготовления. Хлеб,
приготовленный по этой программе, может быть меньше по весу с более
влажной структурой.
7. Быстрое выпекание (2:10)
Для белого хлеба с коротким временем приготовления. Хлеб, приготов-
ленный по этой программе, обычно меньше по весу, с плотной структурой.
8. Европейский (3:25)
Хлеб европейского типа, типа фокачча и хлеб из грубой непросеянной
ржаной муки с изюмом.
9. Тесто (1:30)
Эта программа приготавливает только тесто и не выпекает окончательный
хлеб. Извлеките тесто и наполните форму, чтобы сделать булочки, пиццу и
т.д.
10. Без глютена (2:45)
Для хлеба, который содержит безглютеновую муку. Эта программа имеет
более длительное время подхода.
11. Джем (1:05)
Для приготовления джема из свежих фруктов.
12. Выпекание (1:00)
Эта программа только для выпекания и может использоваться для увели-
чения времени выпекания выбранной программы. Это особенно полезно
для приготовления джема.
13. Любимый хлеб (3:25)
Эта программа позволяет создать собственный рецепт приготовления
хлеба.

19
9. Чтобы выбрать цвет корочки,
повторно нажимайте кнопку цвета
обжаривания .
В хлебопечке по умолчанию установ-
лен средний цвет обжаривания.
10. Чтобы выбрать размер бухан-
ки 500 г, 750 г. и 1000 г., повторно
нажимайте кнопку .
В хлебопечке по умолчанию установ-
лена масса 1000 г.
11. Для включения времени
задержки, выберите время в раз-
деле “Использование Таймера”.
Пропустите этот шаг, если вы хотите,
чтобы хлебопечка приступила к рабо-
те немедленно.
12. Для запуска выбранной
программы нажмите кнопку
Старт/стоп .
На дисплее будет мигать двоеточие
(:). На дисплее отобразится обратный
отсчет оставшегося времени до окон-
чания программы.
13. Хлебопечка автоматически
будет выполнять каждый шаг
процесса приготовления хлеба.
Во время приготовления хлеба из
вентиляционных отверстий будет
выходит пар. Это нормальное явле-
ние.
14. По окончании программы
вы услышите 10 звуковых сигна-
лов и на дисплее отобразится
“0:00”.
15. Чтобы выключить хлебопечку
нажмите и удерживайте 2 секун-
ды кнопку Старт/стоп.
Если вы не выключите хлебопечку,
включится функция поддержания
тепла. Хлеб будет автоматически под-
держиваться в теплом состоянии в
течение 60 минут (за исключением
программ «Тесто» и «Джем»), после
чего прибор выключится.
Для получения лучших результа-
тов, рекомендуется вынимать хлеб
сразу после приготовления.
16. После использования отклю-
чите устройство от сети.
17. Откройте крышку и с помощью
кухонных рукавиц извлеките под-
дон для хлеба.
Помните, что поддон для хлеба и
хлеб очень горячие!
Не кладите хлеб на скатерть, пласти-
ковую поверхность или другие чув-
ствительные к теплу поверхности.
18. Переверните поддон для хлеба
и аккуратно вытряхните хлеб на
решетку.
19. Оставьте хлеб остывать.
Иногда замешивающая лопасть может
оставаться в хлебе. Если это случи-
лось, дайте хлебу остыть, а затем с
помощью крючка, который идет в
комплекте, извлеките лопасть из ос-
нования хлеба. Будьте осторожны, так
как замешивающая лопасть очень
горячая.
Перед нарезкой хлеба извлекайте
замешивающие лопасти.
20. Нарезка и хранение хлеба.
Для нарезки ровными кусочками ис-
пользуйте электрический нож или
острый нож с зубчатым лезвием.
Так как в домашнем хлебе не содер-
жится консервантов, хлеб нужно
съесть в течение 2-3 дней после вы-
печки. Если вы не съедите его сразу,
заверните в фольгу или положите в
полиэтиленовый пакет.
• Хрустящий хлеб типа французской
булки при хранении смягчается, по-
этому его рекомендуется не накрывать
перед нарезкой.
• Если вы хотите заморозить свой
хлеб для более длительного хранения,
положите нарезанный хлеб в плотно
закрытом контейнере в морозильную
камеру.
Table of contents
Languages:
Other Saturn Bread Maker manuals

Saturn
Saturn ST-EC0130 User manual

Saturn
Saturn ST-EC0131 User manual

Saturn
Saturn ST-EC8770 User manual

Saturn
Saturn ST-EC0129 User manual

Saturn
Saturn ST-EC0127 User manual

Saturn
Saturn ST-EC7774 User manual

Saturn
Saturn ST-EC 1775 User manual

Saturn
Saturn ST-EC0130 User manual

Saturn
Saturn ST-EC0125 User manual

Saturn
Saturn ST-EC0124 User manual
Popular Bread Maker manuals by other brands

AMF
AMF Straight Line Sheeter Moulder Panner Specification sheet

TEFAL
TEFAL PAIN ET TRESORS OF250 manual

West Bend
West Bend Hi-Rise L5778C instruction manual

tzs
tzs First Austria FA-5151 instruction manual

Panasonic
Panasonic SD-206 operating instructions

Panasonic
Panasonic Bread Bakery SD-253 Operating instructions & recipes