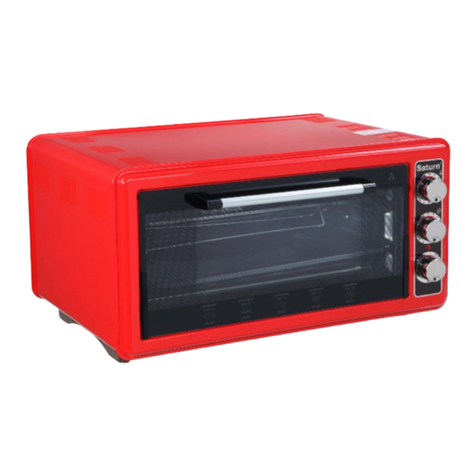
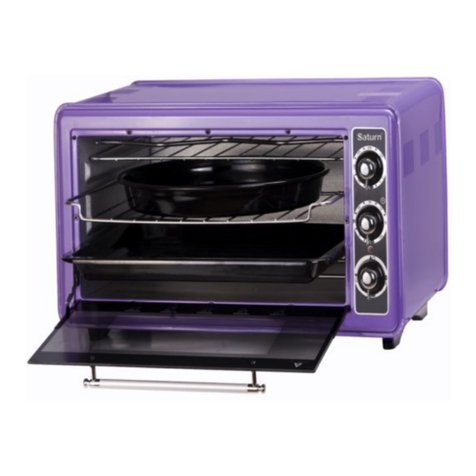
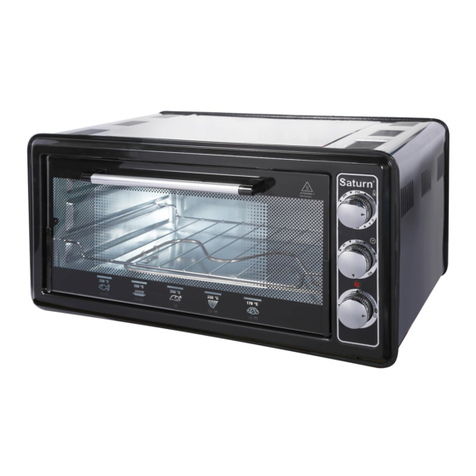
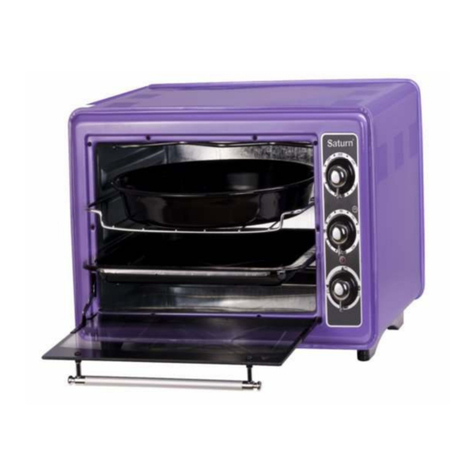
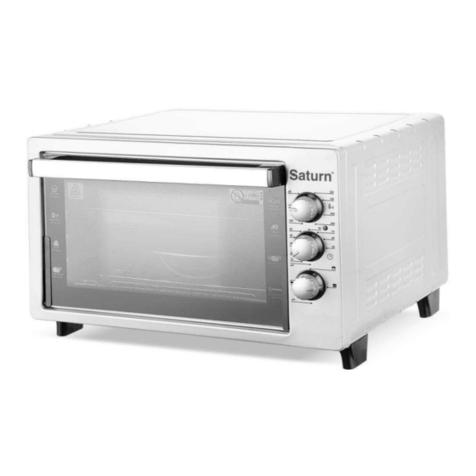
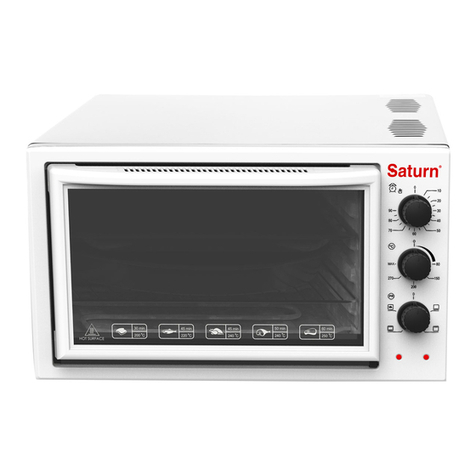
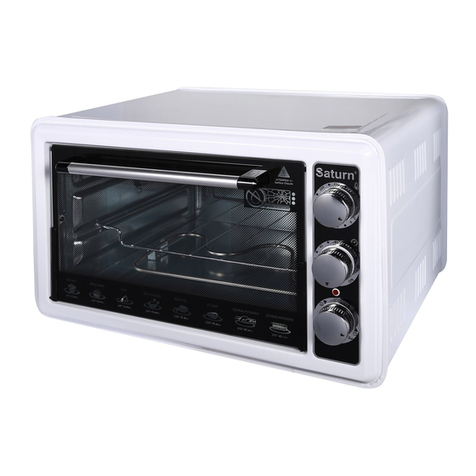
Saturn ST-EC10701 User manual


ST-EC10701
ELECTRIC OVEN


3
GB
Electric oven
Dear Buyer!
We congratulate you on having
bought the device under trade
nameЫ“Saturn”йЫWeЫareЫsureЫthatЫ
our devices will become essen-
tial and reliable assistance in
your housekeeping.
Avoid extreme temperature
changes. Rapid temperature
change (e.g. when the unit is
moved from freezing temperature
to a warm room) may cause con-
densation inside the unit and a
malfunction when it is switched
on. In this case leave the unit at
room temperature for at least 1.5
hours before switching it on.
If the unit has been in transit,
leave it indoors for at least 1.5
hours before starting operation.
DESCRIPTION OF THE OVEN AND
THE ACCESSORIES
Purpose of this manual is to enable
you to operate your electrical oven in
the most efficient manner. Before op-
erating your oven, we recommend you
to read and understand this manual
thoroughly. The oven has 2 tray posi-
tions according to your choice.
Note:
-Since operating manual covers the
general product range, some infor-
mation given in the operating manual
as a function may not be applicable for
the oven you purchased.
-The product voltage and power rating
information is written on the alumi-
num label at the back of the product.
Service life - 4 years. Before putting
into operation shelf life is unlimited.
WARNINGS
1- Usage voltage is 220-240V(-)
2- Use 16 A fuse with your oven.
3- The power cable is equipped
with a grounded plug. Always make
sure that the plug is inserted into a
grounded socket.
4- Before using your oven for
the first time, isolation materials and
heating components shall give off an
odor. For this reason, operate your
oven empty for 30 minutes for the
first time and then ventilate the room.
5- This oven has been designed
for cooking food. It must not be used
for other purposes.
6- Always make sure that your
oven's cable is away from any heated
components. Never let the power ca-
ble to contact with hot parts.
7- Make sure that the oven is at
least 10cm away from the wall at back
and sides during the operation.
8- The door or outer surfaces
may get hot when the appliance is
operating.
9- Place your oven on a smooth
surface and do not place any covers,
vases etc. upon it.
10- Wash all the accessories
thoroughly before use.
11- When the oven door is open,
do not apply excessive force with
heavy objects and never place hot
pans, tray etc. just taken out of the
oven.
12- Do not move your oven im-
mediately after using it. Wait for the
oven to cool down.
13- Never operate your oven in
wet, moist our combustible environ-
ments.
14- Never drip water upon or hit
a hot glass.
15- Do not use the equipment if a
crack occurs on the surface of the
plate.
16- If the supply cord is dam-
aged, it must be replaced by the man-
ufacturer of its service agent or a
similarly qualified person in order to
avoid a hazard.
17- Please do not mount the plug
of the equipment just below the out-
let.
18- The appliance is not to be
used by children or persons with re-
duced physical, sensory or mental
capabilities, or lack of experience and
knowledge, unless they have been
given supervision or instruction.
19- Children must be supervised
not to play with the appliance.
20- This appliance can be used by
children aged 8 years and above and
persons with reduced physical, senso-
ry or mental capabilities or lack of
experience and knowledge if they
have been given supervision or in-
struction concerning use of the appli-
ance in a safe way and understand the
hazards involved. Children shall not
play with the appliance. Cleaning and
user maintenance shall not be made
by children without supervision.
21- If the product is covered or
positioned wrongly, there might be a
fire hazard, therefore do not use a
product that makes use of an auto-
matically managing programmer, a
timer or any other mechanism.
22- The oven is not intended to
be operated by means of an external

4
timer or separate remote control sys-
tem.
23- This oven is intended to be
used in household and staff kitchen
areas, in shops, offices and other
working environments; farm houses;
by clients in hotels, motels and other
residential type environments; bed-
and-breakfast type environments.
For repair: Please consult the author-
ized service if you have any problems
with your oven. Failures to arise from
intervention of unauthorized person
and misuse are not under warranty. In
such cases, the warranty of product
becomes invalid even if the warranty
period does not expire.
SOME INFORMATIVE POINTS TO CARRY
AND TRANSFER THE APPLIANCE
1- Before moving your oven to
another place within the kitchen, al-
ways disconnect the power cord from
electric outlet.
2- Transport your equipment
always within the original package and
foam. If the package is not available,
you may use package and foam that
provide equivalent protection.
THE USE OF CONTROL BUTTONS
ON/OFF AND TIMER KNOB
To switch the oven on and to set the
cooking time, turn the knob clockwise
to the desired time (max.90 minutes).
A bell will ring when the set time has
elapsed, and the oven will automati-
cally switch itself off. To switch the
oven off turn the timer knob the posi-
tion If the cooking time is longer
than 90 min, or independently from
the timer, then set the timer to manu-
al position by rotating counter-
clockwise set the timer or the heating
elements control button “•“Ы positionзЫ
in order to switch the appliance off.
THERMOSTAT KNOB
This knob is for selecting a desired
temperature.
FUNCTION SELECTOR KNOB
This knob is for selecting from the
available cooking functions, as follows:
Frying (top heating element)
Cooking (bottom heating element)
Cooking-Frying (top heating ele-
ment, bottom heating element)
Grill-Chicken Roasting (chicken
skewer)
Turn the knob toЫЭ•“Ыposition to switch
off the oven.
Note: The heating elements are not
switched on, unless the heating ele-
ment control button and the oven,
while it is in function.
TURBO FAN
When you turn oven heater command
button to position, turbo fan mo-
tor operates along with lower and up-
per resistances.
Benefits of Turbo Cooking
1- Heating products such as
cake and pastry homogenously, it en-
sures a delicious cooking.
2- For defrost process, it is nec-
essary to turn the oven button to
position while thermostat button is off
and timer button is on.
USE OF DIGITAL CLOCK
Cooking with the oven and regulate
the cooking time; Press the Menu
touch of the digital clock once, to acti-
vate the minute part. Use the touch +
and - to put at the wanted mi-
nute...Press one more time the Menu
touch, to activate the part for the sec-
ond. Use the touch + and - to put at
the wanted second. After the regula-
tion of the time, press the Menu
touch. The digital clock and the oven
will start to work at the same time. At
the end of the time, the clock will
make a sound to inform you.

5
NEON LIGHT
Light indicates that oven is operating.
(In cases when Timer, Thermostat and
position switch are on). If light flashes
and the oven heats, then ensure your
oven to operate by turning position
selector switch to an appropriate posi-
tion. When light reaches the appropri-
ate heat degree, it will automatically
turn off and indicate that internal
temperature of the oven is at the
temperature selected.
OPERATING OF HOTPLATE
For every position as shown in the
scheme,
(1000 + 1000 watt, 1000+1500 Watt)
the signaling light will be on while 1 2
3 phase while your hotplate is on.
Please observe to use smooth bottom
of saucepan pots to get better solution
and same diameter pans with hot-
plate. Do not put wet bottom pans and
pots on a hotplate.
Do not touch your appliance with wet
hand or fabric.
CHICKEN GRILLING
To grill chicken, settle the tray into the
bottom of the oven after fixing appa-
ratus on.
Tight the screws after setting chicken
to the spit. Sharp tip of spit is being
put into side hole and the other tip to
the spit apparatus. Pour 2 glasses of
water onto the tray.
Turn the function selector knob to
grilling position.
TurnЫ theЫ thermostatЫ knobЫ toЫ “maxЭ.
Turn the timer to the desired time.
When the cooking is complete, manu-
ally turn the timer knob to Э•“position.

6
OVEN LIGHT
The oven light is always on when the
oven is on. To replace the bulb, pro-
ceed as follows:
Unplug the appliance from the mains.
Turn the safety glass anticlockwise
and remove it.
Turn the bulb anti clockwise and re-
move it.
Replace the new bulb turning it
clockwise.
Replace the safety glass turning it
clockwise.
Note: The bulb must be max.
15W 220-нплVгЫдзЫ280 °ю.
You can control big or small hotplates
by top rotary knob and top and bot-
tom heating element of oven or small
hotplate by bottom rotary knob.
Thus you have the possibility that the
oven and big hotplate running at the
same time for these model ovens. For
other model ovens with hotplate you
have a max power by top and bottom
heating element of oven and small
hotplate running together.
Your appliance's tray positions are as
shown bellow

7
COOKING GUIDE
Note: The times do not include pre-heating period of 10 minutes.
ENERGY CONSUMPTION
Please read the recommendations
below to use the product you pur-
chased efficiently in terms of energy
consumption and energy save for your
country.
1- Choose ovens with high effi-
cient heat insulations for electrical
energy consumption.
2- Opening oven door frequently
during cooking makes the cool air en-
ter the oven and thus energy loss. For
this reason, take care of opening oven
door when required.
3- Try to cook more than one
food in the oven. You may take the
one cooking at lower temperature and
not change the temperature of the
oven and so you may consume less
energy.
4- Do not perform pre-heating in
the oven when it is not necessary. If
pre-heating is necessary, do not ex-
tend this duration more than neces-
sary.
5- Before cooking frozen food in
the oven, defrost it.
6- Do not keep flammable, com-
bustible materials around the oven.
Place the oven in areas far away from
combustible areas.
7- If you switch off the electrical
oven a few minutes ago and wait
without opening the oven door, food
continues to cook with existing tem-
perature and you may save energy.
SERVICE AND CLEANING
Warning: Before cleaning and ser-
vice, take out the plug of your oven.
-Cleaning materials: Before using
cleaning materials on your oven,
check that they are suitable and
whether the manufacturer recom-
mends or not. Do not use caustic
creams that damage surfaces, abra-
sive cleaning powders, hard wire wool
or hard items.
-Inside of oven: Cleaning of enamel
interior part must be done when it is
warm. Wipe the oven with a soft cloth
soaked in warm soap water. It may be
necessary to clean thoroughly using
liquid cleaning material from time to
time.
Note: Do not clean the oven door
when glass panels are hot. In the
event of not taking this measure,
glass panel may break.
-Accessories (tray, grill): Put ac-
cessories in water with detergent after
use. Remaining dirt can be removed
with a brush or cleaning sponge easi-
ly.
SPECIFICATIOS:
Power: 1300-1420 W
Voltage: 220-240 V
Frequency: 50 Hz
Current: 6.4 A
Capacity: 36 L
Net weight: 7.26 kg
Gross weight: 8.20 kg
SET
ELECTRIC OVEN 1
INSTRUCTION MANUAL
WITH WARRANTY BOOK 1
PACKAGE 1

8
ENVIRONMENT FRIENDLY DISPOSAL
You can help protect the
environment! Please
remember to respect the
local regulations: hand
in the non-working elec-
trical equipment to an
appropriate waste dis-
posal center.
The manufacturer reserves the
right to change the specification
and design of goods.
RU
Ы
ЫЬ
ЫЫЫи
Ы Ы Ы Ы
“Saturn”йЫ Ы зЫ Ы Ы
Ы Ы Ы Ы
Ы Ы Ы и
ЫЫй
и
й и
ги
з и
д
й
мзр й и
з мзр
й
ЫЫЫ
Ы Ы Ы Ы и
Ы Ы Ы
Ы Ы Ы
Ы зЫ
ЫЫй
Ы Ы Ы Ы
Ы Ы Ы Ы
ЫЫйЫЫи
Ы Ы Ы Ы Ы
Ы Ы Ы Ы
ЫЫЫй
:
,
,
и
Ы Ы Ы и
зЫ Ы Ы Ы Ы
й
и
.
Ы - пЫйЫЫЫЫ
Ы Ы Ы и
й
1. Ы Ы ннл-
нплг~д
2. Ы Ы и
Ы Ы мс-
Ый
3. Ы Ы и
Ы Ы Ы Ы йЫ Ы
Ы Ы Ы Ы и
зЫ Ы Ы Ы и
Ый
4. Ы Ы Ы и
ЫЫЫ зЫЫЫ
Ы Ы Ы Ы
Ы Ы Ы
Ы йЫ зЫ Ы
ЫЫзЫЫЫ
Ы Ы Ы Ы Ы
Ы Ы Ы Ы олЫ и
зЫЫй
5. Ы Ы и
ЫЫЫйЫЫЫ
Ы Ы зЫ Ы Ы и
й
6. Ы Ы Ы
Ы Ы Ы Ы Ы и
зЫ Ы Ы Ы
ЫЫй
7. Ы Ы Ы Ы и
Ы Ы Ы Ы Ы
Ы Ы Ы Ы Ы
млй
8. ЫЫЫЫЫ
ЫЫЫЫЫ
й
9. Ы Ы
зЫЫЫЫи
йЫ Ы Ы зЫ
ЫЫЫЫЫййЫи
й
10. Ы Ы
ЫЫй
11. Ы Ы Ы
Ы Ы Ы
Ы зЫ зЫ и
ЫзЫЫЫйй
12. ЫЫ Ы
Ы Ы Ы зЫ и
Ы Ы Ы Ы и
й
13. Ы Ы
зЫ Ы Ы
й
14. Ы Ы
ЫЫЫй
15. Ы Ы
Ы Ы Ы Ы
Ый
16. Ы ЫЫ и
Ы зЫ Ы зЫ Ы Ы
Ы Ы Ы Ы и
Ы зЫ Ы и

9
Ы -зЫ и
Ы Ы Ы
Ы Ы Ы и
Ый
17. Ы Ы Ы
ЫзЫЫЫи
ЫЫ.
18.Ы Ы и
Ы Ы Ы Ы Ы
Ы Ы Ы и
Ы Ы г Ы
Ы дзЫ Ы Ы зЫ Ы
Ы Ы Ы
ЫЫ.
19.Ы Ы
ЫЫЫЫЫ
й
20. Ы Ы Ы
ЫЫгЫЫЫ
дЫ Ы Ы и
зЫЫЫЫ
зЫ Ы ЫзЫ Ы
Ы Ы Ы
Ы зЫЫ Ы Ы Ы и
Ы Ы Ы Ы и
зЫЫЫЫзЫ
Ы ЫЫ Ы и
Ы Ы Ы и
Ый
ЫзЫЫЫЫи
ЫЫй
21.Ы Ы Ы Ы и
ЫЫз
Ы Ы Ы Ы
Ы Ы Ы и
Ы Ы зЫ
ЫЫЫи
Ый
22.Ы Ы и
Ы Ы Ы Ы Ы Ы
Ы Ы Ы и
Ый
23. Ы
Ы Ы Ы Ы
зЫ зЫ Ы Ы и
Ы Ы , Ы Ы Ы
Ы Ы зЫ
Ы Ы и
Ый
зЫ Ы Ы и
Ы Ы Ы
Ы
1. Ы Ы
ЫЫЫЫ
Ы зЫ зЫ Ы и
Ы - ЫЫ
Ый
2. Ы Ы
Ы Ы Ы Ы зЫ
Ы Ы Ы и
Ы Ы Ы Ы и
з Ы Ы йЫ Ы
Ы Ы Ы зЫ
Ы Ы и
Ы ЫЫ Ы Ы и
ЫЫЫи
й
Ы Ы Ы
й
Ы Ы Ы Ы
ЫЫ хЫ
Ы Ы Ы
Ы Ы Ы
Ы Ы Ы и
Ы Ы гйЫ
флдйЫЫЫи
Ы зЫ Ы Ы Ы
Ы Ы и
йЫ Ы Ы Ы
Ы Ы зЫ и
ЫЫЫ
Ы Ы Ы Ы флЫ Ы
Ы Ы Ы Ы Ы
зЫ Ы Ы и
Ы Ы Ы Ы .
Ы зЫ Ы Ы Ы
Ы Ы Ы Ы
«Ы•Ы»
Ы Ы Ы
Ый
ЫЫ
:
(Ы)
( )
- (
)
-, ()
Э•“ –

10
ЫЫ
Ы и
Ы Ы Ы Ы
Ы Ы Ы и
й
:
1. Ы Ы
ЫзЫЫЫ
ЫЫЫЫ й
2- Ы Ы Ы
Ы Ы зЫ
ЫЫЫЫ
Ы зЫ Ы Ы Ы
Ы Ы Ы и
, Ы Ы Ы Ы Ы
й
Ы
Ы Ы Ы Ы Ы
, ЫЫЫи
Ы «menu»Ы и
ЫЫЫй
Ы Ы Ы зЫ
Ы Ы Ы жЫЫ
- йЫ Ы Ы Ы Ы Ы
«menu»зЫ Ы Ы
ЫйЫЫЫ
зЫ Ы Ы
Ы жЫ Ы -. Ы Ы
Ы Ы Ы и
Ы «menu». Ы Ы и
Ы йЫ Ы Ы
ЫЫй
Ы
Ыз Ы и
Ы гЫ Ы зЫ зЫ и
Ы Ы Ы дйЫ
Ы ЫЫ Ы и
зЫ Ы Ы Ы и
Ы Ы зЫ
Ы Ы Ы
Ы Ы йЫ Ы
зЫ Ы Ы Ы Ы
Ы Ы и
ЫЫзЫЫи
й
ЫЫ
ЫЫØЫул
гд
1
450
-
ЫЫØЫмпр
гд
0
й
й
1
250
кЫ
Ы
2
750
3
1000
-
ЫЫØЫмул
гд
0
й
й
1
350
кЫ
Ы
2
1150
3
1500
-

11
мЫ Ы нЫ Ы и
Ы гмлллжмлллЫ Ы Ы
млллжмрллЫ дЫ Ы Ы Ы
Ы 0-1-2-3.
Ы Ы Ы и
Ы зЫ Ы Ы зЫ
Ы Ы Ы Ы
Ы Ы Ы Ы и
ЫЫЫЫи
Ы зЫ Ы Ы Ы и
Ы Ы Ы Ы Ы и
йЫ Ы Ы Ы и
Ы Ы Ы Ы Ы
йЫ Ы Ы и
ЫЫЫЫй
ЫЫ
ЫЫЫ ЫЫ
зЫ Ы Ы
Ы .
Ы Ы Ы й
Ы Ы Ы и
ЫйЫЫЫЫ
ЫЫЫи
ЫйЫ Ыи
Ы нЫ Ы йЫ
Ы Ы Ы
Ы Ы -.
Ы Ы Ы
«max»йЫ Ы Ы и
Ы Ы Ы Ы
йЫ Ы Ы зЫ
ЫЫЫ
«Ы•Ы»й
Ы
Ы Ы Ы Ы
Ы Ы йЫ Ы и
Ы Ы и
ЫЫ:
.
.
, и
.
,
.
: Ы Ы и
ЫЫЫй
мрЫЫннл-нплг~дзЫ280°й
Ы Ы Ы
ЫЫЫЫЫ
й

12
: ЫЫЫЫЫмл-ЫЫ
Ы.
Ы Ы Ы
ЫЫЫгЫи
Ы Ы Ы и
Ы Ы Ы дзЫ Ы
Ы Ы Ы
Ы Ы Ы
:
- Ы Ы
Ы Ы Ы и
зЫ Ы Ы и
Ы Ы и
й
- Ы Ы Ы
Ы Ы ЫзЫ Ы
Ы зЫ Ы Ы Ы
й
- Ы Ы
ЫЫЫЫ.
Ы Ы Ы Ы Ы и
ЫЫЫЫи
Ы Ы Ы
й
- Ы Ы и
ЫзЫЫ ЫЫ
йЫ Ы Ы и
Ы Ы зЫ и
ЫЫЫЫЫ
Ы й
- Ы Ы Ы
ЫЫЫЫи
зЫ Ы гдЫ Ы и
Ый
- Ы Ы и
Ы Ы Ы Ы Ы
зЫ Ы Ы Ы Ы Ы
Ы Ы и
Ы гЫ зЫ
зЫзЫЫЫййдй
- Ы Ы Ы и
Ы ЫЫЫЫи
ЫзЫЫЫи
зЫ Ы Ы Ы Ы
Ы зЫ Ы Ы Ы
ЫЫй
Ы Ы Ы и
Ы Ы Ы
йЫ Ы Ы и
зЫЫЫЫзЫЫ Ы
Ый
х Ы Ы Ы зЫ
Ы Ы и
Ы ЫйЫ
:
- Ы , Ы Ы и
Ы зЫ Ы и
Ый
- Ы Ы и
Ы Ы Ы Ы Ы и
Ый
- ЫЫЫ
зЫ Ы зЫ Ы и
ЫзЫЫЫЫ
Ы Ы зЫ
Ы Ы Ы и
Ый
Ы
(
) й
.
.

13
Ы
й
хЫ Ы Ы Ы
зЫ Ы Ы - Ы
ЫйЫ
и
и
. и
зЫ Ы
Ы Ы зЫ Ы
Ы Ы Ы Ы Ы Ыи
Ы.
Ы
ЫхЫ 1300-1420
Ых220-нплЫ
ЫхЫ рлЫ
ЫЫхЫ рзфЫ
хЫ осЫ
Ых тзнсЫ
Ых узнлЫ
Ы 1
ЫЫ
ЫЫ 1
1
ЫЫ
йЫ
Ы Ы Ы Ы
Ы Ы и
ЬЫ зЫ и
Ы Ы хЫ
Ы и
Ы Ы и
Ы Ы и
ЫЫЫй
Ы Ы Ы и
Ы Ы Ы Ы Ы
Ы Ы Ы
Ый
U
Ы
ЫЬ
ЫЫЫЫи
Ы Ы “Saturn”.
Ы зЫ Ы Ы Ы
Ы Ы Ы Ы и
Ы Ы и
.
й
гз
д и
и
й
мзр й и
и
и
з мзр
й
ЫЫЫ
Ы Ы Ы Ы Ы
Ы Ы Ы
Ы Ы Ы
зЫ Ы Ы Ы
йЫ Ы Ы Ы Ы
Ы Ы Ы Ы Ы
Ы Ы Ы Ы и
йЫ Ы Ы Ы Ы
Ы Ы Ы Ы Ы
ЫЫЫй
:
Ы зЫ Ы Ы и
ЫЫЫЫЫи
ЫЫзЫЫЫи
ЫЫЫЫЫ
Ы зЫ Ы Ы Ы Ы
Ый
Ы Ы Ы Ы
Ы Ы Ы Ы
ЫЫЫЫЫ
.
ЫЫ- пЫ. ЫЫ
Ы Ы Ы Ы
й
1. 220-нплг~д
2. ЫвЫЫ
вЫ Ы мс-Ы
.
3. Ы Ы Ы и
Ы Ы Ы Ы йЫ Ы
ЫвЫЫЫи
зЫЫЫвЫЫЫи
.
4. ЫЫЫЫ
Ы Ы зЫ Ы Ы
Ы Ы Ы Ы и
ЫЫЫвЫ
й зЫ Ы Ы зЫ
Ы Ы Ы Ы
ЫЫЫЫЫ
Ы Ы олЫ зЫ Ы
.
5. Ы Ы Ы
ЫЫйЫЫи
ЫЫЫзЫЫЫи
.
6. Ы Ы Ы
ЫЫЫЫЫи
зЫ Ы Ы Ы Ы
.

14
7. ЫЫЫЫЫ
Ы Ы Ы Ы Ы и
ЫЫЫЫмлй
8. Ы Ы Ы Ы
Ы Ы Ы Ы Ы Ы
.
9. Ы Ы Ы зЫ
Ы Ы Ы йЫ Ы и
Ы зЫ Ы Ы Ы
ЫЫЫЫ.
10. Ы Ы и
ЫЫЫ.
11. ЫЫЫЫ
Ы Ы Ы Ы и
зЫ зЫ Ы зЫ
зЫй
12. Ы Ы Ы Ы
Ы Ы Ы зЫ
Ы Ы Ы Ы и
.
13. Ы Ы Ы
зЫ Ы Ы и
Ый
14. Ы Ы
ЫЫЫй
15. Ы Ы Ы
ЫЫЫЫи
Ы.
16. Ы Ы Ы
зЫ Ы зЫ Ы Ы
ЫЫЫЫЫи
зЫ Ы Ы -
зЫ Ы и
ЫЫЫЫЫ
Ый
17. Ы Ы Ы Ы
зЫ Ы Ы Ы и
ЫЫй
18. Ы Ы
ЫЫЫЫи
ЫЫЫЫи
Ы гЫ Ы ЫдзЫ Ы и
Ы зЫ Ы Ы Ы и
ЫЫЫЫй
19. Ы Ы
Ы Ы Ы Ы Ы
й
20. Ы Ы Ы
Ы Ы гЫ Ы
Ы дЫ Ы Ы и
зЫ Ы Ы Ы
зЫЫ ЫзЫЫ
Ы Ы Ы Ы Ы
з Ы Ы Ы Ы и
Ы Ы Ы зЫ
Ы Ы Ы зЫ Ы Ы
Ы Ы Ы Ы
вЫЫЫи
й
зЫЫЫЫЫЫи
.
21. Ы Ы Ы Ы и
Ы Ы зЫ
Ы Ы Ы Ы Ы
Ы зЫ и
Ы Ы зЫ и
Ы Ы -Ы и
Ы.
22. Ы Ы
Ы Ы Ы Ы Ы
Ы Ы Ы Ы
й
23. Ы Ы
Ы Ы Ы зЫ
зЫ Ы Ы Ы Ы
зЫ Ы Ы Ы и
Ы Ы зЫ Ы Ы
ЫЫЫй
зЫ Ы Ы Ы
ЫЫ ЫЫ
Ы
1. Ы Ы Ы Ы
Ы Ы Ы Ы
зЫзЫЫЫЫ
– ’Ы Ы Ы и
.
2. Ы Ы
ЫЫЫЫзЫи
ЫЫЫЫЫ
Ы Ы зЫ Ы
Ы Ы йЫ Ы ЫЫ
Ы зЫ Ы и
Ы Ы Ы Ы Ы
Ы Ы Ы Ы
й
Ы
.
Ы Ы Ы Ы
ЫЫЫхЫ
Ы Ы Ы и
Ы Ы Ы Ы
ЫЫЫи
Ы Ы Ы гйЫ флЫ и
дй Ы Ы Ы и
зЫ Ы Ы Ы Ы и
Ы йЫ Ы Ы
Ы Ы Ы Ы зЫ

15
Ы Ы Ы и
Ы Ы Ы Ы флЫ
Ы Ы Ы Ы Ы и
Ы зЫ Ы Ы Ы
Ы Ы Ы Ы
йЫЫзЫЫЫЫ
ЫЫЫЫи
Ы«Ы•Ы».
Ы Ы Ы
Ый
Ы
Ы Ы Ы Ы
Ы:
ЫгЫд
ЫгЫд
-Ы гЫ Ы
Ыд
-зЫЫгд
"•“Ы– Ы
ЫЫ
Ы Ы Ы Ы Ы
Ы Ы Ы Ы Ы
ЫЫ.
и
:
1. Ы Ы
Ы зЫ Ы Ы Ы
ЫЫЫЫ.
2- Ы Ы Ы и
Ы Ы зЫ
Ы Ы Ы Ы Ы
Ы , ЫЫЫи
Ы Ы Ы зЫ Ы
Ы Ы Ы Ы и
.
ЫЫЫЫЫи
зЫ Ы Ы Ы Ы
«menu»Ы Ы Ы Ы
ЫЫ.
ЫЫЫзЫи
Ы Ы Ы жЫ Ы -.
Ы Ы Ы Ы Ы
«menu»зЫ Ы Ы
Ый ЫЫи
ЫзЫЫЫи
ЫжЫЫ-йЫЫЫЫ
Ы Ы Ы Ы «menu»йЫ
ЫЫЫЫйЫ
Ы Ы Ы Ы
.
Ы
Ы зЫ Ы Ы Ы гЫ
Ы зЫ зЫ Ы Ы
Ы Ы дйЫ Ы и
ЫЫЫЫзЫЫи
ЫЫ Ы Ы и
ЫЫзЫЫи
ЫЫЫЫи
йЫЫ зЫЫЫЫЫ
Ы Ы Ы
ЫЫзЫЫи
Ый
Ы
ЫЫØЫул
гд
1
450
Ы-
ЫØЫмпр
гд
0
1
250
кЫи
Ыи
2
750
3
1000
Ы-
ЫØЫмул
гд
0
1
350
кЫи
Ыи
2
1150
3
1500
Ы-
мЫ Ы нЫ Ы Ы
гмлллжмлллЫ Ы 1000+1500
дЫЫЫЫЫ

16
Ы л-1-2-ойЫ Ы Ы
Ы Ы зЫ Ы
Ы зЫ Ы Ы Ы Ы и
Ы Ы Ы Ы Ы
ЫЫЫзЫЫ
Ы Ы Ы Ы Ы
Ы Ы й Ы Ы Ы и
Ы Ы Ы Ы и
Ы йЫ Ы Ы Ы
Ы Ы Ы Ы и
.
ЫЫ
Ы Ы Ы Ы Ы Ы
з Ы и
ЫЫзЫЫЫ
Ы Ы йЫ Ы Ы Ы
Ы Ы Ы йЫ Ы
ЫЫЫЫЫЫ
Ы йЫ Ы Ы Ы
нЫ Ы йЫ Ы Ы
Ы Ы Ы Ы Ы и
Ы -йЫ Ы
Ы Ы Ы «max»йЫ Ы
ЫЫЫЫЫ
Ы йЫ Ы Ы
зЫ Ы Ы и
Ы
«Ы•Ы»й
Ы Ы Ы и
Ы Ы йЫ Ы Ы
Ы Ы Ы и
Ы:
ЫЫЫ.
ЫЫЫи
ЫЫЫЫ.
Ы ЫзЫ и
ЫЫЫ.
ЫзЫЫ
Ы.
:Ы Ы Ы
ЫЫ.
мрЫЫннл-нплг~дзЫ280°й
Ы Ы Ы Ы
ЫЫ.

17
ЫЫ
Ыи
Ы
и
Ы
Ы
Ы
и
Ы
175-200
20-25
=
1
2
175-200
20-25
=
1
2
240
30-45
=
2
3
’
180
20-30
=
1
2
225-240
45-50
=
2
2
250-270
50-60
=
2
2
200-220
30-40
=
1
2
-
Max.
55-60
IV
-
0
: ЫЫ ЫЫмл-ЫЫ
Ый
Ы Ы Ы
Ы Ы Ы гЫ Ы
ЫЫЫи
Ы Ы дзЫ Ы Ы и
Ы Ы Ы и
ЫЫх
- Ы Ы Ы Ы
Ы зЫ Ы
Ы й
- Ы Ы Ы
Ы Ы Ы Ы зЫ Ы
Ы зЫ Ы Ы
.
- ЫЫи
ЫЫЫЫйЫЫ
Ы Ы Ы Ы Ы
Ы Ы Ы Ы и
Ы Ы Ы и
.
- Ы Ы Ы
зЫ Ы Ы Ы Ы Ы
. Ы
Ы взЫЫ Ы
Ы Ы Ы Ы
Ы.
- Ы Ы Ы и
Ы вЫ Ы Ы зЫ Ы
гдЫ Ы Ы и
.
- Ы Ы Ы
Ы Ы Ы Ы зЫ Ы
Ы Ы Ы Ы Ы
Ы Ы гЫ
зЫ зЫ зЫ зЫ
дй
- Ы ЫЫ и
ЫЫЫЫЫЫи
Ы зЫ Ы Ы
зЫ Ы Ы Ы
Ы Ы зЫ и
Ы Ы Ы Ы Ы
.
Ы Ы Ы и
Ы Ы Ы Ы йЫ
ЫЫЫзЫЫЫи
ЫзЫЫЫЫи
.

18
:ЫЫЫзЫви
Ы Ы Ы Ы Ы
.
и
:
- Ы Ы Ы Ы
зЫ Ы Ы и
.
- Ы Ы Ы
ЫЫЫЫ Ы
.
- Ы Ы Ы
зЫ Ы зЫ Ы Ы
зЫЫЫЫЫЫ
Ы зЫ Ы Ы
Ы.
Ы Ы Ы
Ы Ы Ы Ы и
Ы Ы гЫ Ы дЫ Ы
.
Ы Ы
ЫЫ Ы ЫвЫ
йЫ Ы Ы Ыи
ЫЫЫ.
ЫЫЫЫЫи
Ы Ы Ы
ЫЫ.
вхЫЫЫЫи
ЫзЫЫЫЫ- Ы
Ы.
Ы Ы Ы Ы и
ЫЫЫЫЫи
ЫЫЫйЫЫи
Ы Ы зЫ Ы Ы вЫ
зЫЫЫЫЫЫ
ЫЫЫ.
Ы
ЫхЫ Ы1300-1420
ЫхЫ 220-нплЫ
ЫхЫ рлЫ
ЫЫх6з4
вхЫ осЫ
Ых тзнсЫ
Ых узнлЫ
Ы 1
ЫЫ
ЫЫ 1
1
ЫЫи
йЫ
Ы Ы Ы
Ы Ы
Ь Ы зЫ
Ы Ы
хЫ Ы
Ы Ы
Ы Ы
ЫЫй
Ы Ы Ы Ы Ы
ЫЫЫЫи
ЫЫЫй

INTERNATIONAL
MANUFACTURER’S АARRANTВ
'
MEГINÁRODNÍ ГÁRUKA
Table of contents
Other Saturn Oven manuals

Saturn
Saturn ST-EC1076 User manual

Saturn
Saturn ST-EC1079 User manual

Saturn
Saturn ST-EC1079 User manual

Saturn
Saturn ST-EC1075 User manual

Saturn
Saturn ST-EC1075 User manual

Saturn
Saturn ST-EC3803 User manual

Saturn
Saturn ST-EC1074 User manual

Saturn
Saturn ST-EC3801 User manual

Saturn
Saturn ST-EC10709 User manual

Saturn
Saturn ST-EC1070 User manual