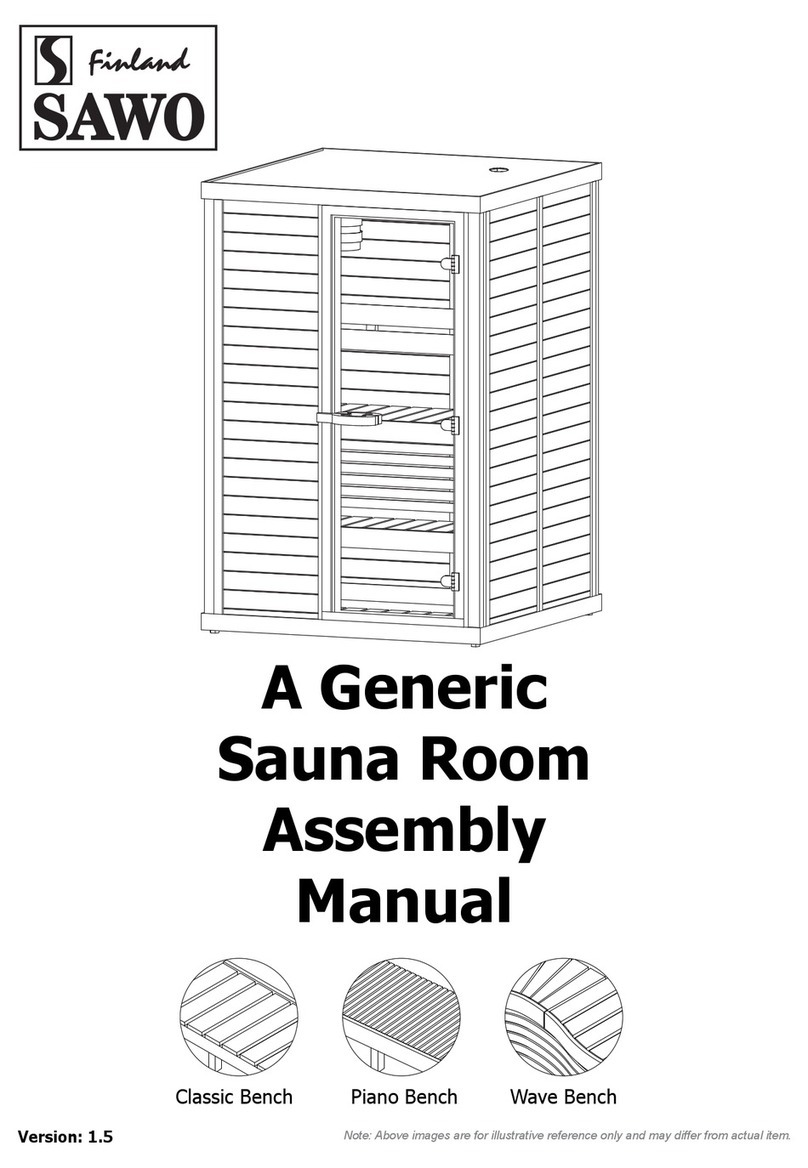
Sawo MOVABLE SAUNA LUXURY LUX-60 Manual

SAUNA SYSTEM
OPERATION & MAINTENANCE
MANUAL
MOVABLE SAUNA LUXURY LUX-60
OWNER
CLASSIC MASSAGE ENTERPRISE
33, Jalan Bukit Indah,
Taman Bukit Indah 2,
Bukit Siput,
85020 Segamat, Johor
Tel : 012-750 0969
SAUNA CONTRACTOR
SAUNA HOLM SDN BHD
Lot 27-1st & 27-2nd Floor,
Jalan LGSB 1/3, Pusat Kommercial LGSB,
Off Jalan Hospital,
47000 Sungai Buloh
Tel : 03-6142 3663

Holm-Spa
Movable Sauna Luxury Lux-60 System Warranty
THIS UNIT IS MEANT FOR INDOOR USE ONLY. WARRANTY IS VOIDED IF WHIRLPOOL SYSTEM IS
PLACED IN AN OUTDOOR ENVIRONMENT.
Limited warranty on sauna system replacement parts.
SaunaHolm warrants its products to be free of defects in material and workmanship. Parts, which become defective
within the warranty period, will be repaired except for damage due to negligence, abuse, misuse, misapplication,
unauthorized modifications, improper installation, or normal wear and tear.
SaunaHolm will not be responsible for labor incurred by its authorized service agents per pre-established takes in
removing, inspecting and reinstalling the warranty parts. SaunaHolm will not cover any labor costs attributable to
disassembly and reassembly of the unit. SaunaHolm will not be responsible for labor costs of the routine maintenance,
adjustments or alterations to the calibration of the electrical devices.
Any parts claimed to be defective must be shipped freight prepaid, to SaunaHolm and the repaired or replaced product
will be returned to the sender freight collect. When sent to SaunaHolm, the product must be accompanied by the sales
receipt or other proof of purchase date, as well as the sender’s name, mailing address, daytime telephone number and
any other information relating to the sender’s claim. This warranty applies to products produced by SaunaHolm after
June 1, 2005.
This warranty is extended only to the original purchaser and terminated upon transfer of ownership. This warranty shall
not apply to any product or component used in any industrial, rental, club or commercial purpose. This warranty shall
not apply to any claims arising from the misuse, neglect, accident, abuse, improper installation, including but not limited
to exposure to fire or to excessive heat, and other hazards of nature. Under no circumstances will the manufacturer be
liable for any special or consequential damages arising from the use of the product, components, and the parts attached,
or installed with it. Nor for injury to any person, any claims for damages arising form the use, installation or servicing of
the product. The purchaser is responsible for providing adequate access to the equipment so that any necessary service
may be performed. The purchaser must establish, by dated sales slip, invoice or deliver receipt, the date of purchase. All
costs for removing and reinstalling the sauna including the freight charges to and from customer shall be at the
customer’s expense.
Attached hereto is the warranty card, which must be completed and returned to SaunaHolm within thirty (30) days from
the date of purchase of the SaunaHolm products. Failure to return the warranty card within thirty days of purchase will
void this warranty without any further notice.
REGARDLESS OF THE WARRANTY CARD BEING RETURNED WITHIN THE SPECIFIED TIME PERIOD.
THERE SHALL BE NO WARRANTIES OR OBLIGATIONS; EXPRESS OR IMPLIED HEREUNDER,
SPECIFICALLY EXCLUDING ANY IMPLIED WARRANTY OF MERCHANTABILITY OR FITNESS FOR A
PARTICULAR PURPOSE, OTHER THAN SPECIFICALLY DESCRIBED HEREIN. NO LIABILITY SHALL
ACCURE TO SAUNAHOLM EXCEPT AS SET FORTH HEREIN.

Holm-Spa
Movable Sauna Luxury Lux-60 System Warranty
Please register your
Holm-Spa
products to receive a full warranty. Please fill out the following information and
mail the form to the following address within 30 days from the date of purchase:
SAUNA HOLM SDN. BHD.
Website: www.saunaholm.com Email:[email protected]
Showroom Add.: Lot 27-1st & 27-2nd Floor, Jalan LGSB 1/3, Pusat Komersial LGSB, Off Jalan Hospital, 47100 Sungai
Buloh
Tel: 1700-81 6353 / 03- 6142 3663
Sabah Add.: Putatan Platinum, Block A, Level 5, No.8, 882000 Kota Kinabalu.
Product
:
Movable Sauna Luxury Lux-60
Model
:
SAWO SCA-30NS (MN 3.0 kw heating element x 2)
Customer
:
Classic Massage Enterprise
Address
Project
:
:
33, Jalan Bukit Indah, Taman Bukit Indah 2, Bukit Siput, 85020 Segamat, Johor
Phone
:
012-750 0969
Dealer Name
:
Sauna Holm Sdn. Bhd
Invoice No. & Date
:
INV : 202209002 Do No : 202209002
Dated
:
6-September-2022
Warranty Period
:
12-months
Optional: Please answer the questions below for us to better serve you and to improve customer care.
What is the primary reason you purchased
Holm-Spa
product?
What was the greatest influence on your decision to purchase
Holm-Spa
product?
What magazines or publications do you subscribe to?
Where did you hear about
Holm-Spa
/ SaunaHolm?
Suggestions/Comments:


SAUNA HOLM SDN. BHD.(597698-H)
SHOWROOM: LOT 27-1ST & 27-2ND FLOOR, JALAN LGSB 1/3, PUSAT KOMMERCIAL
LGSB, OFF JALAN HOSPITAL, 47000, SUNGAI BULOH, SELANGOR MALAYSIA
TEL: 00-6-03-6273 1689, HOTLINE: 1700-816353, FAX: 03-6730 8489
SABAH: PUTATAN PLATINUM, BLOCK A, LEVEL 5, NO.8, 88200 KOTA KINABALU,
SABAH
Website: www.saunaholm.com, email: sales1689@saunaholm.com
The Construction Company for Sauna, Steam and whirlpool System (Jacuzzi). Please visit our SPA mock up
showroom with a variety of SPA concepts: Japanese Sauna, Home spa whirlpool system, Bali Spa & etc.
How to Use a Sauna
1. Leave your clothes in the dressing room. You should also have a clean set of clothes to
wear after the sauna.
2. Take a quick shower and drink a glass of water before you enter the sauna.
3. Enter the sauna and sit on the bench. You may want to use a small towel to seat on.
4. You may increase humidity of the sauna room by pouring water on the stones of the
heater. The recommended temperature in the sauna is 70 to 90 0C (158-194 0F), at most
100 0C (212 0F).
5. Leave the sauna room when you feel hot enough, or stay inside sauna not more than 15
minutes. Cool off by taking a shower or a swim or just by sitting in room temperature or
outside. Have a drink if you feel thirsty, but avoid alcohol in the sauna.
6. You may go back to the warm sauna room, taking your time to relax and enjoy the
sauna atmosphere. You can repeat the hot-cold cycle as many times as you feel
comfortable. Two rounds are usually suitable for other people.
7. After sauna, wash yourself in a shower or go for a swim.
8. Dry yourself with a towel or just by sitting in room temperature.
9. Before putting on clean clothes allow enough time for cooling off, otherwise the
sweating may still continue.
10. have a peaceful rest and a refreshing drink, and light snacks are highly recommended.
Additional Info:
1. Do not make a fast transition from hot to cold surroundings if you cannot take it.
2. Should not wear any jewelry and better to wrap up your hair with/out conditioner.
3. For beauty treatment, slimming cream and body lotion are used.
4. For frequent bathing, a moisturizing lotion should be used to avoid a dry skin.
5. Avoid alcohol and heavy meals before the sauna.
6. For those with pregnancy, high blood pressure, heart disease, severe asthmas or
other medical condition, please consult with your physician before beginning any
hyperthermia therapy program.
7. Limit time in the sauna to 15 minutes. Drink plenty of water before and after the
sauna to replace lost fluids.

SAUNA HOLM SDN. BHD.(597698-H)
SHOWROOM: LOT 27-1ST & 27-2ND FLOOR, JALAN LGSB 1/3, PUSAT KOMMERCIAL
LGSB, OFF JALAN HOSPITAL, 47000, SUNGAI BULOH, SELANGOR MALAYSIA
TEL: 00-6-03-6273 1689, HOTLINE: 1700-816353, FAX: 03-6730 8489
SABAH: PUTATAN PLATINUM, BLOCK A, LEVEL 5, NO.8, 88200 KOTA KINABALU,
SABAH
Website: www.saunaholm.com, email: sales1689@saunaholm.com
The Construction Company for Sauna, Steam and whirlpool System (Jacuzzi). Please visit our SPA mock up
showroom with a variety of SPA concepts: Japanese Sauna, Home spa whirlpool system, Bali Spa & etc.
Management’s Rules & Regulations
The Use of Sauna Room
a. Open daily from __________ to __________.
b. No reservation of the sauna is allowed. The room is to be used on first come
first serve basis. A logbook will be provided for recording the visitors.
c. Children under the age of 12 are not allowed to enter and use the sauna
without any adult’s supervision.
d. Persons using the sauna are advised to familiarize themselves with the use
of equipment, or the management will not be held responsible for any injuries,
damages or loss sustained by the tenants and their guests during the use of these
facilities.
e. Each tenant is permitted to bring in not more than 2 guests at any one time.
f. The management reserves the rights to deny access to the facilities to
anyone in an unacceptable improper behavior.
g. Tenants are requested to keep the room clean and requested to ensure that
all heaters are switched off before leaving the room.
h. The management reserves the right to add or alter or delete any rules from
time to time.
i. The management will not be responsible for any injuries or misadventures
caused by the usage of the sauna room.

KÄYTTÖOHJEET
MANUAL
SUOMI | ENGLISH
MINI HEATER
SÄHKÖKIUAS | ELECTRIC SAUNA HEATER
Ei käytössä seuraavissa maissa: USA, Kanada ja Meksiko.
Not for use in the USA, Canada and Mexico.
MN-23NB
MN-23NS
MN-30NB
MN-30NS
MN-36NB
MN-36NS
AVAILABLE AS:
• PREMIUM
• TRENLINE
• FIBERCOATED
Onnittelut loistavasta kiuasvalinnastanne!
Tutustu käyttöohjeisiin huolellisesti ennen
käyttöönottoa.
Congratulations on your purchase of
SAWO sauna heater!
Please read the manual carefully before
using the heater.
Vastukset
Heating Elements
Termostaatti
Thermostat
Ylikuumenemissuojan
palautuspainike
Reset Button Hole
Sarjanumero
Serial Number
Ajastin
Timer

SUOMI
2
KATSO OHJEISTA TÄRKEÄT
LISÄOHJEET
READ THE MANUAL FOR
ADDITIONAL IMPORTANT
INSTRUCTIONS
PEITTÄMINEN AIHEUTTAA
PALOVAARAN
COVERING THE HEATER
CAUSES FIRE HAZARD
Turvaohjeet.................................................................. 4
Käyttäjälle: .................................................................. 4
Asentajalle:.................................................................. 6
Kiukaan asentaminen................................................... 8
Kytkentäkaavio............................................................10
Tekniset tiedot.............................................................11
Ohjauskeskuksen kätisyyden muuttaminen...................12
Kiuaskivet ...................................................................14
Kivien latominen kiukaaseen.........................................14
Ohjaussäätimet ...........................................................16
Termostaatti................................................................16
Ajastin........................................................................16
Saunahuoneen lämmitys ..............................................18
Eristys ........................................................................20
Ilmanvaihto.................................................................20
Mini kiukaan varaosat: .................................................26
Häiriötilanne................................................................27
SISÄLLYSLUETTELO

ENGLISH 3
TABLE OF CONTENT
Safety instructions........................................................ 5
For user:...................................................................... 5
For technicians:............................................................ 7
Heater Installation........................................................ 9
Electrical diagram ........................................................10
Technical data .............................................................11
Repositioning of the Built-In Control Unit......................13
Heater Stones .............................................................15
Loading stones into the heater .....................................15
Control Settings...........................................................17
Thermostat .................................................................17
Timer .........................................................................17
Heating of the Sauna...................................................19
Insulation ...................................................................21
Air Ventilation..............................................................21
Mini heater spare parts:...............................................26
Malfunctions................................................................27

SUOMI
4
TURVAOHJEET
Ole hyvä ja seuraa näitä ohjeita ennen saunan käyttöä, tai kiukaan
asentamista.
Käyttäjälle:
• Tämä tuote ei sovellu henkilöille (ml. lapset), joilla ei ole aiempaa kokemusta ki-
ukaan käytöstä tai henkilöille, joilla on henkisiä tai fyysisiä rajoiteita. Kiuasta saa
käyttää ainoastaan sen käyttöön perehtynyt henkilö.
• Lapset eivät saa suorittaa puhdistamista ja käyttäjän huoltotoimenpiteitä ilman
valvontaa.
• Älä anna koskaan lasten leikkiä kiukaalla.
• Älä käytä kiuasta grillinä.
• Älä laita puita sähkökiukaalle.
• Älä peitä kiuasta. Se aiheuttaa palovaaran.
• Älä kuivata vaatteita kiukaalla. Se aiheuttaa palovaaran.
• Älä istu kiukaalla. Se on todella kuuma ja aiheuttaa palovammoja.
• Älä käytä kloorivettä (esim. Uima- tai porealtaasta) tai merivettä. Se tuhoaa kiukaan.
• Kiukaan asentamisen jälkeen kytke se toimintaan n. 30 minuutin
ajaksi. Älä ole saunan sisällä suorittaessasi ensimmäistä lämmitystä. Katso sivu 18
• Varmista ettei kiukaalla ole syttyvää materiaalia ennen ajastuksen päälle kytkemistä.

ENGLISH 5
SAFETY INSTRUCTIONS
Please take note of these safety precautions before using the sauna
or when installing the heater.
For user:
• This product is not designed to be used by persons (including children)
with limited physical or mental abilities and limited experience and
knowledge except under close supervision by a responsible person
with knowledge and experience or having been advised by such person.
• Cleaning and user maintenance shall not be made by children without
supervision.
• Under no circumstances should children be allowed to play with the device.
• Do not use the heater as a grill.
• Do not put wood of any kind on the electric heater.
• Do not cover the heater. It may cause a re.
• Do not use the heater as clothes dryer. It may cause re.
• Never sit on the heater. It is really hot and can cause serious burns.
• Do not use chlorinated water (e.g) . From the swimming pool or
jacuzzi) or seawater. It can destroy the heater.
• When installing a new heater, switch the heater on for 30mins. Do not stay inside the
sauna room while performing the operation. See page 19
• Make sure that no ammable objects have been placed on the heater before
activating the preset time function or the stand-by mode for the remote operation.

SUOMI
6
Asentajalle:
• Kiukaan kytkennän ja korjaamisen saa suorittaa vain valtuutettu sähköasentaja.
• Asentaessasi kiuasta, tarkista vaadittavat suojaetäisyydet valmistajan käyttöohjeesta.
Katso sivu 8
• Elektroniset tunnistimet ja muut sensorit tulee asentaa siten, että saunaan
tuleva raitisilma ei vaikuta niiden toimintaan. Käyttäessä erillistä ohjausta, tulee
ohjauskeskus ja ohjauspaneeli asentaa saunan ulkopuolelle.
• Jos kiuas on julkisessa käytössä ja siinä on viikkoajastin, tai jos sen voi kytkeä päälle
kauko-ohjaimella, on saunan oveen asennettava erillinen ovitunnistin, joka kytkee
pois päältä kaikki esiajastustoiminnot kun kiuas on valmiustilassa ja saunan ovi
avataan.
• Ennen kiukaan asennusta, tarkista valmistajan ilmoittamat saunan maximi ja minimi
koot. Katso sivu 11
• Varmista, että saunan ilmanvaihto on riitävä ja asianmukainen. Katso sivu 20

ENGLISH 7
For technicians:
• Wiring and repairs must be done by a certied electrician.
• Follow the Minimum Safety Distances when mounting the heater. See page 8
• The electronic sensor and electornic heating system should be mounted in a way so
that incoming air will not interfere with it. If using separate control, the controlunit
and control panel must be mounted outside the sauna cabin.
• If this sauna heater is used for public saunas or saunas that may be switched on by
a separate remote-control system, the door of the sauna room must be tted with an
interlock such that the stand-by mode setting for remote operation is disabled if the
sauna door is opened when the stand-by mode setting for remote operation is set.
• Observe the specications on volumes of the sauna cabin. See page 11
• Observe the specications on ventilation of the sauna cabin. See page 21

SUOMI
8
Kuva 1
Fig. 1
Minimum Safety Distance (mm) Telineen asentaminen
Wall Mounting Rack Installation
1900
150
1200
A
B
20
225
380
C E
D
MN-23NB
MN-30NB
MN-36NB
MN-23NS
MN-30NS
MN-36NS
100
100
100
60
60
60
20
20
20
20
20
20
100
100
100
50
50
50
140
140
140
90
90
90
155
155
155
155
155
155
A B C D E
KIUKAAN ASENTAMINEN
On suositeltavaa sijoittaa kiuas oven viereiselle seinälle. Näin oven aikaansaama ilmankierto yhdistyy
kiukaasta tulevaan höyryyn. Asennettaessa kiuasta noudata vähimmäisetäisyyksiä turvallisuussyistä
(ks. kuva 1). Noudata annettuja kuutiotilavuuksia (Katso sivu 11). Kiuasta ei saa asentaa
syvennykseen. Saunaan saa asentaa vain yhden sähkökiukaan.
Varmista että seinä, johon asennat kiinnitystelineen on tarpeeksi tukeva (esimerkiksi vahvistukset
paneelissa) tai tue seinä paksulla levyllä estääksesi kiukaan putoamisen. Kiinnitä kiukaan teline
seinään. Ruuvit (6 kpl) ovat mukana telineen asentamista varten. Ripustaaksesi kiukaan telineeseen,
nosta kiuas ja sovita kiukaan takana olevat kannattimet telineen yläosassa oleviin uriin. Kiristä
vähintään yksi sivuruuvi estääksesi kiukaan liikkuminen.
Kiuaskytkennät saa tehdä ainoastaan valtuutettu sähköasentaja turvallisuuden ja luotettavuuden
varmistamiseksi. Väärät kytkennät voivat aiheuttaa oikosulkuja ja palovaaran (Katso sivu 10
kytkentäkaavio).
Sähkökaapeli pitää yhdistää ohjausyksikön sisällä olevaan riviliittimeen kaapelikotelon läpi. Johdon
täytyy olla tyyppiä H07RN-F tai vastaava. Tehdäksesi tämän ohjausyksikkö pitää avata (ks. kuva 2A).
Ensiksi, vedä lämpötilansäätimen nuppi pois löytääksesi ruuvit, jotka pitävät suojakuorta paikoillaan.
Toiseksi, avaa nupin alta löytämäsi ruuvit sekä ohjausyksikön pohjasta (molemmilta puolilta).
Irrota suojakuori ja asenna sähkökaapeli kaapelikoteloon työntämällä se pohjassa olevan reiän läpi
(ks. kuva 2B). Asenna kaapelit tiukasti riviliittimeen. Laita suojakuori, ruuvit ja lämpötilansäätimen
nuppi takaisin paikoilleen.
Käytettäessä kiuas on erittäin kuuma. Välttääksesi kosketuksen kuuman kiukaan kanssa, on
suositeltavaa, että sen ympärille asennetaan suojakaide. Varaa ajastin- ja termostaattisäätimien
käytölle tarpeeksi tilaa (Katso sivu 16).
Vähimmäisturvaetäisyydet (mm)

ENGLISH 9
Min.20
Min.20
Min.20
HEATER INSTALLATION
It is recommended that the heater be placed on the wall nearest to the door. The air circulation
created by the door should work together with the hot air generated by the heater. For safety
and convenience, follow the minimum safety distances as provided (See Fig 1.). Follow the cubic
volumes (See page 11). Do not install the heater to the oor or wall niche. Install only one heater
in a sauna room.
Be sure to build a strong foundation for the mounting rack (e.g. cross struts in sauna paneling) or
reinforce the wall with a thick board to prevent the heater from collapsing. Attach the heater to the
wall with the aid of the mounting rack. Screws (6 pieces) are provided for fastening of the rack to
the wall. To afx the heater to the rack, lift the heater and t the nuts that are placed at the back
of the heater to the slots on both sides at the top of the rack. Lock at least one of the side screws
to prevent the heater from being accidentally moved.
A certied electrician must do the installation of the heater to ensure safety and reliability. Improper
electrical connections can cause electric shock or re. Refer to the electrical diagram See page 10.
An electrical supply cable must be connected to the terminal block inside the control unit through
the cable channel. The cable must be H07RN-F type or its equivalent. To connect the cable, the
control unit must be opened (See page 12). First, pull the temperature knob outward to uncover
the screws that hold the plastic cover. Second, remove the set of screws under the temperature
knob and at the bottom (both sides) of the control unit. Detach the front plastic cover and nally
insert the electrical supply cable into the cable channel by simply slipping it through the hole at the
bottom of the channel towards the opening at the other end (See page 12). Install the cables
tightly to the terminal block. Put back the front plastic cover, screws and temperature knob.
The heater gets very hot. To avoid the risk of accidental contact with the heater, it is recommended
that a heater guard be provided. Reserve enough space for operation of the timer and thermostat
knobs.
Kuva 2
Fig. 2
Ruuvi
Screw
Kehys
Frame
Löylynohjain
Reector
Make sure that the heat
reector shield is placed
at the back part of the
heater frame.
Varmista että löylynohjain
on asennettu kiukaan ke-
hyksen takaosaan.
Löylynohjaimen asen-
nus (valinnainen)
How to install the re-
ector (Optional)

SUOMI | ENGLISH
10
a
a
M
400V 2N~
230V 1N~
N
a1
a1 a
a1
J1
N
L1 K(230V)
PL
A3
H1
H2
B3
b0
b
b0
b
b0
b
A2
A1
PL
B2
B1
L2
NL1 NK(230V)
MN-23NB
MN-30NB
MN-36NB
400V 2N~
NL1 L2
H1
H2
230V 1N~
NL1
MN-23NS
MN-30NS
MN-36NS
(PREMIUM ONLY)
KYTKENTÄKAAVIO
Kuva 3
Fig. 3
2 VAIHE / 1 VAIHE
2 PHASE / 1 PHASE
AJASTIN
TIMER TERMOSTAATTI
THERMOSTAT
SENSORI
SENSOR
Sähkölämmityksen
ohjaus
Control of Electric
Heating in the household
(usage is optional)
Erillinen ohjausyksikkö
Separate Control Unit
Sähkölämmityksen ohjaus
Control of Electric Heating in the
Household (usage is optional)
ELECTRICAL DIAGRAM

SUOMI | ENGLISH 11
kW
kW MIN MAX
(m3) (mm2)(mm)
2.3 kW
3.0 kW
3.6 kW
2.3 kW
3.0 kW
3.6 kW
2 x 1.15 kW
1 x 1.15
1 x 1.8 kW
2 x 1.8 kW
2 x 1.15 kW
1 x 1.15
1 x 1.8 kW
2 x 1.8 kW
1.3
2
3
1.3
2
3
2.5
4
6
2.5
4
6
3 x 2.5 /
4 x 1.5
3 x 2.5 /
4 x 1.5
3 x 2.5 /
4 x 1.5
3 x 2.5 /
4 x 1.5
3 x 2.5 /
4 x 1.5
3 x 2.5 /
4 x 1.5
8 + 4h
8 + 4h
8 + 4h
separate
separate
separate
10.5-18 kg
10.5-18 kg
10.5-18 kg
10.5-18 kg
10.5-18 kg
10.5-18 kg
1 X 16/2 X 10
1 X 16/2 X 10
1 X 16/2 X 10
1 X 16/2 X 10
1 X 16/2 X 10
1 X 16/2 X 10
MN115
MN115
MN180
MN180
MN115
MN115
MN180
MN180
(AMP.)
230V 1N~ /
400V 2N~
230V 1N~ /
400V 2N~
230V 1N~ /
400V 2N~
230V 1N~ /
400V 2N~
230V 1N~ /
400V 2N~
230V 1N~ /
400V 2N~
MN-23NB
MN-30NB
MN-36NB
MN-23NS
MN-30NS
MN-36NS
215*
215*
215*
215*
215*
215*
455**
455**
455**
455**
455**
455**
435
435
435
330
330
330
MN115 MN180
* Depth when installed to wall
** Height without reector
Kuva 4
Fig. 4
Vastukset
Heating Elements
TEKNISET TIEDOT
KIUAS
MALLI
HEATER
MODEL
KIUKAAN KOKO
SIZE OF HEATER
JÄNNITE
SUPPLY
VOLTAGE
KIVET
Erillinen
Erillinen
Erillinen
STONES
OHJAUS
CONTROL
SULAKE
FUSE
SAUNAN
TILAVUUS
SAUNA ROOM
JOHDON
POIKKIPINTA
SIZE OF WIRE
VASTUS
HEATING ELEMENT
TYYPPINUMERO
TYPE
LEVEYS
WIDTH
SYVYYS
DEPTH
KORKEUS
HEIGHT
kW
(kg)
Anturien sijainnit NB-kiukaat
Sensor location NB-heaters
Säätöanturi
Regulating sensor
Turva-anturi
Safety Sensor
TECHNICAL DATA

SUOMI | ENGLISH
12
1
2
3
34
4
Kuva 5A
Fig. 5A
Kuva 5B
Fig. 5B
Kuva 5C
Fig. 5C
Ohjausyksikön avaaminen
Opening of the Control Unit
Kaapelin yhdistäminen
Cable Connection
Piirretty ylösalaisin
Drawn upside-down
for a clear view
Ohjausyksikön kätisyyden
vaihtaminen
Repositioning the Built-in-Con-
trol Unit
OHJAUSKESKUKSEN KÄTISYYDEN MUUTTAMINEN
Jos haluat siirtää ohjausyksikön kiukaan toiselle puolelle (oikealle tai vasemmalle):
1. Irrota termostaatin nuppi (kuva A), ja ruuvit jotka pitävät muovikantta paikoillaan.
2. Avaa ruuvit joilla ohjausyksikkö on kiinnitetty (kuva A).
3. Vedä ohjausyksikön yläreunaa ulospäin ja siirrä ohjausyksikkö kiukaan toiselle
puolelle. (kuva B)
4. Asenna ensin ohjausyksikön alareuna paikoilleen, huomioiden siellä olevat hakaset.
5. Asenna ohjausyksikön yläreuna erittäin varovasti paikoilleen ja kiristä ruuvit.
6. Varmista että anturit ovat oikein sijoitettu (kuva C).
7. Asenna muovikansi ja säätönuppi paikoilleen.
OHJAUSKESKUKSEN KÄTISYYDEN MUUTTAMINEN
REPOSITIONING THE BUILT-IN CONTROL UNIT

ENGLISH 13
Kaapelin yhdistäminen
Cable Connection
REPOSITIONING OF THE BUILT-IN CONTROL UNIT
If you want to transfer the control unit to the other side (right or left):
1. Pull out the thermostat’s knob (Fig. A) and open the screws, which are holding the
front cover.
2. Open the screws which are holding the control unit (Fig. B).
3. Pull outwards the control unit’s upper edge and transfer the control unit to the
other side.
4. First mount the control unit’s bottom-edge, noticing the small hooks there.
5. Then mount upper edge of the control unit very carefully and tighten the screws.
6. Make sure that the sensors are properly placed (Fig. C).
7. Put front cover and thermostat knob on their places.

SUOMI
14
KIUASKIVET
Kivien tarkoitus kiukaassa on varastoida lämpöenergiaa löylyveden tehokkaan höyrystämisen
takaamiseksi. Kiukaan oikean toiminnan varmistamiseksi on kivet poistettava kiukaasta vähintäin
kerran vuodessa tai n. 500 käyttötunnin välein. Kiukaan kivitila puhdistetaan murentuneista
kivistä ja uudet kivet ladotaan ohjeen mukaisesti. Kiuasta kivittäessä suositellaan käyttämään
viiltosuojahansikkaita. Tarvittava kivien määrä on ilmoitettu kiukaan teknisissä tiedoissa (Katso sivu
11).
Laitos/ammattikäytössä olevan kiukaan kivet tulee latoa uudestaan vähintään kolme kertaa
vuodessa ja vaihtaa vähintään kerran vuodessa. Vaihdosta on tarvittaessa esitettävä selvitys.
HUOM! Älä käytä kiuasta ilman kiuaskiviä, sillä se voi aiheuttaa palovaaran. Käytä vain
sähkökiuaskäyttöön tarkoitettuja kiuaskiviä (oliviini tai oliviinidiabaasi). Väärien kivien käyttö
voi aiheuttaa lämmityselementtien ennenaikaisen hajoamisen. Älä käytä kiukaassa keraamisia
kiuaskiviä.
KIVIEN LATOMINEN KIUKAASEEN
Ennen kivien latomista on suositeltavaa pestä ne mahdollisen lian ja pölyn poistamiseksi. Kiviä
ladottaessa kiukaaseen on huomioitava, että kiukaan läpi virtaavaa ilman kiertoa ei estetä, koska
tämä johtaa lämmityselementtien ylikuumenemiseen ja niiden käyttöiän merkittävään lyhenemiseen.
Isokokoisia kiviä ei saa milloinkaan työntää väkisin lämmityselementtien väliin, vaan tällaiset
kivet on poistettava. Kivet on ladottava siten, että elementit eivät väänny ulos- tai sisäänpäin ja
elementit eivät saa koskettaa toisiaan kivien ladonnan tuloksena. Alle 35 mm halkaisijaltaan olevia
pienikokoisia kiviä tai kivien paloja ei saa laittaa kiukaaseen, koska ne vaarantavat ilman kiertoa ja
voivat aiheuttaa lämmityselementtien ylikuumenemisen.
Kiukaan mukana tulevat erilliset vastuspidikkeet on asennettava huolellisesti siten, että ne estävät
vastusten keskinäiset kontaktit. Älä lado kiviä vastustelineen sisäpuolelle, vaan pelkästään sen
ympärille ja yläpuolelle. Kivet on ladottava kiukaaseen siten, että elementit peittyvät mahdollisimman
hyvin ulkoapäin katsottuna. Vastusten ollessa kosketuksissa toisiinsa, vastusten elinikä lyhenee
huomattavasti.
HUOM! Takuu ei korvaa kiukaan lämmityselementtien rikkoutumisia jotka johtuvat väärän kivilajin
käytön tai virheellisen ladonnan aiheuttamasta ylikuumenemisesta tai niiden aiheuttamista
mekaanisista vaurioista.
Table of contents
Languages:
Other Sawo Plumbing Product manuals
Popular Plumbing Product manuals by other brands

Hans Grohe
Hans Grohe Aquno Select M81 170 3jet sBox 73831 Series Instructions for use/assembly instructions

Hans Grohe
Hans Grohe Axor Uno 14850XX1 parts list

Atlantic
Atlantic FBKIT3 instruction manual

Grohe
Grohe 31 041 manual

Bradley
Bradley S53-325 Installation

pure cube
pure cube PU570 Assembly instructions