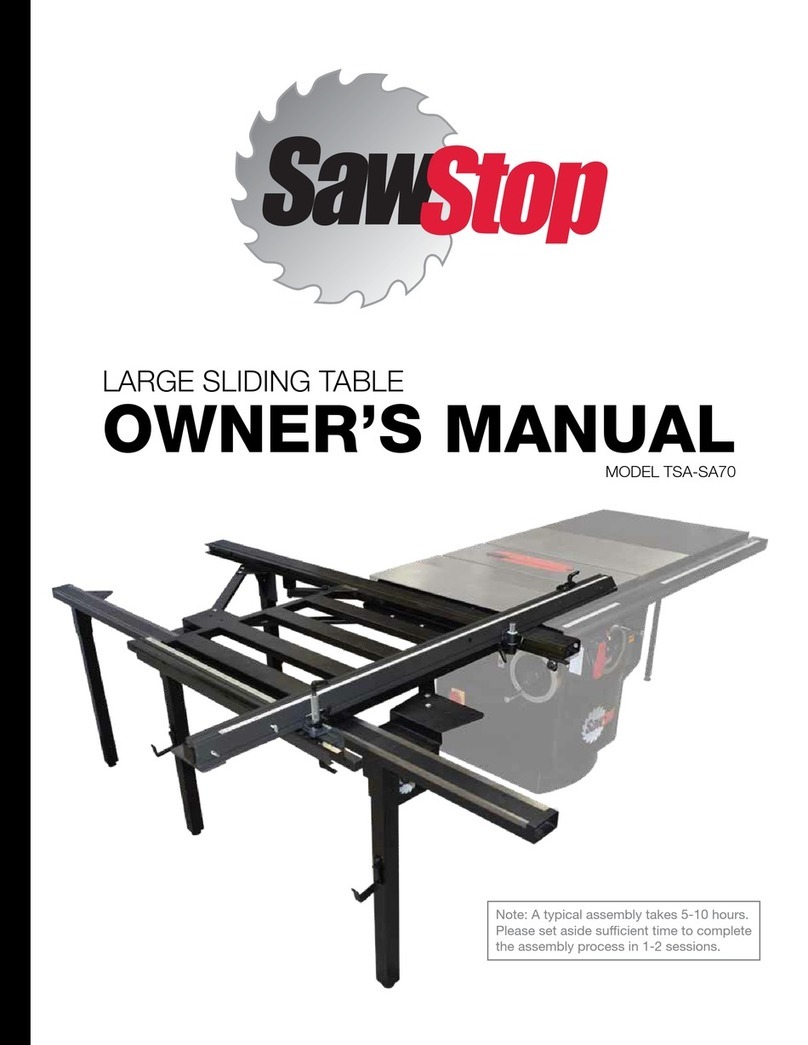
SawStop tsa-sa48 User manual

Sliding Crosscut Table
model tsa-sa48
installation guide

Congratulations on the purchase of this SawStop Sliding Crosscut Table. We at SawStop have
worked very hard to bring this product to you with the features and quality you expect from the
premier manufacturer of table saws and accessories in North America.
The major components of your Sliding Crosscut Table are extruded from high grade aluminum
and then anodized to provide a durable, corrosion-resistant surface. The process of aluminum
anodization creates a lustrous colored nish that can vary slightly from one component to another.
When developing the manufacturing process for the Sliding Crosscut Table, we chose contrasting
hues of black and grey to match and enhance the glossy black powder coating of our table saws.
As a result, the color variation you may see is intended.
We sincerely appreciate your business!
-SawStop
Tualatin, OR
A Note About Color Variations Among
Anodized Aluminum Components

1
SLIDING CROSSCUT TABLE INSTALLATION
table of contents:
•Product Specications........................................................2
•Parts Inventory.....................................................................3
•Modifying Your Table Saw...................................................4
•Mounting Options................................................................5
•Installing with the Extension Wing.....................................7
•Installing without the Extension Wing..............................13
•Operations.........................................................................21
•Sliding Table Attachment Exploded View........................22
•Sliding Table Attachment Parts List.................................24
These icons refer to the three different models of SawStop
table saws compatible with the Sliding Crosscut Table:
Industrial Cabinet Saws, Professional Cabinet Saws and
Contractor Saws. If an installation step includes one or more
of these icons, the step should only be performed if you are
mounting the Sliding Crosscut Table to that model of saw. If
an installation step does not include an icon, the step
should be performed for all models of saw.

2SLIDING CROSSCUT TABLE INSTALLATION
Product specifications:
Standard mounting configuration without wing
SLIDING TABLE.........................................................................................
EXTENSION TABLE....................................................................................
MAXIMUM TABLE TRAVEL.......................................................................
MAXIMUM CROSSCUTTING LENGTH.......................................................
MAXIMUM RIP CAPACITY (STANDARD MOUNTING)..............................
MAXIMUM RIP CAPACITY (FLUSH MOUNTING).....................................
WEIGHT CAPACITY FULLY EXTENDED.....................................................
NET WEIGHT..............................................................................................
9” x 47”
9” x 23.6”
60”
60”
48”
37”
110 lbs
70 lbs

3
SLIDING CROSSCUT TABLE INSTALLATION
parts inventory:
A. SLIDING TABLE ASSEMBLY...............................1
B. SUPPORT LEG ASSEMBLY.................................2
C. FENCE ASSEMBLY............................................1
D. FENCE EXTENSION SUPPORT PLATE...................1
E. EXTENSION TABLE ASSEMBLY..........................1
F. FLIP STOP ASSEMBLY......................................2
G. KNURLED PIVOT HANDLE ASSEMBLY.................1
H. 2” GROMMET FOR CNS SAWS..........................1
I. SWITCH BOX MOUNTING BRACKET...................1
J. AUXILIARY HARDWARE PACK:
Cap Screw M6x1.0x16..........................6
Lock Washer M6..................................6
Flat Washer M6.....................................9
Nut M6...................................................3
T-Bolt M8x1.25x35................................2
Flat Washer M8.....................................2
Lock Nut M8.........................................2
K. PCS/CNS TABLE OR WING MOUNTING HARDWARE PACK:
Cap Screw M8x1.25x35................................4
Lock Washer M8...........................................4
Flat Washer M8.............................................8
Lock Nut M8.................................................4
L. ICS TABLE MOUNTING HARDWARE PACK:
Cap Screw M10x1.5x25................................3
Lock Washer M10.........................................3
D-style Flat Washer M10..............................3
M. ICS WING MOUNTING HARDWARE PACK:
Cap Screw M10x1.5x35...............................3
D-style Flat Washer M10..............................6
Lock Nut M10...............................................3
N. FENCE EXTENSION SUPPORT PLATE MOUNTING
HARDWARE PACK:
Cap Screw M6x1x10.....................................4
Lock Washer M6...........................................4
Flat Washer M6.............................................4
The Sliding Crosscut Table is shipped partially assembled. Please unpack the parts carefully and conrm you have received each
item on the list below.
If you cannot nd an item on this list, check the mounting locations or examine the packaging materials very
carefully. Certain components may have been pre-installed for shipping purposes.
B
C
D
F
E
A
G
H
I
J
L
K
N
(ICS)
M
(ICS)
(PCS / CNS)
(Fence Extension
Support Plate)
(Auxiliary)

4SLIDING CROSSCUT TABLE INSTALLATION
modifying your table saw:
Before mounting the Sliding Crosscut Table, you may need to modify your table saw. Some of the steps below involve removing/
installing your rails and extension wing. For those steps please refer to your table saw manual and fence manual. (You can
download copies of your manuals at www.sawstop.com.)
For Unassembled Saws: If your saw has not yet been assembled, you will rst need to pre-install the rails
to mark them for cutting. If you plan to mount the Sliding Crosscut Table with the left extension wing, begin by
installing and aligning the left extension wing as described in the installation documentation for your table saw. If
you plan to mount the Sliding Crosscut Table without the left extension wing, then do not install the wing for this
step. Next, install your rail assembly to the saw as described in your fence manual. It is not necessary to install
every screw or to fully align and tighten your rails at this time.
Now proceed to page 7 if you plan to install the Sliding Crosscut Table with the left extension wing.
Alternatively, proceed to page 13 if you plan to install the Sliding Crosscut Table without the left extension wing.
WARNING: Disconnect your table saw from electrical power before beginning any modications.

5
SLIDING CROSSCUT TABLE INSTALLATION
mounting options
Option 1 of 4
Start on Page 13
This conguration minimizes the total footprint of the table saw and crosscut table, but the
ripping length is reduced from 48 inches to 37 inches. Since the left wing is not installed,
the crosscut table is close to the saw blade.
FLUSH MOUNTING
WITHOUT LEFT WING
This conguration provides the maximum ripping length and the closest position of the Crosscut
Table to the saw blade.
STANDARD MOUNTING
WITHOUT LEFT WING Option 2 of 4
Start on Page 13
The SawStop Sliding Crosscut Table can be mounted to your SawStop table saw in any of four different
congurations depending on your needs.

6SLIDING CROSSCUT TABLE INSTALLATION
mounting options
This conguration provides the maximum ripping length while also maintaining the additional
support to the left of the blade provided by the left extension wing.
STANDARD MOUNTING
WITH LEFT WING Option 3 of 4
Start on Page 7
Option 4 of 4
Start on Page 7
This conguration reduces the front-to-back footprint of the saw and crosscut table while
maintaining the additional support to the left of the blade provided by the left extension wing.
FLUSH MOUNTING
WITH LEFT WING

7
SLIDING CROSSCUT TABLE INSTALLATION
Modifying your table saw to install the Sliding Crosscut Table with the Left
Extension Wing: If the left ends of the front and rear rails do not extend past the left edge of the left
extension wing, then no modications are necessary so complete the assembly of your saw and rails then skip
directly to page 8. If the left ends of the front and rear rails do extend past the left edge of the extension wing,
then you will need to shorten your rails so continue to step 1 below.
1. Mark the front rail, rear rail and main tube ¼” to the right of the left edge of the left extension wing.
2. Use a 13mm wrench to remove the bolts from the underside of the main tube. Set it aside.
3. Use a 13mm wrench and 5mm Allen wrench to remove the front and rear rails.
4. Use a metal cutting band saw to cut off the front rail, rear rail, and main tube at the marks made in
Step 1 above.
5. Remove any burrs or sharp edges with a le.
6. Remove the plastic end cap from the cut off portion of the main tube and install it on the new left end of the
main tube.
7. If necessary, complete the assembly of your saw then re-install the front and rear rails and the main tube
(refer to your saw and fence manuals).
8. Continue to page 8
Using other types of saws (such as a circular saw) can generate enough heat to blister the powder
coating. It is strongly suggested that you use a metal cutting band saw only.
WITH EXTENSION WING
INSTALLING WITH THE EXTENSION WING

8SLIDING CROSSCUT TABLE INSTALLATION
1. Turn the sliding table assembly upside down, slide the support leg T-bolts (109) into the sliding table T-slot
(see Fig. 1), then hand-tighten the legs clockwise to secure them in place.
2. For saws ONLY: if necessary, mount the switch box assembly as described in the installation
documentation for your saw, then continue to step 3.
3. For saws ONLY: remove the hardware from the ICS Wing Mounting Hardware pack (the
hardware from the ICS Table Mounting Hardware pack is not needed for this mounting conguration).
For saws ONLY: remove the cap screws, the at washers and the lock nuts from the PCS/CNS Table or
Wing Mounting Hardware pack (the lock washers are not needed for this mounting conguration).
4. With the help of at least one other person to support the weight, turn the sliding table assembly over and
position it against the side of the extension wing.
5. Adjust the height of the sliding table to approximately match the wing by turning the foot pads on the bottom
of the leg assemblies.
6. Visually align the mounting holes in the side of the sliding table assembly with the holes in the side of the
wing and then mark the set of holes to be used. See Fig. 2 for saws, or Fig. 3 for saws.
Mounting the sliding crosscut table to your saw: Before continuing, make sure the sliding table top is locked
to the sliding table assembly. If the sliding table top is not locked, pull out the sliding table lock knob on the bottom of the table
assembly and rotate it 90 degrees, then release. Slowly slide the table top toward the Home Position. The Home Position is where
the front of the sliding table top is generally ush with the table bottom. The lock knob should engage the table top and lock it
against further movement. This will help prevent injury due to the sliding table top moving unexpectedly.
Fig. 1
For the best
support, position
the legs near
the edges of the
sliding table, as
shown in Fig. 1.
ICS saws have 3
mounting holes.
PCS and CNS
saws have 4
mounting holes.
See the exploded
views on pages
22-23 for part
number labels.
Fig. 3
Fig. 2
Flush
Flush
Standard
Standard
WITH EXTENSION WING
INSTALLING WITH THE EXTENSION WING

9
SLIDING CROSSCUT TABLE INSTALLATION
7. Pull out the sliding table lock knob on the underside of the sliding table assembly and rotate it 90 degrees to
unlock the sliding table. Then slide the table top toward the front of the saw to expose two of the mounting
holes, as shown in Fig. 4.
Fig. 4
ICS Model Shown
without the
extension wing.
8. For saws ONLY: with the mounting holes aligned, insert an M10x35 cap screw through a D-style washer,
then through one of the two exposed rear holes in the sliding table and extension wing, and then through a
second D-style washer and a lock nut. (See the exploded view on page 22-23 for illustration). Repeat this
process for the other exposed rear hole in the sliding table and extension wing. Only nger tighten the lock
nuts at this time. Make sure to position the at edge of the D-style washers facing downward. Skip to step 10.
9. For saws ONLY: with the mounting holes aligned, insert an M8x35 cap screw through a at washer,
then through one of the two exposed rear holes in the sliding table and extension wing, and then through a
second at washer and a lock nut. (See the exploded view on page 22-23 for illustration). Repeat this process
for the other exposed rear hole in the sliding table and extension wing. Only nger tighten the lock nuts at this
time. Continue to step 10.
10. Slide the table top toward the back of the saw to expose the nal mounting hole(s) and install the remaining
cap screw(s), washer(s), and lock nut(s). Only nger tighten the lock nuts at this time.
11. Slide the table top as necessary until only one cap screw is exposed at the front of the saw. Lay a straight
edge across the sliding table top so that it extends over the top of the table saw as close to the exposed cap
screw as possible. Make sure the sliding table top is parallel to the top of the wing and saw table and then
adjust the foot pad on the bottom of the front leg until the sliding table top is between 0.010” and 0.020”
higher than the table saw top. Tighten the exposed lock nut. Slide the table toward the front of the saw to
expose one cap screw at the back of the saw and repeat the process at this location. Recheck both ends of
the table (front and back) to make sure they are still correct. Then tighten the remaining lock nuts.
12. Pull out the sliding table lock knob on the underside of the sliding table assembly, rotate it 90 degrees then
release. Slide the table top toward the Home Position until it locks in place.
WITH EXTENSION WING
INSTALLING WITH THE EXTENSION WING

10 SLIDING CROSSCUT TABLE INSTALLATION
13. Place the two M8 T-bolts (109) from the Auxiliary Hardware Pack through the holes in the side of the
extension table assembly. Loosely install the at washers (108) and lock nuts (110) on the T-bolts. Slide the
heads of the T-bolts (109) into the T-slot on the outside edge of the sliding table, and then tighten the nuts
(110) to secure the extension table in place. For most operations, position the extension table so that it is
ush with the front edge of the sliding table top, as shown in Fig.5.
14. Slide the miter gauge bar (249) into the T-slot on the sliding table top farthest from the blade, as shown in
Fig.6. For full cutting capacity, the miter gauge bar should be positioned ush with the front edge of the
sliding table. Use a 5mm wrench to turn the reverse-thread fasteners (248) at the front and rear of the miter
gauge bar
COUNTERCLOCKWISE
to lock the miter gauge bar in place.
Fig. 5
Fig. 6
WITH EXTENSION WING
INSTALLING WITH THE EXTENSION WING

11
SLIDING CROSSCUT TABLE INSTALLATION
15. Use a 5mm allen wrench to slightly loosen the crosscut fence from the miter gauge as shown in Fig. 7. Do not
loosen the screws more than 1 ½ full turn. With the blade guard installed, raise the saw blade to the highest
elevation and tilt it to 45 degrees. Pivot the crosscut fence until it is parallel to the front edge of the saw. Slide the
crosscut fence to the right until the right side of the crosscut fence is about 2 inches from the left side of the blade
guard. If you want to position the crosscut fence closer to the blade, be careful not to run the crosscut fence into
the blade guard or anti-kickback pawls during operation. Retighten the screws.
16. Pivot the crosscut fence clockwise until the right end of the long slot on the crosscut fence is off the saw
table. Remove the T-bolt (229) from the Crosscut Fence Lock Knob and insert the threaded shaft of the T-bolt
up through the slot. Pivot the fence counterclockwise and slide the T-bolt into the T-slot in the right side of
the sliding table top as shown in Fig. 8. Place the plastic washer (228) on the T-bolt threaded shaft and then
screw on the crosscut fence lock knob. Do not tighten the lock knob at this time.
Fig. 7
Fig. 8
WITH EXTENSION WING
INSTALLING WITH THE EXTENSION WING

12 SLIDING CROSSCUT TABLE INSTALLATION
17. Use a square to position the fence exactly 90 degrees relative to the saw blade then tighten the crosscut
fence lock knob.
18. Check the miter gauge angle indicator. If the reading is not 0 degrees, loosen the indicator lens mounting
screw (245) and adjust the position of the indicator to read 0 degrees. Retighten the mounting screw.
19. Mount the Fence Extension Support Plate (202) to the bottom of the Fence Extension using four M6 Cap
Screws (203), M6 Lock Washers (115) and M6 Flat Washers (116) from the Fence Extension Support Plate
Mounting Screw Hardware Pack as shown in Fig. 9.
20. Slide the two ip stops (264) into the T-slot on top of the crosscut fence and then tighten their lock knobs to
hold them in place.
21. Using a tape measure, adjust the right ip stop to 12” from the blade. Adjust the fence ruler (225) so that it
indicates 12” in the ip stop indicator lens. This adjustment ensures exact measurements when cutting using
the ip
stop
with the miter gauge set to the 0 degree mark.
When the miter gauge is adjusted to an angle
other than 0 degrees, the fence ruler will need to be readjusted before using the ip stop indicator lens.
22. To properly position the ruler on the crosscut fence extension, slide the left ip stop to the left-most position
on the crosscut extension section. Next, slide the extension ruler left until it stops. Using a tape measure,
extend the crosscut fence extension out until the distance between the blade and the left ip stop is 50”.
Check the indicator reading on the extension fence. If the indicator does not read 50”, adjust the position
of the ip stop until the indicator reads 50”, then lock the ip stop in place by tightening the lock knob. This
adjustment ensures exact measurements when cutting using the ip stop on the crosscut fence extension
with the miter gauge set to the 0 degree mark.
When the miter gauge is adjusted to an angle other than 0
degrees, the extension ruler will need to be readjusted before using the ip stop indicator lens.
CONGRATULATIONS! Your Sliding Table Attachment is now installed. Skip to page 21 for Operating Instructions.
Fig. 9
The rulers on the fence and the fence extension are double-sided. Flip them over for
metric measurements.
WITH EXTENSION WING
INSTALLING WITH THE EXTENSION WING

13
SLIDING CROSSCUT TABLE INSTALLATION
1. Find the seam between the table and the left extension wing (or the left edge of the table if the wing is not
installed). Mark the front rail, rear rail and main tube ¼” to the right of the seam (or edge).
2. Use a 13mm wrench to remove the bolts from the underside of the main tube. Set it aside.
3. Use a 13mm wrench and 5mm Allen wrench to remove the front and rear rails.
4. If the wing is already installed, use either a 17mm wrench (for saws) or 13mm wrench (for saws)
to remove the left extension wing from the table saw.
5. For saws only: if you have not yet mounted the switch box assembly to your saw, skip to step 6
below. If your switch box assembly has already been mounted to your saw, use an Allen wrench to remove
the two bolts that mount the switch box bracket to the main table. Allow the switch box assembly to dangle
in place.
6. Use a metal cutting band saw to cut off the front rail, rear rail, and main tube at the marks made in Step 1
above.
7. Remove any burrs or sharp edges with a le.
8. Remove the plastic end cap from the cut off portion of the main tube and install it on the new left end of the
main tube.
9. If necessary, complete the assembly of your saw (without the left extension wing) but do not mount the
switch box if your saw is a or . Next, re-install the front and rear rails and the main tube (refer to your
fence manual).
Modifying your table saw to install the Sliding Crosscut Table Without the Left
Extension Wing: You will need to shorten your rails to mount the sliding table attachment without the left
extension wing so proceed to step 1 below.
Using other types of saws (such as circular saw) can generate enough heat to blister the
powder coating. It is strongly suggested that you use a metal cutting band saw only.
For ICS and PCS saws, no further modications are needed, so proceed directly to page
15. For CNS saws without the left extension wing, continue to step 10 on the next page.
WITHOUT EXTENSION WING
INSTALLING WITHOUT THE EXTENSION WING

14 SLIDING CROSSCUT TABLE INSTALLATION
10. On saws without the left extension wing it is necessary to increase the slack in the motor power cord in
order to move the switch box to the new mounting position. The rst step is to remove the motor power cord
from the strain relief on the rear of the saw (Fig.1). Remove the three screws that mount the strain relief to the
rear of the saw frame. Remove the cord connected to the motor and replace the strain relief. Make sure the
AC power cord remains captured by the strain relief.
11. If your saw is mounted on a Mobile Cart as shown in Fig. 2, simply route the motor power cord
underneath the upper frame of the Mobile Cart, then reconnect it with the motor power cord.
12. If your saw is mounted on the stand, it is necessary to create a 2” diameter hole in the rear panel
of the stand. The center point of the hole should be located as shown in Fig. 3. SawStop recommends using
a 2” hole saw to form the hole in the rear panel. Finally, snap the supplied 2” grommet into the hole and feed
the cord from the motor through the grommet then reconnect it with the motor power cord.
Fig. 2
Fig. 3
Fig. 1
WITHOUT EXTENSION WING
INSTALLING WITHOUT THE EXTENSION WING

15
SLIDING CROSSCUT TABLE INSTALLATION
1. Turn the sliding table assembly upside down, slide the support leg T-bolts (109) into the sliding table T-slot
(see Fig. 4), then hand-tighten the legs clockwise to secure them in place.
2. For saws, skip to step 3. For saws, attach the switch box mounting bracket (113) to the underside
of the sliding table assembly using three M6x1.0x16 cap screws, three M6 washers and three M6 lock washers
from the Auxiliary Hardware Pack, as shown in Fig. 5. If you are mounting the Sliding Crosscut Table in the
standard conguration, align the holes in the bracket to the rear holes on the underside of the table (Fig. 5-A). If
you are mounting the Sliding Crosscut Table in the Flush Conguration, align the holes in the bracket to the front
holes on the underside of the table (Fig. 5-B).
Mounting the sliding crosscut table to your saw: Before continuing, make sure the sliding table top is locked
to the sliding table assembly. If the sliding table top is not locked, pull out the sliding table lock knob on the bottom of the table
assembly and rotate it 90 degrees, then release. Slowly slide the table top toward the Home Position. The Home Position is where
the front of the sliding table top is generally ush with the table bottom. The lock knob should engage the table top and lock it
against further movement. This will help prevent injury due to the sliding table top moving unexpectedly.
Fig. 4
For the best
support, position
the legs near
the edges of the
sliding table, as
shown in Fig. 4.
See the exploded
views on pages
22-23 for part
number labels.
Fig. 5
AB
Standard Mounting Conguration Flush Mounting Conguration
WITHOUT EXTENSION WING
INSTALLING WITHOUT THE EXTENSION WING

16 SLIDING CROSSCUT TABLE INSTALLATION
3. For saws ONLY: remove all the hardware from the ICS Table Mounting Hardware pack (the
hardware from the ICS Wing Mounting Hardware pack is not needed for this mounting conguration).
For saws ONLY: remove the cap screws, the lock washers and four of the at washers from the
PCS/CNS Table or Wing Mounting Hardware pack (the remaining hardware is not needed for this mounting
conguration).
4. With the help of at least one other person to support the weight, turn the sliding table assembly over and
position it against the side of the saw table.
5. Adjust the height of the sliding table to approximately match the saw table by turning the foot pads on the
bottoms of the leg assemblies.
6. Visually align the mounting holes in the side of the sliding table assembly with the holes in the side of the saw
table and then mark the set of holes to be used. See Fig. 6 for saws, or Fig. 7 for saws.
7. Pull out the sliding table lock knob on the underside of the sliding table assembly and rotate it 90 degrees to
unlock the sliding table. Then slide the table top toward the front of the saw to expose two of the mounting
holes, as shown in Fig. 8.
WITHOUT EXTENSION WING
Fig. 8
ICS Model Shown
without the
extension wing.
ICS saws have 3
mounting holes.
PCS and CNS
saws have 4
mounting holes.
Fig. 7
Fig. 6
Flush
Flush
Standard
Standard
INSTALLING WITHOUT THE EXTENSION WING

17
SLIDING CROSSCUT TABLE INSTALLATION
8. For saws ONLY: With the mounting holes aligned, thread two M10x1.5x25 cap screws (121) with two
10mm lock washers (122) and two 10mm D-shaped at washers (123) from the ICS Table Mounting Hardware
Pack through the sliding table into the exposed mounting holes in the saw table (see the exploded view on
pages 22-23 for illustration). Only nger tighten the cap screws at this time. Position the at edge on the
D-shaped at washers facing downward. Skip to step 10.
9. For saws ONLY: With the mounting holes aligned, thread two M8x1.25x35 cap screws (106) with two
8mm lock washers (107) and two 8mm at washers (108) from the PCS/CNS Table or Wing Mounting Hardware
Pack through the sliding table into the exposed mounting holes of the saw table (see the exploded view on
pages 22-23 for illustration). Only nger tighten the cap screws at this time.
10. Slide the table top toward the back of the saw to expose the nal mounting hole(s) and install the remaining
cap screw(s), lock washer(s), and at washer(s). Only nger tighten the cap screws at this time.
11. Slide the table top as necessary until only one cap screw is exposed at the front of the saw. Lay a straight
edge across the sliding table top so that it extends over the top of the table saw as close to the exposed cap
screw as possible. Make sure the sliding table top is parallel to the top of the saw table and then adjust the
foot pad on the bottom of the front leg until the sliding table top is between 0.010” and 0.020” higher than the
table saw top. Tighten the exposed cap screw. Slide the table toward the front of the saw to expose one cap
screw at the back of the saw and repeat the process at this location. Recheck both ends of the table (front
and back) to make sure they are still correct. Then tighten the remaining fasteners.
12. Pull out the sliding table lock knob on the underside of the sliding table assembly, rotate it 90 degrees then
release. Slide the table top toward the Home Position until it locks in place.
13. For saws ONLY: Attach the switch box assembly to the mounting bracket on the underside of the
sliding table using three M6x1.0x16 cap screws, six M6 washers, three M6 lock washers and three M6 nuts
from the Auxiliary Hardware Pack, as shown in Fig. 9.
Fig. 9
PCS Model
Shown without
the extension
wing
WITHOUT EXTENSION WING
INSTALLING WITHOUT THE EXTENSION WING

18 SLIDING CROSSCUT TABLE INSTALLATION
14. Place the two M8 T-bolts (109) from the Auxiliary Hardware Pack through the holes in the side of the
extension table assembly. Loosely install the at washers (108) and lock nuts (110) on the T-bolts. Slide the
heads of the T-bolts (109) into the T-slot on the outside edge of the sliding table, and then tighten the nuts
(110) to secure the extension table in place. For most operations, position the extension table so that it is
ush with the front edge of the sliding table top, as shown in Fig. 10.
15. Slide the miter gauge bar (249) into the T-slot on the sliding table top nearest the blade, as shown in Fig. 11.
For full cutting capacity, the miter gauge bar should be positioned ush with the front edge of the sliding table.
Use a 5mm wrench to turn the reverse-thread fasteners (248) at the front and rear of the miter gauge bar
COUNTERCLOCKWISE
to lock the miter gauge bar in place.
Fig. 11
Fig. 10
WITHOUT EXTENSION WING
INSTALLING WITHOUT THE EXTENSION WING
Table of contents
Other SawStop Indoor Furnishing manuals
Popular Indoor Furnishing manuals by other brands

Regency
Regency LWMS3015 Assembly instructions

Furniture of America
Furniture of America CM7751C Assembly instructions

Safavieh Furniture
Safavieh Furniture Estella CNS5731 manual

PLACES OF STYLE
PLACES OF STYLE Ovalfuss Assembly instruction

Trasman
Trasman 1138 Bo1 Assembly manual

Costway
Costway JV10856 manual