Thank you for purchasing this light fitting. Please read the instructions carefully before use to ensure safe and satisfactory
operation of this product. Please retain these instructions for future reference.
This is a Class 3 product.
Warning
Please read these instructions carefully before commencing any work.
This unit must be fitted by a competent and qualified electrician.
Check the pack and make sure you have all the parts listed.
Install in accordance with the IEE Wiring regulations and current Building Regulations.
To prevent electrocution switch off and took out the batteries before installing or maintaining this fitting. Ensure other persons
cannot restore the electrical supply without your knowledge. If you are in any doubt, please consult a qualified electrician.
This light fitting should be connected to a fused circuit.
If replacing an existing fitting, make a careful note of the connections.
This product contains non-replaceable parts and cannot be serviced. If damage occurs the part should be scrapped.
Waste electrical products should not be disposed of with household waste. Please recycle where facilities exist. Check with
your local authority or retailer for recycling advice.
Layout
Installation
This product is battery powered and is therefore exempt from IEE wiring regulations concerning bathrooms.
Thisproduct is suitable for all areas of a bathroom. The chosen location should allow for theproduct to be
securely mounted. (e.g. to a stud wall framework)
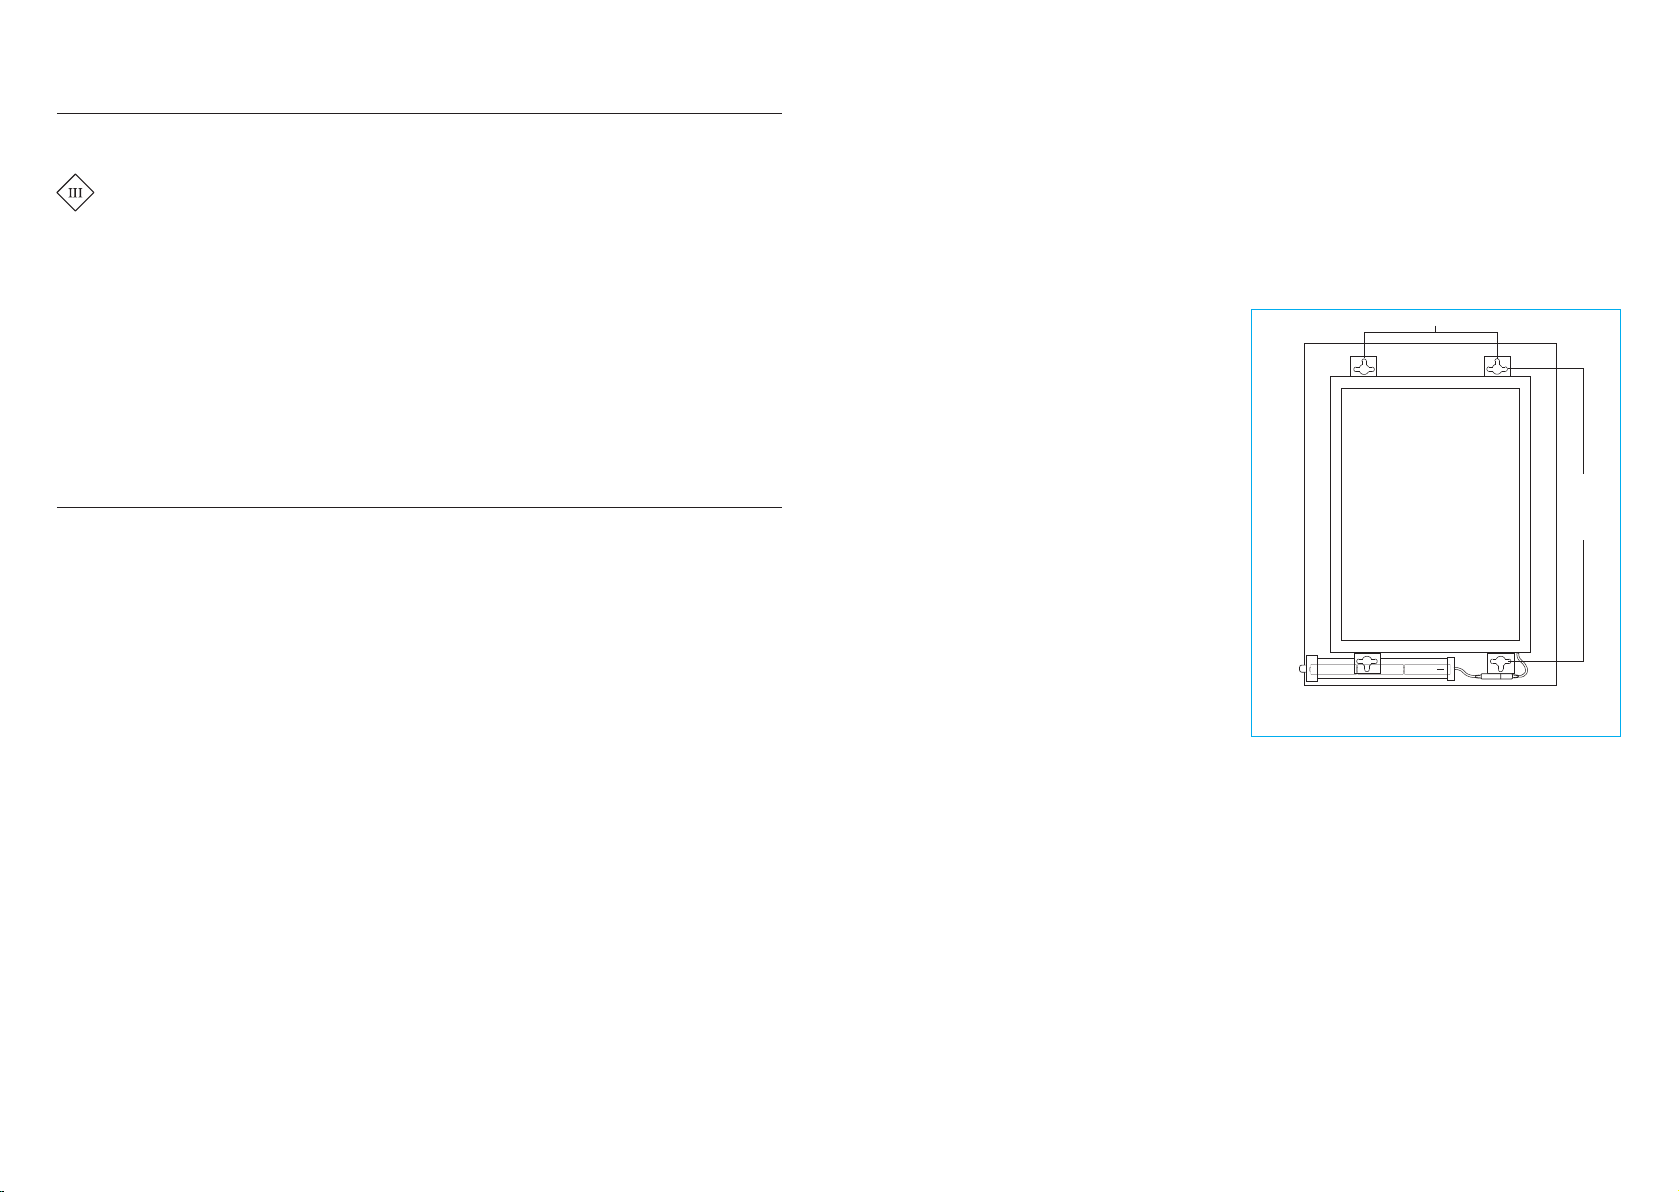
This product can be mounted either vertically (portrait) or horizontally (landscape)
• Decide if the mirror is to be installed landscape or portrait. This mirror fixes to the wall by locating the keyhole shaped slots
over the mounting screws in the wall. It is important to get the screw positions correct to ensure easy and secure fitting.
• Measure the distance between the hole centres on the fixing lugs. Mark the positions of the screw holes on the wall. Check for
concealed pipes and wiring before drilling. Use suitable drill bits for masonry and ceramic tiles.
• Supplied wall plugs are for solid walls only. For all other wall types ensure correct fixings are used. Fit appropriate wall fixings
and fit supplied screws. Screw heads must protrude approx 3-5mm from the wall to enable lugs to fit over adequately.
• Fit mirror onto screw heads - check the screw heads are securely located into the keyhole slots.
• Switch mirror on.
This product requires 3x 1.5V AA batteries
Fitting/Replacing Batteries
+
To mount portrait, use these slots
To mount
Landscape
Use these
Slots
Battery tube attached
with Velcro Jack plug
connection
Switch
• Loosen 2 screws on battery tube switch end. Remove
lid, insert batteries, observing correct polarity (+ end
of batteries towards switch end). Refit lid, secure
screws and switch-on to test.
• The performance of the product will depend on the
quality and type of batteries used. Always use good
quality batteries. The battery tube is attached to the
rear of the mirror with spring clips for easy access to
batteries. It can also be completely removed from the
product - by disconnecting the jack plug and socket.
• Batteries are to be inserted with the correct polarity.
• Different types of batteries (alkaline, ordinary or
rechargeable) or new and used batteries are not to
be mixed.
• Exhausted batteries are to be removed from the
product to prevent leakage.
• The supply terminals of batteries are not to be
shortcircuited.
• Non-rechargeable batteries are not to be recharged.
• Rechargeable batteries are to be removed from the
product before being charged.
• Do not dispose of used batteries with your household
waste.


