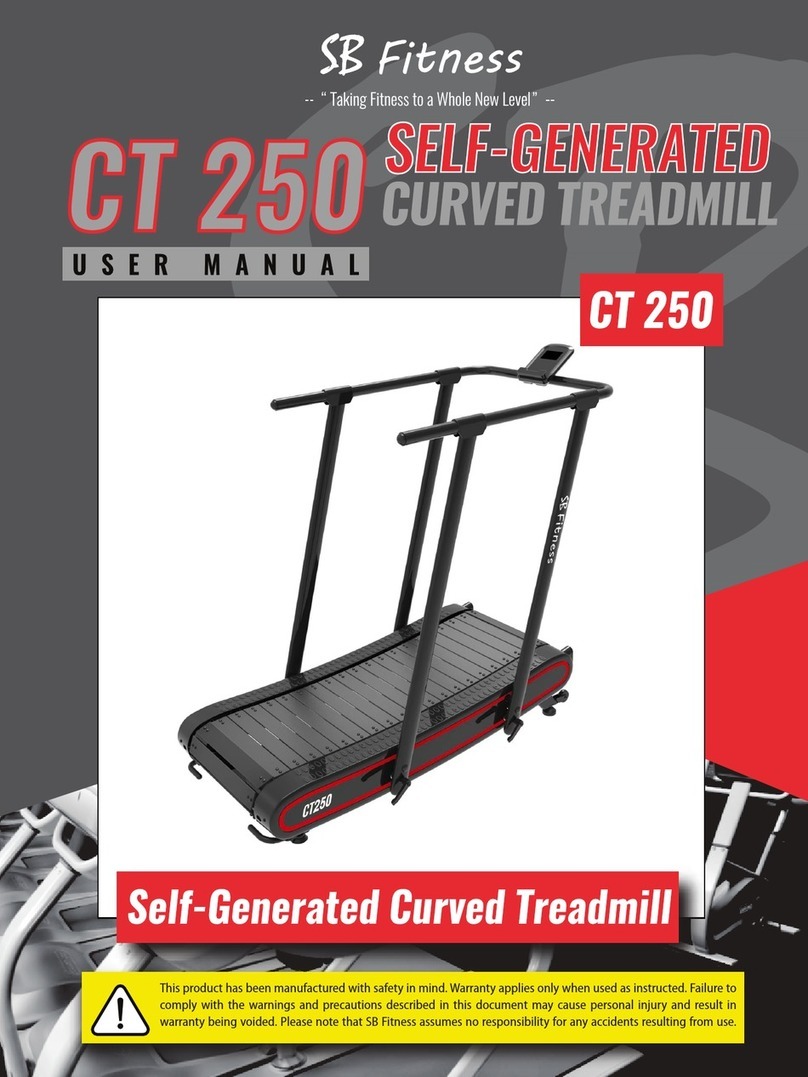
SB Filters CT700 User manual

Full Commercial/Club Rated
Self-Generated Curved Treadmill
Owners Manual
Installation Instructions
and Specifications
CT700
Curved Treadmill

CT700
CONTENTS
Treadmill Model
Assumption of Risk
For Your Saftey
Proper Use of Your Treadmill
CT700 Description and Specifications
Assembly Instructions and Procedures
Display Console Functions
Packing List
Warranty
Warranty Information
01
02
03
04
06
07
15
17
18
19
CT700

TREADMILL MODEL
CT700
Full Commercial/Club Rated
Self-Generated Curved Treadmill
- 1 -

ASSUMPTION OF RISK
- 2 -
5IJTQSPEVDUIBTCFFONBOVGBDUVSFEXJUITBGFUZ
JONJOE
8BSSBOUZBQQMJFTPOMZXIFOVTFEBTJOTUSVDUFE
'BJMVSFUPDPNQMZXJUIUIFXBSOJOHTBOE
QSFDBVUJPOTEFTDSJCFEJOUIJTEPDVNFOUNBZDBVTF
QFSTPOBMJOKVSZBOESFTVMUJOXBSSBOUZCFJOH
WPJEFE1MFBTFOPUFUIBU4#'JUOFTTBTTVNFTOP
SFTQPOTJCJMJUZGPSBOZBDDJEFOUTSFTVMUJOHGSPNVTF

FOR YOUR SAFETY
- 3 -
1. Consult your physician or health care provider before using your CT700
Treadmill and/or exercise equipment.
2. Only one (1) person is permitted on the treadmill at any time.
3. In order to avoid accidents, injuries, or death, please keep children,
disabled people, and pets away from the treadmill at all times. Especially
when in use.
4. If you have a physical disability or an athletic disability, it is required that
you consult your physician or health care provider before proceeding with
any exercise program.
5. Before using this product, please read this manual carefully. SB Fitness
Equipment is not responsible for any personal injury or damage caused by
using this product under any circumstances or negligence caused by the
user.

PROPER USE OF YOUR
CT700 TREADMILL
- 4 -
Please read this manual carefully and take not of the following safety
measures:
1. Your CT700 Treadmill should be kept indoors, away from moisture. Keep
liquids and foreign objects away from your treadmill.
2. During the operation of your CT700 Treadmill, moving parts will generate
static electricity. For your safety, you must keep your treadmill away from
flammable and explosive items.
3. Use the adjustment feet located under the rear of your treadmill to level
and stabilize the base.
4. You must wear walking/running shoes when using the treadmill. When
using treadmill, bare feet are strictly prohibited and can cause serisous
injury to feet and toes!
5. Only one (1) person is permitted on the treadmill while in use. Max
user weight: 475 lbs.
6. Please aquire your physician’s approval if you are: A child under 12,
elderly, disabled, of have heart disease. Adult supervision is required for
children under the age of 14. Persons with high blood pressure, heart
disease or other diseases and/or persons with disabilities should use the
equipment only with written permission from their doctors. If you feel
dizzy, faint, short of breath, or any weakness, stop exercising immediately
and call your medical professional.
7. Never touch any moving part on your CT700 Treadmill with your hand.
If you have long hair, you should tie it up for safety from the track, due to the
space between the slats.
8. Check your treadmill before each use for any loose parts. Tighten parts
if necessary. Do not overtighten.

PROPER USE OF YOUR
CT700 TREADMILL
- 5 -
9. When the CT700 Treadmill is in use or not in use, keep children and pets
away at least 10 feet from all sides, front & rear at all times.
10. Place the treadmill in a clean, flat area. Do not place the CT700 Treadmill
on a heavy carpet. This will affect the air flow below the treadmill. Also,
do not use the CT700 Treadmill near water, wet areas, or outdoors. Do not
place any items within 6’-8’ from the back of the CT700 Treadmill
11. The first time you use your CT700 Treadmill, be sure to hold on to the
handrail with both your hands until you feel comfortable then release the
handrail.
12. If you feel comfortable during use, hold the handlebars/handrails in
front of the CT700 and simply stop walking and you will stop. Then step
onto the side rails to exit or rest untill you are ready to walk/run again.
13. If you experience dizziness, chest pain, nausea, or shortness of breath
while exercising, stop immediately and consult your physician or medical
care provider.
14. Any injury caused by non-compliance with the above provisions shall be
the sole responsibility of the user himself/herself, not SB Fitness Equipment.

CT700 DESCRIPTION
AND SPECIFICATIONS
SB Fitness CT700
Commercial Self-Generated Curved Treadmill
Magnetically Controlled Resistance
for Tension and to Aid in Stopping Belt
Super Heavy Duty
Durable Rubber
Self-Generated
Gravity Drive
8 Levels of Magnetic Resistance
Unlimited
19 in.
308 lbs.
475 lbs.
66 in. x 19 in.
71 in. x 37 in. x 25 in.
76 in. x 34 in. x 62 in.(LxWxH)
Make/Model
Resistance
Levels
Brake Mode
Running Belt
Driving Mode
Maximum
Speed
Running Width
Running Area
Package
Crate Size
Net Weight
Maximum Load
Assembled
Size
- 6 -

ASSEMBLY INSTRUCTIONS
AND PROCEDURES
- 7 -
1. The purpose of this section of the user manual is to ensure that the
CT700 Treadmill can be installed easily and correctly. Please follow
instructions carefully and entirely.
2. Because of its large size and weight, the CT700 Treadmill should be
assembled near the location where it will be used.
3. Place all parts of the CT700 Treadmill in the empy area and remove all
packing material. Do not discard the packaging material until the
assembly is complete.
4. All bolts must be tightened during assembly unless otherwise specified,
and all bolts must be tightened after assembly, in order for assembly to be
complete.
5. When assembling the CT700 Treadmill, make sure that all parts are
assembled according to the assembly diagram.

CT700 TREADMILL SCHEMATIC DIAGRAM
- 8 -
ASSEMBLY INSTRUCTIONS
AND PROCEDURES
Sport Training Handlebars
Resistance Adjustment
Display Console
Upright Column
Running BeltRunning Belt
Transport Wheels
Leveling Feet
Transport Handle

- 9 -
ASSEMBLY INSTRUCTIONS
AND PROCEDURES
Step 1: Remove From Box and Prepare For Assembly
1. Be careful not to scratch or damage your CT700 Treadmill while
removing it from the wooden box.
2. Put the main treadmill where you intend to keep it. Make sure there is
plenty of room around your treadmill. Adjust the leveling feet to make
the treadmill stable.
Treadmill Front
Treadmill Rear
Leveling Feet
Transport Wheels
Transport Handle
Use this handle when moving your CT700 Treadmill.
Transportation wheels are located in the front of
the treadmill. Use your legs, not your back to lift
treadmill.

- 10 -
ASSEMBLY INSTRUCTIONS
AND PROCEDURES
3. Remove the 4 bolts on each corner, leaving the 5th bolt (Center Bolt) in
the frame. This bolt is for the right and left column to align with the hole
provided on the inside of each column. This helps you hold it in place to
screw the 4 corner bolts back in place you just removed.
Step 2: Remove Left and Right Front Covers
1. Use a phillips screwdriver to remove the 5mm screws at the left and
right sides as shown, removing both left and right front side covers. Each
side panel has 4 screws on the top and 2 on the side.
2. Please properly place the plastic covers and screws aside to prevent
loss and damage.
Right Front Cover

- 11 -
ASSEMBLY INSTRUCTIONS
AND PROCEDURES
Step 3: Assemble the Right Column
1. You may want to get the assistance of a second person for this step.
To install the right column, first place the hole of the connecting plate
on the inside of the right column on the “Center Bolt” of the main
frame. Next position the connecting plate face close to the side of the
main frame, slowly tilt the column until the other four holes align with
the screw holes of the main frame. Finally, screw in the bolts you removed
in Step 2.
2. Make sure that the bolts are not tightened too tightly. Do not tighten
bolts fully until all parts are installed. At that time begin tightening at the
bottom of the machine and work your way toward the console.
Resistance Cable Hole
Adjustment Bolt
Resistance Cable
3. Carefully feed the
Resistance Cable from the
bottom of the Right
Column through the
Resistance Cable Hole
toward the bolt attached to
the Resistance Adjustment.
Do not attach Resistance
Cable at this time!

ASSEMBLY INSTRUCTIONS
AND PROCEDURES
- 12 -
Step 4: Attach Resistance Cable
1. Now attach Resistance Cable to the Resistance Adjustment Bolt. (see picture below)
Carefully follow these steps:
a. Connect Resistance to the inside anchor bolt that controls the lever arm, housing the
magnets.
b. You must connect the Resistance Cable to the bolt through the Resistance Cable Hole.
c. Connect the Resistance Cable to the bolt in the CENTER hole as shown in the pictures
provided.
d. After you connect Resistance Cable to the center hole, adjust the resistance handle all
the way to level 8. Then CAREFULLY move the fly wheel with the fins so it does not hit
the steel arms that contains the magnets. You may need to make adjustments by
moving the Resistance Cable Adjustment Bolt one hole to the left in order to
ensure the flywheel fins are not hitting the steel arm that contains the magnets.
2. Reinstall the Right Front Cover
at this time.
Resistance Cable Adjustment Bolt
Side View Overhead View
Steel Arm
Fly Wheel

- 13 -
ASSEMBLY INSTRUCTIONS
AND PROCEDURES
Step 5: Assemble the Left Column
1. You may want to get the assistance of a second person for these steps.
Carefully connect the Data Cable from the bottom of the Left Column
through the Data Cable Hole in the Main Frame.
2. To install the left column, first place the hole of the connecting plate
on the inside of the left column on the “Center Bolt” of the main
frame. Next position the connecting plate face close to the side of the
main frame, slowly tilt the column until the other four holes align with
the screw holes of the main frame. Finally, screw in the bolts you removed
in Step 2.
3. Make sure that the bolts are not tightened too tightly. Do not tighten
bolts fully until all parts are installed. At that time begin tightening at the
bottom of the machine and work your way toward the console.
4. Reinstall Left Front Cover at this time.
Data Cable Hole

- 14 -
ASSEMBLY INSTRUCTIONS
AND PROCEDURES
Step 6: Connect Remaining Data Cables and Assemble
the Multi-Functional Handrails
1. You may want to get the assistance of a second person for this step.
Connect main handlebars to each upright using the (4) M10x20 Allen
Head Bolts. (2 for each side)
2. Carefully connect the Data Cable where the upright posts of the
handlebars bolt to the left handrail of the left upright column. Connect
Data Cable first, then use the M8x16 shorter bolts to connect the
handlebars. Do not fully tighten bolts until all bolts are in.
3. Use the remaining M8x16 (short) bolts to connect the remaining
handlebars and upright grips to handrails.
4. Using screws provided in the back of the console, install batteries
at this time. Be sure to push excess Data Cable into the void in the
Console/Handrail Tube. Do not pinch cable!
Data Cable Connection

DISPLAY CONSOLE FUNCTIONS
Speed
Time
Reset
Mode
Distance
Calories
Total Distance
Set
Time
Speed
Distance
Calories
Total Distance
00:00 - 99:59 (min:sec)
0.0 - 999.9 (mi/h)
0.00 - 99.9 (mi)
0.0 - 999.9 (kcal)
0.00 - 99.99 (mi)
- 15 -
Note: Once batteries are installed and you begin walking/running on the
track, console display will automatically turn on. Time, Distance, Calories
will begin to count up.

- 16 -
Display Key Functions:
Mode Key: Select and view a function, Press key for 3-4 seconds, Console
will automatically reset mode if you wish to make changes.
Set Key: Press this key to enter each desired function.
Reset Key: It is valid for the current data reset/clear. (Not valid in the
non-scanning state, invalid for the total distance)
Automatic Shut Off:
Upon completion of a workout and track stopping, the console will shut
off after 4 minutes.
DISPLAY CONSOLE FUNCTIONS

Serial Name
Mainframes/Runways
Handrail
Console
Upright Post
M10*20 Hexagon Socket Headscews
w/Cylindrical Head
M8*16 Hexagon Socket Headscews
w/Round Head
M5*20 Phillips Head Screws
8mm L-shaped Hex Wrench
For Handrail
and Column
For Mainframe
and Column
For the side
plastic shell
3mm Hex Wrench
4mm Hex Wrench
5mm Hex Wrench
6mm Hex Wrench
Cards
Phillips Screwdriver
Quantity Notes
PACKING/PARTS LIST
- 17 -

WARRANTY
Commercial Warranty:
Frame: 10 Years
Parts: 5 Years
Electronics: 2 Years
Labor: 1 Year
Residential Warranty:
Frame: 15 Years
Parts: 7 Years
Electronics: 2 Years
Labor: 1 Year
- 18 -
If you have questions or need assistance with
your CT700 Curved Treadmill, please call
Customer Service: 1-814-558-4859
or email Chad:
chad@sbfitnessequipment.com
Table of contents
Other SB Filters Treadmill manuals