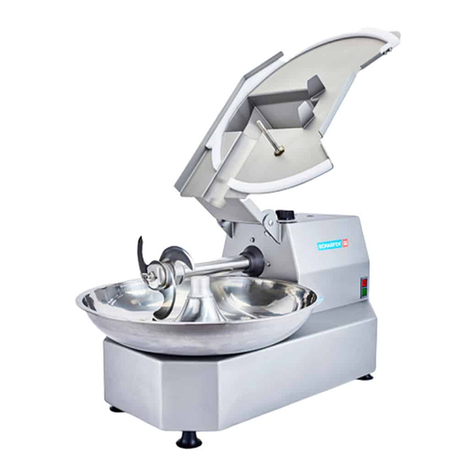
Scharfen HR 2035 User manual

Technical alterations and alterations regarding accessories reserved.
Operating instructions for
tumbler model HR 2035
Scharfen Slicing
Machines GmbH
Friedrich-Ebert-Str. 86 D - 58454 Witten
phone ++49-2302 –28277-41

Seite 2
Contents
1. General Information 4
1.1. ATTENTION hint regarding pump 4
1.2. Notes regarding the operating instructions 4
1.3. Notes regarding warranty 4
1.4. Notes regarding security 4
1.5. Dimensions of the machine and technical data 5
1.6. Description of the machine 5
1.6.1. General plan of the machine 6
1.7. Usage 6
2. Installation and initial operation 6
2.1. Checking the contents of the carton 7
2.2. Installation 7
2.3. Electrical installation 7
2.4. Oil filling of the vacuum pump 7
3. Operation 8
3.1. Important notes before switching on the machine 8
3.2. Switch functions (push button) 8
3.3. Filling of the drum 8
3.4. Tilting lever 8
3.5. Connection of the connecting tube 9
3.6. Control 9
3.7. Switching on the machine 9
3.8. Switching off the machine 10
4. Machine functions 10
4.1. Switch functions (push buttons) 10
4.2. Switching on 10
5. Program functions 10
5.1. Program flow 10
5.2. Description of the keyboard 11
5.3. Meaning of the display 11
5.4. Working with PLU 12
5.4.1. Choice of a certain PLU 12
5.4.2. Starting with a selected PLU number 12
5.4.3. Modifying a selected PLU number 12
5.5. Working in the manual mode 13
5.5.1. Starting the manual mode 13
5.5.2. Modifying the condition in the manual mode 14
5.6. Note 14

Seite 3
6. Cleaning 14
6.1. How to proceed with cleaning 14
6.1.1. Cleaning of the machineReinigung der Maschine 14
6.1.2. Cleaning of the drum 14
6.2. Cleaning of the single parts. 15
6.3. Reassembling the parts 15
7. Maintenance 15
7.1. Oil change at the vacuum pump 15
7.1.1. How to proceed the oil change 15
7.2. Water separator 15
8. Trouble shooting 16
9. Waste disposal 16
10. Appendix Fehler! Textmarke nicht definiert.

Seite 4
1.
General Information
1.1.
ATTENTION hint regarding pump
Vacuum pumps are always supplied without oil filling. You have to pay
attention in any case to chapter 2.4. When operating the pump without oil any
warranty claim will be refused.
1.2.
Notes regarding the operating instructions
Read the following hints before installing and operating this machine!
Make yourself familiar with this machine by reading this operating instructions carefully.
Within these operating instructions there are indicated the following safety notes and hints:
means Attention. Notes for probable danger and for avoiding mistakes.
means notes and hints regarding certain operation procedures.
1.3.
Notes regarding warranty
The installation and initial operation has to be done by an authorised supplier or service technician.
Only trained persons are allowed to operate this machine. When required, the training has to be repeated.
Supervisory and operating staff have to read the operating instructions carefully before initial operation
of this machine. Starting, operating and cleaning have to be done according the operating instructions
and are only allowed after having been introduced to the way of working.
In case of
unauthorised installation
unauthorised electrical installation
wrong operation
misuse
constructional alteration
detaching security or protecting equipment
and in case of using non-original Scharfen spare parts
any responsibility from our side is refused.
In above cases the operator acts on his own risk and is responsible himself for damages which might occur.
Therefore, only use original Scharfen spare parts!
In case high pressure or steam cleaning devices or water plugs are used any claims regarding
warranty will be refused.
This is valid also for faults and damages which are caused by natural wear and tear.
Especially when in case of too high filling of the drum liquids are sucked into the vacuum pump.
The pictorial representation might differ from the machine supplied because of regional specific requirements or
as a result of technical improvement.
The contents of these operating instructions is not affected by that.
1.4.
Notes regarding security
This machine corresponds to legal security and hygienic requirements. Nevertheless there is a risk of getting hurt
in case of wrong or inattentive operation or maintenance. Especially there is a risk of serious finger or hand injury.
The operating staff has to be trained carefully how to operate and maintain this machine according to these
operating instructions.
Pay attention in any case to the following notes regarding security:
See to it that unauthorised, untrained persons and in particular children cannot start the
machine.
It is not allowed to detach, to modify or to disregard protecting or security equipment.

Seite 5
Otherwise there is a high risk of injury.
A remaining risk of squeezing and jamming in the area of the driving unit of the drum cannot be avoided
because of constructive reasons.
Always work with concentration, do not let distract yourself from your work.
Only treat material as indicated in these operating instructions.
Never carry out experiments. Never try to treat foreign material.
Do not treat frozen material.
Never detach the drum while it is rotating.
Never use the machine as a place to put something on or to do other work on.
Take care that the floor space is clean, dry and non-slip.
In case the current supply cable or the plug are defective, these parts have to be exchanged or repaired by your
after sales service or an electrician.
For cleaning pull the plug in any case.
In case of non-typical noise switch off the machine immediately.
In case the fault cannot be put right by yourself, you have to inform your after sales service.
1.5.
Dimensions of the machine and technical data
overall dimensions L2 580 x B1 430 x H 430 mm
counter space required 430 x 330 mm
sound level < 70 db(A)
weight app. 32 kg
voltage 230/1/50 or 110/1/60
power requirement 0,35 kW
Manufacturer: Hermann Scharfen GmbH & Co. Maschinenfabrik KG
Ruhrstr. 76a, D - 58452 Witten, phone 02302/282770
1.6.
Description of the machine
This machine is a fully automatic tumbler with an automatic program flow.
The tumbling process is effected fully automatically. There are different programs retrievable.
The vacuum pump is driven electrically by a maintenance free, air-cooled singlephase motor.
By means of a special air guiding the warming up is very low.
The drum is driven by a strong singlephase motor.
All materials getting into touch with food correspond to the conditions of food hygiene.
The complete machine housing and the drum are made of stainless steel.
All visible bearings as well as open sliding surfaces are lubricated only with lubricant suitable for food zones.
For switching the machine on and off there is used a double red/blue push button.
Self-starting of the machine after a voltage drop is avoided by the electric control.

Seite 6
The protecting and security equipment as well as electrical and mechanical components correspond to
regulations in force.
The machine is equipped with the following security equipment:
no self-starting of the machine after a voltage drop
double push-button
1.6.1.
General plan of the machine
1 coupling 7 tilting lever
2 water separator 8 name plate
3 water outlet 9 viewing glass
4 vacuum meter 10 oil filling screw
5 switch foil 11 plug-in coupling
6 lever
1.7.
Usage
In view of the maximum filling quantity following kinds of food can be treated:
Any kind of fresh meat like beef, pork, lamb, game and seafood
pieces and slices
meat cut into strips
The following products are not allowed to be treated as there is a danger:
NON FOOD articles
deep frozen food products
The machine has to be installed in a shopping room. The installation in moist rooms is allowed. The room
temperature must not go under the limit of 7°C and not over the limit of 40°C.
The machine is drip-proof only.
High air humidity and condensation water may damage the machine. The machine is not splash-proof.
2.
Installation and initial operation
First read the operating instructions very carefully!
You have to pay attention to all notes.
Operating procedures have to be carried out as described.

Seite 7
Always work carefully and with concentration, this way you can avoid damages and injuries.
The installation, introduction and initial operation has to be done by an authorised supplier or service technician.
2.1.
Checking the contents of the carton
The supplied carton has to have the following contents:
Scharfen tumbler HR 2035
as well as the following equipment:
drum with lid and locking ring
chicane
connecting tube
oil filling for the vacuum pump
these operating instructions
2.2.
Installation
The tumbler model HR 2035 has to be installed on a plain, horizontal, non-slip and stable
surface. If necessary the machine has to be screwed tight in addition.
Recommended height of the working surface about 800 mm. Pay attention to the required counter
space.
2.3.
Electrical installation
Before you plug in the machine, you have to check if the current supply is the same as indicated on
the rating plate. In case there are discrepancies you have to inform the supplier or technical service.
Under no circumstances plug in the machine!
The socket-outlet has to be equipped with earthing contact. It has to be connected according to customary
regulations.
A defective socket-outlet may damage the machine or endanger the operator.
The socket has to be installed at a place which can be reached easily by the operator, so that in case of
emergency the plug can be pulled out quickly. In any case the socket must not be under the counter or at a
place which cannot be reached easily.
In case it is necessary to exchange the plug, this has to be done by an electrician or the after sales service.
2.4.
Oil filling of the vacuum pump
The vacuum pump is generally supplied without oil filling and it has to be filled before the first operation of the
machine.
After having filled the vacuum pump with oil the machine must not be tilted more than 400as
otherwise oil gets into the vacuum chamber and due to this the vacuum pump could be
destroyed.
Pay attention to this fact especially when moving the machine to another place or in case of a repair. If the
machine has to be tilted you have to let out the oil before.
For filling the pump screw off the filling screw "1"
and fill in oil supplied with the machine.
The viewing glass "2" has to be filled approximately 3/4.

Seite 8
3.
Operation
3.1.
Important notes before switching on the machine
Because of security reasons pay attention to the following notes:
-first read this operating instructions carefully
-take care that the machine is placed on a stable and secure surface
-work with concentration
-never touch the drum while it is turning
- never touch the driving or guiding rolls while the machine is in operation
3.2.
Switch functions (push button)
red push button = main switch off
blue push button = main switch on
3.3.
Filling of the drum
Never fill the drum more than half of the height of the drum. In case the maximum filling height
is exceeded there is a risk that the vacuum pump is sucking liquid. As a result the pump will be
destroyed.
3.4.
Tilting lever
In order to avoid heavy lifting of the filled drum we recommend to fill the drum when it is mounted on the basic
device. For this purpose there is available at the right side a tilting lever in order to lift the drum in filling position.
For filling the drum the device is tilted upwards as shown below. Then position the drum on the coupling as shown
below for filling it.
wrong correct

Seite 9
After that mount the chicane and fill the drum. Place the lid on top of the drum and lock it as shown on the
following photos. Before putting on the tube tilt the device in any case downwards.
In case there should come out liquid under no circumstances put on the tube. Overfilling!!!
3.5.
Connection of the connecting tube
Engage the connecting tube into the tube connection of the lid. In case there should come out liquid of the
open end of the connecting tube the maximum filling height is exceeded in any case. In this case you have
to empty the drum until the maximum filling height is reached.
Engage now the connecting tube into the plug-in coupling of the water separator.
3.6.
Control
Before starting the operation of the machine you have to control again the following points:
1. Is the drum positioned correctly on the coupling?
2. Is the connecting tube engaged correctly on both sides? Is there any liquid in the tube?
3.7.
Switching on the machine
Switch on the machine at the main switch.
The display lights up and shows the following digits.
01 05 03 043 000

Seite 10
The machine is now operational and can now be started. The meaning of the single digits are described in the
following chapter.
3.8.
Switching off the machine
The machine can be switched off at any time at the main switch.
Take care of the fact that probably there is still a vacuum in the drum and that you cannot take off the
lid.
In order to let out the vacuum plug in the connecting tube into the tube connection of the lid. The connecting tube
must no longer be connected with the plug-in coupling of the water separator.
4.
Machine functions
4.1.
Switch functions (push buttons)
red push button = main switch off
blue push button = main switch on
4.2.
Switching on
Switching on at the main switch
The display shows the following digits:
01 05 03 043 000
5.
Program functions
5.1.
Program flow
After having started the machine by pushing the "automatic on/off" push button the machine always
passes through the following program:
1. The program is only starting when the lead time is counted down to zero.
2. When the lead time is zero the machine switches on the vacuum pump for an adjustable period.
3. Turning of the drum during the adjusted Pre-Time if it is programmed.
4. Turning of the drum during the adjusted working time.
5. Stopping of the drum.
6. Aerating of the drum when the pre set cycle is reached.
7. Expiring of the pause time.
This cycle (from 2 to 6) is repeated several times for an adjustable number of cycles.

Seite 11
5.2.
Description of the keyboard
Anzeigewert vergrößern increasing display value
Anzeige wechseln change indication
Trommeldrehen manuell turning of the drum manually
Automatik Ein / Aus automatic on / off
Hauptschalter Aus main switch off
Hauptschalter Ein main switch on
Anzeigewert verkleinern decrease display value
Umschaltung Manuell –PLU change over manual - PLU
Vacuumpumpe manuell vacuum pump manual
5.3.
Meaning of the display
In case you have not yet made any changes in the several programs the display shows the following digits:
01 00 00 000 000
This means in detail the following:
PLU Nummer –PLU number
Arbeitszeit –time work
Pausenzeit –time pause
Gesamtzeit –total time
Vorlaufzeit –lead time
When switching the machine on at the main switch the machine is generally in the PLU mode of the first PLU
number. This means that pre set programs can be called up . The electronic control can store 11 different PLU
programs and 1 manual program.
The first two digits show the actually adjusted PLU. In this case PLU No. 01.
During the program flow the PLU number does not change. All other numbers are changing continuously after
having started the machine and always show the actual status.
The following two numbers are showing the programmed working time, 05 minutes. This is the time while the
drum is turning. Each minute the indication will be reduced by 1 until the display shows zero. Then the drum stops
immediately.
The two following digits are showing the programmed breaking time. As soon as the drum stops the breaking time
starts. When the pre set number of cycles is reached the drum is aerated. Also the breaking time is reduced by 1
per minute until the display shows zero. After that the cycle starts new.
The next three digits show the calculated total time, in this case 043 minutes. By means of this you have an
indication when the program will be finished.
PLU
Arbeit Pause Gesamt Vorlauf
Hauptschalter Aus
Hauptschalter Ein
Automatik Ein / Aus
Anzeigewert verkleinern
Anzeigewert vergrößern Anzeige wechseln Trommeldrehen manuell
Vacuumpumpe manuellUmschaltung Manuell - PLU
01 05 00 043 000
{
{
{
{
{
PLU Nummer
Arbeitszeit
Pausenzeit
Gesamtzeit
Vorlaufzeit

Seite 12
The last three digits show the lead time. After the start of the machine this time is running minute by minute. Only
when the lead time is showing 000 the machine starts with the real cycle. By means of this you have the possibility
to fill the drum already in the evening and to start the program in such a way that the program will be finished
when you start working in the morning.
5.4.
Working with PLU
5.4.1.
Choice of a certain PLU
With the buttons
you can increase or decrease the PLU number. Pay attention to the pre set factory values which are indicated in
chapter 10.
5.4.2.
Starting with a selected PLU number
As soon as the required PLU number is shown on the display you can start the machine
by pushing the button "automatic on / off".
You can see that the machine started as the corresponding times are now shown on the
display.
The program flow can be interrupted at any time by pushing the button "automatic on / off". The program will be
interrupted immediately then and the drum will be aerated.
When starting the program flow again the cycle starts from the very beginning.
Risk of bruises.
Never touch the turning drum.
Never touch the drum before you have switched off the machine at the main switch.
Never take off the drum from the machine before you have switched off the machine at the
main switch.
Never touch the driving and guiding rolls while the machine is in operation.
5.4.3.
Modifying a selected PLU number
In case the factory values do not meet your request you can change the single values at any time.
First adjust the PLU number you would like to modify.
Then push the button ’change indication’ and keep it pushing for at least 6 seconds.
The indication changes and shows:
Time Work 05
Now you can change the working time with the buttons ’+ and –’ in minutes. Adjustable between 1 – 99.
With the button ’change indication’ you get to the next indication.
Time Pause 03
Also here you can change the time with the buttons ’+ and –’ in minutes. Adjustable between 1 – 99.
With the button ’change indication’ you get to the next indication.
Num. Cycles 05
Here you adjust how many times the program flow is repeated. When you enter 5 this means the drum is turning
five times and there will be five times a break. Also here you can change the value with the buttons ’+ and –’.
Adjustable between 1 –99.
With the button ’change indication’ you get to the next indication.
Lead Time 000
Remember: This is the time running before the real program starts working. Also here you can change the value
with the buttons ’+ and –’in minutes. Adjustable between 0 – 999.
With the button ’change indication’ you get to the next indication.
VAC. CYCLES 02
Here you can adjust how many cycles should be effected without aerating the drum. In this example the drum is
aerated after each second cycle. Also here you can change the value with the buttons ’+ and –’. Adjustable
between 1 –20.

Seite 13
With the button ’change indication’ you get to the next indication.
Time 1 Vac 65
Here you adjust how much time the vacuum pump is working after having started the program and after each
aerating. Indication in seconds. Adjustable between 1 –99.
There is a difference between vacuum time 1 and vacuum time 2. The first vacuum time is used during the
program flow only when the program is started and after one aerating. In this example the machine is effecting the
following program after having pushed the button start / stop: start of the vacuum pump for 65 seconds (Time 1
Vac), turning of the drum for 5 minutes, stopping of the drum for 3 minutes, start of the vacuum pump for 25
seconds (Time 2 Vac, this time is adjusted in the next step), turning of the drum for 5 minutes, stopping of the
drum, aerating of the drum for 30 seconds (Time Airing, this time is adjusted in the step after next), three minutes
break, start of the vacuum pump for 65 seconds (Time 1 Vac), turning of the drum for 5 minutes, etc. until 5
cycles have been executed. At the end of the program the drum will not be aerated in order to prevent a probable
development of germs. Aerating of the drum is only effected when pushing the start / stop button. As a hint for this
status the display shows at the end of the program PUSH STOP
With the button ’change indication’ you get to the next indication.
Time 2 Vac 25
Here you adjust how long the vacuum pump should be switched on after the cycle breaks in which the drum was
not aerated. Indication in seconds. Adjustable between 1 –99.
The air contained in the meat is sucked out during the process which results in a reduction of the vacuum. In
order to achieve again a complete vacuum the vacuum pump switches on for this time before the drum starts
turning.
With the button ’change indication’ you get to the next indication.
Time Airing 30
Here you can adjust how long the drum should be aerated when the "Vac Cycles" are reached.
In case you prefer to keep a remaining vacuum the time has to be adjusted accordingly low. If you prefer
complete aerating accordingly high. Also here you can adjust the time with the buttons ’+ and –’. Indication in
seconds. Adjustable between 1 –99.
With the button ’change indication’ you get to the next indication.
Pre-Time 00
Here you can adjust whether you want a pre-working time under vacuum before the normal cycles starts. If you
adjust a time here the program will do the following: After pushing the start button the lead time will expire if a lead
time is adjusted. The vacuum pump is switched on for the time adjusted under Vacuum Time 1 and the drum will
be evacuated. After that the drum starts turning for the adjusted Pre-Time. After this time the machine starts with
the normal program. Indication in minutes. Adjustable between 0 –99.
When pushing again the button ’ change indication’ the display changes to “Time Work”. Now you can check
again all values by pushing several times the button . If all values are correct do not touch any button for 2
seconds and all modified values are saved and the display returns to the basic indication.
The procedure can be effected with each PLU number.
5.5.
Working in the manual mode
By means of the button ’PLU’ you can change from the manual mode to the PLU mode and the other way around.
In the manual mode the display shows the letter MA instead of the PLU number and it looks as follows:
MA 05 00 000 000
You should choose this mode in case you are in need of a certain program only for a short time and you do not
want to reprogram your PLU numbers.
The working process is the same in both modes.
5.5.1.
Starting the manual mode
Also in the manual mode you can start the machine at any time by pushing the button
’automatic on / off’.
You can see that the machine started as the corresponding times are now shown on the
display.
The program flow can be interrupted at any time by pushing the button "automatic on / off". The program will be
interrupted immediately then and the drum will be aerated.
When starting the program flow again the cycle starts from the very beginning.
Risk of bruises.

Seite 14
Never touch the turning drum.
Never touch the drum before you have switched off the machine at the main switch.
Never take off the drum from the machine before you have switched off the machine at the
main switch.
Never touch the driving and guiding rolls while the machine is in operation.
5.5.2.
Modifying the condition in the manual mode
The modification of the conditions in the manual mode is effected in the same way as it is done with the
modification of a PLU number.
Only the start of the modification is different. In case you would like to modify the manual mode only push shortly
the button ’change indication’.
The indication changes and shows:
Time Work 05
Now you can change the working time with the buttons ’+ and –’. All other steps are the same as the steps within
the PLU mode.
5.6.
Note
Here again the following note:
At the end of the program the drum will not be aerated in order to prevent
a probable development of germs. Aerating of the drum is only effected when
pushing the start / stop button.
As a hint for this status the display shows at the end of the program PUSH STOP
6.
Cleaning
Before initial operation and after a longer period of standstill the machine has to be cleaned carefully.
With permanent use of the machine you have to clean it at least one time per day or if necessary also a few times
per day. For cleaning proceed as follows:
6.1.
How to proceed with cleaning
Switch off the machine.
Pull off the plug
Take off the drum from the machine
6.1.1.
Cleaning of the machine
Wipe the machine with a moist cloth and dry it afterwards.
Note: For cleaning only use usual washing-up liquids. Do not use scratching or scouring cleansing
agents or devices.
The machine is only drip-proof. Therefore do not use high pressure cleaning devices, water
hoses or similar devices. Furthermore you must not pour water over the machine. Danger of
short circuit or machine defect. In such cases any claims regarding warranty will be refused.
6.1.2.
Cleaning of the drum
Disengage the connecting tube on both sides and take it off.
Take off the drum from the basic device.
Take off locking ring and lid.
Take out the chicane of the drum by slightly pulling it.
Clean all single parts. Here you can use high pressure cleaning devices or similar without any risk.

Seite 15
6.2.
Cleaning of the single parts.
Never clean detached parts or accessories in a dish washer.
cleaning
detergent
procedure
cleaning device
procedure after cleaning
machine
warm water,
detergent, acid free
from chlorine
manually
cleaning rag, cleaning
brush
wash up with clear water,
dry
detached parts
warm water,
detergent, acid free
from chlorine
manually
cleaning rag, cleaning
brush
wash up with clear water,
dry
6.3.
Reassembling the parts
Reassemble the parts in reverse order.
7.
Maintenance
Clean the machine at least one time per day.
Slightly oil the couplings of the connecting tubes one time per day.
For oiling the machine only use acid free oil.
Check the oil level of the vacuum pump daily.
After each filling of the drum check the water separator.
7.1.
Oil change at the vacuum pump
When the oil level has sunk under the lower edge of the viewing glass there has to be made an oil change.
Also if you find out during the daily control that liquid has penetrated into the pump you have to make an oil
change. You will recognise this by a milky white colour of the oil. In this case change the oil immediately as
otherwise there is the risk that the pump gets rusty inside. In this case any warranty claim will be refused.
7.1.1.
How to proceed the oil change
Lift up the machine by using the tilting lever and place a flat
collecting container under the waste oil screw. Loosen this
screw by means of a hexagon socket screw key. Now let
the machine down. Leave it like this for at least two hours,
or even better during the whole night. Screw tight the waste
oil screw, open the oil filling screw. Fill in new oil,
BV 32 app. 0,2 litre, through the oil filling screw 1. Control
the oil level at the viewing glass 2, it should be filled up to ¾.
Then screw tight again the filling screw with a hexagon socket screw key.
7.2.
Water separator
In case the drum should have been overfilled by error, the water
separator tries to hold back the sucked liquid. For this reason you
have to control each time before starting the program and before
the vacuum pump works the first time if water is accumulated in
the water separator. If this should be the case interrupt the
program immediately and reduce the filling level in the drum.
Also when working correctly it can happen that water will be
accumulated in the water separator. It has to be let off in any case.
In order to let off the water proceed as follows:
Switch off the machine.
Make sure that there is no more vacuum. The vacuum meter has to show zero. If there is still a vacuum in the
machine you have to remove the connecting tube from the drum. Only if the vacuum escaped completely from the

Seite 16
machine open the drain plug 1, size of key SW 14, at the lower end of the water separator. The water drains off
outwardly.
When the water has drained off completely close again the drain plug.
In case the container should be dirty loosen the upper screw 2with a key size SW 10, turn off the container, clean
it and fix it again.
Now you can engage the connecting plug again and restart the machine.
8.
Trouble shooting
trouble solution
grinding noise drum has not been positioned correctly
switch off the machine and position the drum correctly
on the coupling
machine stops automatically short-term voltage drop, switch on the machine again
display does not light up current supply has been interrupted or fuse for electronic
board is activated
check the current supply, ask for service
oil level too low make oil change
oil is milky white make oil change
9.
Waste disposal
The producer is obliged to take back the machine for waste disposal. For this purpose the machine can be
returned to the manufacturer free of charge.
Table of contents
Other Scharfen Commercial Food Equipment manuals
Popular Commercial Food Equipment manuals by other brands

Bartscher
Bartscher 700FX-E1110 manual

Ideal AKE
Ideal AKE UKW Programming instructions

Angelo Po
Angelo Po 191PI2E Use and installation manual

OZTI
OZTI OSD 800 user manual

Unified Brands
Unified Brands groen ECLIPSE BPM-15 Operator's manual

Silver King
Silver King SKRCB38H-EDUS3 Technical manual and replacement parts list