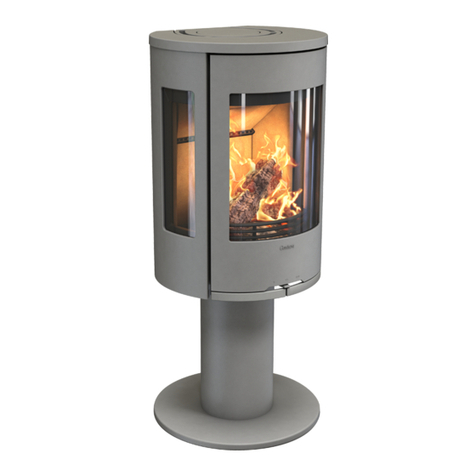
Schiedel SARGAS 1 User guide

Instructions for installation and operation
SARGAS wood burning stove
Models 1 & 3
www.schiedel.com/uk - December 2022 - Version 1

FOREWORD
By opting to purchase the SARGAS fireplace, you are receiving a quality SCHIEDEL
product.
In addition to its elegant and classic design, we have paid particular attention to ensuring
that the combustion technology is advanced, materials are high in quality and workmanship
is immaculate.
We are convinced that you will be very pleased with our SARGAS fireplace.
Contents
FOREWORD 2
The Clean Air Act 1993 and Smoke Control Areas 4
DEVICE DESCRIPTION 5
Documents included 7
Accessories included 8
IMPORTANT INFORMATION 8
SAFETY 9
Labelling 9
Liability 9
Improper use 10
Information on legal regulations 10
Only use suitable fuel 10
Chimney requirements 10
Regular cleaning and maintenance work 10
Spare parts and accessories 11
Original condition 11
Proper installation & entering into service 11
Sufficient supply of fresh air 11
What to do in the event of a chimney fire 11
TRANSPORT / PACKAGING 12
Transport on pallets: 13
Page 2

Transport on dollies: 13
Serial number: 13
FUEL 13
Permitted fuel 14
Unauthorised fuel 14
INSTALLATION 15
Minimum distances to combustibles 15
Floor protection 17
Chimney 17
Room-sealed operation 17
Changing the combustion air feed/exhaust extraction pipe 20
Using Single wall or Double Wall connecting flue pipe from the top 20
Using Single Wall or Double Wall Connecting Flue pipe from the rear 21
Combustion air feed from the rear 23
Mounting the heat shield 23
OPERATION 24
Accessories provided 24
Opening and closing the stove door 24
Setting for the combustion air 24
DEFRA KIT 26
Window cleaning air 26
INITIAL OPERATION 26
Entering the device into operation for the first time 26
Information on odours 27
Information on noises 27
Information on combustion chamber lining 27
HEATING CORRECTLY 28
Fuel amounts 29
CLEANING AND MAINTENANCE 29
Page 3

Cleaning with an ash vacuum 30
Cleaning varnished surfaces 30
Cleaning the combustion chamber 31
TROUBLESHOOTING 31
TECHNICAL DATA 33
Type testing / Quality seal 33
Energy label 35
Warranty 35
DoP & CE marking 37
The Clean Air Act 1993 and Smoke Control Areas
The Sargas 1 and Sargas 3 have been recommended as suitable for use in smoke control
areas when burning wood logs. The Sargas 1 and Sargas 3 must be fitted with a permanent
stop to prevent closure of the combustion air regulator beyond 80mm open.
Under the Clean Air Act local authorities may declare the whole or part of the district of the
authority to be a smoke control area. The Clean Air Act 1993 and Smoke Control Areas
Under the Clean Air Act local authorities may declare the whole or part of the district of the
authority to be a smoke control area. It is an offence to emit smoke from a chimney of a
building, from a furnace or from any fixed boiler if located in a designated smoke control
area. It is also an offence to acquire an “unauthorised fuel” for use within a smoke control
area unless it is used in an “exempt” appliance (“exempted” from the controls which
generally apply in the smoke control area).
In England appliances are exempted by publication on a list by the Secretary of State in
accordance with changes made to sections 20 and 21 of the Clean Air Act 1993 by section
15 of the Deregulation Act 2015. Similarly in Scotland appliances are exempted by
publication on a list by Scottish Ministers under section 50 of the Regulatory Reform
(Scotland) Act 2014. In Wales and Northern Ireland these are authorised by regulations
made by Welsh Ministers and by the Department of the Environment respectively.
Further information on the requirements of the Clean Air Act can be found here at:
https://www.gov.uk/smoke-control-area-rules
Your local authority is responsible for implementing the Clean Air Act 1993 including
designation and supervision of smoke control areas and you can contact them for details of
Clean Air Act requirements. It is an offence to emit smoke from a chimney of a building, from
a furnace or from any fixed boiler if located in a designated smoke control area. It is also an
offence to acquire an “unauthorised fuel” for use within a smoke control area unless it is
used in an “exempt” appliance (“exempted” from the controls which generally apply in the
smoke control area). (see p.26 for details)
Page 4

In England appliances are exempted by publication on a list by the Secretary of State in
accordance with changes made to sections 20 and 21 of the Clean Air Act 1993 by section
15 of the Deregulation Act 2015. Similarly in Scotland appliances are exempted by
publication on a list by Scottish Ministers under section 50 of the Regulatory Reform
(Scotland) Act 2014. In Wales and Northern Ireland these are authorised by regulations
made by Welsh Ministers and by the Department of the Environment respectively.
Further information on the requirements of the Clean Air Act can be found here at:
https://www.gov.uk/smoke-control-area-rules
Your local authority is responsible for implementing the Clean Air Act 1993 including
designation and supervision of smoke control areas and you can contact them for details of
Clean Air Act requirements.
DEVICE DESCRIPTION
The SARGAS fireplace is a stove for intermittent burning which has been specially designed
for the combustion of firewood. This type of fireplace differs from a stove for continuous
burning in terms of its replenishing interval; burning time, however, is not restricted.
This means that a stove for intermittent burning can be used over longer periods of time (3-5
hours = 3-5 burning cycles with each max. 2 kg filing) without the risk of the device getting
damaged. The device shell is a welded steel structure
Page 5

Page 6

Documents included
The documents below are located in small plastic bags that stick on the plastic cover over
the stove.
1. Type plate copy
2. Eco label and product data sheet
3. Production label
Page 7

Accessories included
All the accessory components below are located in a small plastic bag that sticks on the
plastic cover over the stove.
1. Ring for the top
plate
2. Cover for the
top plate
3.Connecting
element for the
central air inlet
(100 mm)
4. Protective
glove
5. Hook for the
revolving grate
6. Closure caps
for base plate
All the accessory components below are located in a small paper box inside the wood
storage compartment
Device dimensions
IMPORTANT INFORMATION
Please read these instructions on installation and operation carefully before installing the
device and entering it into service. In doing so, damage that may arise due to improper
installation or operation can be avoided.
Page 8

SAFETY
Burn hazard
Please be aware that some components (heating door, handles etc.) get hot whilst the
device is being used in heating mode and, as such, they may cause burns. Please use the
protective glove provided when using the device.
Fire hazard
Please observe the safety distances to combustible materials when installing the device.
It is forbidden to place any objects which are not resistant to heat on the stove. It is also
prohibited to dry clothes on the stove. Clothes, or similar items, must be placed a sufficient
distance away from the stove when drying.
Caution - children playing
Please note that the surface of the stove can become very hot when the device is being
used. Make sure children are aware of the hazard and keep them away from the stove when
it is being used.
Chimney connection
The stove should only be used after it has been properly connected to a chimney.
Using the stove
When the stove is in operation, it is forbidden to use highly flammable or explosive
substances in the same, or in adjacent, rooms.
The stove should never be operated when the heating door is open.
Please make sure that the combustion air supply is sufficient by using an air inlet pipe with
an appropriate design.
Labelling
Using the documentation provided, you may...
...safely operate the device
...carry out cleaning and maintenance work
Store this instruction manual in a safe location.
If the instruction manual goes missing, you can contact SCHIEDEL to order a new copy at
any time.
Illustrations and simplified images are for general guidance. They are not true to scale.
Liability
In the event of bodily injury or material damage, the manufacturer may only be held liable if
design faults are proven to exist.
The manufacturer shall bear no liability if...
...the device is not used as intended
Page 9

....the device is not operated as intended
...maintenance work is inadequate
...the spare parts used are not original
...structural changes have been made to the device
Improper use
Using the device in any other way than that intended may result in life-threatening injuries
and large-scale material damage. It may also mean that the guarantee or warranty becomes
void.
Improper use includes...
...making any structural changes to the device.
...operating the device when it is not properly connected to the chimney.
...operating the device when the heating door is open.
... operating the device without having read the instruction manual.
...using spare parts which are not original.
... using fuel which has not been approved.
Information on legal regulations
Please observe the local, national and European regulations and standards which apply to
the installation and operation of stoves.
Only use suitable fuel
Use only seasoned or kiln dried wood with a moisture content below 20%.
Chimney requirements
It must be ensured that any new or existing chimneys are suitable and ready for use before
using the stove, or before entering it into service.
Please ensure that the chimney is not blocked if the device is going to be fired after it has
not been used for a long time.
Detailed information can be found on www.schiedel.com by reading the SCHIEDEL chimney
documentation applicable for your country.
Regular cleaning and maintenance work
The stove, including all of the system components connected (e.g. the chimney,...) must be
cleaned and serviced on a regular basis in order to make sure that the device remains
functional and efficient.
Locking mechanisms (spring lock and hinges) need to be lubricated with copper paste on
demand or at least once a year.
Page 10

Please check occasionally (about 2x per heating season) that the screws and nuts are
securely attached to the glass retaining strips, door hinges and the handle mechanism.
Please tighten loose screws and nuts very lightly by hand, if necessary with a wrench. If it is
difficult to open or close the door, we recommend that the locking mechanism (spring lock
and hinges) and the friction surfaces be slightly greased. Please use the enclosed copper
paste or a heat-resistant grease (temperature-resistant up to 1,100 ° C; e.g. copper paste).
Spare parts and accessories
Only use original spare parts and accessories
Original condition
The stove has been inspected in the form in which it is delivered and changes should not be
made.
Proper installation & entering into service
The device is only considered safe if installed by a qualified specialist in accordance with the
regulations and requirements applicable to the installation site.
Sufficient supply of fresh air
Please make sure that the room in which the stove has been installed has a sufficient supply
of fresh air whilst the device is in heating mode.
If doors and windows are tightly closed, or if devices, such as extractor hoods, tumble dryers
and fans, among other appliances, extract air from the room in which the device is situated,
combustion air (fresh air) must be fed into the room from outdoors if need be.
Combustion air inlets must not be closed.
What to do in the event of a chimney fire
If the stove, chimney or connecting flue pipe are not cleaned on a regular basis, or if
unsuitable fuel is used, residue may catch fire. This may cause a chimney fire.
Keep the heating door closed and set the air regulator to “0”. Move any combustible
materials away from the chimney!
Do not try to put the chimney fire out by throwing water on it under any circumstances.
--> Call the fire brigade!
Page 11

TRANSPORT / PACKAGING
The device is packaged in such a way so that it is well protected from getting damaged
during transportation. However, there is a possibility that the device and its accessories may
still become damaged.
The plastic bag over the stove within the wooden crate protects the stove from rain and dirt
during transport and storage.
Warning: Do not store the stove outside or use it in a wet/humid environment to avoid
corrosion.
To remove the wooden crate, four screws have to be removed (one on each corner).
After unpacking the device, please check carefully whether the device has been damaged
during transportation and check whether all components are present.
PLEASE NOTE:
Any visible defects should be reported immediately! It is not possible to make complaints at
a later date!
Page 12

Modes of transport
The device may only be transported using vehicles with a sufficient load-bearing capacity.
Safety during transportation
The device is secured on the pallet using transport locking screws in the wood storage
compartment (see image).
Transport on pallets:
Transport the device to the installation site on a pallet. Remove the transport locks in the
wood storage compartment and lift the device off the pallet.
Transport on dollies:
The device may be placed on its back and transported using a dolly. Remove the transport
locks and move the device to the installation site using the dolly. In order to prevent any
damage to the paintwork, protect the rear side of the stove, using cardboard for example.
Serial number:
The serial number of the stove can be found (1) on the packaging label, (2) on the type plate
and (3) on a yellow label that is inside a small plastic bag,these are attached to the plastic
bag of the stove.
Page 13

FUEL
Permitted fuel
The device is suitable for burning firewood.
Only small amounts of the following materials may be used for igniting purposes: bark, wood
chippings, brushwood, wood shavings, sawdust and paper. When these types of fuel are set
alight, large amounts of emissions and ash are discharged, with little heat being generated.
Wood
The water content of firewood should be around 20% of its dry weight. Firewood should also
be 1/3m long and chopped into small pieces. In this way, the pieces of wood catch fire
quickly and generate a higher heat output than if the same amount of wood were used in
larger pieces. Spruce, pine and alder can be stored outdoors for 2 years, whilst hardwood
can be stored for 3 years (under cover!).
The following table shows the impact of the water content of wood on its heat value:
Wood storage
Water content (%)
Heat output
(kWh/kg)
Straight from the woods
50
~2,3
Stored over the winter
40
~2,7
Stored over the summer
18-25
~3,4
Air-dried
15-20
~4,2
Unauthorised fuel
Surface-treated wood (veneered, varnished, water-proof coating, etc.), damp wood,
chipboard, flammable liquids, any type of waste (packaging waste), plastics, newspapers,
rubber, leather, fabrics, etc. Burning these kinds of materials pollutes the environment very
badly. Furthermore, it may cause damage to the device and the chimney.
Burning charcoal is not permitted. The device has not been verified for use with this kind of
fuel and, as such, it may cause damage to the device and is not covered by the guarantee.
PLEASE NOTE:
If unauthorised and low-quality fuels are used, we reserve the right to withdraw the
guarantee and warranty claims!
Fuel Overloading
The maximum amount of fuel specified in this manual should not be exceeded, overloading
can cause excess smoke.(see p.29 for max loading details)
Page 14

Refuelling on to a low fire bed
If there is insufficient burning material in the firebed to light a new fuel charge, excessive
smoke emission can occur.Refuelling must be carried out onto a sufficient quantity of
glowing embers and ash that the new fuel charge will ignite in a reasonable period.If there
are too few embers in the fire bed add suitable kindling to prevent excess smoke
INSTALLATION
Minimum distances to combustibles
The stove is designed to be a free-standing indoor device. It must be installed at the
following minimum distances to combustible materials (wood partitions, furniture, decorative
fabrics,...)
SARGAS 1 (EN 13240)
SARGAS 3 (EN 13240)
Rear: 70 mm
Rear: 50 mm
Sides: 100 mm
Sides: 400 mm
Front: 1200 mm
Front: 1200 mm
Floor: 0 mm
Floor: 0 mm
Page 15

Sargas 1
Sargas 3
Page 16

Floor protection
If the floor is made from flammable material (floors made from wood, synthetic materials,
carpets, …), a spark arrestor plate made from toughened glass, or any other non-flammable
material, should be used.
This base must have the following minimum dimensions, with the opening of the combustion
chamber as the starting point:
▪ Front 50 cm
▪ Side 30 cm
Inlay board for the base plate and closure caps for base plate (please see accessory
component 6 provided) must be installed after the final location for the stove has been
chosen and the stove is in position..
Chimney
It must be ensured that any new or existing chimneys are suitable and ready for use before
firing the stove.
Please ensure that the chimney is not blocked if the device is going to be fired after it has
not been used for a long time (i.e over the summer).
Detailed information can be found on www.schiedel.com by reading the SCHIEDEL chimney
documentation applicable for your country.
Room-sealed operation
SCHIEDEL RECOMMENDS USING THE STOVE AIR INDEPENDENTLY, USING
SCHIEDEL'S TESTED AND APPROVED PERMETER SMOOTH AIR SYSTEM
As modern or refurbished houses have a highly dense construction, it often means that there
is not enough interior air for combustion.
By installing the stove to be room air independent, the stove can be used, by and large,
regardless of the air and pressure ratios in the room where it has been installed.
Generally speaking, it is safe to use these kinds of room-sealed stoves if the building has a
controlled ventilation system as they are characterised by their largely compact design and
self-closing doors.
If the structural conditions mean that room-sealed operation is impossible, it is also possible
for the stove to draw the combustion air from the room where it has been installed (non
room-sealed operation).
In this case, the user should ensure that the air supply in the room where the device has
been installed is sufficient.
Page 17

1.) Connection to the SCHIEDEL
Permeter Smooth Air System
Combustion air comes directly from
above
Emissions exit directly upwards
PLEASE NOTE:
This is the standard delivery condition.
2.) Combustion air comes from the rear
(changing to this variant as described
in related paragraph)
The connecting element is 100 mm in
diameter. The air pipe used by the
customer should be airtight.
Flue Gases exit directly upwards or to
the rear via Single Wall or Double Wall
connecting flue flue pipes (150 mm in
diameter).
Page 18

3.) Combustion air comes from the
room where the device has been
installed (not recommended by
SCHIEDEL) (changing to this variant
as described in related paragraph –
combustion air feed from below)
No separate air supply connection is
necessary, combustion air is
extracted from the room where the
device has been installed via the
bottom of the device – open
windows regularly, this is mandatory,
especially for extremely tight
houses.
Emissions exit directly upwards or to
the rear using Single Wall or Double
Wall connecting flue pipes (150 mm
in diameter)
Page 19

Changing the combustion air feed/exhaust extraction pipe
The device comes with an upper combustion air feed/exhaust extraction pipe as standard.
Tools required to make any alterations:
● Allen key (magnetic)
● Allen wrench
● Diagonal-cutting pliers
Using Single wall or Double Wall connecting flue pipe from the top
1.) Remove the top plate and take off the outer air inlet and inner flue tube supports.
2.) Stick the seal for the central supply air feed (accessory component 2) onto the inner
and outer edge of the cover for the upper central supply air feed (accessory component
7) and attach it to the stove.
Page 20
This manual suits for next models
1
Table of contents
Popular Wood Stove manuals by other brands

RAIS
RAIS attika NEXO 100 GAS installation guide

WoodPro
WoodPro WS-TS-1500 owner's manual

Contura
Contura C 586W installation instructions

Palazzetti
Palazzetti EVA GENERAL INFORMATION - WARNINGS - INSTALLATION - MAINTENANCE

Lopi
Lopi 1250 Republic owner's manual

Panadero
Panadero CAPRI 3V Usage and maintenance instructions