Schweißkraft EASY-STICK 121 User manual

Operating Instructions
EASY-STICK 121
Electrode Inverter
EASY-STICK 141
EASY-STICK 161
EASY-STICK 121

2Electrode Inverter | Version 1.09
Imprint
Product identification
Electrode Inverter Item number
EASY-STICK 121 1073012
EASY-STICK 141 1073014
EASY-STICK 161 1073016
Manufacturer
Stürmer Maschinen GmbH
Dr.-Robert-Pfleger-Str. 26
D-96103 Hallstadt
Fax: 0049 (0) 951 96555 - 55
E-Mail: info@schweißkraft.de
Internet: www.schweißkraft.de
Indications regarding the operating instructions
Original instruction
Edition: 06.10.2020
Version: 1.09
Language: English
Author: SN
Indications regarding the copyright
Copyright © 2020 Stürmer Maschinen GmbH, Hallstadt,
Germany.
The contents of these operating instructions are the sole
property of the company Stürmer.
Passing on as well as copying of this document, the use
and distribution of its content are prohibited if not explic-
itly permitted. Contraventions are liable to compensa-
tion.
Subject to technical modifications and error.
Content
1 Introduction ............................................. 3
1.1 Copyright ............................................................ 3
1.2 Customer service................................................ 3
1.3 Limitation of liability............................................. 3
2 Safety ....................................................... 3
2.1 Symbol explanation ............................................ 3
2.2 Personal protective equipment ........................... 4
2.3 General safety regulations.................................. 4
2.4 Safety labels on device....................................... 4
3 Intended Use ........................................... 5
4 Transport, packaging, storage............... 5
4.1 Delivery and Transport ....................................... 5
4.2 Packaging........................................................... 5
4.3 Storage ............................................................... 5
4.4 Installation requirements..................................... 5
5 Technical Data......................................... 6
5.1 Table................................................................... 6
5.2 Type plate........................................................... 6
6 Operating principle ................................. 7
6.1 Principle of electrode welding............................. 7
7 Description of the operating elements ....8
7.1 Representation ................................................... 8
7.2 Scope of delivery ................................................ 8
8 Inverter characteristics .......................... 9
8.1 Duty cycle and thermal protection ...................... 9
8.2 Volt-Ampere Characteristic............................... 10
9 EMC measure ........................................ 10
10 Electromagnetic fields........................ 11
11 Operation ............................................. 11
11.1 Operating conditions....................................... 14
11.2 Electrical connection....................................... 14
11.3 Welding with rod electrode (MMA).................. 14
11.4 Selection of the electrode size and welding
current (MMA) ................................................ 15
12 Troubleshooting.................................. 15
12.1 Electrode welding ........................................... 16
13 Care, maintenance and repair............ 18
13.1 Care after work ............................................... 18
13.2 Maintenance and repair .................................. 18
14 Disposal, reusing used machines ..... 19
14.1 Decommissioning ........................................... 19
14.2 Disposal of electrical equipment..................... 19
14.3 Disposal via communal recycling points ......... 19
15 Spare parts .......................................... 19
15.1 Spare parts orders.......................................... 19
15.2 Spare parts drawings...................................... 20
16 Electrical circuit diagrams ................. 23
17 EC Declaration of Conformity ............ 25

Electrode Inverter | Version 1.09 3
Introduction
1 Introduction
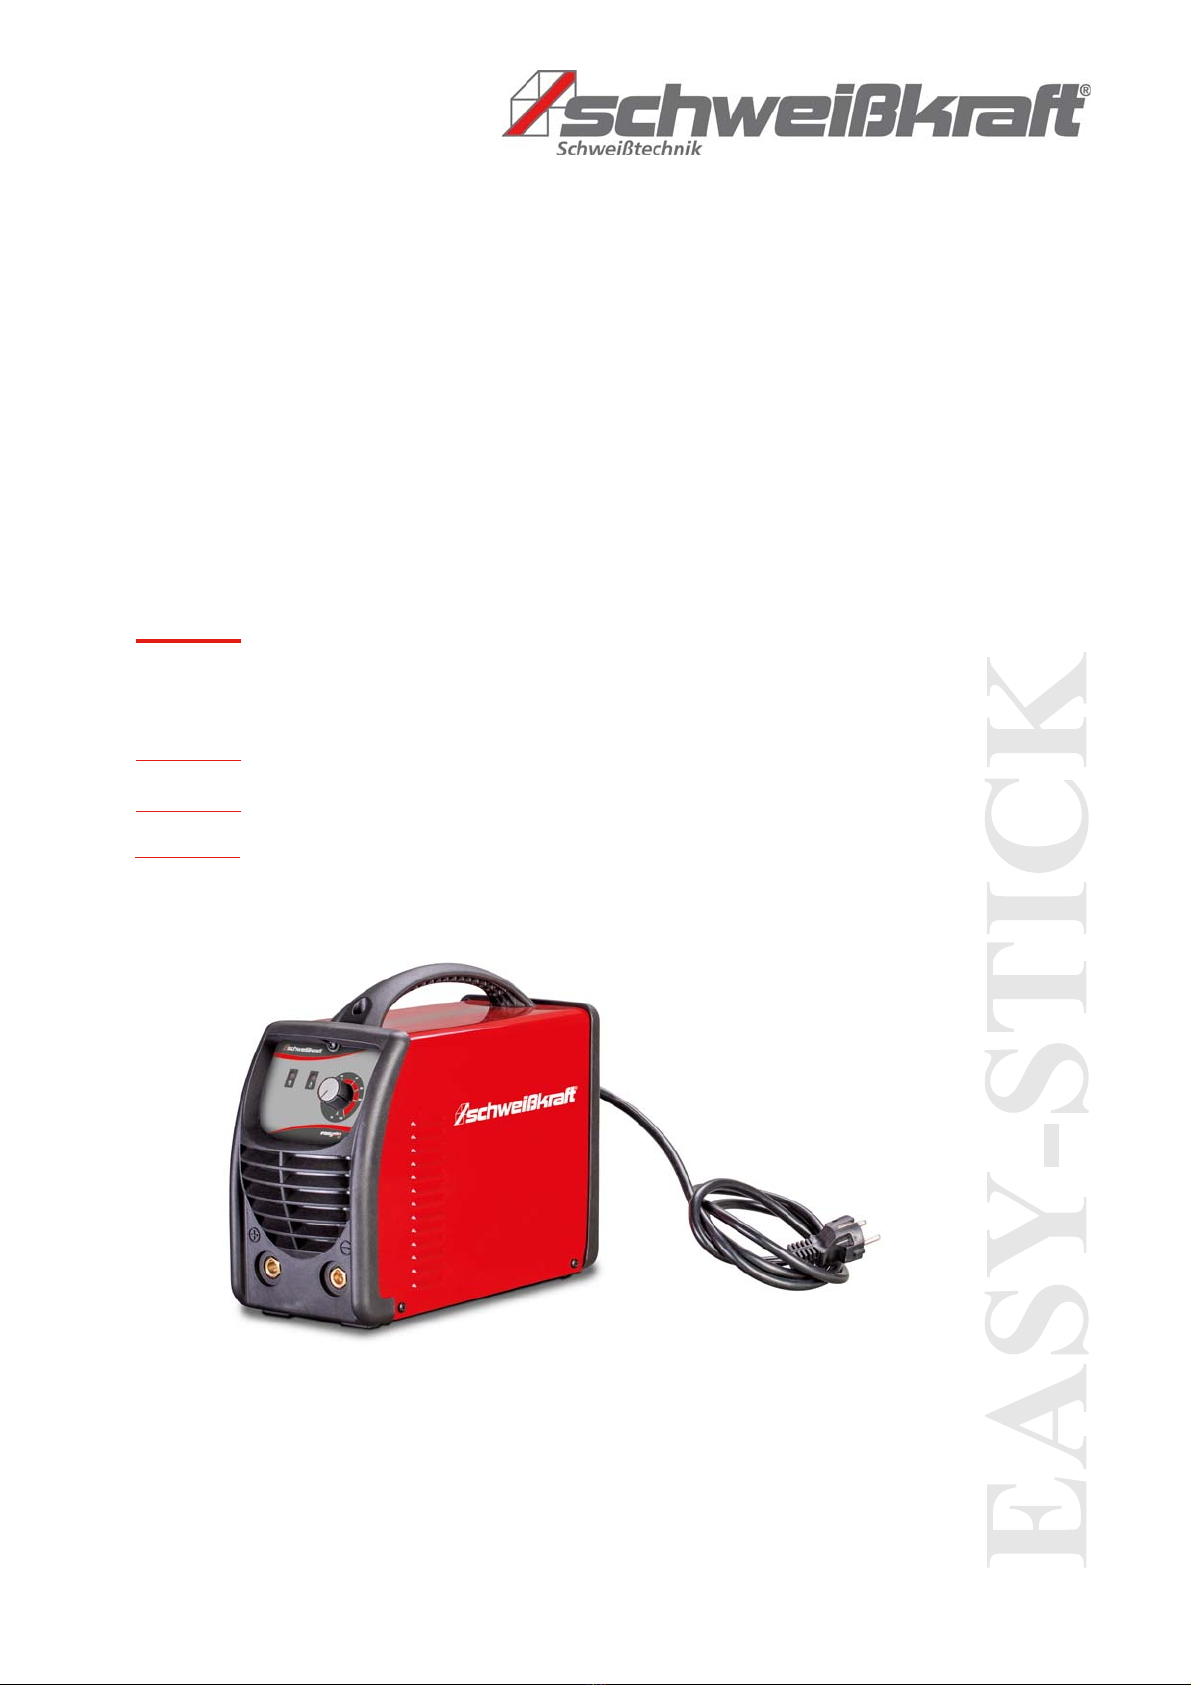
You have made a good choice by purchasing the
Schweißkraft electrode inverter.
Read the operating manual thoroughly before com-
missioning the machine.
It gives you information about the proper commissioning,
intended use and safe and efficient operation and main-
tenance of your electrode inverter.
The operating manual is part of electrode inverter. pac-
kage. Always keep this operating manual in the location
where your electrode inverter is being operated. All local
accident prevention regulations and general safety in-
structions for the operating range of your electrode inver-
ter must also be complied with.
1.1 Copyright
The contents of these instructions are copyright. They
may be used in conjunction with the operation of elec-
trode inverter. Any application beyond those described is
not permitted without the written approval of Stürmer Ma-
schinen GmbH.
For the protection of our products, we shall register tra-
demark, patent and design rights, as this is possible in
individual cases. We strongly oppose any infringement
of our intellectual property.
1.2 Customer service
Please contact your dealer if you have questions con-
cerning your electrode inverter or if you need technical
advice. They will help you with specialist information and
expert advice.
Germany:
Stürmer Maschinen GmbH
Dr.-Robert-Pfleger-Str. 26
D-96103 Hallstadt
Repair service:
Fax: 0049 (0) 951 96555-111
E-Mail: service@stuermer-maschinen.de
Internet: www.unicraft.de
Spare part orders:
Fax: 0049 (0) 951 96555-119
E-Mail: ersatzteile@stuermer-maschinen.de
We are always interested in valuable experience and
knowledge gained from using the application which then
could be shared and be valuable to develop our products
even further.
1.3 Limitation of liability
All information and notes in these operating instructions
were summarised while taking applicable standards and
rules, the state-of-the-art technology and our long-term
knowledge and experiences into consideration.
In the following cases the manufacturer is not liable for
damages:
- Non-observance of the operating instructions,
- Inappropriate use
- Use of untrained staff,
- Unauthorised modifications
- Technical changes,
- Use of not allowed spare parts.
The actual scope of delivery may deviate from the expla-
nations and presentations described here in case of spe-
cial models, when using additional ordering options or
due to latest technical modifications.
The obligations agreed in the delivery contract, the gen-
eral terms and conditions as well as the delivery condi-
tions of the manufacturer and the legal regulations at the
time of the conclusion of the contract are applicablen.
2 Safety
This section provides an overview of all important safety
packages for the protection of the operating personnel
as well as for safe and fault-free operation. Other task
based safety notes are included in the paragraphs of the
individual phases of life.
2.1 Symbol explanation
Safety instructions
The safety notes in these operating instructions are high-
lighted by symbols. The safety notes are introduced by
signal words which express the concern of the risk.
DANGER!
This combination of symbol and signal words indi-
cates an imminently dangerous situation which may
lead to death or severe injuries if they are not
avoided.
WARNING!
This combination of symbols and signal words indica-
tes a possibly dangerous situation which may lead to
death or severe injuries if they are not avoided.

4Electrode Inverter | Version 1.09
Safety
Tips and recommendation
It is necessary to observe the safety notes written in
these operating instructions in order to reduce the risk of
personal injuries and damages to property.
2.2 Personal protective equipment
The personal protective equipment serves to protect per-
sons against impairments of safety and health while
working. The staff member has to wear personal protec-
tive equipment while performing different tasks on and
with the machine which are indicated in the individual
paragraphs of these instructions.
The personal protective equipment is explained in the
following paragraph:
2.3 General safety regulations
- Before commissioning, check the device for exter-
nally visible damage and defects.
- Repair defects and damage immediately.
- Work on the electrical equipment may only be car-
ried out by a qualified electrician.
- Do not use the device in a damp, wet environment,
rain, etc.
- Only use original spare parts and accessories.
- Disconnect the mains plug before carrying out repair
and maintenance work and after use.
- Make sure the ON/OFF switch is off when plugging
the plug into the power outlet to prevent accidental
start-up.
2.4 Safety labels on device
Several warning signs and safety labels are attached to
the device, which must be observed and followed. The
safety labels attached to the device must not be remo-
ved. Damaged or missing safety labels can lead to incor-
rect actions, personal injury and damage to property.
They must be replaced immediately. If the safety mar-
kings are not visible and understandable at first glance,
the device must be taken out of operation until new
safety labels have been applied.
CAUTION!
This combination of symbol and signal words indi-
cates a possibly dangerous situation which may lead
to minor or light injuries if they are not avoided
ATTENTION!
This combination of symbol and signal words indi-
cates a possibly dangerous situation which may lead
to property and environmental damages if they are
not avoided.
NOTE!
This combination of symbol and signal words indica-
tes a possibly dangerous situation which may lead to
property and environmental damages if they are not
avoided.
Tips and recommendation
This symbol highlights useful tips and recommenda-
tion as well as information for all efficient and trouble-
free operation.
Welders face shield or Helmet with
welder face shield
The welding shield, which is worn on the head and in
front of the face or attached to a suitable protective
helmet, protects eyes and face, equipped with
suitable filters.
Protective gloves with pulse pro-
tection
The protective gloves with pulse protection prevent
the hands from sharp-edged components, as well as
from friction, abrasions, light burns or deeper injuries.
Safety boots
The safety boots protect the feet from crushing, fal-
ling parts and slipping on slippery surfaces.
Protective clothes
Protective clothes are made of a tightly fitted fabric
without the protruding parts of low tear strength.
Protective apron
The protective apron mainly protects the front of the
body from sparks or radiation during welding.

Electrode Inverter | Version 1.09 5
Intended Use
Fig. 1: Safety labels
3 Intended Use
The device is exclusively used for arc welding according
to MMA.
The device is built and tested according to the standard
EN 60974-10 in EMC class A.
Intended use also includes compliance with all informa-
tion in these instructions. Any use exceeding the inten-
ded use or any other use is considered misuse.
Stürmer Maschinen GmbH accepts no liability for design
and technical modifications to the electrode inverter.
Claims of any kind for damage due to improper use are
excluded.
4 Transport, packaging, storage
4.1 Delivery and Transport
After delivery, check the device for visible transport da-
mage. If the electrode inverter is damaged, report this
immediately to the transport company or the dealer.
4.2 Packaging
All used packaging materials and packaging aids are re-
cyclable and should be taken to a materials recycling de-
pot to be disposed of.
The delivery packaging is made of cardboard, so please
dispose carefully by having it chopped up and given to
the recycling collection.
The film is made of polyethylene (PE) and the cushioned
parts of polystyrene (PS). These materials should be
taken to a collection point for recyclable materials or to
the local waste disposal company.
4.3 Storage
The electrode inverter must be installed in closed, dry
and well-ventilated rooms with room temperatures bet-
ween 15 and 35 degrees. Do not expose it to moisture or
intense sunlight.
4.4 Installation requirements
The device has been designed for use in covered rooms
and outdoors and must be installed in a dry environment.
The environment in which the electrode inverter is used
should be below +40°C and the humidity should be low.
The environment must be free of dust, acids, salts or
concentrations of iron or metal powders.
Ensure that there is sufficient space in front of the device
so that the operating elements can be easily reached
and viewed. Position the device so that the air inlet and
outlet are not obstructed. Make sure that no metal parts,
dust or other foreign objects can enter the device.
The environmental conditions must be appropriate for
protection class IP21!
WARNING!
This Class A welding device is not intended for use in
residential installations where the power supply is
provided by a low-voltage public power supply
system. It may be difficult to ensure electromagnetic
compatibility in these areas due to both conducted
and radiated interference.
WARNUNG!
Danger in case of misuse!
Misuse of the device can lead to dangerous situati-
ons.
- Only operate the device in the power range speci-
fied in the technical data.
- Never bypass or disable the safety devices.
- Only operate the device in a technically perfect con-
dition.
DANGER! ELECTRICAL VOLTAGE!
Do not use the device outdoors in the rain!

6Electrode Inverter | Version 1.09
Technical Data
5 Technical Data
5.1 Table
5.2 Type plate
Fig. 2: Type plate EASY-STICK 121
EASY-STICK 121 EASY-STICK 141 EASY-STICK 161
Dimensions (LxWxH)) [mm] 320 x 135 x 255 320 x 135 x 255 320 x 135 x 255
Weight (Netto) [kg] 4,1 4,3 4,4
Supply voltage [V] 230 230 230
Phase (s) 1 1 1
Type of current AC AC AC
Mains frequency [Hz] 50/60 50/60 50/60
Current consumption [A] 28 36,6 36,5
Total power [kVA] 6,4 8,4 8,4
Norm / Marking EN 60974-1:2012, EN 60974-10:2014 / CE
Degree of protection IP21S IP21S IP21S
Insulation class H H H
EMC class A A A
Fuse, slow blow [A] 16 16 16
Required generator output >6.4kVA >8.4 kVA >8.4 kVA
Mains plug [A] 16 16 16
No-load voltage [V] 77,9 77,4 69,9
Operating temperature [C°] 10~40 10~40 10~40
Weldable electrode Ø [mm] 1.6~3.2 1.6~3.2 1.6~3.2
Electrode setting range [A] 10~120 10~140 10~160
Electrode duty cycle at 40°C;
Electrode [%]
25 15 25
Electrode welding current at DC
40°C; Electrode [%]
60 55 80
Electrode power consumption [kVA] 3,8 4,5 5
Sheet thicknesses [mm] 1.0~4.0 1.0~4.0 1.0~6.0

Electrode Inverter | Version 1.09 7
Operating principle
6 Operating principle
The EASY-STICK welding unit is an electrode inverter
for welding with all common rutile, stainless steel and
cast iron electrodes with direct current. The required wel-
ding current can be adjusted steplessly via a control dial.
The Hot-Start function provides stable ignition of the arc
and the Anti-Stick function prevents the electrode from
sticking. These functions are automatically activated and
deactivated. The Arc-Force control adjusts the dyna-
mics to the welding process and can be controlled. The
unit is cooled with an air fan. If the permissible tempera-
ture of the power components is overshot, the welding
current is automatically switched off. This is indicated by
a control lamp on the control panel. The housing protects
the components against external influences and direct
contact. Depending on the application, there are different
degrees of protection against penetration by solid bodies
and water. The degree of protection is indicated by the
letters IP followed by two digits: The first digit indicates
the degree of protection against solid bodies and the se-
cond digit the degree of protection against water.
6.1 Principle of electrode welding
Electrode welding is an uncomplicated welding method
with which almost all metals can be welded. This method
can also be used outdoors and with special equipment
even under water. In electrode welding, the arc length is
determined by hand. The distance between the electro-
des determines the arc length. Welding is mainly carried
out under direct current; e.g. rutile electrodes are easy to
weld under minus-pole direct current; basic electrodes
under plus-pole direct current. The electrode is an arc
carrier and also an additional material. It consists of a
core wire and a coating. The coating protects the molten
pool from harmful atmospheric oxygen and stabilizes the
arc. In addition, a slag forms which protects and shapes
the weld seam. Depending on the thickness and compo-
sition of the coating, a difference is made between rutile
and basic electrodes. Rutile electrodes are easier to
weld and have a nice flat seam. The slag is also easier to
remove. It should be noted that many electrodes It
should be noted that many electrodes must be dried
back after prolonged storage, because moisture accu-
mulates from the air over time back after longer storage,
because moisture accumulates from the air over time.
Otherwise, electrode welding is a very common and
easy-to-use welding process.
Fig. 3: Functional principle manual arc welding
Welding current and electrode diameter:
Protect
against solid
objects over
12 mm e.g.
hands, large
tools
21
Protected
against
vertically
falling
dripping
water
S
Tested
when
moving
parts are
at a
standstill
IP2
1
øElectrode (mm) Adjustment range of the
welding current (A)
1.60 30 - 50
2.00 40 - 70
2.50 70 - 110
3.25 110 - 140
4.00 140 - 180
5.00 180 - 200
Workpiece
Arc
Coating
Core rod
Molten bath
Gas and slag
Rod electrode

8Electrode Inverter | Version 1.09
Description of the operating elements
7 Description of the operating
elements
7.1 Representation
EASY-STICK 121, EASY-STICK 141 and EASY-STICK
161:
Fig. 4: Device view EASY-STICK 121, EASY-STICK 141 and EASY-
STICK 161
1 „+“ - Output terminal
2 „-“ - Output terminal
3 LED: Power indicator, Lamp lights up when in
operation
4 LED: Alarm indicator
5 Welding current adjustment knob
6 Mains connection (Back side)
7 ON/OFF switch (Back side)
Alarm indicator (4):
Lights up in case of current overload, overvoltage, over-
heating, mains failure or internal defect in the power cir-
cuit. The device protection is activated. The welding cur-
rent is switched off until the system detects that the
overload has been significantly reduced. The alarm dis-
play then goes out.
Welding current adjustment knob (5):
The desired welding current can be set steplessly with
the welding current adjustment knob (5).
Fig. 5: Control panel EASY-STICK 161
7.2 Scope of delivery
EASY-STICK 121:
- Electrode Inverter
- 3 m welding cable 12 mm² with electrode holder
- 3 m earth cable 12 mm² with ground clamp 200 A
- Operating instructions
EASY-STICK 141:
- Electrode Inverter
- 3 m welding cable 16 mm² with electrode holder
- 3 m earth cable 16 mm² with ground clamp 200 A
- Operating instructions
EASY-STICK 161:
- Electrode Inverter
- 3 m welding cable 16 mm² with electrode holder
- 3 m earth cable 16 mm² with ground clamp 200 A
- Operating instructions

Electrode Inverter | Version 1.09 9
Inverter characteristics
8 Inverter characteristics
The EASY-STICK-series of welding machines has excel-
lent performance: constant current output makes wel-
ding arc more stable; fast dynamic response speed re-
duces the impact from the arc length fluctuation to the
current; accurate stepless current adjustment and pre-
setting function. There are also some automatic protec-
tion functions for under voltage, over current, over heat,
etc. inside the welder, when the problems listed before
occurred, the alarm light on the front panel is on and at
the same time the output current will be cut off. It can
self-protect, prolong the usefull life, greatly improved the
reliability and practicality of the welding machine.
ARC series of welding machines can be ignited easily,
also with little splash and good weld bead.
ARC series of welding machines is widely used in Petro-
leum, chemical, mechanical, shipbuilding, architecture,
boiler, pressure container, military industry and Main-
tenance work , etc.
8.1 Duty cycle and thermal protection
The “X”-axis stands for Duty Cycle, which is defined as
the portion of the time a welding machine can weld conti-
nuously with it’s rated output current within a certain time
cycle (10 minutes).
Fig. 6: Relationship between welding current and working cycle
Fig. 7: Relationship between welding current and working cycle
If the welding device overheats, the thermoswitch re-
sponds and puts the welding device out of operation
Indication: The LED alarm indicator is licht up red.
In that case, the machine should not be welding for 10-
15 minutes to cool down with the fanrunning.
When operating the machine again, the welding output
current or the duty cycle should be reduced.
Relation of welding current
and duty cycle for EASY-
STICK 141.
Relation of welding current
and duty cycle fo EASY-
STICK 161.

10 Electrode Inverter | Version 1.09
EMC measure
8.2 Volt-Ampere Characteristic
The Electrode Inverter EASY-STICK 121, EASY-STICK
141 und EASY-STICK 161 have an optimized volt-am-
pere characteristic (see diagram). In MMA mode, the ra-
tio between nominal voltage U2and welding current I2is
as follows:
IF I2≤ 600 A, U2 = 20 + 0,04 I2 (V);
IF I2 > 600A, U2 = 44 (V)
Fig. 8: Volt-Ampere characteristic
9 EMC measure
Fig. 9: EMC
In the special situation, The specified area may be af-
fected, the standard of radiation limit value has been
complied with (eg: The device, which is easy effected by
electromagnetism, is used at the installation location, or
there is radio or TV near the installation location). In this
condition, the operator should adopt some appropriate
measures to remove interference.
Accoring to the domestic and international standards,
the ambient devices’ electromagnetism situation and
anti-interference ability must be checked:
- Safety device
- Power line, Signal transmission line and Date
transmission line
- Date processing equipment and telecommunica-
tion equipment
- Inspection and calibration device
The effective measures avoid the problem of EMC:
a) Power source:
Even though the power source connection meet rules,
we still need to take additional measure to remove the
electromagnetic interference (eg: Use the right power fil-
ter).
b) The welding line:
- Try to shorten the length of cable
- Put the cable together
- Be Far away from other cable
c) Equipotential connection
d) Ground connection of work-piece:
- When necessary, use appropriate capacitance to
connect the ground.
e) Shielding, when necessary:
- Shield the ambient devices
- Shield the whole welding machine
Radiation Class B device:
It can meet the radiation requirements of residential area
and industrial area. It also can be used in residential
area which power is supplied by public low voltage cir-
cuit.
Hi-zone welding machines belong to Class A.
Volt-Ampere characteristic
Working point
The relation of rated
loading voltage and wel-
ding current

Electrode Inverter | Version 1.09 11
Electromagnetic fields
10 Electromagnetic fields
Current-carrying conductors generate electromagnetic
fields (EMF). So far, no negative effect of these magnetic
fields on health has been proven. Nevertheless, a ha-
zard cannot be completely excluded.
11 Operation
NOTE!
For your own safety you should observe the follo-
wing to minimize the electromagnetic field lines:
- Lay the cables as far away from your body as pos-
sible.
- Never wrap welding cables around your body.
- Ensure that the welder and power cord are as far
away from the operator as possible.
- Connect the earth cable as close as possible to the
welding point.
- Special care must be taken with pacemakers!
Use welders face shield or helmet
with welder face shield!
Use protective gloves with pulse
protection!
Wear safety boots!
Wear protective clothes!
Wear protective apron!
DANGER! ELECTRICAL VOLTAGE
!
- Open-circuit voltage is present when the device is
switched on. Never touch the electrode with any
part of your body!
- Do not use the unit outdoors in the rain!
- Do not connect welding equipment together. The
open circuit voltage could lead to fatal injuries!
- The wire, the drive roller, the wire feed housing and
all metal parts touching the welding wire are live!
- Never touch simultaneously live heated parts of
electrode holders which are connected to two wel-
ding devices. The voltage between the parts can be
the total of the open circuit voltage!
DANGER OF EXPLOSION!
- Do not weld in rooms where there is a risk of fire or
explosion. Special regulations apply here!
- No welding work may be carried out on containers
in which gases, fuel, oils, dyes or the like have been
stored, even if they have been emptied for a long
time. There is a risk of explosion due to residues.
- Do not carry out welding work near pressurised
containers.
- Do not weld in environments where dust, gas or ex-
plosive vapours are present.
- Do not use damaged or leaking gas cylinders.
- Never touch the gas cylinders with the electrode or
other live parts!
WARNING!
- Protect your body and eyes from electric arc radia-
tion.
- Ensure adequate ventilation of the machine.
- Switch off the machine if welding is not taking place.
(Energy consumption)
- If the device switches to safety mode, check the er-
ror before switching the device off and on again.
ATTENTION!
Welded joints which are subject to particular cons-
traints and and high safety requirements may only
be carried out by specially trained and tested wel-
ders.

12 Electrode Inverter | Version 1.09
Operation
WARNING!
DANGER FROM DUST AND
GASES!
During welding hazardous gases are produced:
- Avoid inhalation of harmful substances.
- During the welding process, keep your head as far
away as possible.
- Ensure sufficient ventilation, suction or, if neces-
sary, supply of breathing air.
- Take special care when welding stainless steel
electrodes, hardfacing electrodes and over-wel-
ding coatings!
- Never weld near chlorinated hydrocarbons. To-
gether with the arc they form a lethal poison gas
mixture.
- Protective gases can displace the breathing air
and lead to suffocation. Therefore, always ensure
adequate ventilation. Many gases used in welding
are invisible and odourless.
- Use approved breathing apparatus.
- Read and understand the operating instructions of
the filler material manufacturers and carefully
read the safety data sheets.
- When opening the gas valve, never face the valve
and open the valve slowly.
- Switch off the protective gas supply when not in
use.
ATTENTION! MAGNETIC FIELD!
Magnetic fields from power circuits can influence the
function of pacemakers. Persons wearing vital
electronic devices of this type must consult their phy-
sician before being in areas where such welding
equipment is present.
Interference may occur in the following areas/
devices. Appropriate countermeasures must be
taken:
- Data transmission systems,
- Communication systems,
- Control,
- Security devices,
- Calibration and measuring equipment.
WARNING!
Danger in case of insufficient quali-
fication of the staff!
Insufficiently qualified persons cannot estimate the
risks while using the electrode inverter and expose
themselves and others to the danger of severe or let-
hal injuries.
- Have all works only performed by qualified persons.
- Keep insufficiently qualified persons out of the wor-
king area.
- Keep not required staff out of the working area.
DANGER! ELECTRICAL VOLTAGE!
- Always switch on the machine only after all cables
have been connected correctly.
- Ensure that all accessories are correctly connected
and that the ground connection is correct.
NOTE!
The welding equipment may only be operated by per-
sons who have been instructed in the use of welding
machines and are familiar with safety regulations.
Always wear protective clothing when welding and
ensure that other persons are not exposed to the UV
radiation of the arc.
RISK OF FIRE!
- Avoid the dispersion of open fire, which can be cau-
sed by sparks, slag and glowing material.
- Fire protection devices must be in the vicinity of the
workplace.
- Remove flammable materials and fuels from the
work area.
- Never weld next to flammable materials.
- Have suitable extinguishing agents ready.
RISK OF FIRE!
- Special safety regulations apply to compressed ga-
ses.
- Never weld on tanks or containers until you know
exactly what was inside and whether the appropri-
ate protective measures should be taken.
- Make sure that no part of the electrical circuit comes
into contact with the workplace or the floor if you do
not weld.
WARNING!
DANGER DUE TO BURNS!
- Moving parts or thermal parts can damage your
body or other people.
- Workpieces become very hot during welding, wear
suitable protective clothing.
- Make sure that the wire, the electrode, the electrode
coil, the welding head, the nozzle and the semi-au-
tomatic welding gun are heated by the current and
become very hot!

Electrode Inverter | Version 1.09 13
Operation
DANGER! ELECTRICAL VOLTAGE!
- Never touch any live parts!
- There is a danger of an electric shock!
- Always wear dry and closed gloves and flame-retar-
dant clothing with insulating properties.
- Make sure that the insulation of the workplace is
such that no person can be physically damaged by
contact with the workplace.
- Always make sure there is insulation between your
body and the component.
- Special care and precautions should be taken when
using the welder and equipment in confined
spaces.
- Be careful not to use the welder in humid environ-
ments.
- Make sure that the welder is always securely posi-
tioned so that it cannot fall down. When working at
great heights, use a safety catch for the unit.
- When working at higher altitudes above the ground,
wear a safety harness to avoid a dangerous fall if
you are exposed to an electric shock.
WARNING!
Risk of hearing damage due to
noises!
Noises from certain processes or devices can
damage your hearing. You must protect your ears
from loud noise to prevent permanent hearing loss or
damage.
- To protect your hearing from loud noises, wear ear
plugs and / or ear plugs. Protect others in the work-
place.
- The noise level should be measured to ensure that
the decibel number (sound) does not exceed the
safe level for the hearing.
WARNING
Danger from sparks and welding
spatter!
- The arc throws the spatter and sparks. Always wear
oil-free protective clothing! Cover your hair with a
cap.
- Wear ear plugs when welding in a constrained posi-
tion or in small spaces.
- Always wear safety glasses with side shields when
you are in a welding zone.
WARNING!
Danger from the arc!
- Ensure that persons standing nearby have sufficient
protection against the arc and wear protective gog-
gles.
- Prevent uninvolved persons from looking into the arc.
WARNING!
Danger from rotating parts!
- Moving or rotating parts can damage their bodies or
other people. Never touch moving parts with your
limbs!
- Keep all guards, covers and equipment in place and
in good condition.
- Keep hands, hair, clothing and tools away from V-
belts, gears, fans and other moving parts when star-
ting, operating or repairing equipment.
WARNING
Danger due to incorrect storage
and
incorrect use of inert gas cylin-
ders!
- Only use inert gases in cylinders designed for this
purpose.
- Ensure that all gas lines and hoses are not dama-
ged.
- Ensure that inert gas cylinders are properly secu-
red. Always keep the cylinders in an vertical posi-
tion, e.g. securely chained, on a chassis or fixed
carrier.
- When storing the bottles, make sure that they are
properly secured and that there are no mechanical
or thermal hazards.
- Store the gas cylinder at a safe distance from the
arc and hot parts.
- If the gas cylinder is not in use, close it with the pro-
tective cap.
- Always keep your head and face away from the
cylinder valve outlet when opening the cylinder
valve.
- Use only compressed gas cylinders that contain the
correct inert gas for the process and properly func-
tioning regulators. The components must be desi-
gned for the gas and pressure used.
- All hoses, clamps, etc. must be suitable for the ap-
plication, maintained and in good condition.
- Never allow the electrode, electrode holder or any
other "hot" part to touch a gas cylinder.

14 Electrode Inverter | Version 1.09
Operation
With the EASY-STICK 121, EASY-STICK 141 and
EASY-STICK 161 welding units, welding with all com-
mon rod electrodes is possible. The device has the auto-
matic functions "Hot Start", "Anti-Stick" and "Arc
Force". The Hot-Start function provides stable ignition
of the arc and the Anti-Stick function prevents the
electrode from sticking. These functions are automati-
cally activated and deactivated. The Arc-Force control
adjusts the dynamics to the welding process and can be
controlled.
11.1Operating conditions
Working altitude: </= 1000 m above sea level
Operating temperature: -10°C to +40°C
Humidity: < 90% (20°C)
Substrate: solid, level (max inclination angle 15°).
Protect the unit from rain and direct sunlight.
Environment free of dust, chemicals (acids, corrosive
substances).
Ensure adequate ventilation. Minimum distance of the
device to the wall: 30 cm.
11.2Electrical connection
Check that the voltage indicated on the type plate corre-
sponds to the nominal voltage of your voltage mains.
The device may only be used at a connection with a 1-
phase voltage of 230 V (+/-10%), which has been instal-
led by an authorised specialist. The required power
consumption must be available and the mains socket
must be properly grounded. The fusing of the supply li-
nes to the mains socket must comply with the regulati-
ons.
For some applications, extension cords must be used to
reach the workplace. To ensure full performance of the
unit, the required conductor cross-sections must be ob-
served depending on the cable length.
If necessary, a qualified electrician must ensure that the
electrical installation is carried out in such a way as to
ensure the correct operation of the welding machine.
11.3Welding with rod electrode (MMA)
Important! Before welding, read the instructions of the
electrode manufacturer on the electrode packaging.
They contain the following information:
- Recommended welding current,
- Ground Polarity; Connect to ¨+¨ or ¨-¨ Connection,
- Welding current type: direct current, alternating
current.
Fig. 10: Connection for arc welding
The cable provided is for connecting the welding material
to the device (Fig. 12, DCEP - right: MMA welding). The
welding material must be clean at the connection with
the earth terminal in order to achieve good contact. The
earth terminal must always be connected directly to the
workpiece and to the ¨-¨ connection on the device side -
according to the instructions of the electrode manufactu-
rer. The electrode holder - cable must be connected to
the ¨+¨ connection - according to the instructions of the
electrode manufacturer.
WARNING!
Danger due to incorrect storage
and incorrect use of inert gas
cylinders!
- Protect gas cylinders from excessive heat, mecha-
nical shock, physical damage, slag, open flames,
sparks and electric arcs.
- Never let the welding electrode or earthing clamp
touch the gas cylinder, do not lay any cables over
the cylinder.
APPLICATION INSTRUCTIONS:
- Switch off the motor if the welding machine is not
used to save energy.
- Connect the protective conductor directly to the ma-
chine.
- If the mains switch switches off in a protective man-
ner due to a fault. Do not restart until the problem is
solved. Otherwise the problem area will be extended.
ATTENTION!
OVERLOAD!
If you use the EASY-STICK 161 welding machine,
welding may only be carried out with currents of up to
140 A. Electrode welding with higher currents leads
to overload and to fuse tripping.

Electrode Inverter | Version 1.09 15
Troubleshooting
Step 1: Connect the cables to the particular terminal on
the unit and tighten clockwise (bayonet lock).
If the polarities are reversed (according to the instructi-
ons of the electrode manufacturer), make the connecti-
ons as shown in Fig. 12, DCEN - left.
Step 2: Switch on the unit with the ON/OFF switch on the
rear panel.
Step 3: Adjust the welding current with the welding cur-
rent adjustment knob 5.
Step 4: Place the electrode into the electrode holder and
clamp tight.
Step 5: Strike the electrode against the work piece to
create and arc and hold the electrode steady to
maintain the arc.
Step 6: Pull the electrode over the workpiece. The arc is
automatically ignited with the Hot-Start function.
Carry out the welding process. Adjust the wel-
ding current as required.
Step 7: To stop the welding process, remove the
electrode from the workpiece so that the arc
goes out.
Step 8: After completion of welding the Power Source
should be left turned ON for 2 to 3 minutes. This
allows the fan to run and cool the internal com-
ponents.
Step 9: Switch the ON/OFF Switch (located on the rear
panel) to the OFF position.
In case of overheating, the LED alarm indicator (Fig.11;
Pos.4) lights up and the unit switches off. Overheating
can occur when welding at high currents for a long time.
Leave the unit switched on to allow it to cool down while
the fan is running.
11.4Selection of the electrode size and
welding current (MMA)
12 Troubleshooting
- The EASY-STICK-seriess welding devices are te-
sted for faultless function and correctly calibrated
before being shipped from the factory.
- Do not make any unauthorized changes to the unit.
Maintenance, care and servicing must be carried out
carefully and conscientiously.
- If any wire is loose or incorrectly positioned, this may
pose a hazard to the user.
- Only qualified personnel authorised by us may ser-
vice and repair the machine!
Always switch off the machine before connecting acces-
sories.
ATTENTION!
Different electrodes demand different polarities to
ensure optimal results. Therefore, special attention
must be paid to polarity and the instructions of the
electrode manufacturer must be followed exactly.
ATTENTION!
APPLICATION INSTRUCTIONS:
Incorrect polarity adjustment results in arc instability,
spatter, high adhesion and sticking and other unwan-
ted effects
Selection of the electrode diameter:
Material thickness
[mm]
Electrode diameter [mm]
1,0 to 2,0 2,5
2,0 to 5,0 3,2
5,0 to 8,0 4,0
> 8,0 5,0
Selection of the welding current:
Electrode diameter [mm]
[mm]
Welding current
range [A]
2,5 60 to 95
3,2 100 to 130
4,0 130 to 165
5,0 165 to 260

16 Electrode Inverter | Version 1.09
Troubleshooting
12.1 Electrode welding
Troubleshooting table of the models EASY-STICK 121, EASY-STICK 141 and EASY-STICK 161:
S/N Fault Possible cause Solution
1
No arc
Incomplete welding circuit Check earth lead is connected.
Check all cable connections.
No power supply Check that the machine is switched
on and has a power supply
2
Porosity - small cavi-
ties or holes resulting
from gas pockets in
weld metal
Arc length too long Shorten the arc length
Work piece dirty,
contaminated or
moisture
Remove moisture and materials like
paint, grease, oil, and dirt, including mill scale
from base metal
Damp electrodes Use only dry electrodes
3Excessive Spatter Amperage too high Decrease the amperage or choose a
larger electrode
Arc length too long Shorten the arc length
4 Weld sits on top, lack of
fusion
Insufficient heat input Increase the amperage or choose a larger
electrode
Work piece dirty,
contaminated or
moisture
Remove moisture and materials like paint,
grease, oil, and dirt, including mill scale from
base metal
Poor welding technique Use the correct welding technique or seek assi-
stance for the correct technique
5 Lack of penetration Insufficient heat input Increase the amperage or choose a larger electrode
Poor welding technique Use the correct welding technique or seek
assistance for the correct technique
Poor joint preparation Check the joint design and fit up, make sure the ma-
terial is not too thick. Seek assistance for the correct
joint design and fit up
6 Excessive penetration-
burn through
Excessive heat input Reduce the amperage or use a smaller electrode
Incorrect travel speed Try increasing the weld travel speed
7 Uneven weld
appearance
Unsteady hand, wavering
hand
Use two hands where possible to steady up, practise
your technique
8 Distortion - movement
of base metal during
welding
Excessive heat input Reduce the amperage or use a smaller electrode
Poor welding technique Use the correct welding technique or seek assi-
stance for the correct technique
Poor joint preparation and
or joint design
Check the joint design and fit up, make sure the ma-
terial is not too thick. Seek assistance for the correct
joint design and fit up
9 Electrode welds with
different or unusual arc
characteristic
Incorrect polarity Change the polarity, check the electrode manufactu-
rer for correct polarity

Electrode Inverter | Version 1.09 17
Troubleshooting
Type of
error
Error
code
Description Lamp display
Thermal
relay
E01 Overheating (thermal relay 1) yellow light (thermal protection) permanently on
E02 Overheating (thermal relay 2) yellow light (thermal protection) permanently on
E03 Overheating (thermal relay 3) yellow light (thermal protection) permanently on
E04 Overheating (thermal relay 4) yellow light (thermal protection) permanently on
E09 Overheating (program run error) yellow light (thermal protection) permanently on
Welding
equipment
E10 Loss of phase yellow light (thermal protection) permanently on
E11 no water yellow light (water leak) permanently on
E12 no gas red light permanently on
E13 Undervoltage yellow light (thermal protection) permanently on
E14 Overvoltage yellow light (thermal protection) permanently on
E15 Overcurrent yellow light (thermal protection) permanently on
E16 Overload of the wire feeder
E17 Overload wire feed slide
E18 Wire feeder cover opened
E19 Input voltage error
Switch E20 Key error on the operating panel after
the machine was switched on.
yellow light (thermal protection) permanently on
E21 Other error on the control panel when
the machine was switched on.
yellow light (thermal protection) permanently on
E22 Welding torch error after the machine
has been switched on.
yellow light (thermal protection) permanently on
E23 Torch failure during the normal wel-
ding process.
yellow light (thermal protection) permanently on
Accesso-
ries
E30 Cutting torch switch-off red light flashes
E31 Water cooling shutdown yellow light (water leak) permanently on
E32 Charge protection signal of the bat-
tery
E33 Error fan / ventilation wheel
E34 Short circuit of the water circulation
Communi-
cation
E40 Connection problems between the
wire feed and the power source
E41 Connection error
E42 Connection error robot
E43 Connection error WIFI

18 Electrode Inverter | Version 1.09
Care, maintenance and repair
13 Care, maintenance and repair
13.1Care after work
Step 1: Disconnect the mains plug from the power
socket.
Step 2: Clean the outside of the appliance with a dry
cloth.
13.2Maintenance and repair
Maintenance and repair work may only be carried out by
qualified personnel.
If the electrode inverter does not function properly, con-
tact a specialist dealer or our customer service. The con-
tact details can be found in chapter 1.2 Customer ser-
vice.
All protective and safety devices must be mounted again
immediately after completion of repair and maintenance
work.
Check daily:
- Check the regulator and switches on the control
panel and on the rear of the device for function and
ease of movement.
- After switching on, check for unusual noises.
- Check the display, check whether the set values
match the displayed values.
- Check the fan wheel for proper function.
- Check plug connections
- Check mains cable for damage.
Replace defective parts or contact customer service.
Check/clean monthly:
- Carefully clean the inside of the unit with compres-
sed air.
Attention: Use protective goggles!
- Check screws and bolts for secure seating.
Clean dirty or rusted screws and bolts, replace defective
parts or contact customer service.
Check every three months:
- Check display, check whether set values and dis-
played values correspond.
Replace defective parts or contact customer service.
Check yearly:
- Measure the insulation impedance between the
main circuit, the printed circuit board and the hous-
ing. If it is less than 1 MΩthe insulation is damaged
and must be replaced or re-insulated. Contact
customer service if necessary.
DANGER!
Risk of fatal electric shock!
Contact with live components may result in fatal in-
jury. Switched-on electrical components can make un-
controlled movements and lead to serious injuries.
- Before starting cleaning and maintenance work,
switch off the device and pull out the mains plug.
- Connections and repairs to the electrical equipment
may only be carried out by a qualified electrician.
NOTE!
After care, maintenance and repair work, check that
all guards and protective devices have been pro-
perly installed on the device and that no tools are left
inside or in the working area of the device. Damaged
protective devices and equipment parts must be
repaired or replaced by customer service or a specia-
list workshop.
Use protective gloves!
NOTE!
Never use aggressive cleaning agents for any
cleaning work. This can damage or destroy the de-
vice.
WARNING!
Before carrying out any maintenance work, the
machine must be switched off and waited at least 5
minutes until the capacity potential has been reduced
to 36 V!

Electrode Inverter | Version 1.09 19
Disposal, reusing used machines
14 Disposal, reusing used ma-
chines
In your own interest and to protect the environment make
sure that all machine components are exclusively dis-
posed of in as intended and permitted.
14.1Decommissioning
Disused machines must be decommissioned immedi-
ately to prevent misuse at a later point and putting the
environment or persons at risk.
Step 1: Remove all environmentally hazardous process-
ing materials from the used machine.
Step 2: If necessary, disassemble the machine into as-
semblies and components that are easy to han-
dle and suitable for recycling.
Step 3: The machine components and processing mate-
rials must be disposed of using the intended dis-
posal methods.
14.2Disposal of electrical equipment
Electrical equipment contains a variety of recyclable ma-
terials and environmentally harmful components.
These components must be disposed of separately and
properly. In case of doubt, contact the municipal waste
disposal department.
If necessary, a specialist waste disposal company
should be called upon to help with processing.
14.3Disposal via communal recycling
points
Disposal of used electrical and electronic equipment (to
be used in the countries of the European Union and
other European countries with a separate collection sy-
stem for this equipment).
The symbol on the product or its packaging indi-
cates that this product is not to be treated as
normal household waste, but must be returned
to a collection point for the recycling of electrical
and electronic equipment. By contributing to the correct
disposal of this product, you protect the environment and
the health of your fellow human beings. Environment and
health are endangered by incorrect disposal. Material
recycling helps to reduce the consumption of raw materi-
als. For more information about recycling this product,
contact your local community, municipal waste manage-
ment company or the store where you purchased the
product.
15 Spare parts
15.1Spare parts orders
Spare parts are available from authorised retailers or di-
rectly from the manufacturer. The contact details have
been listed in section 1.2 Customer service.
The following key data is required for queries or spare
parts orders:
- Device type
- Item number
- Position number
- Year of construction
- Quantity
- Desired shipping type (post, freight, sea, air, ex-
press)
- Shipping address
Spare parts orders without the aforementioned data can-
not be taken into account. The supplier shall determine
the shipping type if no relevant data was provided.
Data on the machine type, item number and year of
manufacture is listed on the type plate attached to the
device.
Example
The fan for the electrode inverter EASY-STICK 121 must
be ordered. The fan is identified in the spare parts draw-
ing with the number 3.
By ordering spare parts, send a copy of the spare parts
drawing with the marked part (Fan) and marked positon
number (3) to the dealer or spare parts department and
provide the following information:
Type of device: Electrode Inverter
EASY-STICK 121
Item number: 1073012
Position number: 3
Item number of your device:
Electrode Inverter EASY-STICK 121: 1073012
Electrode Inverter EASY-STICK 141: 1073014
Electrode Inverter EASY-STICK 161: 1073016
DANGER!
Risk of injury caused by the use of
incorrect spare parts!
The use of incorrect or faulty spare parts may cause
risks for operating staff and damage as well as mal-
functions.
- Exclusively genuine spare parts made by the manu-
facturer or spare parts authorised by the manufac-
turer shall be used.
- Always contact the manufacturer if you are unsure.

20 Electrode Inverter | Version 1.09
Spare parts
15.2Spare parts drawings
The following spare parts drawings is intended to help identify the necessary spare parts.
Spare parts drawing EASY-STICK 121
Fig. 11: Spare parts drawing EASY-STICK 121
This manual suits for next models
2
Table of contents
Other Schweißkraft Inverter manuals
Popular Inverter manuals by other brands

Mitsubishi Electric
Mitsubishi Electric fr-e700 series instruction manual

ABB
ABB UNO-DM-6.0-TL-PLUS-US Quick installation guide

Fischer Panda
Fischer Panda Panda AGT/DC 10000 PMS Operation manual

Hoymiles
Hoymiles DTU-WLite user manual

Veichi
Veichi SI23-D1 series manual

SunSynk
SunSynk LIFELYNK X SM3.6kWLL user manual

Eico
Eico 378 operating manual

Mitsubishi Electric
Mitsubishi Electric 800 Series instruction manual

Toshiba
Toshiba P9 ASD quick start guide

Dometic
Dometic PP 1002 Installation and operating manual

Briggs & Stratton
Briggs & Stratton 40213 Installation and start-up manual

aptos
aptos MAC 800R Quick installation guide