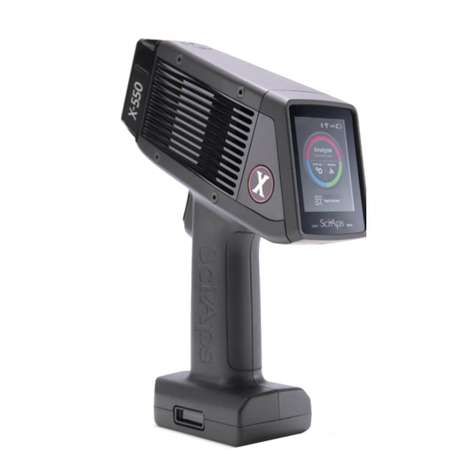
SciAps X-550 Pb User manual

QuickStart Guide
X-550 Pb
Lead Paint Handheld XRF Analyzers

SciAps X-550 Pb QuickStart Guide
2
Contents
............................................................................................................. 1
Contents 2
1. Powering up the unit................................................................................................ 3
Inserting the battery ................................................................................................................ 3
Turning on the unit.................................................................................................................. 4
Wrist Strap ............................................................................................................................. 4
Analyzer ports ........................................................................................................................ 4
2. Logging in ............................................................................................................... 5
3. Calibrating the Analyzer .......................................................................................... 7
4. Taking a Test .......................................................................................................... 9
5. Looking at Results ..................................................................................................10
5.1 Positive and Negative results ...........................................................................................10
5.2 Depth results ...................................................................................................................10
6. Test Screen ............................................................................................................11
6.1 Photo icon .......................................................................................................................11
6.2 Test Mode .......................................................................................................................11
7. Menu Options .........................................................................................................12
7.1 Beam Settings .................................................................................................................12
7.2 Display Preferences ........................................................................................................12
7.3 Test Info ..........................................................................................................................13
7.4 Classification Level ..........................................................................................................14
7.5 Test Mode .......................................................................................................................14
7.6 PCS Cal Check................................................................................................................15
7.7 Energy Calibration ...........................................................................................................15
8. Exporting tests .......................................................................................................16
9. Turning off the Unit .................................................................................................18
10. How to safely use SciAps XRF instruments ............................................................19

1. Powering up the unit
Inserting the battery
The X-550 Pb is battery operated.
It comes with a wall charger. The charger light is red when it is
plugged in and empty.
The battery is directional and keyed to go in only one way, so
don’t force it.
When the battery is plugged in, the light blinks green when it is
charging, and it is solid green when it is done charging.
The battery fits into the handle of the analyzer, forming the
bottom of the handle. It is also keyed.
Insert the battery into the handle, until the connectors click into
place.

SciAps X-550 Pb QuickStart Guide
4
Turning on the unit
Wrist Strap
Analyzer ports
The on/off button is on the top of the unit.
Press it to turn the unit on
It takes about 20 seconds to boot up.
The light is green when it is ready.
We recommend operators wear the wrist strap. It
easily expands and tightens.
The ports underneath the analyzer:
On the far right is where you plug in if you want
to run on AC power. Battery must be installed to
run on AC power (the battery will charge while
plugged in)
On the far left is a Micro USB-B port to download
data. The analyzer has Wi-Fi and Bluetooth as
well.
The middle port is for factory firmware updates
and test stand use.

SciAps X-550 Pb QuickStart Guide
5
2. Logging in
When the analyzer boots up, you will need to enter name and
passcode.
The factory-set name is admin.
The factory-set passcode is 12345.
The administrator can change this later.
The X-Ray warning screen appears.
X-Rays can cause serious harm to people and animals!
Tapping OK on this screen means you understand that, and that
you will not use this XRF unit improperly.
It is recommended that operators wear two badges: one on the
torso and one on the finger. The badges make sure operators are
using the analyzer properly.

SciAps X-550 Pb QuickStart Guide
6
The main screen appears. Operators can choose Analyze,
Settings, and Results.
Tap Analyze to prepare for the calibration process.
The screen listing the applications installed on your unit will
appear. This list depends on how the analyzer was configured at
the factory.
Tap Lead Paint.

SciAps X-550 Pb QuickStart Guide
7
3. Calibrating the Analyzer
There are two steps to the calibration process after you turn
the unit on. If calibration is required, the unit will automatically
bring up the Calibration Window.
First, perform the clip calibration. Then perform the 1.0 lead
paint standard calibration check with the NIST (National
Institute of Standards Technology) SRM 2573.
The clip and lead paint standard come with every analyzer.
We recommend that after four hours of continuous use,
operators repeat those two steps.
Place the clip on the nose as shown.
Tap Calibrate on the screen to begin the process.
Calibration takes 15 seconds.
1 of 15 means the first second of the 15 seconds of the
calibration. It is doing an “energy scale calibration.”

SciAps X-550 Pb QuickStart Guide
8
W
hen the instrument is
emitting
X
-
rays, the light on top
will be
blinking red.
When the tube is not energized, it is green.
When the clip calibration is successful, the PCS Cal Check screen
appears.
Remove the clip from the front of the aperture.
Next, perform the 1.0 lead paint standard check. Place the
analyzer window on the red square of your lead paint
calibration check block. The square must cover the window.
User starts test by pressing PCS Cal Check or pulling trigger. A
second trigger pull before set test time has elapsed will end the
test.
The test takes 10 seconds.
At end of test, the screen will give the lead paint reading (top
left), which will include lead, the value, and whether it is a PCS
Cal Check test. If the Pb result is not within 0.8 – 1.2, the
software will indicate the instrument calibration has failed.
A passing calibration means the instrument is ready for use.
If the calibration fails, an error message will be displayed.
Confirm the standard is positioned correctly in front of the
window and retry the calibration. PCS Cal Check must pass
before user can take tests in Lead Paint Mode.
If the calibration continues to fail, please contact SciAps
technical support at +1 339-927-9455

SciAps X-550 Pb QuickStart Guide
9
4. Taking a Test
When ready to begin testing material, make sure the analyzer is
flush to the surface.
Use the camera display on the screen to align the properly align
the analyzer with respect to the sample.
Once sample is aligned, tap START.
—OR—
Squeeze (and release) the trigger at the top of the handle.
The test will start.
During test, result looks like this. Live updates will show as test
progresses.
Test will end when max test time is reached (Timed) or once a
Positive or Negative determination can be made (Quick). See
section 7 for more information on Timed and Quick Mode.
User may abort test at any time by pressing the trigger or
clicking the back button (top left) from the live update.

SciAps X-550 Pb QuickStart Guide
10
5. Looking at Results
5.1 Positive and Negative results
Once the test is completed, result will get a reading number (top
left) and the Positive or Negative determination will show.
The Federal Action Level for lead paint is 1.0 units or milligrams
of lead per square centimeter (mg/cm2).
Lead Paint Mode reports Pb result in mg/cm2 if Pb is detected. It
rounds the Pb result to the nearest 0.1.
The Positive result means the instrument has calculated that the
concentration of lead is equal to or greater than the
classification level.
The Negative result means the instrument has calculated that
the concentration of lead is less than the classification level.
As some locales have different action levels, local ordinances
should be consulted.
Operators will have the opportunity to change the Classification
Level, if needed, in the Settings menu (Section 7.4).
If lead is not detected, the analyzer will show ND.
Test Mode (Timed vs Quick) will be noted on the screen as well.
See Section 7.5 for more information on these two test modes.
5.2 Depth results
The Depth calculation tells the operator if the paint being
analyzed is non-lead paint or if lead is on the surface.
A Depth value of 1.00 means lead is on the surface. A depth
value greater than 1.0 tells the operator it is underneath
unleaded paint. A larger number (like 8, 10, 20) indicates a
greater number of layers of unleaded paint are present on top of
the leaded paint. The Depth value will not be less than 1.0.

SciAps X-550 Pb QuickStart Guide
11
6. Test Screen
6.1 Photo icon
Tap the Photo icon for the camera. Operators can choose
to take a photo of an exterior item. This image flips
between the micro camera inside the nose, looking at the
sample area tested, and the macro camera, which has a
wider field of view. Operators can take a picture of the
surface tested and store it with the test results.
Tap this image to take a picture. Then operators can tap
Retake or Save to save picture with test results.
6.2 Test Mode
The clock icon indicates analyzer Test Mode
Timed
Quick
See Section 7 for more information on these modes.

SciAps X-550 Pb QuickStart Guide
12
7. Menu Options
More information about these menu options can be found in the full X550 Manual.
Click the (…) menu in the top left to see the
menu options.
7.1 Beam Settings
Set test time
7.2 Display Preferences
Show Uncertainty – Show the ± value on the
Pb measurement. Off by default. Showing this
will also show Limit of Detection (LOD) when
Pb is ND
Precision – Round Pb value to nearest 0.1
decimal place. User may adjust this but the
PCS specifies rounding to nearest tenth (0.1)
when comparing to threshold value.

SciAps X-550 Pb QuickStart Guide
13
Show non detect elements and Show Chem <
LOD as ND – these options should be checked.
This will show list Pb even when not detected
(ND).
LOD Sigma – 3.0. When Pb is ND and Show
Uncertainty is checked, the screen will show
the estimated Limit of Detection (LOD) of Pb
as 3 x uncertainty.
Display Sigma – 1.0. If uncertainty (±) is
shown, this is the 1-sigma confidence of the Pb
measurement.
Advanced Mode
OFF – Show Pb (mg/cm2) and Depth Factor
only
ON – Show other elements calibrated in
mg/cm2 (Cd, Zn, Ba) and Intensities (in cps) of
the 3 Pb lines alpha, beta, gamma. These
additional elements must be configured
separately at the factory.
7.3 Test Info
Configure template to type additional
information to save with each reading.

SciAps X-550 Pb QuickStart Guide
14
7.4 Classification Level
This level controls whether the analyzer
determines a Positive or Negative classification
on the screen. Tap to change.
Default is the Federal Pb level of 1.0. User may
change this based on local Pb limits.
Note: This is NOT the Action Level setting that
controls use of Quick Mode. The PCS specifies
that the action level must be set to 1.0
regardless of classification level. In the Lead
Paint application, the action level is fixed at 1.0
and user cannot change it.
7.5 Test Mode
OSHA/IH (Timed) – Test will run until set time
has elapsed (default 10sec).
PCS (Quick) – Test will run until analyzer can
make a clear Positive or Negative
determination, up to a maximum of the set
test time.
Note: This setting may affect what Pb
screening threshold applies or whether an
inconclusive range applies. Please consult PCS
for more information.
Action Level on this screen is shown for
informational purposes. User cannot change
this as all X550Pb PCS require this to be set to
1.0.

SciAps X-550 Pb QuickStart Guide
15
7.6 PCS Cal Check
Run additional check of 1.0 standard. The
Software will enforce this every 8 hours or
every time the analyzer is powered on. Users
may prefer to run the check more frequently.
7.7 Energy Calibration
Run additional clip calibration. This serves as a
system check. Software will require this to run
at startup. Users do not have to run this more
frequently.

SciAps X-550 Pb QuickStart Guide
16
8. Exporting tests
From the Home Screen, tap Results.
Tap the Checkbox button to individually
select multiple tests for export.
Click on any result to view.
Tap Export button to get to export screen.
Tap the Menu button to open export options.
Filter by Date to quickly export a batch of results.
Templates Setup allows user to select which
elements and other fields to export.
Delete All Results will remove all results from the
analyzer software. Be sure to export any needed
results to csv before taking this step. Delete All
Results cannot be undone.
If all results are deleted, the test counter may not
reset to 1.

SciAps X-550 Pb QuickStart Guide
17
Tap either PDF or EXCEL to select the desired
export format.
Choose Excel
Test results will export to SD card/export/csv.
Or tap the filename to change the export
location.
Analyzer may have a Lead Paint export template
configured. User can modify this in Templates
Setup
Tap Start Export
The X-550 Pb uses an embedded SD card to store
test results.
The SD Card can be accessed by connecting the
analyzer to a computer using the micro-USB
cable. Once connected, the analyzer’s SD Card
will show as a new drive from the computer’s file
explorer.
Navigate to the export location selected at time
of export (default export location is SD
card\export). Drag the exported files over from
the SD Card to the desktop to save copies locally
on the computer. Drag the exported files over
from the SD Card to the desktop to save copies
locally on the computer.

SciAps X-550 Pb QuickStart Guide
18
9. Turning off the Unit
Press and hold the on/off button for 2 seconds.
The Power off screen appears.
Tap Power off.
The unit will power off.

SciAps X-550 Pb QuickStart Guide
19
10. How to safely use SciAps XRF instruments
Radiation Safety is up to you.
As the owner or operator of an X-Ray tube device, you are responsible for understanding the safety
requirements and state regulations for using your X-ray tube equipment.
When the X-550 Pb is not actively testing samples,
no X-rays are emitted.
When the X-550 Pb is energized, X-rays are
emitted, through the window in the nosecone.
X-rays are invisible to the human eye; you
will not see them when they are being
emitted.
Stay safe when using handheld XRF instruments:
Best Practices for Safe Operation:
Trigger finger should be the body part closest to the analyzer window
Run tests with the XRF pointed away from yourself and other people
Do not place hand or any other body part near nose while testing
Pay attention to where the beam is pointed
Don’t hold samples in your hand
Maintain control of the analyzer
Limit operation to trained personnel
Table of contents
Other SciAps Measuring Instrument manuals
Popular Measuring Instrument manuals by other brands

EUTECH INSTRUMENTS
EUTECH INSTRUMENTS WATERPROOF CYBERSCAN PH 300310 PHMV METER instruction manual

Sekonic
Sekonic C-500 operating manual

DHC
DHC BT900 owner's manual

Lutron Electronics
Lutron Electronics SP-82AM manual

System Sensor
System Sensor PC4RLA Installation and maintenance instructions

Certa
Certa CTLASTAPEMA user guide