Science mad Chemistry Lab User manual

Materials which may come into contact with the
skin could cause allergic reactions to susceptible
individuals. In the case of irritation discontinue use. If the lens
becomes scratched or damaged, the goggles should be replaced.
Eye protectors/goggles worn over standard ophthalmic spectacles
may transmit impacts, thus creating a hazard to the wearer.
WARNING!
Not suitable for children under 10 years. For use
under adult supervision. Contains some chemicals
which present a hazard to health. Read the instructions before use,
follow them and keep them for reference. Do not allow chemicals to
come into contact with any part of the body, particularly the mouth and
eyes. Keep small children and animals away from experiments. Keep
the experimental set out of reach of children under 10 years old. Eye
protection for supervising adults is not included. Functional sharp points
and edges: cut and puncture wound hazard. Dispose of unwanted
chemicals by greatly diluting with water and running into the waste
water system. For chemicals labelled as hazardous to the environment,
please contact your local council for safe disposal information.
WARNING!
Item No. SM20
Please retain the information in
this manual for future reference.
Colour, designs and decorations
may vary from those shown in
the photographs.
Printed in China.
P38-CM002-81049003 AGES 10 AND UP
Distributed by Trends UK Ltd,
Harwell Innovation Centre,
Curie Avenue,
Harwell Oxford,
Didcot, OX11 0QG. UK
Email: [email protected]t
www.trendsuk.co.uk Customer Services:
+44 (0)1702 208175

Contents of Chemistry Lab 3
First Aid 4
Safety Goggles user information 4
Safety Matters 5
Advice for Supervising Adults 5
Introduction 6
Setting up your Chemistry Laboratory 8
Working in your Chemistry Laboratory 9
Additional equipment and chemicals 14
The chemistry experiments 16
Chapter 1 - Soluble & insoluble substances 17
Chapter 2 - Invisible inks 20
Chapter 3 - Crystal chemistry 22
Growing crystals 23
Water of crystallisation 28
Chapter 4 - Paper chromatography 29
Chapter 5 - Acids & alkalis 30
Making acid & alkali solutions 30
Testing for acids & alkalis 32
Chapter 6 - Chemical reactions of acids & alkalis 37
Reactions of acids with metals 37
Reactions of alkalis & water with metals 39
Reactions of acids with oxides & carbonates 40
Chapter 7 - Other chemical reactions 41
Reactions which give insoluble substances 41
Reactions which give metals 43
Chapter 8 - Heating substances 45
Chapter 9 - The chemistry of some gases 47
Carbon dioxide 47
Ammonia 51
Oxygen 53
Sulphur dioxide 55
Chapter 10 - Some iodine chemistry 56
Chapter 11 - Some sugar chemistry 59
Results of the experiments 64
Contents of this instruction booklet Contents of the Chemistry Lab
Equipment
CAUTION! Contains some chemicals that are classified as a safety hazard
CHEMICAL RISK
Ammonium
Chloride
Harmful if swallowed
Causes serious eye
irritation.
CHEMICAL RISK
Magnesium Sulphate Not hazardous
Potassium Iodide Not hazardous
Sodium Sulphate Not hazardous
Sodium Thiosulphate Not hazardous
Sodium
Carbonate
Causes serious eye
irritation.
Sodium
Hydrogen
Sulphate
Causes serious eye
irritation.
Zinc Pellets Very toxic to aquatic
life with long lasting
effects.
Tartaric Acid
Aluminium
Potassium Sulphate
Not hazardous
Copper(II)
Sulphate
Harmful if swallowed.
Causes skin irritation.
Causes serious eye
irritation. Very toxic to
aquatic life with long
lasting effects.
Copper Foil
Iron(II)
Sulphate
Iron Filings
Not hazardous.
Litmus Blue
Magnesium
Strip
Not hazardous.
Calcium
Carbonate
Calcium
Hydroxide
Copper(II)
Oxide
1 x 100ml beaker
Universal Indicator papers
1 x 100ml conical flask
2 x Stoppers - cork
3 x Stoppers - cork with hole
Filter papers
1 x Plastic funnel
1 x 120mm glass stirring rod
3 x 100mm glass tubing
1 x Measuring spoon
1 x Plastic dropping pipette
1 x 100mm rubber tubing
1 x Safety goggles
1 x Small scoop
1 x Spirit burner
4 x Test tube caps
1 x Test tube cleaning brush
1 x Test tube holder
1 x Test tube rack
4 x Test tubes
1 x Instruction booklet
2 3

• In case of eye contact: Wash out eye with plenty of water, holding eye open if necessary.
Seek immediate medical advice.
• In case of skin contact and burns: Wash affected area with plenty of cold water for at
least 10 minutes.
• If swallowed: Wash out mouth with water, drink some fresh water. Do not induce vomiting.
Seek immediate medical advice.
• In case of inhalation: Remove person to fresh air.
• In case of doubt, seek medical advice without delay. Take the chemical together
with the container with you.
• In case of injury always seek medical advice.
DO read these instructions before use, follow them and keep them for reference.
DO keep young children, animals and those not wearing eye protection away from the experimental area.
DO always wear eye protection.
DO store experimental sets out of reach of children under 10 years of age.
DO clean all equipment after use.
DO make sure that all containers are fully closed and properly stored after use.
DO wash hands after carrying out experiments.
DO dispose of chemicals in accordance with local and national regulations.
DO NOT use equipment which has not been supplied with the set or recommended
in the instructions for use.
DO NOT eat, drink or smoke in the experimental area.
DO NOT allow chemicals to come into contact with the eyes or mouth.
DO NOT replace foodstuffs in original container. Dispose of immediately.
a) Read and follow these instructions, the safety rules and the first aid information, and keep
for reference.
b) The incorrect use of chemicals can cause injury and damage to health. Only carry out those
activities which are listed in the instructions
c) This chemical set is for use only of children over 10 years of age.
d) Because children’s abilities vary so much, even within age groups, supervising adults should
exercise discretion as to which experiments are suitable and safe for them. The instructions
should enable supervisors to assess any experiment to establish its suitability for a particular child.
e) The supervising adult should discuss the warnings and safety information with the child or children
before commencing the experiments. Particular attention should be paid to the safe handling of
acids, alkalies and flammable liquids.
f) The area surrounding the experiment should be kept clear of any obstruction and away from the
storage of food. It should be well lit and ventilated and close to a water supply. A solid table with
a heat resistant top should be provided.
g) The Spirit Burner should be placed on a metal tray. Fill the burner three quarters full with Methylated
Spirits. You need about 3mm of wick protruding from the cap. Keep the bottle of Methylated Spirits
well away from the Spirit Burner. Light the burner with a match. CAUTION! The flame is nearly
colourless and in bright sunlight it may be invisible. It is very easy to burn yourself.
Record the telephone number of your local hospital (or local poison
centre) in the box below.
(Write the number in NOW so you do not have to search for it in an emergency)
Telephone Local Hospital:
First Aid Instructions
Instructions for use, storage and maintenance.
• Hold goggles with one hand, if possible without touching the lens. Pull the elastic head band over the
back of your head, just above the ears so that the goggles sit on your forehead. Carefully pull the
goggles down over the eyes and adjust the strap for a snug and comfortable fit. Ensure the goggles
are kept clean and dry, and cannot come into contact with loose chemicals or sharp objects.
• Wash with warm soapy water, rinse and dry with a soft cloth.
• These goggles are only to be used with the contents and instructions supplied. If goggles become
damaged, do not attempt to repair; discard immediately.
• Materials which may come into contact with the wearer’s skin could cause allergic reactions
to susceptible individuals.
• Goggle markings - Edu-Science (HK) Ltd 1 S - EN166 3 S H CE
Safety Goggles User Information
Safety Matters
Advice for Supervising Adults
THE SAFETY RULES
4 5
Manufacturer
Optical glass
S - increased robustness
European standard for Personal Eye Protection
3 - for use with liquids
S - intended for protection against
droplets or splashes
H - designed to fit small heads
CE - complies with EN 166

This Chemistry Lab Instruction Booklet has
been written by David Webster. Dr. Webster
is a Fellow of the Royal Society of
Chemistry and a Chartered Chemist. He
has been teaching practical chemistry for
over 40 years, and is the author of a
chemistry textbook for younger secondary
school children. He has designed and
tested the 100 experiments in this
instruction booklet. The experiments,
which get more difficult and involve more
complex ideas as you move through the
You are now the owner of a Chemistry Laboratory. We hope that you enjoy
the many interesting chemistry experiments which are given in this
Instruction Booklet.
ADULT SUPERVISION IS NECESSARY AT ALL TIMES.
A Chemistry Laboratory, such as this, is not for ‘playing’ with. When carrying out chemistry
experiments you need to take GREAT CARE in both following the instructions and in keeping
a Laboratory Notebook of your experiments and results.
If you do this you will be working safely and learning some chemistry at the same time.
Working safely must always be your main concern. The experiments given here are safe and
enjoyable and at the same time you will learn about chemistry.
Always be careful to avoid getting chemicals on you, particularly not in your eyes or mouth.
Also be careful not to burn yourself. To avoid injury read and follow all the safety rules
which follow.
Introduction
6 7
booklet, are a collection of safe chemical
experiments for you to carry out using both
the chemicals and equipment in the
Chemistry Lab and common chemicals and
other readily available materials, many of
which you will already have at home. The
experiments are intended to show you some
of the magic and mystery of chemistry, and
the relevance of chemistry to your
understanding of what is to be found in your
home and in the world around you.
Chemistry is a very important science,
because everything in the Universe is made of
chemical substances. You, the water you drink,
the air your breathe, the food you eat, the hills
you climb, are all chemical substances.
All chemical substances are made from about
100 elements. You, for example, are a very
complicated mixture of chemicals, but 98% of
you is just 6 of these 100 elements (hydrogen,
carbon, nitrogen, oxygen, phosphorus and
sulphur). Many other elements make up the
remaining 2% of you, such as iron, in your
blood, and sodium, in the cells of your body.
When you carry out chemical experiments you
are studying how the many different chemical
substances behave. This Chemistry Lab
contains the equipment and chemicals to carry
out many interesting experiments, but no
chemistry set can be “complete” as there are
millions of possible chemistry experiments.
You must regard your Chemistry Lab as the
heart of a laboratory to which you can add
other equipment and chemicals (only those
suggested on pages 14/15 in this manual
or listed in each experiment in this manual).
Then you can carry out other experiments.
Some of the experiments here require other
equipment and chemicals and these are
described in the section Additional Equipment
and Chemicals. DO NOT use anything not
listed as a requirement in this manual.
It is a good idea to get together as much
of this equipment and as many of these
chemicals before your start. Certainly get
them before you start the experiment which
needs them. These additional chemicals and
equipment need not be expensive. Part of the
fun of using a chemistry set at home is to
improvise, that is to make the equipment
from common household items, and use
common household chemicals, as much
as possible.
Glass
stirring rod
100mm beaker 100mm conical
flask
Spirit burner Dropping
pipette
test tube
rack
Plastic funnel
Test tube holder
Filter papers
Corks
Rubber
tubing
Test
tubes
Test tube
cleaning
brush

Setting up your Chemistry Laboratory Working in your Chemistry Laboratory
8 9
Keep accurate records of your work. There is
little point in doing chemical experiments if
you don’t know what you have done, why
you did it and what happened. Follow the
instructions carefully and watch very closely
what happens, and then try to work out why
it happened. At the back of these instructions
are answers to what you should see and
conclude from your observations.
The Record Book
The best type of book to use is a hard
covered book or one with a spiral binder.
Write up each experiment with:
• when you did the experiment (the date)
• what the experiment was about (its title)
• what you did (the method)
• what happened (the results)
• why it happened (the conclusions).
Laboratory Techniques
Practical chemistry requires you to carry out
various tasks which will at first be unfamiliar
to you. This section contains some hints and
tips that will help you with these tasks.
Using The Spirit Burner
You must use the Spirit Burner with great
care. It should always be placed on a metal
tray that can catch any spillages - a biscuit
tin lid is ideal.
Fill the burner three quarters full with
Methylated Spirits, screw on the cap and
wait a few minutes for the Methylated Spirits
to soak up the wick. You need about 3mm of
wick protruding from the cap. Ensure that the
outside of the burner is dry. Keep the bottle
of Methylated Spirits well away from the
Spirit Burner. Light the burner with a match
(or preferably a disposable cigarette lighter).
You will see that the flame is nearly
colourless and in bright sunlight it may be
invisible. It is very easy to burn yourself and
to minimise this risk we recommend the
following tip.
Continued...
You need to set up your laboratory work
space in a well lit and ventilated room with, if
possible, a heat resistant surface to work on.
You will soon discover that an experimental
chemist spends a lot of time washing dirty
equipment so a close supply of running
water, or a large container to hold waste
water is essential.
For most people the kitchen is the best place
to set up your laboratory.
You also need a clean area nearby where you
can write in your laboratory notebook and
keep other items safe and dry. It is unlikely
that you will have a laboratory area that is
not to be used by other people at other
times. This is certainly so if you work in your
kitchen. You need, therefore, to be able to
easily pack away your Chemistry Laboratory.
You can, of course, use the box which we
have supplied, but you will quickly acquire
other equipment and chemicals, and we
strongly recommend that you get a large
strong cardboard or plastic box in which you
can conveniently pack and unpack
everything and store it away when not in use.
IT IS VERY IMPORTANT that you store this
set somewhere where young children do not
have access to it. Read and act upon all the
safety advice within this manual!
Have readily available at all times the
following 6 items.
A sink or container for liquid waste.
A waste bin for solid waste.
A piece of hardboard or thick
cardboard or similar (newspaper in an
emergency) to put on the work bench.
Then if you have any spills you can
easily clean up the mess.
A kitchen roll, or some cloths,
for keeping your laboratory area
clean and tidy.
Two tea-towels (not those usually used
in the kitchen). One dry tea-towel
should be used for drying your
apparatus after you have washed it.
The other tea-towel should be wet and
you should keep it handy so that you
can quickly smother a small fire if you
are unlucky enough to have one.
A biscuit tin lid, or something similar,
in which to stand your
Spirit Burner.
1
2
3
4
5
6

Working in your Chemistry Laboratory continued... Working in your Chemistry Laboratory continued...
10 11
SAFETY TIP: The use of clay pot.
You can considerably reduce the risk of an
accident due to the contents of a test tube
spurting out, by putting one or two small
pieces of clay pot into the tube. As the
water boils the steam is formed as tiny
bubbles on the sharp points of the clay pot
and these then bubble smoothly out of the
solution.
See Note 2 at the beginning of “The
Chemistry Experiments” where how to
make the pieces of clay pot is described.
Never heat a test tube with a cork in it.
If you have hot water in the test tube you can
safely put it into the test tube rack. If you have
a hot solid in the tube then the tube may be
VERY HOT and could melt the test tube rack
– put the hot tube into an empty beaker and
leave it there until it is cool.
Cleaning The Test Tubes
Wash them with running water and clean with
the test tube brush. If necessary use a little
washing-up detergent. The outsides of the
test tubes will get black with deposits from
the burner. Clean this off with a cream kitchen
cleaner such as Cif. To dry inside test tubes
use rolled up kitchen paper towel.
Your Water Supply
For washing dirty equipment a tap and
sink are best. When carrying out the
experiments you will need a “water bottle”
for adding small quantities of water, in a
controlled way, to the chemicals in the test
tubes. Two suggestions are a “Washing-up
Detergent Bottle” or a “Hand Sprayer”.
TIP: A Washing-up Detergent Bottle.
Remove the cap from an empty bottle
(or better get an adult to do so for you by
prizing the cap off with the edge of a knife)
and thoroughly wash the bottle and,
particularly, the cap to remove all traces
of detergent.
You can fill the bottle with water, replace
the cap and use it by gently squeezing the
bottle. However, the jet of water you get is
rather too much. The bottle can be
considerably improved for your purpose if
you get an adult to heat a needle held in
a pair of pliers in your Spirit Burner flame
and melt a small hole through the centre
of the top of the cap. Then click shut the
top of the cap and squirt the water out of
this fine hole.
continued...
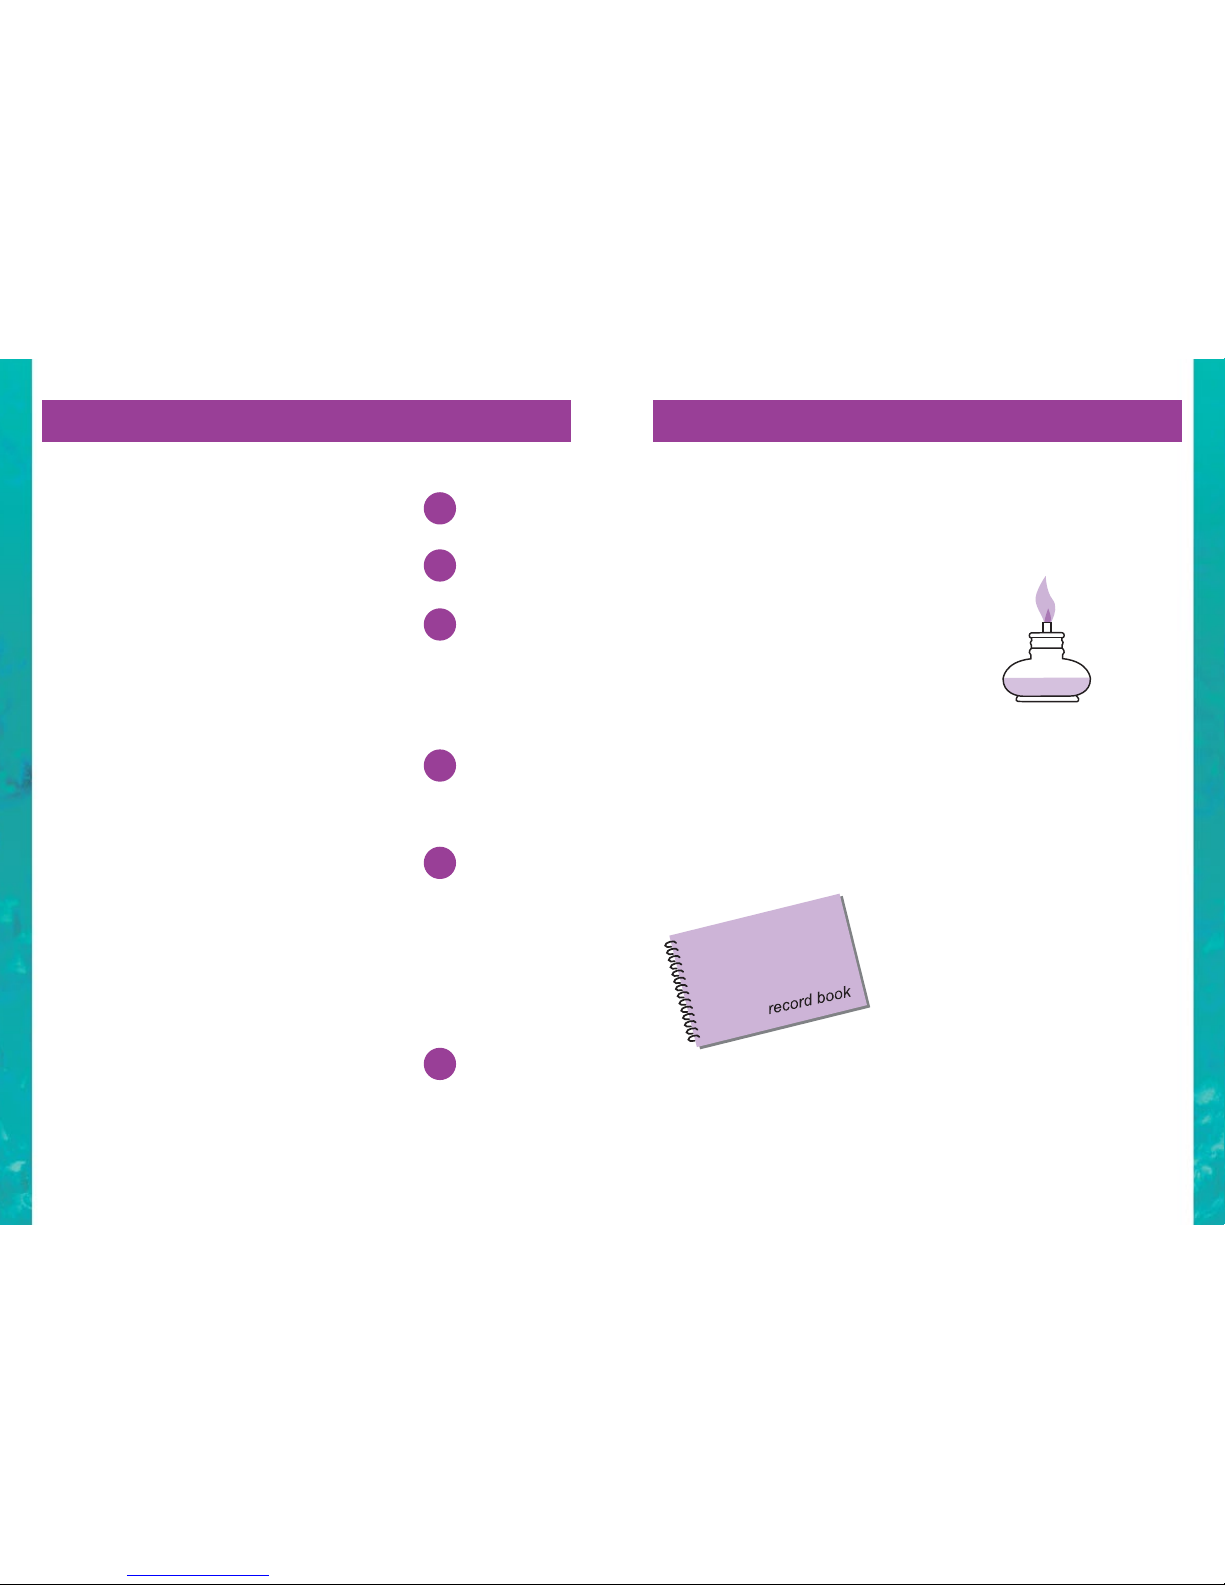
SAFETY TIP: Using the Spirit Burner.
You can extinguish the burner flame by
blowing it out, but a good tip to follow is
to have a heat proof drinking glass that fits
over the burner. To extinguish the flame
just put the glass upside down over the
burner and after a few seconds the flame
will go out. (Do you know why?
Experiments 9.8 and 9.17 have the
answer).
Leave the glass in place until you next
want to use the burner.
YOU THEN ALWAYS KNOW THAT IF
THE BURNER IS NOT UNDER THE
GLASS, IT IS ALIGHT.
NEVER LEAVE CHILDREN UNATTENDED
WITH THE SPIRIT BURNER.
Using The Test Tubes
For these experiments you will usually be
using less than 3cm depth of water in the
test tubes. Do not overfill as the more liquid
you have in a test tube the more difficult it is
to control any boiling that occurs. Solids can
be added to a test tube with the measuring
spoon. You might find it easier to add liquids
by using the funnel, or by pouring the liquid
into a beaker and then into the test tube.
Heating A Test Tube:
Always point the test tube away from you
and other people. Hold the test tube in the
test tube holder whenever you are likely to
boil the contents or heat them strongly.
TIP: A wooden clothes peg also makes
a good test tube holder.
The easiest way to dissolve solids in water is
to put a cork in the test tube and shake it. If
the solid does not dissolve after about 15
seconds of shaking then gently warm the
solution.
Most solids dissolve more readily in water if
you gently warm the solution. You can hold
the tube without the holder if you are only
going to heat it for a few seconds to get the
water warm to help a solid dissolve. To heat
a tube hold it in a slanting position away
from you and continually move it about in the
flame. Even when told to heat a tube
strongly, start with gentle heating and watch
carefully in case the contents spit or spurt
out of the tube.

Working in your Chemistry Laboratory continued... Working in your Chemistry Laboratory continued...
12 13
Using Chemicals
NEVER TASTE A CHEMICAL.
REMEMBER to be careful when carrying
out all the experiments. Wear your Safety
Goggles, but should you get any chemical
in your eyes, get someone else to wash
them immediately with your water bottle
or under a running tap.
You only have a limited supply of
chemicals. Although these can be added to
by buying more from elsewhere, you only
want to work with small quantities.
In the experiments “one measure” is a
level scoopful of the chemical in the round
measuring spoon.
You will add other chemicals to those
supplied and make up “Stock Solutions”
of some of the chemicals that you will need
for many experiments. Keep these in
stoppered containers and bottles. It is most
important that you always label any
chemicals or solutions when you put them
in your own bottles or containers.
TIP: You will need some empty bottles and
containers. Small bottles that have had
fizzy drinks, or something similar, are
satisfactory, although smaller bottles would
be better - you will need 4. Small plastic
containers that have been used for 35mm
films are perfect for solids. You can get as
many as you want of these for nothing
from your local photo-processor. They will
be pleased to give them to you as they
usually throw them away. NEVER store
chemicals and solutions near or with
foodstuffs.
Using Glassware
If you do have an accident and break some
glassware clean it up immediately. Wipe up
tiny fragments with several pieces of kitchen
roll and throw it away. Wash your hands under
running water when you have cleared up.
One of the trickiest tasks you will have to do is
to push the glass tubing into a cork. It is very,
very easy to break the tubing and cut your
hand when doing this so take great care.
TIP: A Hand Sprayer.
A small (1 pint) garden or indoor plant
sprayer that is readily available at Garden
Centres and DIY stores is ideal. It has a
trigger action and is designed to give a
spray. By rotating the spray head a fine
jet of water can be produced instead.
This is very controllable by lightly
squeezing the trigger. Additionally the
sprayer has the advantage of being easy
to refill by just unscrewing the water
container.
Using Filter Papers
You will use the filter papers supplied to
separate solids from liquids and for the
Paper Chromatography experiments. Always
use a new paper for each experiment. You
may need more papers than supplied here.
Very cheap filter papers can be cut from
Coffee Filter Papers; get the white ones
rather than the brown ones if you can. You
are advised to use the small filter papers and
Coffee Filter Papers for filtering and retain
the large filter papers supplied here for the
Chromatography experiments. Filter papers
are folded as shown in the diagram below.
TIP: Thoroughly wet the cork and the end
of the tubing with a strong solution of
washing-up detergent. Hold the glass
tubing and the cork in a tea-towel, or other
cloth and push the tubing gently with slight
twisting into the cork.
Wash the excess detergent off the cork
and tubing and allow them to dry. Once it
is in the cork it is usually impossible to
remove the tubing without breaking it
unless you cut the cork. Don’t try.

Additional equipment and chemicals Additional equipment and chemicals
14 15
In order to carry out the full set of experiments
described in this instruction booklet it is
necessary to add other equipment and
chemicals. The more important of these are
listed below. You should have no difficulty in
finding these but some sources are given. You
should get these together before you start on
the experiments. Readily available household
items that are needed for specific experiments
are given in the list at the side of the
experimental instructions. (N.B. some
experiments may require more of a chemical
than we have supplied with your set (see
example 3-8). Use your small scoop for
refilling chemical bottles.
Equipment
A small ruler
To measure the amount of liquid in a test tube.
Crystallising dishes
Make them from yogurt pots or small plastic
beakers by carefully cutting round the pot
about 1cm from the base. The small dishes
that you make are ideal. Make 5 or 6.
Metal evaporating spoons
Two different sizes are needed, large and
small. Use two unwanted stainless steel
spoons (one dessert and one tea) If you don’t
have any at home, a local charity shop will
have them for a few pence.
N.B. Some experiments call for two identical
teaspoons.
A water dispenser
See the section on “A Water Supply”.
A small clay plant pot
(preferably a new one) - from a gardening shop.
Coffee filter papers
(preferably white) - from supermarket.
A box of matches/cigarette lighter
For lighting the Spirit Burner and other
experiments.
A heat proof drinking glass
For covering the Spirit Burner.
Small bottles and containers
See the section “Using Chemicals”.
Small self-adhesive labels
Wooden ice-cream or lolly sticks
A small artist’s paint brush or cotton-buds
A pencil
A small mirror or piece of glass
Writing paper (preferably unglazed)
2 tea-towels
A kitchen roll
A roll of sellotape
A pair of scissors
A pair of tweezers or small pliers
5 small nails
A wooden clothes peg
(very useful as a test tube holder)
A small saucepan
An old cup or mug
An egg cup
A small plate
DO NOT RE-USE cutlery, plates, glasses or
mugs etc. used in experiments for drinking
and eating.
Chemicals that you will need
Methylated spirits
From a DIY store.
Colourless (distilled malt) vinegar
284ml bottle from supermarket.
Citric acid
50g packet from a pharmacist.
Sodium chloride (common salt)
From a supermarket.
Sodium bicarbonate
(Sodium hydrogen carbonate)
From a pharmacist or a supermarket.
Magnesium sulphate (Epsom salts)
500g packet from pharmacist.
Hydrogen peroxide
150ml bottle from a pharmacist.
Turmeric
From a supermarket.
Other items that you will need for
specific experiments, check before
you start.
Sparkling water
White sugar
Golden Syrup
Course ground pepper
Vitamin C tablets
Aluminium foil
Spray starch
Black ink
Black food dye
Green food dye
Black & coloured felt-tipped pens
A lemon(s)
Distilled water
Sewing thread
A potato
Red cabbage
Beetroot
Blackberry juice
Red rose or red carnation
Indigestion tablet
An apple
Soluble aspirin
A drop of gin, whisky or brandy
(Ask an adult for this.)
Chemicals that you may need
Washing soda (Sodium carbonate
decahydrate)*
From a supermarket.
Sodium sulphate (Glauber’s salt)*
200g packet from pharmacist.
Garden lime (Calcium hydroxide)*
From a garden centre (but note that very
little will be needed).
(Do not get the items marked with a * until
you need them. Epsom salts, Glauber’s salt,
washing soda and garden lime are included
in the chemicals supplied, but you may
need more.)
ALWAYS read and follow the manufacturers
instructions for safe use as seen on the
packaging.
NEVER substitute chemicals listed in each
experiment for anything else.

The Chemistry Experiments Chapter 1 - Soluble & Insoluble Substances
16 17
Some substances dissolve in water to form a solution, they are said to be soluble; others do
not, they are insoluble. The water is called a solvent and the substance which dissolves is
called a solute.
Experiment 1.1 What substances dissolve in water?
• copper sulphate
• sodium chloride
• calcium carbonate
• sugar
• course ground pepper
• test tubes
Put ¼ measure of copper sulphate into a clean dry test tube and
add about 2cm of water. Gently shake the tube. Does the copper
sulphate disappear and the solution become coloured?
Repeat the experiment four more times using sodium chloride,
then sugar, then calcium carbonate and then coarse ground pepper
instead of copper sulphate.
Record your results for each substance as soluble or insoluble.
Experiment 1.2 Solubility of substances in cold and in hot water
• sodium sulphate
• test tube
Put 1 measure (look at note 5 opposite) of sodium sulphate into a
clean dry test tube and add about 2cm of water. Gently shake the
tube. Roughly time how long it takes for the sodium sulphate to
dissolve. Repeat the experiment but this time gently shake the tube
in the burner flame to warm (not boil) the water.
Does the sodium sulphate dissolve slower or quicker in the warm
water?
Keep the solution for Experiment 1.6.
Experiment 1.3
To recover a dissolved substance by boiling off the water
• sodium chloride
• test tube
• large evaporating spoon
Put 1 measure of sodium chloride into a clean dry test tube and add
about 2cm of water. Gently shake and warm in the burner flame.
Where do you think the sodium chloride has gone to when it
dissolves? Has it disappeared? To see if it is still there pour the
solution into the large evaporating spoon and CAREFULLY boil the
solution over the burner flame until all the water has boiled away
(evaporated). The white sodium chloride is left behind in the spoon.
Be careful not to let the sodium chloride spit too much towards the
end of the experiment - heat it very gently.
DANGER – The spoon will be VERY HOT – put it on the tin tray
holding the burner and wait for it to cool down.
Before doing any of the experiments read
and understand the two earlier sections
in this Booklet on “Safety Matters” and
“Your Chemistry Laboratory”.
Collect together the “Additional Equipment
and Chemicals” listed earlier. For many
experiments you will need some small
pieces of clay pot. Make these now by
breaking up a small clay plant pot and
collecting the little pieces that are smaller
than a pea. Put these pieces of clay pot in
a container and label it.
Some of the experiments will need
equipment that you should be able to
easily find at home. The chemicals and
equipment needed for each experiment
are given at the side of the instructions.
Get everything ready before
you start an experiment.
When scientists carry out an experiment they carefully observe what happens and then try to
work out why it happens. This is what you will have to do here. For most of the experiments
the instructions do not explain what happens. Do the experiment, record your results, and try
to explain them. You can check to see if you have the correct result in the section Results of
the Experiments at the end of this booklet. If the results of your experiment are different from
those given there check to see if you followed the instructions and try the experiment again.
In this booklet the experiments are
arranged with the easiest ones first.
It is therefore best to carry them out in the
order given here. You can, however, start at the
beginning of any chapter which interests you.
Please note that many experiments from
Chapter 5 onwards use the solutions of acids
and alkalis made in Chapter 5a.
Remember; one measure is a level scoopful of
the chemical in the round measuring spoon.
The amount of liquid needed in an experiment
is given as a length in the test tube. You do
not need to have exactly this amount. If, for
example, it says 2cm then anything from
1½ cm to 2½ cm is satisfactory. Use your ruler
to check the amount of liquid in a test tube.
You will find that after a few experiments
you will be able to guess the amount
accurately enough.
1
2
3
4
5
6

Chapter 1 - Soluble & Insoluble Substances
18 19
Experiment 1.4 To see if there are any dissolved substance in tap water
• distilled water
• large evaporating spoon
This is a very simple experiment. Half fill the evaporating spoon with
tap water. Boil the water over the burner flame until it has all boiled
away. Is there anything left in the spoon? Don’t forget the spoon
will be HOT.
Try the same experiment with distilled water. Distilled water is also
called deionised water and is used for adding to car batteries. Is
there anything left in the spoon?
If you do not have any distilled water collect and use rain water.
This has been distilled by nature for you.
With tap water there should be a visible thin film of solid on the
spoon. This is because all tap waters contain dissolved solids.
If you live where the water is “hard” there is more deposit than
where the water is “soft”, but even here there will be some solids
dissolved in the water. Distilled water has had the solids removed,
so in this part of the experiment the spoon should have no deposits
remaining on it.
This is an important, but very easy, test to distinguish between
tap water and distilled water.
Chapter 1 - Soluble & Insoluble Substances
Experiment 1.6 To separate a mixture of a soluble substance and an
insoluble substance
• sodium sulphate solution
from Experiment 1.2
• course ground pepper
• 2 test tubes
• funnel
• filter paper (not one
made from a coffee filter
paper)
You should have a solution of a soluble substance, sodium sulphate,
from Experiment 1.2. Add 1 measure of course ground pepper to the
solution and shake the test tube. The pepper will not dissolve.
Place the funnel and filter paper into the mouth of a test tube and
pour the solution and pepper into it. The liquid filtrate passes
through the fine holes in the filter paper into the test tube leaving the
pepper stuck onto the filter paper.
To recover clean and dry pepper move the funnel into another test
tube and gently wash the pepper with water. Then carefully lift the
filter paper out of the funnel and put it somewhere warm for a few
hours until it is dry. Carefully scrape the pepper off the paper. Try to
recover the sodium sulphate from the clear filtrate as in Experiments
1.3 or 1.5.
You can repeat this experiment with other mixture of soluble and
insoluble substances.
Experiment 1.5 To recover a dissolved substance by crystallisation
• copper sulphate
• test tube
• crystallising dish
In Experiment 1.3 you boiled away all the water to recover the
chemical. As you do this it is likely that the chemical will get hot and
be destroyed. If you allow the water to evaporate away more slowly
then the chemical is left behind - often as beautifully shaped
crystals as you will see in Chapter 3. This process is called
crystallisation.
Put ½ measure of copper sulphate into a clean dry test tube and add
2cm of water. Dissolve by gentle shaking and warming. Pour the
solution into a crystallising dish and leave it somewhere warm, such
as a safe place in your kitchen or in an airing cupboard, until the
water has evaporated away. What is left in the crystallising dish?
You cannot see the sodium chloride or copper sulphate in
Experiments 1.3 and 1.5 because when they are in solution
in water the particles of the chemical are very, very small.
This property can be used to separate insoluble solids from
solids which have dissolved.
You can filter off the solid, and then recover both the solid
and the chemical from the water.

Chapter 2 - Invisible Inks
20 21
Some substances are a different colour when they are cold and when they are hot. We can use
this property to make invisible inks. You can write on paper with the ink and it only becomes
visible when you “develop” it, by heating the paper with an iron or holding it in front of a fire.
Chapter 2 - Invisible Inks
Experiment 2.4 Using a chemical developer for invisible ink
• iodine solution from
experiment 2.5
• conical flask
ª crystallising dish
• filter paper
• dropping pipette
• artists paint brush
• small plate
• spray starch
Collect some starch from a Spray Starch spray in a small container
(for example a mug or a bowl). It is likely that it will be a foam. Let
the foam settle and then pour the solution into the crystallising dish
and write on a filter paper with the paint brush. Let the writing dry.
While the writing is drying carry out Experiment 2.5 to make the
iodine solution which you will need as the developer.
When the writing is dry put 30ml of water into the conical flask.
Add 10 drops of iodine solution using the dropping pipette. Pour
a little of this iodine solution onto a small plate. Drop the filter paper
into the iodine and the writing will magically appear.
What colour is it?
Experiment 2.5 Using a chemical developer for invisible ink
• potassium iodide
• sodium hydrogen
sulphate
• hydrogen peroxide
solution
• test tube
• small clean dry bottle
Put ½ measure of potassium iodide and ¼ measure of sodium
hydrogen sulphate into a clean dry test tube and add about 2cm of
water. Add 10 drops of hydrogen peroxide solution; yellow-brown
iodine will be formed. Add water until the test tube is half full.
Carefully pour this solution into a bottle. Label it “Iodine Solution”.
THIS IS VERY IMPORTANT.
Experiment 2.1 Invisible ink from a lemon
• a lemon
• crystallising dish
• artist’s paint brush
or a cotton-bud
• writing paper
Squeeze a lemon and pour some juice into a crystallising dish. Use
the paint brush or a cotton-bud to write on a piece of white paper.
Unglazed writing paper is best. Let the writing dry.
Get an adult to help you carefully heat the paper by pressing it with
an iron or holding it in front of a fire. Take great care not to let the
paper catch fire.
What colour is the writing?
Experiment 2.2 Other invisible inks
• iron sulphate
• test tube
• crystallising dish
• artist’s paint brush
or a cotton-bud
• writing paper
Dissolve ¼ of a measure of iron sulphate in about 1cm of water in
a test tube. Pour the solution into a crystallising dish and write on
unglazed paper as in Experiment 2.1.
Develop the invisible ink by heating as in Experiment 2.1.
What colour is the writing?
Experiment 2.3 An invisible ink made from two chemicals
• iron sulphate
• test tube
• crystallising dish
• artist’s paint brush
or a cotton-bud
• writing paper
Put ¼ measure of copper sulphate and ¼ measure of ammonium
chloride in a clean dry test tube and add 1cm of water. Shake the
tube gently until the chemicals have dissolved (do not heat the
solution). Pour the solution into the crystallising dish and write on
unglazed paper as in Experiment 2.1.
Develop the invisible ink by heating as in Experiment 2.1.
What colour is the writing?
Later in this instruction booklet you will see how sometimes
when chemicals react together a colourless chemical changes
into a coloured one. This property is used here to develop an
invisible ink.

Chapter 3 - Crystal Chemistry
22 23
Chapter 3 - Crystal Chemistry 3a - Growing Crystals
Experiment 3.1 Copper sulphate crystals
• copper sulphate
• test tube
• conical flask
• crystallising dish
• pencil
Put 8 measures of copper sulphate into a clean conical flask and add 3cm
of water from a test tube. Gently warm the conical flask until all the copper
sulphate has dissolved. Pour the solution into a crystallising dish and leave
it somewhere warm for several days until all the water has evaporated away.
If possible prop up one side of the crystallising dish, say with a pencil, so the
solution is not spread too thinly over the bottom of the dish.
You will have formed some large blue copper sulphate crystals. Grown in this
way crystals do not have a regular shape, but look carefully at them (use a
magnifying glass if you have one) and decide which of the 3 shapes shown
opposite do copper sulphate crystals most resemble?
You can redissolve the crystals in water and grow them again if you wish.
If you grow a lot of small crystals and want to grow bigger ones, try growing
them where it is not so warm, the water takes longer to evaporate away and
they grow bigger.
Do not throw the crystals away when you have finished crystal growing.
Put the crystals somewhere warm until they are thoroughly dry and return
them to your copper sulphate container.
Experiment 3.2 Aluminium potassium sulphate crystals
• aluminium potassium
• sulphate test tube
• conical flask
• crystallising dish
• pencil
Repeat Experiment 3.1 using 8 measures of aluminium potassium sulphate
in place of copper sulphate, and 6cm of water instead of 3. Which of the 3
shapes shown opposite do aluminium potassium sulphate crystals most
resemble?
Experiment 3.3 Sodium sulphate crystals
• sodium sulphate
• test tube
• crystallising dish
• pencil
Put 4 measures of sodium sulphate in a clean dry test tube and add 3cm of
water. Heat the solution until it just boils and pour it into a crystallising dish,
leaving any residue in the test tube. Put the crystallising dish somewhere
warm for several days until all the water has evaporated away. If possible
prop up one side of the crystallising dish, say with a pencil, so the solution
is not spread too thinly over the bottom of the dish. Sodium sulphate
crystals will be left in the crystallising dish when all the water has
evaporated away. Initially the crystals are colourless but they quickly
become white as they lose some of their water of crystallisation. This
process is called efflorescence.
Which of the 3 shapes shown opposite do sodium sulphate crystals
most resemble?
In Experiment 1.5 you made some crystals of copper sulphate.
Crystals are solid substances in which all the particles are
arranged in a regular pattern. Crystals can be many different
shapes, some are simple shapes like cubes, rhombohedra or
long needles.
Crystals form in solutions when the solution contains as much
of the substance (the solute) as it can dissolve. The solution
is said to be saturated with the solute. Any excess amount of
solute that is present in the solution forms crystals. As most
substances increase in solubility as the temperature is
increased, one way to form crystals is to start with a hot
saturated solution and let it cool. As it cools the amount of
solute needed to keep the solution saturated decreases and
the excess is deposited out of solution as crystals. Crystals
formed in this way are usually small ones.
The other way to form crystals, and the way that must be used
if big crystals are wanted, is to start with a saturated solution
and to let the solvent slowly evaporate away. As it does so the
excess solute is deposited as crystals. A general rule for
crystal growing is that the slower the crystals grow the
bigger they will be.
Using the chemicals supplied with this Chemistry Lab you can
grow big crystals if you are patient and let them grow over
several days. To grow really big crystals you will need to buy
more chemicals.
Cubic
Rhombohedral
Long needle

Chapter 3 - Crystal Chemistry 3a - Growing Crystals
24 25
Chapter 3 - Crystal Chemistry 3a - Growing Crystals
Experiment 3.6 Ammonium chloride crystals
• ammonium chloride
• test tube
• crystallising dish
• dropping pipette
• small mirror or
piece of glass
Put ½ measure of ammonium chloride into a clean dry test tube,
add 2cm of water, and shake the test tube until the ammonium
chloride has dissolved. Pour the solution into a crystallising dish.
Use the dropping pipette to put some of the solution onto a small
mirror or a piece of clean glass. Put the mirror somewhere warm
for the water to evaporate.
You can clearly see ammonium chloride crystals on the mirror.
Which of the 3 shapes shown on page 22 do ammonium chloride
crystals most resemble? Their beauty is best seen if you look at
them through a magnifying glass.
Experiment 3.4 Sodium chloride crystals
• sodium chloride
• test tube
• conical flask
• beaker
• funnel
• drinking glass
Fill 6cm of a test tube with solid sodium chloride. Use the funnel to
transfer it from the test tube into the conical flask. Add 20ml of hot
water (measured in your beaker). Gently shake the flask to help the
sodium chloride dissolve. It may not all do so. Allow the solution
to cool.
Pour the solution into a glass container with a clear bottom
(a drinking glass is ideal) and leave it somewhere warm.
Look at the container each day. You will see crystals of sodium
chloride forming in the bottom of the container (some may also
form on the surface)
Which of the 3 shapes shown on page 22 do sodium chloride
crystals most resemble? You can see the crystals more clearly
if you look up at the bottom of the container.
Experiment 3.5 Magnesium sulphate crystals
• magnesium sulphate
• beaker
• test tube
• small saucepan
• glass container
There is a sample of magnesium sulphate in the Chemistry Lab, but
to carry out this experiment you will need to buy more. It is sold as
Epsom Salts. Magnesium sulphate has this name because it is an
important chemical in drinking water, that was first found in spring
water at Epsom in Surrey over 300 years ago in 1695.
Put half a beaker-full (60g) of magnesium sulphate into a small
saucepan and add 3 test tube-fulls (60ml) of water. Heat, whilst
stirring, until the magnesium sulphate has dissolved. Allow it to cool
and then pour it into a glass container. Put this to stand undisturbed
in a warm place. As the water evaporates away a mass of clear
ice-like crystals of magnesium sulphate are formed. Which of the
3 shapes shown on page 22 do magnesium sulphate crystals most
resemble?
Sometimes magnesium sulphate crystallises as big crystals over
a period of time, sometimes as small crystals quickly. Exactly what
will happen will depend on the conditions, such as how slowly the
solution cools, how warm it is where you are keeping it, and how
much it gets disturbed. If small crystals grow, try again. You can
safely experiment using a slightly larger or slightly smaller quantity
of magnesium sulphate.
Experiment 3.7 Sodium thiosulphate crystals
• sodium thiosulphate
• test tube
Put 9 measures of sodium thiosulphate into a clean dry test tube.
Gently heat the crystals moving the test tube continually in the burner
flame. Continue heating until all the solid has melted. Put the HOT
test tube into an empty beaker and allow it to cool. The cold liquid
has more solid dissolved in it than it can hold, it is supersaturated.
Get 1 small crystal of sodium thiosulphate and hold the test tube
level with your eye. Drop the crystal into the liquid. Watch carefully
and describe what you see.

Chapter 3 - Crystal Chemistry 3a - Growing Crystals
26 27
Chapter 3 - Crystal Chemistry 3a - Growing Crystals
If you are growing a copper sulphate crystal then you need to
add 60g of copper sulphate and 1 measure of sodium hydrogen
sulphate for every 100g (100ml) of water. (60g of copper sulphate
is 2 test tubes-full.) Tie a piece of sewing thread around your seed
crystal. Tie the other end of the thread around a pencil, or lolly
stick so that the seed crystal hangs in the middle of the container.
Carefully fill the container with the cold saturated solution and hang
the seed crystal in place. Put the container where it will not be
disturbed. Somewhere where the temperature does not change
much from day to night is best, otherwise the crystal may grow
during the cold night and dissolve again during the warm day!
A good tip is to grow the crystal only at night when the temperature
is falling. Each morning take the crystal out of the solution and lay
it on a piece of paper towel. Each night put it back into the solution.
A large crystal will grow over a period of several weeks. Take it out
of the solution from time to time to look at it and to remove any
small crystals that are growing on it and on the thread. If small
crystals grow on the sides and bottom of the container pour out the
solution, wash and dry the container and refill it, then continue the
experiment.
In this way over a period of weeks and months very large crystals
can be grown. It is easy to grow crystals but difficult to grow
perfect big crystals. Sometimes you may see competitions for
crystal growing. If you are interested in crystal growing you can
buy a book on crystals and crystal growing and get the chemicals
from a chemical supplier. Or you could start by buying a Crystal
Growing Kit.
Experiment 3.8 Growing large crystals
• aluminium potassium
sulphate
• saucepan
• glass container
• sewing thread
• pencil
Note: The are insufficient chemicals supplied in your lab to carry
out this experiment. Before you can carry out this experiment you
need to buy more aluminium potassium sulphate or copper sulphate
from a chemical supplier.
To grow really large crystals you need to suspend a small one
(known as the seed crystal) in a saturated solution of the chemical
and let the water slowly evaporate away. As it does so the chemical
will grow as one large crystal on the seed crystal. The best
chemicals for growing large crystals are aluminium potassium
sulphate and copper sulphate. The method is described here for
aluminium potassium sulphate; you can substitute copper sulphate
if this is the crystal that you are growing.
First you need a seed crystal of aluminium potassium sulphate which
you have grown as in Experiment 3.2 (If you are working with copper
sulphate then the seed-crystal will be grown by Experiment 3.1).
Get a suitable container (e.g. an egg cup, a drinking glass or a jam
jar) the size of which will depend on the amount of the aluminium
potassium sulphate that you have available. Measure the volume
of the container that you are using.
You now need a saturated solution of aluminium potassium sulphate
that will fill your container. Prepare this by measuring into a small
saucepan 32g of aluminium potassium sulphate and 1 measure of
sodium hydrogen sulphate (to keep the solution acidic and prevent
decomposition of the aluminium potassium sulphate) for every 100g
(100ml) of water. (It is best to weigh the aluminium potassium
sulphate but, if this is not possible, 32g is 1 test tube-full plus
another 6cm in the test tube.) Gently heat and stir the solution until all
the aluminium potassium sulphate has dissolved. When cool enough
pour the solution into the container and leave it for 24 hours. Some
aluminium potassium sulphate crystals should be formed, leaving
a saturated solution. Filter, or carefully pour, off this solution into
another temporary container and wash and dry the container in
which you are going to grow the crystal. One of the crystals
deposited during this initial cooling may be a suitable seed crystal.
Pencil
Container
Thread
Seed
crystal
Saturated
solution

Chapter 3 - Crystal Chemistry 3b - Water of crystallisation
28 29
Chapter 4 - Paper Chromatography
Experiment 4.1 The analysis of black and green food colourings
• black & green food
colouring
• test tube
• conical flask
• large filter paper
• sellotape
• pair of scissors
• pencil
• small paint brush
or dropping pipette
Here we use filter paper to make a chromatogram. One filter paper
can be used for 4 chromatograms. 1 filter paper can be used for 4
chromatograms.
Cut four 1½ cm wide strips from the widest part of a large (11cm)
filter paper. Stick a second piece cut from the waste filter paper
across the top as in the diagram. Draw a pencil line 2cm from the
bottom end of each strip.
Put 3 strips aside for other experiments. Use the paint brush to paint
a line of black food colouring on the pencil line, or add 2 drops of the
colouring in the middle of the line using the dropping pipette. Put a
test tube full of water in the conical flask and hang the strip in the
flask. The colouring will be just above the water, which will rise up
the paper taking the colouring with it, and separating the different
dyes that make up the black food colouring.
Stop the experiment when the water reaches the top of the filter
paper strip. Dry the chromatogram and label it. Describe what it
shows.
Repeat the experiment using green food colouring.
The two food colourings have listed on their labels the single dyes
which they contain. Do your paper chromatograms agree with what
is given on the labels?
Paper chromatography is a method of separating two or more substances. It is particularly
useful if the substances are coloured.
Experiment 3.9 Does a substance contain water of crystallisation?
• magnesium sulphate
• aluminium potassium
sulphate
• sodium chloride
• sodium sulphate
• test tubes
Put ½ measure of magnesium sulphate into a clean dry test tube.
Heat the solid in the burner flame and look carefully at what
happens. Do you see any water vapour coming off from the
magnesium sulphate and condensing on the cool upper parts
of the test tube? This water is part of the magnesium sulphate
crystal. It is called water of crystallisation. Record in your notebook
that magnesium sulphate contains water of crystallisation.
Repeat this experiment with aluminium potassium sulphate, sodium
chloride and sodium sulphate. Do these substances contain water
of crystallisation?
Experiment 3.10 Heating blue copper sulphate crystals
• copper sulphate
• test tube
• dropping pipette
Put ½ measure of blue copper sulphate into a clean dry test tube.
This contains water of crystallisation. Heat the test tube gently and
record what you see happening. Do you see any water condensing
on the upper parts of the test tube? The solid left behind is
anhydrous copper sulphate. What colour is it? Put the HOT test tube
into an empty beaker to cool.
When the tube is cool add one or two drops of water with the
dropping pipette to the white copper sulphate solid in the test tube.
Does it change colour? What to?
This colour change is a test for water. No other liquid makes
anhydrous copper sulphate change colour.
Sellotape
Pencil
line
Experiment 4.2 The analysis of inks
• black felt-tipped pen
• other inks or felt-tipped
pens
• test tube
• conical flask
• large filter paper
• sellotape
• pair of scissors
• pencil
• small paint brush
or dropping pipette
Use the method given in Experiment 4.1 to analyse black fountain
pen ink. What colour dyes does the ink contain?
Repeat the experiment using a black felt-tipped pen.
Does this contain the same coloured dyes as the black ink?
Try the experiment with other inks or felt-tipped pens. Some colours
will be just a single dye, others will be mixtures. Try several colours,
for example red, green, blue, purple and
brown felt-tipped pens. Do many of those that you try contain
a single dye?

30 31
Chapter 5 - Acids and alkalis
5a - Making acid and alkali solutions
Chapter 5 - Acids and alkalis
5a - Making acid and alkali solutions
Solutions of acids and of alkalis must be handled with care. Always wash your hands if you spill
any of the solutions on you. Always wear your goggles – ESPECIALLY WHEN HEATING ACID OR
ALKALI SOLUTIONS.
The word “acid” is commonly used in everyday life where it is usually regarded as a dangerous
liquid that eats away metal and burns your skin, it is said to be “corrosive”. An acid is not
necessarily corrosive, but they should all be treated with care. You will read in chemistry books
that acids all have a sour taste and turn blue litmus red. An alkali is the opposite to an acid. We
shall see that an alkali reacts with an acid to give water and a salt. The alkali neutralises the
acid: acid + alkali water + salt.
Experiment 5.1 Making sodium hydrogen sulphate solution
• sodium hydrogen
sulphate
• conical flask
• test tube
• funnel
• small clean bottle
• label
Sodium hydrogen sulphate is an acidic salt. You will need a solution
of it for many of the experiments.
Put 8 measures of sodium hydrogen sulphate into a clean dry
conical flask and add a test tube full of water. Gently shake and
warm to dissolve. Now add a second test tube full of water.
Carefully pour the solution into a clean dry bottle, using the funnel
if necessary. Add 2 more test tubes-full of water into the bottle.
Label the bottle - THIS IS VERY IMPORTANT.
Experiment 5.4 Making sodium hydroxide solution
• sodium carbonate
• calcium hydroxide
• test tube
• beaker
• conical flask
• funnel
• filter paper
• half a sheet of A4 paper
• small clean bottle
• label
You make sodium hydroxide solution by reacting together sodium
carbonate and calcium hydroxide. Calcium carbonate is formed as
an insoluble solid, leaving sodium hydroxide in the solution.
Put 3 measures of sodium carbonate and 3 measures of calcium
hydroxide in a clean conical flask. Add a test tube full of water, and
gently shake and heat the flask over the burner for about 5 minutes.
(As the flask will get hot you need to make a holder for it. Do this by
cutting an A4 sheet of paper in half to give a piece 15cm x 21cm,
and then folding this over 3 times to form a strip about 2cm x 21cm.
Put this strip round the neck of the flask and hold the paper strip
near to the flask). Get the solution quite hot but do not boil it.
If you get any of the solution onto your hand then wash it off
immediately.
Carefully pour the solution into the beaker. Add a second test
tube-full of water to the conical flask, swirl it round and pour this
also into the beaker.
Wash the conical flask and filter the solution back into it. Carefully
pour the clear solution from the conical flask into a clean empty
bottle. Put a third test tubeful of water into the bottle. Label the
bottle - THIS IS VERY IMPORTANT.
Experiment 5.2 Making lime water
• calcium hydroxide
• small clean bottle
• label
Lime water is a solution of calcium hydroxide.
Put 2 measures of calcium hydroxide into a bottle and add 80ml of
water, measured in the beaker. Put the cap on the bottle and shake
for a minute or so. Leave it to stand and the solid particles of the
calcium hydroxide which remain will settle leaving a clear solution.
This clear solution is lime water. To use carefully pour off the clear
solution. Label the bottle - THIS IS VERY IMPORTANT.
Experiment 5.3 Making sodium carbonate solution
• sodium carbonate
• beaker
• conical flask
• funnel
• filter paper
• wooden lolly stick
• small clean bottle
• label
Add 3 measures of sodium carbonate to 50ml of warm water in the
beaker. Stir the solution with a wooden stick until all the solid has
dissolved. Filter the milky solution into the conical flask through a
filter paper. Pour the solution into an empty bottle. Label the bottle
- THIS IS VERY IMPORTANT.
Paper
strip
Conical
flask
Solution
Spirit
burner

32 33
Chapter 5 - Acids and alkalis
5b - Testing for acids and alkalis
Chapter 5 - Acids and alkalis
5b - Testing for acids and alkalis
Experiment 5.5 To show that acids have a sour taste and are
neutralised by alkalis
• a lemon
• citric acid
• sodium hydrogen
carbonate (sodium
bicarbonate)
• a plate
• an egg cup
Normally you should NEVER TASTE a chemical. However some
chemicals that are in our food are obviously safe to taste. One such
chemical is citric acid. This is the acid in most citrus fruits such as
oranges and lemons. It is also put into many sour tasting sweets and
fizzy drinks.
An alkali which we can eat is sodium hydrogen carbonate (sodium
bicarbonate). This is used in cooking to make cakes rise and in
stomach powders that are taken if you have indigestion.
Squeeze a lemon and taste the juice. Does it taste sharp and sour?
This is due to the citric acid in the lemon.
Put a little citric acid and a little sodium hydrogen carbonate (sodium
bicarbonate) onto a plate. Wet a clean finger, dip it into the citric acid
and taste it. Does it have the same sharp taste as the lemon juice?
Now do it again and immediately after putting the citric acid on your
tongue dip your finger in the sodium hydrogen carbonate and taste it.
Has the sharp citric acid taste disappeared?
You can do a similar experiment by putting a little lemon juice into an
egg cup. Taste the lemon juice and then add a little sodium hydrogen
carbonate (sodium bicarbonate) and taste again. Keep doing this
until the sharp taste of the lemon juice has disappeared.
Why do you think citric acid has this name?
Experiment 5.7 Home made indicators - red cabbage & turmeric
• citric acid
• sodium hydroxide solution
• red cabbage
• turmeric
• saucepan
• beaker
• conical flask
Many common vegetables and flowers contain acid-alkali indicators.
The substance that gives red cabbage its colour is an indicator.
Chop up a little red cabbage and gently boil it in water for 10 minutes
or so. Let the deep purple water cool and pour some
into your beaker.
Dissolve ½ measure of citric acid in 2cm of water in a test tube and
pour it into the conical flask. Add 1cm of red cabbage water. What
colour is the solution? Add 2cm of your sodium hydroxide solution.
What colour is the indicator now? As in the previous experiment you
can continually change the colour backwards
and forwards as the solution changes from acidic to alkaline.
Repeat the experiment using a solution of the spice turmeric as the
indicator. What are the colours of turmeric in acid and alkalis?
Experiment 5.8 Other home made indicators
• citric acid
• sodium hydroxide
solution
• beetroot
• blackberry juice
• red rose or red carnation
• saucepan
• beaker
• conical flask
Other coloured vegetables and flowers can be used as indicators.
Beetroot indicator is made in an identical way to that used for red
cabbage in Experiment 5.7, and can be tested as in Experiment 5.7.
Blackberry juice can also be used as an indicator. A red rose or a
red carnation can be boiled in a little water in a saucepan. Let the
water cool and use it as an indicator.
For most of these vegetable and flower indicators the colour in acid
is usually red. In alkali the colour may be yellow, blue, green or
purple.
Experiment 5.6 Using litmus to test for acids and alkalis
• litmus blue
• citric acid
• sodium hydrogen
carbonate (sodium
bicarbonate)
• test tube
Dissolve a “pinch” (less than ¼ measure) of litmus blue in 2cm
of water in a test tube. Warm the tube to dissolve the litmus blue.
Add ¼ measure of citric acid. The blue colour changes to red.
Now add ½ measure of sodium hydrogen carbonate (sodium
bicarbonate) and shake the tube. Does the colour go back to blue?
If not add more sodium hydrogen carbonate until it does.
The litmus is red in acidic solution and blue in alkaline solution.
It is acting as an acid-alkali indicator.

34 35
Chapter 5 - Acids and alkalis 5a - Making acid
and alkali solutions
Experiment 5.10 Testing household chemicals with universal indicator
• universal indicator paper
• test tubes
• dropping pipette
Repeat Experiment 5.9 with various household chemicals. Test the
ones given here if you have them and any others that you can find
around your house.
1. Lemon juice
2. Vinegar
3. Sparkling water
4. Laundry detergent dissolved in water
5. A vitamin C tablet dissolved in water
6. A soluble aspirin tablet dissolved in water
7. Sugar dissolved in water
8. Gin, whisky or brandy (just a drop) – ask an adult to supply this.
Record your results as acid, alkali or neutral depending on the
colour of the universal indicator paper.
Experiment 5.11 Testing the soil from a garden
• universal indicator paper
• dropping pipette
• cup
It is important for a gardener to know whether the soil is acid or
alkaline, as some plants will only grow in acid soil and some in
alkaline soil.
Dig a little soil from a garden. Do not take the surface soil, but go
down a few centimetres. Add about a dessertspoonful of soil to
twice as much water in a cup or mug. Stir the mud and leave it to
settle overnight. Take a sample of the clear liquid with your dropping
pipette and test it on a piece of universal indicator paper.
Experiment 5.9 Using universal indicator paper
• universal indicator paper
• sodium hydrogen
sulphate
• solution lime water
• sodium carbonate
solution
• sodium hydroxide
solution
• tartaric acid
• citric acid
• sodium hydrogen
carbonate (sodium
bicarbonate)
• aluminium potassium
sulphate
• iron sulphate
• test tubes
• dropping pipette
• white plate
Chemists often need to test for acids or alkalis, and indicators that
have been soaked onto filter paper and dried are usually used. The
most useful is called universal indicator paper. This indicator not
only shows the presence of an acid or alkali but also shows its
strength. The colour of the universal indicator changes from red to
violet (in the order that the colours are in a rainbow) from strong
acid solution to strong alkali solution. These colours are shown on
the covers of the book of universal indicator papers. They are: red
(strong acid), orange (weak acid), yellow (weaker acid), green
(neutral), blue (weaker alkali), indigo (weak alkali), violet (strong
alkali).
To test with universal indicator paper cut one of the strips into about
8 pieces and spread them out on a white plate. To test a liquid put 1
drop with the dropping pipette onto a piece of the universal indicator
paper.
Test the following liquids and record your results as acid, alkali or
neutral (neither acid or alkali) from the colour of the universal
indicator paper.
1. Your solution of sodium hydrogen sulphate.
2. Your solution of lime water.
3. Your solution of sodium carbonate.
4. Your solution of sodium hydroxide.
5. Tap water.
6. ¼ measure of tartaric acid in 1cm water.
7. ¼ measure citric acid in 1cm water.
8. ½ measure sodium hydrogen carbonate (sodium bicarbonate)
in 2cm water.
9. ¼ measure aluminium potassium sulphate in 1cm water.
10. ¼ measure iron sulphate in 1cm water.
Check your results with the answers at the back of this booklet and if
you do not agree do the test again.
Chapter 5 - Acids and alkalis
5b - Testing for acids and alkalis
Chapter 5 - Acids and alkalis
5b - Testing for acids and alkalis

36 37
Chapter 5 - Acids and alkalis 5a - Making acid
and alkali solutions
Experiment 6.1 The reaction of magnesium with an acid
• magnesium strip
• vinegar
• test tube
• matches
In Experiment 5.11 you found that vinegar is acidic. It contains an acid
called ethanoic acid.
Add a 2cm piece of magnesium strip to 2cm of vinegar in a test tube.
Tiny bubbles of hydrogen gas can be seen coming from the surface of the
magnesium. This is hydrogen gas. Warm the test tube so that there is a
vigorous reaction. Loosely put one of the red caps (not a cork) into the
test tube and stand the test tube in the test tube rack. Wait for 30 seconds
(count to 30). Light a match, remove the cap and immediately hold the
match flame in the top of the test tube. There is a very tiny explosion as
the hydrogen gas quickly burns with a POP. This is the test for hydrogen
gas. If this doesn’t happen repeat the experiment.
NOTE: It is perfectly safe to burn a test tube full of hydrogen gas, but
you must NEVER try this experiment in a bigger container. You could
break the container and do damage.
The word equation for the reaction that has taken place is: magnesium
+ ethanoic acid hydrogen + magnesium ethanoate.
Experiment 6.2 The reaction of zinc with an acid
• granulated zinc
• sodium hydrogen
sulphate solution
• 2 test tubes
• funnel
• filter paper
• crystallising dish
Add 2 pieces of granulated zinc to 2cm of your sodium hydrogen
sulphate solution (made in Experiment 5.1) in a test tube. Warm the test
tube. Bubbles of hydrogen gas will be seen coming from the surface of
the zinc. Warm the solution to increase the rate of the reaction. You can
try capping the tube and collecting and burning the hydrogen as in
Experiment 6.1, but the reaction here is not so vigorous and you will
probably be unsuccessful.
Keep periodically warming the tube and keep it in the test tube rack for
half an hour or so when no more hydrogen should be being formed.
This means that all the acid has been used up.
The word equation for the reaction that has taken place is: zinc +
sodium hydrogen sulphate hydrogen + sodium sulphate +
zinc sulphate.
Filter off the remaining zinc, wash it and return it to its container. The
sodium sulphate and zinc sulphate are in the filtrate. Pour this into a
crystallising dish and let the water evaporate off in a warm place leaving
a mixture of sodium sulphate and zinc sulphate crystals.
Experiment 5.12 Neutralisation of an acid with an alkali using
universal indicator
• universal indicator paper
• citric acid
• sodium hydrogen
carbonate (sodium
bicarbonate)
• sodium hydrogen
sulphate solution
• sodium carbonate
solution
• 2 test tubes
• conical flask
• 2 crystallising dishes
• dropping pipette
The indicator chemicals in a piece of indicator paper can be dissolved in
water and used in solution. Tear a piece of universal indicator paper into
several pieces and put them into a clean conical flask. Add 2cm of water
from a test tube. Gently shake to dissolve the indicator from the paper, a
green solution will be formed. Stand the conical flask on a piece of white
paper so the colour of the indicator shows clearly.
Dissolve ½ measure of citric acid in 5cm of water in a test tube and
pour the solution into a crystallising dish. Dissolve ½ measure of
sodium hydrogen carbonate (sodium bicarbonate) in 5cm of water in a
second test tube and pour this solution into a second crystallising dish.
Using the dropping pipette add 10 drops of the sodium hydrogen
carbonate to the indicator. What colour is the indicator?
Wash the dropping pipette and use it to add the citric acid solution DROP
BY DROP into the conical flask. Gently shake the flask after each drop
and note the colour of the indicator. Suddenly the colour will change over
one or two drops and remain the same as more citric acid is added.
What colour is the solution now?
Repeat the experiment using sodium hydrogen sulphate solution instead
of citric acid and sodium carbonate solution instead of sodium hydrogen
carbonate. What are the colours of the indicator in sodium carbonate
solution and in sodium hydrogen sulphate solution?
Try to explain what has happened as the indicator has changed colour
from its original colour, to that with sodium hydrogen carbonate, that
with citric acid, that with sodium carbonate and that with sodium
hydrogen sulphate.
Chapter 5 - Acids and alkalis
5b - Testing for acids and alkalis
Chapter 6 - Chemical reactions of acids and alkalis
6a - Reactions of acids with metals
Dropping
pipette
1 drop
of liquid
Indicator
Acids contain hydrogen. When metals react with acids the hydrogen is released as hydrogen gas.
The word equation for the reaction that takes place is: Acid + metal hydrogen + salt.

38 39
Chapter 5 - Acids and alkalis 5a - Making acid
and alkali solutions
Experiment 6.5 The reactions of aluminium with sodium hydroxide
& sodium carbonate
• aluminium foil
• sodium hydroxide
solution
• sodium carbonate
solution
• 2 test tubes
Cut up a 2cm square of aluminium foil into small pieces and put
them into a clean dry test tube. Add 2cm of sodium hydroxide
solution. Gently warm the solution and look carefully at the
aluminium foil. What do you think the gas is that is being formed?
You can test to show that it is hydrogen gas by burning it as you
did in Experiment 6.1.
Sodium carbonate is also an alkali. Repeat the experiment using
your sodium carbonate solution instead of sodium hydroxide.
Experiment 6.6 The reaction of magnesium with water
• magnesium strip
• test tube
• test tube holder or
wooden clothes peg
• clay pot
Only very reactive metals react rapidly with water. Magnesium
is the most reactive metal that you have.
Put 2cm of shiny magnesium strip into a clean dry test tube and
add 2cm of water. Magnesium is a shiny metal. The strip you have
may have reacted with impurities in air and have a black surface.
Clean this off with some fine emery or sand paper to show the
clean shiny surface.
Add a piece of clay pot, briefly boil the water and look carefully at
the magnesium. What do you see? If you see nothing happening,
boil the solution again and be patient.
Experiment 6.3 The reaction of iron with an acid
• iron filings
• sodium hydrogen
sulphate solution
• 2 test tubes
• funnel
• filter paper
• crystallising dish
Repeat Experiment 6.2 using 1 measure of iron filings instead of the
zinc. The crystals that you obtain are a mixture of sodium sulphate
and iron sulphate.
Write a word equation for this reaction.
Experiment 6.4 The reactions of aluminium & copper with an acid
• aluminium foil
• copper foil
• sodium hydrogen
sulphate solution
• test tube
• test tube holder or
wooden clothes peg
• clay pot
Cut a 2cm square piece of aluminium foil into small pieces and put
them into a clean dry test tube. Add 2cm of your sodium hydrogen
sulphate solution. Add a piece of clay pot. Carefully boil the solution
and look at it very carefully. What do you see? If you do not see any
reaction heat the test tube again and be patient.
Repeat the experiment with a 1cm square of copper foil instead
of aluminium foil. Again look carefully. What do you see?
You have now studied the reactions of acids with 5 metals:
aluminium, copper, iron, magnesium and zinc. Put these metals
in the order of their reactivity with acid.
Chapter 6 - Chemical reactions of acids and alkalis
6a - Reactions of acids with metals
Chapter 6 - Chemical reactions of acids and alkalis
6b - Reactions of alkalies & water with metals
Only the most reactive metals react with alkalis and with water.
Table of contents
Popular Toy manuals by other brands

marklin
marklin DHG 700 Assembly instructions

Faller
Faller DUAL SILO instructions

Eduard
Eduard Zoom A-26C Invader seatbelts STEEL quick start guide

WEDICO
WEDICO Peterbilt 41 Assembly instruction

RC Logger
RC Logger RC EYE One operating instructions

Vintage Model Co
Vintage Model Co MAGNIFICENT FLYING MACHINES DE HAVILLAND TIGER... manual