manuals.online logo
Brands
  1. Home
  2. •
  3. Brands
  4. •
  5. Scosche
  6. •
  7. Camera Accessories
  8. •
  9. Scosche BOOMSUP AMTK User manual

Scosche BOOMSUP AMTK User manual

Register your product online at
Enregistrez votre produit en ligne a
www.scosche.com/register
Registre su producto por
internet en
BOOMSUP
AMTK
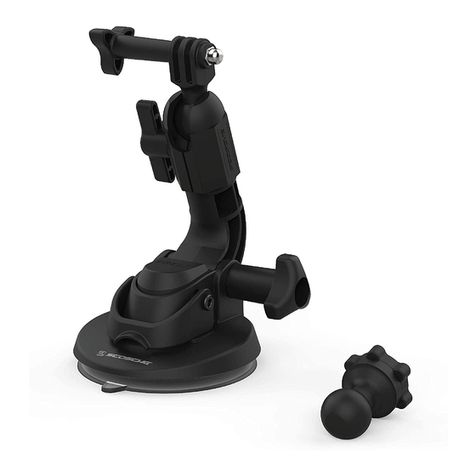
UNIVERSAL SUCTION CUP MOUNT
MONTAGE DE LA VENTOUSE UNIVERSELLE
MONTAJE UNIVERSAL CON VENTOSA
FEATURES
• Mount any speaker, GoPro"',
iON '"
camera, DSLR or
handheld device with a 1/4"
screw mounting port
• Mounting adapter for
GoPro® camera
• Swivel neck allows for optimal
positioning
• 3M ™ safety leash for added
security
• Integrated suction cup easily
attaches to any smooth
surface
CARACTERIST/QUES
•
Montez tout haut-parteur, camera
GoPro
M
0
ou iON
M
0,
appareil photo
reflex mono objectif numerique
ou dispositif manue/ avec un port de
montage avec vis 6,4
mm
(114 po)
•
Adaptateur de montage pour la
camera GoPro
M
0
•
Le cou pivotant permet /'optimisation
de la position
•
Cordon de securite 3M
MC
pour plus
desecurite
•
La ventouse integree
se
fixe
facilement a toute surface
/isse
CARACTERiSTICAS
•
Monte cualquier altavoz, camara
GoPro
®
y iON®, camara DSLR
o
dispositivo de mano con soporte
de montaje roscado de ¼"
•
Adaptador de montaje para camara
GoPro
®
•
El cue/lo giratorio permite la
posici6n 6ptima
•
Correa de seguridad 3M
M
Rpara
mayor seguridad
•
La ventosa integrada
se
fija
facilmente a cua/quier
superficie lisa
SI 300AMTK 10/15
©2015 SCOSCHE INDUSTRIES, INC.
A. SUCTION CUP MOUNTING
BASE
BASE DE MONTAGE DE
VENTOUSE
BASE
CON VENTOSA
B. ROTATING BALL-JOINT MOUNT
MONTAGE D'ART/CULAT/ON ROTATIVE
MONTAJE DE R6TULA GIRATORIA
C.
2-WAY PIVOT ANGLE ADJUSTMENT
REGLAGE DEL 'ANGLE DE PIVOTEMENT
DE DEUX FA<;ONS
AJUSTE DE ANGULO DE 2 viAs
D. 1/4" THREADED MOUNTING
ADAPTER
ADAPTATEUR DE MONTAGE FILETE DE 6,4 MM (114 PO)
SOPORTE DE MONTAJE ROSCADO DE 114"
E. MOUNTING
ADAPTER
for GoPro•
(Includes screw-in arm clamp)
ADAPTATEUR DE MONTAGE POUR GoPro
(inclut la pince de bras
avec
vis int6gr6e)
ADAPTADOR DE MONTAJE para camara GoPro•
(inc/uye soporte
a rosca
para brazo)
F.
3M� SAFETY
LEASH
CORDON DE
SECURITE 3M"'
G
CORREA DE SEGUR/DAD 3M"'
G. (1) ALCOHOL CLEANING PAD
(1) TAMPON DE NETTOYAGE A L 'ALCOOL
(1) ALMOHADILLA UMP/ADORA CON ALCOHOL
2
MOUNTING THE SUCTION CUP BASE
1. Make sure the mounting lever is in the UP position as shown. Select a smooth, flat mounting surface and wipe down the
area with the included alcohol cleaning pad. Once dry, place the suction cup on the mounting surface.
2.
Press down on the lever to add suction, and secure the mount in place.
3. Attach leash cord to the mounting base as shown (see inset). Peel off the backing of the 3M'" safety leash mounting disc
and adhere to the desired surface. Firmly hold for 5 seconds for best adhesion.
MONTAGE DE LA BASE DE LA VENTOUSE
1. Assurez-vous que le levier de montage est
a
la position HAUT comme indique. Choisissez une surface de montage
/isse
et
a
plat et
essuyez la zone avec le tampon de nettoyage a /'a/cool inc/us. Une fois la surface seche, placez la ventouse sur la surface de montage.
2. Appuyez sur le levier pour ajouter la ventouse et
fixez le montage en place.
3. Fixez le cordon d'attache
a
la base de montage comme illustre (voir insere). Decol/ez l'endos du disque de montage du cordon de
securite 3M"° et fixez-/e sur la surface desiree Maintenez fermement en place pendant 5 secondes pour une meilleure adhesion.
MONTAJE DE
LA BASE CON VENTOSA
1. Asegurese de que la palanca de montaje este en la posici6n superior coma
se
muestra. Se/eccione una superficie /isa y plana de
montaje y limpie el area con
la
a/mohadilla limpiadora con alcohol inc/uida. Une vez que
se
haya secado, co/oque
la
ventosa sabre
la
superficie de montaje.
2. Presione
la
palanca hacia abajo para agregar
succi6n y fije
la
base en su lugar.
3. Fije
la correa
de seguridad a
la
base de montaje coma
se
indica (ver
el
inserto). Despegue
el
papal protector de/ disco de montaje de
la
correa
de seguridad 3M"' y adhiera/a a
la
superficie deseada. Presi6nela firmemente durante 5 segundos para que
se
adhiera bien.
REMOVING THE SUCTION CUP BASE
1.
Raise the lever to the UP position to release the suction cup.
2.
Pull up on the tab at the edge of the suction cup,
and gently remove the mounting base.
3. Carefully peel off the 3M™ safety leash
mounting disc from the attached surface.
RETRAIT DE LA BASE DE LA VENTOUSE
1. Positionnez
le
levier a HAUT pour re/acher la ventouse.
2. Tirez sur l'onglet au bard de
la
ventouse et retirez
soigneusement la base de montage.
3. Decollez soigneusement le disque de montage du
cordon de securite 3M"° de
la
surface fixee.
EXTRACC/6N DE LA BASE CON VENTOSA
1. Levante
la
pa/anca hacia ARRIBA para liberar
la
ventosa.
2. Tire de
la
pestaiia de/ borde de
la
ventosa, y remueva suavemente
la
base de montaje.
3. Despegue cuidadosamente
el
disco de montaje de
la correa
de seguridad 3M" de la superficie.
3
ATTACHING THE MOUNTING ADAPTER TO THE MOUNTING BASE
1. Remove the collar from the threaded ball-joint socket at the top of the mounting base.
2. Place the ball end of the mounting adapter through the collar and into the socket as shown.
3. Thread the collar onto the ball-joint assembly and tighten until snug. DO NOT OVERTIGHTEN.
FIXATION DEL 'ADAPTATEUR DE MONTAGE A LA BASE DE MONTAGE
1. Retirez la bague du trou de /'articulation filetee au haut de la base de montage.
2. Placez l'extremite de la bou/e de /'adaptateur de montage
a
/ravers la bague et dans le trou
comme
indique.
3. Faites passer la bague dans /'assemblage d'articulation et serrer jusqu 'a ce que le tout soil bien ajuste. NE
PAS
TROP VISSER.
FIJACION DEL ADAPTADOR DE MONTAJE A LA BASE
1. Remueva el collar def orificio roscado de la r6tula de la parte superior de la base de montaje.
2. Pase el extrema esferico def adaptador de montaje par el collar y dentro def orificio coma
se
muestra.
3. Enrosque el collar sabre la r6tula y ajustelo bien. NO LO AJUSTE DE
MAS.
MOUNTING ANGLE ADJUSTMENT
The angle may be adjusted by loosening the mount at two points:
The ball-joint
(A)
for rotation and tilt, and the 2-way pivot (B) for tilt only.
These may be combined for a wider variety of positions.
AJUSTEMENT DE L'ANGLE DE MONTAGE
L 'angle peut
etre reg/e en desserrant le montage sur
deux points :
L 'articulation (A) pour la rotation et l'inc/inaison, et le pivot (B) a deux
positions pour l'inclinaison seulement. Ceux-ci peuvent etre combines
pour une plus grande variete de positions.
AJUSTE DEL ANGULO DE MONTAJE
Se
puede ajustar el angu/o aflojando el montaje en dos lugares: En la
r6tula (A)
para
rotarlo e inclinarlo, y en el pivote de 2 vlas (B) para inclinarlo
unicamente. Estos ajustes se pueden combinar para un mayor rango de
posiciones.
4
1/4" THREADED MOUNTING ADAPTER
for Scosche• boomBOTTLE"+ and other
devices with a 1/4" threaded mount
Screw the 1/4" threaded mounting adapter
directly into the 1/4" mounting hole.
ADAPTATEUR DE MONTAGE FILETE 6,4
MM (114 PO} pour le boomBOTTLE"'+ de
Scosch.,..
et /es
autres dispositffs avec un
montage fi/ete de 6,4 mm (1 /4 po}
Vissez f'adaptateur de montage fifete
6,4
mm
/114 po} directement dans /'orifice de montage
6,4
mm
/114
po).
ADAPTADOR DE MONTAJE ROSCADO DE
114" para el boomBOTTLE"+ de Scosche•
y
otros
dispositivos
con
una base de
montaje roscada de 1/4"
Enrosque el adaptador de montaje roscado de ¼"
directamente en el orificio roscado de 114
".
MOUNTING ADAPTER for GoPro•
Requires GoPro camera with waterproof case (not included).
1. Place the camera case onto the adapter so that the (2)
mounting brackets on the case fit between the (3) mounting
brackets on the adapter as shown.
Make sure the holes on both sets of brackets are aligned.
2. Insert the threaded end of the clamping arm into the bracket holes,
and thread into the threaded nut at the opposite end and tighten
until snug. Loosen the arm to adjust the angle of the camera.
ADAPTATEUR DE MONTAGE pour GoPro-
Necessite une
camera
GoPro avec un boitier etanche (non inc/us}.
1. Pfacez fa
camera
sur f'adaptateur afin qua
/es
(2} supports de montage sur
fa boitier
entrant entre /es /3) supports de montage sur f'adaptateur, comme iffustre.
Assurez-vous que /es orifices sur /es deux ensembles de supports soient
bien a/ignes.
2. fnserez f'extremite fifetee du bras de pince dans /es orifices du support, faites passer
dans /'ecrou fi/ete a f'extremite opposee et bien serrer jusqu'a ce que le tout soit bien
ajuste. Desserrez le bras pour reg/er /'angle de fa
camera.
ADAPTADOR DE MONTAJE para GoPro•
Requiere
camara
GoPro con estuche impermeable (no inc/uida}.
1. Co/oque el estuche de fa
camara
sobre el adaptador de modo que /os /2} soportes de montaje def estuche queden entre
/os
(3}
soportes de montaje def adaptador, como se
muestra.
Verifique que
/os
orificios en ambos juegos de soportes queden a/ineados.
2. lnserte el extremo roscado def brazo de sujeci6n en los orificios def soporte, enr6squefo en fa tuerca def extremo opuesto y
ajustefo bien. Afloje el brazo para ajustar el angufo de ta
camara.
5
LIMITED WARRANTY
Scosche Industries Inc. warrants this product to be free from defects in material and workmanship for a period of 1 year from purchase.
This Scosche product is sold wijh the understanding that the purchaser has independently determined the suitabilfy of this product.
This warranty is offered to the original purchaser of the product only. This warranty does not cover the product if physically damaged,
subject to negligence or misuse, abuse, alteration, accident, or an act of GOD. This warranty does not apply to product which has water
or physically damaged by accident or which has been misused, disassembled or altered.
The original dated sales slip or proof of purchase will establish warranty eligibility. If the product should prove defective within the
warranty period, return the product with proof of purchase to Scosche Industries Inc. Scosche, at its option, will replace or repair the
product free of charge and return the product postage paid.
In no event shall Scosche Industries, Inc. be responsible for claims beyond the replacement value of the defective product, or in any
way be liable or responsible for consequential or incidental damages. No empress warranties and no implied warranties, whether for
fitness or any particular use or otherwise, except as set forth above (which is made expressly in lieu of all other warranties) shall apply
to products sold by Scosche. Scosche Industries cannot be held responsible for discrepancies/inconsistencies that may occur due to
automotive manufacturing changes or option.
GARANTIE LIM/TEE
Scosche Industries, Inc. garantit ce produit d'etre fibre
de
tout defaut
de
materiaux et
de
fabrication pour une periode
de
1
an a
partir de
la date
de
f'achat. Ce produit
Scosche est
vendu sous entente que l'acheteur
a
independamment determine l'adaptabilite de
ce
produit.
Cette garantie NE COUVRE PAS Jes frais access.oires ou autres encourus pour /'installation, le retrait ou la feinstallation de ce produit
dans le vehicule.
Cette garantie est of/erte a
/'acheteur original seulement.
Cette garantie
ne couvre pas
le
produit s'il
est
physiquement
endommage, ou soumis
a
la negligence ou
a
l'abus,
a
/'usage inapproprie,
a
une installation
ma/
approprieB,
a
la modification,
a
un accident
ou
a
une catastrophe nature/le.
Aussi exclus
de
cette
garantie sont
/es
frais encourus pour la rectification d'une installation detectueuse et pour /'elimination d'une interference
BlectromagnBtique {bruit cause par le moteur). Le �u de caisse original indiquant la date de l'achat Btablira l'admissibilitB 8 la garantie.
Si le produit est trouve defectueux en dedans de la pBriode de la garantie, renvoyer le produit accompagnB de la preuve d'achat chez
Scosche Industries, Inc.
Scosche, a
sa discretion, fepatera ou remplacera /'unite sans frais et paiera les frais d'expBdition du retour par
la poste au client.
Scosche,
en aucune circonstance ne sera responsable pour /es reclamations au-de/a de la valeur de ,emplacement du
produit detectueux et refuse toute responsabilite envers
/es
dommages incidents ou accessoires. Aucune garantie explicits ou implicite,
soit d'adaptabifite pour
un usage particulier ou autre, sauf celle qui
precede
�aquelle est expressement presentee au lieu de toutes autres
garanties), ne sera applicable aux produits.
Scosche
Industries ne sera aucunement responsable pour !es divergences et/ou Jes variations
qui
pourra.ient se produire en raison des changements ou options apportes par Jes fabricants d'automobiles.
GARANTiA LIM/TADA
Scosche Industries Inc. garantiza
este
producto contra defectos
de
material y de mano de obra por un periodo
de
1 ano desde la
fecha de compra. Esta producto
Scosche se
vende entendiendo que el comprador ha determinado independientemente qua el
mismo
es apropiado. Esta garantfa
es
vB.lida solamente para el comprador original de este producto. Esta garantfa no cubre dal?os ffsicos al
producto causados por negligencia
o
uso incorrecto, abuso, alteraciones, accidentes
o
causas de fue/7.a mayor. Esta garantfa no cubre
productos qua hayan sido dal?ados por agua
o
ffsicamente, por accidentes
o
abusados, alterados
o
desarmados.
La validez de esta garantfa estara determinada por el recibo original fechado u otro comprobante de compra. Si el producto se encuentra
defectuoso dentro def periodo de garantfa, ret6rnelo junto con un comprobante de compra a Scosche Industries Inc. Scosche, a su
criterio, reemplazara
o
reparani el producto sin cargo y
se
lo retornara cobnindole el envfo. En ning(m caso, Scosche Industries, Inc.
sera
responsable por reclamos mas al/a def costo de reemplazo def producto defectuoso,
o
sent responsable
o
culpable por dal?os indirectos
o
incidentales. Ninguna otra garantfa, ya sea expresa
o
implfcita, ya sea de aptitud para cualquier uso en particular
o
por lo contrario,
excepto
como
se indica mBs arriba (lo cual reemplaza expresamente cua/quier otra garantfa) se aplicant a los productos vendidos por
Scosche.
Scosche Industries no sera responsable por diferencias
o
inconsistencias que pudieran presentarse debido a cambios u
opciones de los fabricantes de autom6viles.
For All Australian Sales
This document details the terms and conditions of the warranty provided with this product. Please disregard any other representations
contained on this product's packaging or provided with this product which constitute or appear to constitute a warranty.
This warranty is offered by Scosche Industries, 1550 Pacific Ave, Oxnard, CA 93033 United States. We can be called on 1 (805) 486
4450 or emailed at [email protected]
Subject to the exclusions and limitations set out below, we warrant to you that if you purchase a product directly from us, or from any of
our authorized resellers, that it will not contain defects which are a result of faulty manufacturer workmanship or materials. This warranty
subsists for 1 year from the date of purchase.
Subject to any rights you have under the Australian Consumer Law, we will not be liable for defects which are a result of damage or loss
caused by factors beyond our control, any product which has not been maintained according to any care or maintenance instructions
provided with the product, any alterations to a product which are not perfonned by us, or damage or defects caused to the product due
to unusual or non-recommended use. We will not be liable for any special, indirect, consequential or economic loss or damage or loss
of profits whatsoever suffered by you or any other person resulting from any act or omission by us.
Our total liability in respect of this Warranty against Defects is limited to the replacement of the goods.
Any claim made under this warranty must be made by contacting Scosche Industries. Scosche will then put you in touch with the
closest company to you that will cover warranties. All Returns of defective product will be sent at your expense, to be exchanged for
a replacement.
This Warranty against Defects is provided in addition to other rights and remedies that you may have at law. Our goods come with
guarantees that cannot be excluded under the Australian Consumer Law. You are entitled to a replacement or refund for a major failure
and for compensation for any reasonably foreseeable loss or damage. You are also entitled to have the goods repaired or replaced if the
goods fail to be of acceptable quality and the failure does not amount to major failure.
6

Other Scosche Camera Accessories manuals

Scosche PSM31001 User manual

Scosche

Scosche PSM31001 User manual

Scosche GOBAT 12000 User manual

Scosche

Scosche GOBAT 12000 User manual

Scosche PSM11021 User manual

Scosche

Scosche PSM11021 User manual

Popular Camera Accessories manuals by other brands

Dometic eStore Installation & setup guide

Dometic

Dometic eStore Installation & setup guide

Hohem iSteady Mobile+ user manual

Hohem

Hohem iSteady Mobile+ user manual

Multimetrix CBF01 user manual

Multimetrix

Multimetrix CBF01 user manual

Gitzo GT3531 parts list

Gitzo

Gitzo GT3531 parts list

Canon VFL-2 manual

Canon

Canon VFL-2 manual

Nikon AF-S NIKKOR 24mm f/1.8G ED user manual

Nikon

Nikon AF-S NIKKOR 24mm f/1.8G ED user manual

Vitek VT-IR1/12 user guide

Vitek

Vitek VT-IR1/12 user guide

Moog Videolarm PFH10 Series Installation and operation instructions

Moog Videolarm

Moog Videolarm PFH10 Series Installation and operation instructions

GigaPan EPIC user guide

GigaPan

GigaPan EPIC user guide

Lee Filters SW150 Assembly instructions

Lee Filters

Lee Filters SW150 Assembly instructions

Tiffen UltraPol Filters brochure

Tiffen

Tiffen UltraPol Filters brochure

Harbor Freight Tools 02893 Assembly & operating instructions

Harbor Freight Tools

Harbor Freight Tools 02893 Assembly & operating instructions

Sennheiser MKE 440 quick guide

Sennheiser

Sennheiser MKE 440 quick guide

Sony VCT-MP1 operating instructions

Sony

Sony VCT-MP1 operating instructions

EssentialPhoto PIXAPRO COLLAPSIBLE BEAUTY DISH Assembly instructions

EssentialPhoto

EssentialPhoto PIXAPRO COLLAPSIBLE BEAUTY DISH Assembly instructions

Axis TP3902 installation guide

Axis

Axis TP3902 installation guide

VADDIO CCU Image Controller for Canon Installation and user guide

VADDIO

VADDIO CCU Image Controller for Canon Installation and user guide

Axis 01445-001 user manual

Axis

Axis 01445-001 user manual

manuals.online logo
manuals.online logoBrands
  • About & Mission
  • Contact us
  • Privacy Policy
  • Terms and Conditions

Copyright 2025 Manuals.Online. All Rights Reserved.