7746
7745
TA2122B
23
INSTALLATION GUIDE INSTALLATION GUIDE
Disassembly Kit Assembly
Disassembly
Disassembly
Disassembly
Disassembly
Assembly
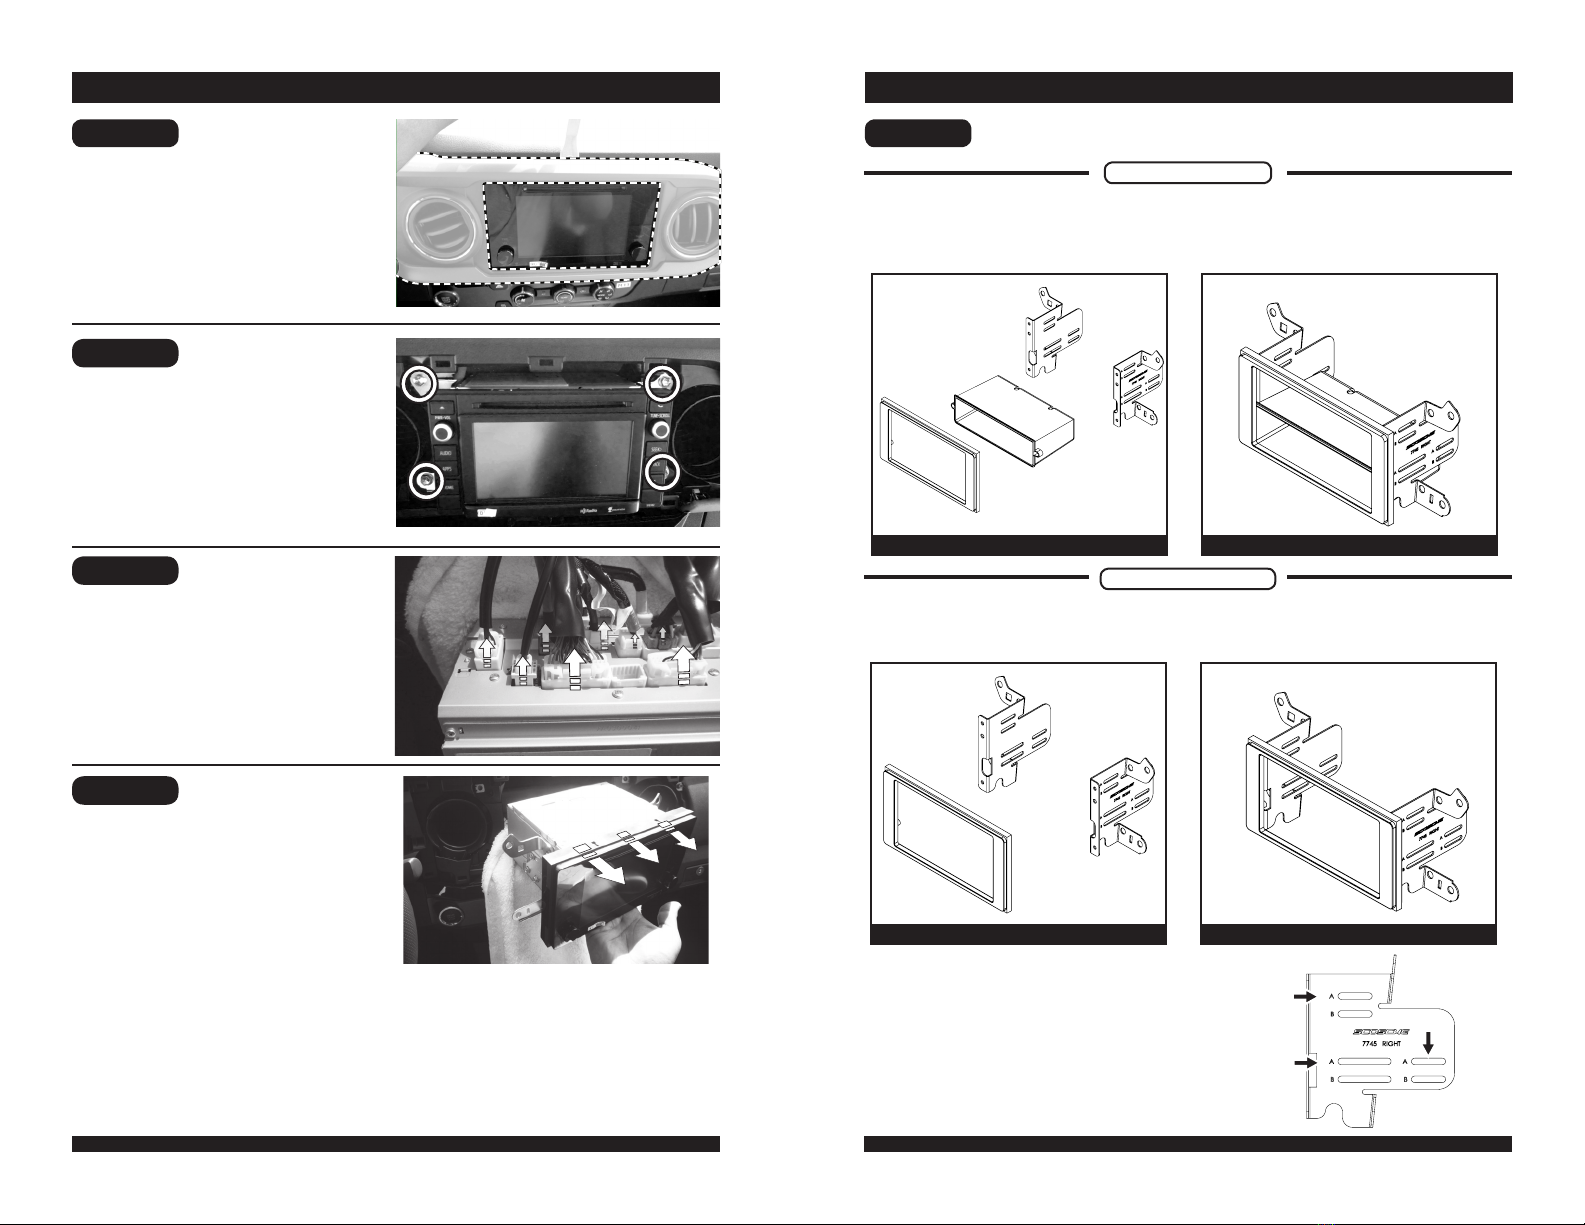
Step 2
Step 1 Step 5
DOUBLE DIN RADIO
SINGLE DIN RADIO
Step 3
Step 4
Remove (4) screws securing
the radio in place (circled).
Using a PRT (Panel Removal
Tool) remove the air vent duct
panel surrounding the OEM
radio unit (dashed highlighted
area)
Unplug all wiring
Remove radio from the dash cavity
and unscrew brackets from the
OEM radio
1. Attach provided 6552 (pocket) to the back side of the TA2122B face panel using the
screws provided.
2. Attach the 7745 &7746 (brackets) to the pocket face panel assembly.
3. Screw the single DIN radio unit to the bracket assembly (Not shown in gures).
1. Attach the 7745 & 7746 (brackets) to the face panel.
2. Slide double DIN radio into face panel bracket assembly then screw brackets onto
aftermarket double DIN radio (Not shown in gures).
Fig 3 Fig 4
Double DIN Exploded View Double DIN Assembled View
7746
7745
6552
TA2122B
Fig 1 Fig 2
Single DIN Exploded View (Pocket) Single DIN Assembled View (Pocket)
NOTE: When mounting both brackets to the radio
unit only use “A” screw locations only!
Bracket Side View
TA2122B 02/16TA2122B 02/16


