manuals.online logo
Brands
  1. Home
  2. •
  3. Brands
  4. •
  5. SCS
  6. •
  7. Measuring Instrument
  8. •
  9. SCS WSMONITOR1 User manual

SCS WSMONITOR1 User manual

TB-9036 Page 1 of 4 © 2015 DESCO INDUSTRIES, INC.
Employee Owned
Constant Monitor
Installation, Operation and Maintenance
December 2015
USER GUIDE TB-9036
Description
SCS Constant Monitors meet the Continuous Monitor
requirements of ANSI/ESD S20.20. “Typical test
programs recommend that wrist straps that are used
daily should be tested daily. However, if the products
that are being produced are of such value that
knowledge of a continuous, reliable ground is needed,
and then continuous monitoring should be considered
or even required.” (ESD Handbook ESD TR20.20 Wrist
Strap section 5.3.2.4.4 Test Frequency)
• Monitors can check up to two wrist strap systems
and one worksurface, depending on the model.
• Compatible with single-wire wrist straps.
• Easy to use: Simply plug in the wrist strap.
• Easy to install: Attach the monitor boxes to the
bench with included hardware, connect the mat and
plug it in.
Damage to electronic devices is caused by static
electricity from people. Connecting people to ground
directs static electricity away from devices. Constant
Monitors are designed to constantly test the connection
of the person, the wristband and the coiled cord to help
ensure that people remain grounded.
Constant Monitor WSMONITOR1 uses a solid state
impedance design to constantly test the connection
integrity of the entire ground system including the
person, the wristband and the coiled cord. Constant
Monitors WSMONITOR2 and WSMONITOR3 also
provide worksurface monitoring. This system is fully
automatic and activates when a wrist strap is plugged
into the unit. A green light indicates connection and a
red light indicates there is no connection. The unit is
powered and grounded by the AC adapter.
The Constant Monitor is available in six models:
Item Operator(s) Mat(s)
Power
Adapter
Input
WSMONITOR1 1 0 120VAC
WSMONITOR1-
230VAC 1 0 230VAC
WSMONITOR2 1 1 120VAC
WSMONITOR2-
230VAC 1 1 230VAC
WSMONITOR3 2 1 120VAC
WSMONITOR3-
230VAC 2 1 230VAC
Packaging
WSMONITOR1 & WSMONITOR1-230VAC
1 WSMONITOR1 Constant Monitor
1 Power Adapter
2 Screws
1 Hook and Loop Fasteners
1 Certificate of Calibration
WSMONITOR2 & WSMONITOR2-230VAC
1 WSMONITOR2 Constant Monitor
1 Mat Monitor Cord
1 Power Adapter
1 STACKJACK
1 Alligator Clip
2 Screws
2 Hook and Loop Fasteners
1 Certificate of Calibration
WSMONITOR3 & WSMONITOR3-230VAC
1 WSMONITOR3 Constant Monitor
2 Operator Remotes
1 Mat Monitor Cord
1 Power Adapter
1 STACKJACK
1 Alligator Clip
4 Screws
2 Hook and Loop Fasteners
1 Certificate of Calibration
Figure 1. SCS WSMONITOR1 Constant Monitor
Figure 2. SCS WSMONITOR2 Constant Monitor
Figure 3. SCS WSMONITOR3 Constant Monitor
www.GlobalTestSupply.com
Find Quality Products Online at: sales@GlobalTestSupply.com
TB-9036 Page 2 of 4 © 2015 DESCO INDUSTRIES, INC.
Employee Owned
Installation
WSMONITOR1
1. Check that you have received all parts: monitor,
power ground adapter and two mounting screws.
2. Using the mounting screws, mount the monitor
under the work bench. (Other suggested mounting
locations include the bench top and under bench
shelving.)
3. Plug the power/ground adapter into the back of the
monitor and into a 3-prong 120VAC outlet.
WSMONITOR3
1. Check that you have received all parts: monitor,
remotes, four screws, power/ground adapter, mat
cord and industrial hook and loop.
2. Using the hook and loop, mount the monitor under
the workbench shelf.
3. Mount the remotes to the work bench with screws.
4. Connect the monitor to the STACKJACK.
5. Remove a plastic cap from STACKJACK and snap it
to the mat.
6. Connect the other mat snap to ground. (Cable not
included.)
7. Plug the power/ground adapter into the back of the
monitor and into a power outlet.
Note: The mat connection monitoring function can be
connected to a workbench with a hard worksurface.
AC ADAPTER
BENCH MAT
MONITOR
HOOK & LOOP
WORK BENCH
STACKJACK
REMOVE CAP
(cable not
included)
Figure 5. Installing the WSMONITOR2 Constant Monitor
WSMONITOR2
1. Check that you have received all parts: monitor,
power/ground adapter and two mounting screws.
2. Using the mounting screws, mount the monitor
under the work bench. (Other suggested mounting
locations include the bench top and under bench
shelving.)
3. Plug the power/ground adapter into the back of the
monitor and into a 3-prong 120VAC outlet.
AC ADAPTER
BENCH MAT
MONITOR
SHELF
REMOTE
REMOTE
HOOK & LOOP
WRIST STRAP
WRIST STRAP
WORK BENCH
(cable not
included)
STACKJACK
REMOVE CAP
Figure 6. Installing the WSMONITOR3 Constant Monitor
AC ADAPTER
MONITOR
SCREWS
WRIST STRAP
WORK BENCH
Figure 4. Installing the WSMONITOR1 Constant Monitor
Operation
• Place a wristband on your wrist and plug the
coiled cord banana plug into the monitor’s banana
jack. The monitor will display a green light when
a functional wrist strap with good skin contact is
connected to the unit.
• The unit will sound an alarm and display a red light
if the wrist strap becomes defective or if the person
is not in contact with the wristband.
• Unplug the wrist strap coiled cord from the unit to
stop the alarm.
• Monitor will alarm if the continuity from the monitor
to the mat to ground is lost.
www.GlobalTestSupply.com
Find Quality Products Online at: sales@GlobalTestSupply.com
TB-9036 Page 3 of 4 © 2015 DESCO INDUSTRIES, INC.
Employee Owned
Calibration
The Constant Monitors are calibrated to standards
traceable to NIST. Frequency of recalibratrion should
be based on the critical nature of those ESD sensitive
items handled and the risk of failure for the ESD
protective equipment and materials. In general, we
recommend that calibration be performed annually.
Use the SCS TMTOOL Verification Tester to perform
periodic testing (once every 6-12 months) of the
Constant Monitors. The Verification Tester can be
used on the shop floor within a few minutes virtually
eliminating downtime, verifying that the monitor is
operating within tolerances.
Safety Information
Read, understand, and follow all safety information
contained in these instructions prior to the use of
Constant Monitors WSMONITOR1, WSMONITOR 2,
and WSMONITOR3. Retain these instructions for future
reference.
Warning
To reduce the risks associated with fire and explosion:
• Do not use in an explosive environment - monitor is
not designed to be intrinsically safe.
To reduce the risks associated with medical device
malfunction:
• Persons with heart pacemaker devices should never
use this monitor.
To reduce the risks associated with hazardous voltage
and fire:
• Use only the power supply provided by SCS and
specified for the country of use.
• Do not position the monitor accessories or other
equipment where unplugging the power supply is
difficult.
• Always locate the power source (socket or outlet)
near the equipment. The power supply plug serves
as the disconnect device.
• Do not modify or attempt to service the power
supply or monitor; there are no user serviceable
parts.
• Do not use the power supply if damaged;
• Replace power supply if damaged using only SCS
supplied parts.
• Do not use the Constant Monitors WSMONITOR1,
WSMONITOR 2, WSMONITOR3 or their power
supplies outdoors in wet/humid environments.
• Do not use the Constant Monitors WSMONITOR1,
WSMONITOR 2, WSMONITOR3 or their power
supplies outside of the operating conditions listed in
this user guide.
• Always follow instructions for installation as stated in
this user guide.
Caution
To reduce the risks associated with environmental
contamination:
• Dispose of this monitor in accordance with all
applicable local and government regulations.
Notice
To reduce the risk of ESD damage to components or
assemblies being handled:
• Monitor must be checked periodically to verify each
test mode is functioning correctly.
• Ensure proper operation of monitor by performing
operational verification test as required.
• Ensure tester is properly grounded.
Figure 7. SCS TMTOOL Verication Tester
Specifications
Monitor Type Impedence - single-wire
Circuitry Solid-state, surface mount
Alarm Audible and visible (LED)
Alarm Threshold 8 megohms
Power 120VAC, 230VAC
Adjustments None required
Calibration See SCS TMTOOL
Item Dimensions Weight
WSMONITOR1 0.9" H x 1.8" W x 1.3" D 1.2 oz.
WSMONITOR2 1.0" H x 2.4" W x 2.3" D 1.6 oz.
WSMONITOR3 1.0" H x 4.0" W x 2.4" D 2.6 oz.
www.GlobalTestSupply.com
Find Quality Products Online at: sales@GlobalTestSupply.com
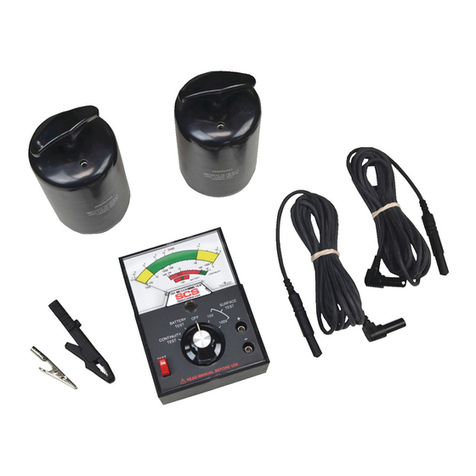
This manual suits for next models

2

Other SCS Measuring Instrument manuals

SCS 770048 Owner's manual

SCS

SCS 770048 Owner's manual

SCS 770066 User manual

SCS

SCS 770066 User manual

SCS CTC337 Installation and operating instructions

SCS

SCS CTC337 Installation and operating instructions

SCS 740 User manual

SCS

SCS 740 User manual

SCS 711 User manual

SCS

SCS 711 User manual

SCS WS aware User manual

SCS

SCS WS aware User manual

SCS 701 Installation guide

SCS

SCS 701 Installation guide

SCS CTM048-21 EM Eye User manual

SCS

SCS CTM048-21 EM Eye User manual

SCS CTS001 Installation and operating instructions

SCS

SCS CTS001 Installation and operating instructions

SCS 770066 Installation and operating instructions

SCS

SCS 770066 Installation and operating instructions

SCS CTC034-030-3-WW Technical Document

SCS

SCS CTC034-030-3-WW Technical Document

SCS CTM048 User manual

SCS

SCS CTM048 User manual

SCS SRMETER2 Technical Document

SCS

SCS SRMETER2 Technical Document

SCS CTC334-T User manual

SCS

SCS CTC334-T User manual

SCS 770063 Installation and operating instructions

SCS

SCS 770063 Installation and operating instructions

SCS 770760 Installation and operating instructions

SCS

SCS 770760 Installation and operating instructions

SCS TB-9079 User manual

SCS

SCS TB-9079 User manual

SCS Static Monitor 790 Installation and operating instructions

SCS

SCS Static Monitor 790 Installation and operating instructions

SCS 711RS User manual

SCS

SCS 711RS User manual

SCS CTM051 User manual

SCS

SCS CTM051 User manual

SCS CTE701 User manual

SCS

SCS CTE701 User manual

SCS TB-9017 User manual

SCS

SCS TB-9017 User manual

Popular Measuring Instrument manuals by other brands

Endress+Hauser RIA15 operating instructions

Endress+Hauser

Endress+Hauser RIA15 operating instructions

CEM DT-610B user manual

CEM

CEM DT-610B user manual

Tenma 72-10465 operating manual

Tenma

Tenma 72-10465 operating manual

TPI 721 instruction manual

TPI

TPI 721 instruction manual

PCB Piezotronics 354M56 Installation and operating manual

PCB Piezotronics

PCB Piezotronics 354M56 Installation and operating manual

Allsheng AMR-100T Operation manual

Allsheng

Allsheng AMR-100T Operation manual

Fema Electronica M40-P user manual

Fema Electronica

Fema Electronica M40-P user manual

Texmate DI-60AE manual

Texmate

Texmate DI-60AE manual

BEKA BA327E-SS manual

BEKA

BEKA BA327E-SS manual

Elesa DD51-E operating instructions

Elesa

Elesa DD51-E operating instructions

Quark-Elec QK-AS06 Setup guide

Quark-Elec

Quark-Elec QK-AS06 Setup guide

Fluke RaySafe 452 user manual

Fluke

Fluke RaySafe 452 user manual

Topcon BM-7A instruction manual

Topcon

Topcon BM-7A instruction manual

Sennheiser NET 1 Instructions for use

Sennheiser

Sennheiser NET 1 Instructions for use

GTCO CalComp DrawingBoard VI quick start

GTCO CalComp

GTCO CalComp DrawingBoard VI quick start

Fluke Biomedical IDA-4 Plus Operators Operator's manual

Fluke

Fluke Biomedical IDA-4 Plus Operators Operator's manual

Canon TX-F Operation manual

Canon

Canon TX-F Operation manual

Nidek Medical AR-600 Service manual

Nidek Medical

Nidek Medical AR-600 Service manual

manuals.online logo
manuals.online logoBrands
  • About & Mission
  • Contact us
  • Privacy Policy
  • Terms and Conditions

Copyright 2025 Manuals.Online. All Rights Reserved.