Sebatron VMPDualPlus User manual

~Sebatron~
Innovative Australian Audio
VMPDualPlus - operating manual
Copyright Sebatron 2021

Valve Microphone Preamplifier with EQ
VMPDualPlus
1/Introduction
2/Features
3/Functions and Dials
4/Inputs and Outputs
5/Operation
6/General Maintenance
7/Specifications
Table of Contents:

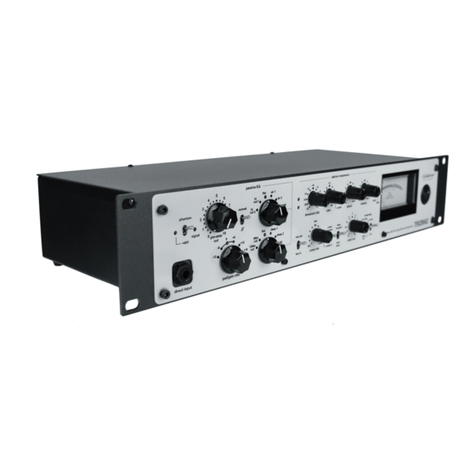
The VMPDualPlus is a high quality two channel high voltage Valve
Microphone Preamplifier and Direct Input with a basic passive two band
shelving Equalizer on each channel.
As its name suggests the VMPDualPlus is a part of the Sebatron VMP
series of Valve Microphone Preamplifiers. Like its four channel counterpart,
the VMPQuadPlus, the VMPDualPlus is based around a transformer-coupled
microphone input and 12AT7 valve triode combination running on a proper
high tension voltage rail.
All circuitry is fully discrete and completely Class A. There are no
intergrated circuits or chips used in the design. This has the benefits of wide
sonic bandwidth for maximum audio frequency response and extra headroom to
ensure the dynamics of the signal remain intact.
Gain is adjusted via a six way Pad/Gain selector switch that controls
negative feedback around the first stage of the 12AT7 Valve. Gain steps are
evenly placed at 6db apart making the settings effective and easy to recall. The
adjustable gain range in conjunction with the pre-amp out control makes it
possible to use the preamp on virtually all sources from the very quiet to the
very loud. The VMPDualPlus handles all microphone types - Ribbon, Dynamic
and Condenser - with ease.
To sweeten signals the VMPDualPlus passive two band Equalizer is
extremely effective and an indispensable tool for sound manipulation.
The high frequency boost settings add clarity and sparkle to material
which would otherwise sound harsh or unnatural when boosted with
conventional digital EQ.
The low frequency boost settings add body and depth to thin signals in a
buttery manner that embellishes the signal by adding a distinct classic
character. Both bands have been configured to bring out the best in Valve
colouration by their chosen frequencies.
Running pre-recorded matrerial through the VMPDualPlus can also add
flavour and spark to otherwise dull or unexciting mixes.
Like all Sebatron products the VMPDualPlus is a musical vehicle that will take
you and your music on long sonic journeys.
1. Introduction

2. Features

• Transformer balanced XLR input feeding 12AT7 dual triode valve
• High Impedance unbalanced phono Direct Input for Guitar, Bass,
Keyboards or line level signals etc. on front panel for easy access
• Balanced phono TRS outputs for independent monitoring
• Fully balanced XLR main outputs
• Quality 12AT7/ecc81 Valve running on a High Voltage rail
providing crystal clear musical signal amplification
• Over 68db of gain variable from clean to coloured
• Six-way Pad/Gain control in 6db increments that sets the gain
and colour of the preamp
• Six-way High Shelf selector dealing high Frequency boost or cut
• Six-way Low Shelf selector dealing low Frequency boost or cut
• 180 degree Phase toggle switch to flip signal output phase
• +48 VDC Phantom Power for condenser microphones with LED
indication
• Green LED indicates signal is in correct operating range
• Output level control for transparent control of the final
output signal
• Solid build with 3mm mild steel powdercoated front panel and
1mm mild steel faceplate
• Switchable 110/120 - 220/240 VAC mains voltage selector
VMPDualPlus preamp
2. Features

(top row)
-Phantom Power Switch: Switchable +48V power for condenser microphones
-Signal LED: Illuminates when signal is present and in optimum range
-Pre-amp out: Adjusts final output level of preamp
-Normal/Reversed Phase Switch: Selects the phase or polarity of the signal
-Passive EQ High Selector: Six position selector switch for
high frequency cut or boost
(bottom row)
-Direct Input: 100k High Impedence Balanced/Unbalanced Phono input for
electric Bass, Guitars, Keyboards and line inputs
-Pad/Gain Selector: Acts as a pad and gain control by varying
negative feedback around first stage of Valve - set in 6db steps
-Passive EQ Low Selector: Six position selector switch for
low frequency cut or boost
3. Functions and Dials

3. Functions and Dials
Pad/Gain
The Pad/Gain selector has been designed to be used in conjunction with the
pre-amp out control to achieve the optimum recording level.
As the dial is turned to the right the signal increments by 6db and the flow to
the valve is increased allowing the onset of a mild harmonic distortion. This also
adds weight to the signal by subtley pushing peaks down and average levels up.
To compensate for the extra signal level when incrementing the Pad/Gain control to
the right the pre-amp out control is usually turned slightly to the left.
Passive EQ
The passive EQ has been designed to compliment existing digital EQ by utilizing
the positive attributes of the valve’s natural compression and colouration. This gives the
signal a ‘pleasant to the ear’ musical texture while still retaining the width and integrity of
the original signal.
The High band is subtle and sweet with smooth equalization curves at 6db boost
per octave. The increments are nonlinear with the initial step of approximately 1db
stretching out to over 4db on the bright setting.
On the outer settings there is some slight interaction with the gain control.
On the first two settings (air 1 and air 2) the boosted high frequencies start from 10khz.
The last boost setting (bright) is wider and has the frequency boosted from lower down at
around 4khz. In addition to the three high boost EQ settings there are two high cut
settings designed for use with vocals or instruments such as drums etc.
The Low band EQ circuitry is situated between the two triode stages of the valve.
This gives the lower EQ a specific coloured response that is slightly syrypy in nature.
All the settings are centred around a single low frequency with each setting varying the
amount of boost.
Like the High band EQ settings the Low band settings are not linearly or evenly
spaced. The steps get wider as the settings progress consequently adding colour
and an organic texture.
In addition to the three low boost EQ settings there are two low cut settings
designed for use with vocals or instruments such as acoustic guitar etc. These are 6db
per octave roll offs with the first setting -3db point at 80hz and second setting -3db point
at 120hz.

Channel 1 Output
Channel 1 Output/Input
Channel 2 Output/Input
Balanced TRS
Balanced XLR Balanced XLR
All XLR inputs and outputs are pin 1=shield, pin 2=hot (+), pin 3=cold (-).
All TRS outputs are Tip=hot, Ring=cold, Sleeve=ground/shield.
Channel 2 Output
Balanced TRS
4. Inputs and Outputs

Mains Power Input
Voltage Selector Switch
The VMPDualPlus can be switched between different global mains voltages via
the voltage mains selector on the back of the unit.
This switch is usually set in the factory for the appropriate voltage that the
unit is destined for, however, in cases of resale etc. it is always recommended to
check this switch before initial power up.
If Voltage Selector Switch is set to the wrong position the fuse should blow
before any damage occurs.
Fuse rating is 0.8 amp @ 240/250 volts (or 1.6 amp @ 110/120 volts).
4. Inputs and Outputs

General Tracking with Mic or Direct Input:
1./ Turn pre-amp out level control fully left, phase switch to normal, both EQ set to flat.
Set Pad/Gain six way selector to default 0db setting.
2./ Plug chosen microphone into XLR mic input socket on back.
If the microphone is of the condenser type then activate the Phantom Power switch
and observe phantom LED to confirm power.
3./ Observe green signal indication LED light when speaking or singing into the
microphone to confirm microphone signal.
4./ If more gain or colour is required then adjust six way Pad/Gain selector to suit.
5./ Adjust pre-amp output level to achieve optimum signal level.
Adjust equalization controls to taste.
5. Operation
Running pre-recorded tracks through the VMPDualPlus mic pre for colour:
Signals can be injected into either the XLR on the back or the Direct Input.
1./ Turn pre-amp output control fully left so there is no output.
Set Pad/Gain control to 0db, both EQ to flat, phase to normal and phantom power
to off.
2./ Plug external signal into XLR on back of unit or into Direct Input on front panel
using a balanced (TRS) or unbalanced phono cable.
We recommend using the front panel Direct Input as it is a direct path to the Valve
without the transformer colouration.
3./ With signal flowing slowly turn pre-amp output level up and monitor signal.
4./ Adjust Pad/Gain selector for more or less colour and adjust pre-amp output level
control for optimum reading on the recording unit (DAW etc.).
Adjust equalization controls to taste.

6. General Maintenance
Warm up period:
For the valves to settle in and voltages to stablize we recommend a brief
warm up time of 2 to 4 minutes.
General Use:
The VMPDualPlus preamp comes stocked with brand new J.J valves.
We use J.J valves because of low microphony, consistency and of course the
sound which is generally regarded as neutral.
Valve life varies from valve to valve but is generally three to five years with
average useage and up to ten years if used sporadically and kept in a good
environment. As valves approach the end of their lifespan there usually is a rise
in noisefloor (hiss-noise) and a narrowing of the sonic bandwidth.
If useage is minimal and within 10 hours a week on average, then we
would recommend valve replacement around the four to five year mark. Heavier
useage, twenty hours a week and upwards for example, we would recommend
valve replacement within three years.
In all cases useage is simply having the unit on, not necessarily passing
signals. Even in an idle state with no signals there are still transformers and
valves operating and it is recommended that for general useage that the unit be
left on for periods of no longer than eight hours at a time. If longer periods are
required it is recommended that the unit be switched off for at least half an hour
for some cooling to occur before proceeding with the next shift.
Precautions:
- Do not operate unit in moist or wet enviroments
- Avoid moisture and excessive heat
- Do not remove lid when mains power cord is connected
- Always replace with same type of rated or recommended fuse
- Operating temperature range : 0C to +50C approx
- To prevent the risk of electric shock, do not operate with lid removed
- Do not expose to dripping or splashing and do not place objects filled with
liquids, such as vases, on top of the unit
- For proper safety, the unit must be connected to a mains socket outlet with a
protective earthing connection
- Unit is live even when switched off. Indicator lamp beside the on switch does
not mean the apparatus is disconnected from the mains
- To disconnect completely from the mains supply cable needs to be removed
from the apparatus
- The mains power disconnect device for apparatus is the appliance coupler on
the rear of the apparatus and shall remain readily operable
- No user servicable parts inside. Refer service to qualified personel
- Refer to manual illustration for input and outputs connect

Valve Type: 12AT7 or ECC81 ( two valves required )
Prefered Valve Brand(s): J.J, Amperax, Telefunken, JAN
Frequency Response: 20Hz - 80 KHz +/- 2db (air 1)
Maximum Input level ( mic ): +4dbm
Maximum Input Level (D.I ): +10dbm
Maximum Output Level: +30dbm balanced
Total Gain of preamp section: 68 db
Input Impedance (mic): 1K ohm
Input Impedance (D.I): 100K ohm
Output Impedance: Less than 600 ohm
Service/Repair queries:
Power: Externally switchable 110/120/220/240 VAC for global useage
Build: Chassis is 1.2mm mild steel powder coated ‘Textured Black’
Front Panel: 3mm mild steel powder coated ‘Magnolia’
Modular P.C.B: Preamp for easy servicing and modifications
Topology: Discrete and Class A Valve and Solid State signal path
running on +300V and +60V rails respectively
Circuitry: Class A Discrete and low noise
Two Dual Triode 12AT7/ecc81 and High Voltage Silicon Transistors
7. Specifications


Other Sebatron Amplifier manuals
Popular Amplifier manuals by other brands

Sony
Sony XM-2150GSX Marketing Specifications Service manual

Bosch
Bosch Plena Easy Line PLE-1P120-EU Installation and user instructions
OM POWER
OM POWER OM2000+ manual
Honeywell
Honeywell AA919 Installation and technical manual

DiBiQuadro
DiBiQuadro SaturnLO user manual

Elettronika
Elettronika AUTV/250LD user manual
