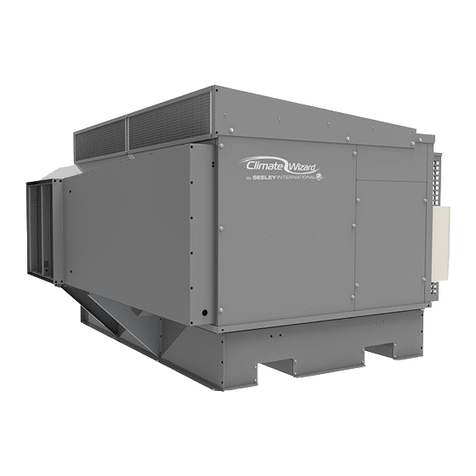
SEELEY INTERNATIONAL Climate Wizard CW-6S User manual

INSTALLATION MANUAL
CW-6S Microcore Indirect Evaporative Cooler
Original English Instructions

i |

CW-6S INDIRECT COOLER INSTALLATION MANUAL | 1
TABLE OF CONTENTS
IMPORTANT SAFETY INSTRUCTIONS
Read And Save These Instructions For Future Reference. 2
Warning - To Reduce The Risk Of Fire, Electric Shock, Or Injury To Persons, Observe The Following: 2
For Australian Bushre Prone Areas 2
Employer And Employee Responsibilities 2
Installer And Maintenance Contractors - Risk Assessment 2
Some Points To Consider 2
Other Important Requirements 2
COOLER VIEWS 3
EXPLODED VIEW 4
COOLER CONTENTS
Cooler Installation Components 6
Optional Components 6
Cooler Controls 6
INSTALLATION
Moving The Cooler 7
Unpacking The Cooler 7
Assessment Of Roof Structure 7
Cooler Location 8
Access For Servicing And Maintenance 8
Mounting / Support 8
Dropper Details 9
Preparing The Transition 9
Mounting The Dropper Assembly 10
Flashing The Dropper 11
Weatherseal 11
Control Cable Installation 12
Power Cable Installation 12
Cooler Method Of Installation 13
Preparing To Lift The Cooler 13
Lifting The Cooler 13
Installation Cable Connections 15
Control Cable Path 15
ELECTRICAL REQUIREMENTS
Australia Only 16
Rest Of World Field Wiring Diagram 16
Control Module Wiring Diagram 16
WATER REQUIREMENTS
Water Hammer 17
Connection To Mains Water 17
Installing The Drain Valve 18
CONTROL SCHEMES 19
Group Installations 19
FAULT CODES INDICATED BY LED’s ON THE COOLER ELECTRONICS MODULE 20
COMMISSIONING COMPLETION CHECKLIST 21
ADJUSTING COOLER SETTINGS 22
WINTERISATION 22
TROUBLE SHOOTING 23
APPENDICES 24
Appendix – A Generic Structurally Engineered Roof Mounting Schemes: 24
Appendix – B ‘Piece By Piece’ Installation 31
HOW TO REGISTER YOUR PRODUCT WARRANTY (Australia only) 38
WARRANTY TERMS AND INFORMATION (Australia only) 39
WARNING! Failure to install and commission the product in compliance with these instructions, or failure to do the job properly
and competently, may void the customer’s warranty. Further, it could expose the Installer and/or the Retailer to serious liability.

2 |
IMPORTANT SAFETY INSTRUCTIONS
READ AND SAVE THESE INSTRUCTIONS FOR
FUTURE REFERENCE.
Means for all pole disconnection must be incorporated in the
xed wiring in accordance with the wiring rules.
If the supply cord is damaged, it must be replaced by the manu-
facturer, its service agent or similarly qualied persons in order
to avoid a hazard.
The following specications for the cooler water supply are
required:
Min Water Pressure 100kPa (15psi)
Max Water Pressure 800kPa (115psi)
New hose sets supplied with the appliance are to be used and
old hose-sets should not be re-used.
To x the cooler to its support:-
• screw the transition to the dropper
• level the dropper and screw to roof
• t 4 x T-washers into the transition
• place cooler onto dropper and secure with the 12 x 12g
screws supplied
Refer to installation section for details
WARNING - TO REDUCE THE RISK OF FIRE,
ELECTRIC SHOCK, OR INJURY TO PERSONS,
OBSERVE THE FOLLOWING:
a) Installation work and electrical wiring must be done by
qualied person(s) in accordance with all applicable codes
and standards, including re-rated construction.
b) When cutting or drilling into wall or ceiling, do not damage
electrical wiring and other hidden utilities.
c) Ducted fans must always be vented to the outdoors
d) Do Not Use This Fan With Any Solid-State Speed Control
Device.
FOR AUSTRALIAN BUSHFIRE PRONE
AREAS
WARNING If an evaporative cooler is installed in a BAL-12.5 to
29 area the evaporative cooler dropper duct and ashings shall
be adequately sealed at the roof to prevent gaps greater than
3mm. The dropper duct and ashings shall be non-combustible.
WARNING: This cooler is NOT APPROVED for installation
in any bushre zoned area/property (BAL-12.5 to BAL-FZ).
EMPLOYER AND EMPLOYEE RESPONSIBILITIES
The installation and maintenance of evaporative coolers at
height has the potential to create Occupational Health and
Safety issues for those involved. Installers are advised to
ensure they are familiar with the relevant State and Federal
legislation, such as Acts, Regulations, approved Codes of
Practice and Australian Standards, which oer practical
guidance on these health and safety issues. Compliance
with these regulations will require appropriate work practices,
equipment, training and qualications of workers.
Seeley International provides the following information as a
guide to contractors and employees to assist in minimising risk
whilst working at height.
INSTALLER AND MAINTENANCE CONTRACTORS -
RISK ASSESSMENT
A risk assessment of all hazardous tasks is required under
legislation. A risk assessment is an essential element that
should be conducted before the commencement of work, to
identify and eliminate the risk of falls or to minimise these risks
by implementing control measures. There is no need for this to
be a complicated process, it just is a matter of looking at the job
to be done and considering what action(s) are necessary so the
person doing the job does not injure themselves.
This should be considered in terms of:
• What are the chances of an incident happening?
• What could the possible consequence be?
• What can you do to reduce, or better still, completely get rid of
the risk?
SOME POINTS TO CONSIDER
• What is the best and safest access to the roof and working
areas?
• If a worker is alone, who knows they are there and if they get
into diculty, how can they summon help? (Call someone on
the ground? Mobile phone? etc.)
• What condition is the roof in? Should the trusses, underside
or surface be checked?
• Does the worker have appropriate foot wear? (Flat sole jogger
type is advisable.)
• Are all power cables / extension leads safe and appropriately
rated?
• Are all ladders, tools and equipment suitable in good
condition?
• Where ladders are to be used, is there a rm, stable base for
them to stand on? Can they be tied or secured in some way
at the top? Is the top of the ladder clear of electricity supply
cables?
• Is there a roof anchor to attach a harness and lanyard to? If
so, instruction should be issued for the use of an approved
harness or only suitably trained people used.
• Are all tools and materials being used, prevented from
slipping and falling onto a person at ground level? Is the area
below the work area suitably protected to prevent persons
walking in this area?
• Does the work schedule take into account weather conditions,
allowing for work to be suspended in high winds, thunder
storms/lightning or other types of weather giving wet, slippery
surfaces?
• Is there an on-going safety check system of harnesses,
ropes, ladders and access/lifting equipment and where they
exist on roofs, anchor points before the commencement of
work?
• Is there a system which prevents employees from working
on roofs if they are unwell or under the inuence of drugs or
alcohol?
• Are there any special conditions to consider i.e. excessive
roof pitch, limited ground area, fragile roof, electrical power
lines?
OTHER IMPORTANT REQUIREMENTS
• Never force parts to t because all parts are designed to t
together easily without undue force.
• Never drill holes in the tank of the cooler.
• Check the proposed cooler location, to ensure that it is
structurally capable of supporting the weight of the cooler, or
provide an adequate alternate load bearing structure.
• Ensure the installation complies with all local and national
regulations with regards to electrical, plumbing and bushre
construction requirements.

CW-6S INDIRECT COOLER INSTALLATION MANUAL | 3
COOLER VIEWS
Dimensions are in mm (inches in brackets).
ILL2679-A
ILL2676-A
TOP ISO
ILL2680-A
ILL2677-A ILL2675-A
FRONT SIDE
SERVICES UNDERSIDE
1160mm
(45 1/2”)
1160mm
(45 1/2”)
1020mm
(40”)
ILL2678-A
(8.3”) (8.0”)
570 (22.4”)
(suits
530
(20.9”)
dropper)
(suits 530 (20.9”) dropper)
565 (22.2”)
Inlet
Inlet
Drain
Drain
CW Logo
location
(13.6”)
212
346
212
230 (9.0”)

4 |
EXPLODED VIEW
ILL2982-B
(LEFT HAND
ASSEMBLY
SHOWN)
ILL2982-B
INDEX PART No. DESCRIPTION QTY
1 562162 TANK 1
2 562391 CLIP PANEL SIDE 8
3 562438 CLIP PANEL TOP 4
4 562179 PANEL SIDE 4
5 855879 FILTER CARTRIDGE 25”x14”x1” 8
6 562063 LID GRILLE EXHAUST 1
7 562223 LID SCREW GRILLE 8
8 849317 STRAP TRANSITION 4
10 122328 DROPPER TRANSITION ASSY 1
11 639381 T-WASHER 4
12 114905 PLENUM INNER 1
13 834660 PLENUM OUTER 4
21 122175RP MOTOR ASSY 1PH INVERTER DRIVE 1
22 122182RP MOTOR ASSY 1PH INVERTER DRIVE 1
23 562308 RING MOTOR LOCK 2
24 562046 VENTURI SUPPLY 1
25 562094 FAN SUPPLY 1
26 562186 MOUNT MOTOR SUPPLY 1
27 562056 VENTURI EXHAUST 1
INDEX PART No. DESCRIPTION QTY
28 122342 FAN EXHAUST 1
29 562476 CAP FAN EXHAUST 1
30 863832 PLUG VENTURI 1
31 863665 STRAPS RETENTION MANIFOLD 16
32 091426 CHLORINATOR LARGE ASSY 1
33 560294 COVER CHLORINATOR MOUNT 1
34 935874 FITTING ELBOW AIR-BREAK 1
36 804415L O’RING BS128 38ID*2.6 N70 M51 1
37 865607 SOLENOID VALVE 12V DC 1
39 815978 WASHER RUBBER LCQ KITS 1
40 833835 PROBE WATER 3PIN 1.76M 1
639392 BRACKET PROBE 1
41 122472 PUMP 230/50 TWIN OUTLET 50Hz 2
41 118314RP PUMP 230/50 TWIN OUTLET 60Hz 2
48 122311RP DRAIN VALVE ASSY 12V MFG 1
49 535401 ^NUT 1.5” BSP 1
52A 861593 NUT PIPE FITTING 1.5” BSP 1
53A 593104 ADAPTOR DRAIN 32-20MM 1
53 117928RP CONTROL ASSY 1
54 862758 ELECTRONICS MOUNT PLATE 1
55 862757 ELECTRONICS SPLASH COVER 1

CW-6S INDIRECT COOLER INSTALLATION MANUAL | 5
EXPLODED VIEW
INDEX PART No. DESCRIPTION QTY
14, 15,
17 & 18
122199RP ENCAPSULATION INDIRECT & DIRECT RIGHT 4
14, 15,
17 & 18
122205RP ENCAPSULATION INDIRECT & DIRECT LEFT 4
14A 120904P65 CHILLCEL 263*665*35 8
19 562124 SPREADER ELBOW CLIP 16
20 863208 O RING BS112 16
ILL2982-B
(LEFT HAND
ASSEMBLY
SHOWN)
ILL2982-A

6 |
COOLER CONTENTS
COOLER INSTALLATION COMPONENTS
The cooler will be accompanied by a packout kit box containing
control items and other components that are required for
installation.
OPTIONAL COMPONENTS
The cooler installation can be optioned with the following items.
Item Part No. Description QTY
1856162 Power Cable 4m (12’) 1
2833880 Control Cable 20m (65”) 1
3859741 Instruction - Installation 1
4122311RP Drain Valve Assy 12V 1
5850764 Flexible Water Inlet Hose 1
6864471 Dropper Height Gauge 1
7583020 Grommet for Dropper 1
8639381 T-Washer 4
9101713 Adapter Drain Fitting Assembly 1
10 639391 Solenoid Cover 1
11 122328 Dropper Transition Assembly 1
12 875392
Dropper TEK Screw Fasteners
Screw TEK, Hex, Steel, 12 Gauge, 30-35mm x 14TPI,
Neoprene Seal
(20 for dropper + 1 for solenoid cover)
21
13 560359 Tank Plug 1
Item Seeley
Part Description
1094946 Heat/Cool Duct Switch (Australia Only)
2A
2B
134192
122489
Roofstand 0-10O
Kit Add On CW3/CW-6S For Roof Stand 134192
ITEM 1. ITEM 2
ITEM 9 ITEM 10 ITEM 11
ITEM 12 ITEM 13
ITEM 3 ITEM 4
ITEM 6 ITEM 7 ITEM 8
ILL3813-A
ITEM 5
ITEM 1 ITEM 2
ILL -A3814
ILL2425-B
ILL3813-A
COOLER CONTROLS
This cooler is compatible with a wide range of MagIQtouch control solutions, including Wall Controllers, Building Management
System (BMS) Controllers and Sensor Accessories. Contact your local Sales oce for compatible kits and installation literature.
ITEM 1 ITEM 2 ITEM 3 ITEM 4
ITEM 5 ITEM 6 ITEM 7 ITEM 8
ITEM 9 ITEM 10 ITEM 11
ITEM 12 ITEM 13
ITEM 1 ITEM 2

CW-6S INDIRECT COOLER INSTALLATION MANUAL | 7
ILL2773-B
INSTALLATION
To correctly unpackage the cooler, follow the instructions below:
1. Inspect for transport damage prior to unpacking.
2. Remove the plastic lm, polystyrene foam packing blocks
and pallet strapping. Dispose of responsibly.
3. Remove the top horizontal timber support members and
vertical timber support members. Dispose of responsibly.
4. Leave the base pallet and foam supporting blocks in
position in 3 places, as shown. These are required for lifting.
5. Remove pad frames to access the BMS Module packed
inside the cooler.
Model Shipping Weight Operating Weight
CW-6S 175 kg
(385 lb)
210 kg
(465 lb)
UNPACKING THE COOLER
The cooler will be delivered on a dedicated pallet and will
be wrapped in plastic lm with timber and foam supporting
members.
The cooler will be accompanied by a packout kit box containing
control items and other components that are required for
installation.
ILL2772-A
ILL2772-A
ILL2773-B
ASSESSMENT OF ROOF STRUCTURE
THE COOLER REQUIRES AN ADEQUATE ROOF
STRUCTURE TO BEAR THE LOAD OF ITS OPERATING
WEIGHT. IT IS LIKELY THAT MOST RESIDENTIAL
STRUCTURES WILL REQUIRE REINFORCEMENT.
Engineering designs of roofs, including the supporting
structure and cladding, should take into account whether the
work practices necessary to carry out the installation and
maintenance on the roof can be carried out safely.
It is the installers responsibility to verify the integrity of the roof
structure as well as determine and implement an adequate load
bearing structure to which the dropper and cooler is xed. The
roof structure in question must be in good condition (i.e. no worn
members or pre-existing damage) and compliant with one of the
structurally engineered roof mounting schemes provided (Refer
to Appendix A):
If these generic schemes are not applicable to the customer
installation, it is the installer’s responsibility to seek the services
of a structural engineer or certied builder to ensure that the
installation is adequate and complies with local and national
building codes. Installation on inadequate structures will void
the warranty and could result in death or serious injury. If the
installer has any doubt in regards to the structural integrity or
condition of the customer installation, then a structural engineer
or building certier must be consulted.
MOVING THE COOLER
The cooler can be moved either by fork-truck or pallet-truck
whilst it is resting on its dedicated pallet. Do not drag or lift the
cooler unless it is on its dedicated pallet.
ILL2970-B
ILL2970-B
1 2 3

8 |
INSTALLATION
ACCESS FOR SERVICING AND MAINTENANCE
The cooler should be installed in a position that allows adequate
access for installation, and future maintenance and servicing
activities. This should comply with installation guidelines and
any local, State and National regulations.
Consider the following for installation location:-
• Which has clear access to and around the cooler
• Which is clear of xtures in line with below clearances
• Which is clear of fall edges (> 3m away)
• Which is structurally capable of supporting the weight of the
cooler and service technicians
Required clearances around the cooler for future maintenance
and servicing are shown below.
Extra service or warranty charges may apply for the cost of
any equipment or additional labour involved in accessing
the cooler if these guidelines are not met.
ILL2987-A
COOLER LOCATION
Check proposed cooler location to ensure it is structurally
capable of supporting the weight of the cooler. If the roof is
structurally inadequate, provide an alternate load bearing
structure.
The ideal location for the cooler is in a central position on the
roof (away from sleeping areas and where people spend most
of their time) so that the duct runs are of approximately the
same length. Carefully consider neighbouring residences and
noise levels when locating the cooler, if necessary talk to the
customer and the neighbour before carrying out the installation.
Always locate the cooler where it will receive adequate fresh air
and not in a recess where it may be starved for air or where the
air is polluted.
Air exiting the exhaust fan is warm and heavily laden with
moisture. Ensure the cooler’s exhaust air will not cause
corrosion or damage to other nearby items. Do not allow
exhaust air to re-circulate into the air intake of the cooler.
Ensure location is a minimum of:
• 3m (10’) from a solid fuel heater ue,
• 1.5m (5’) from a gas ue,
• 1.0m (3.5’) away from adjacent solar panels or similar roof
mounted xtures,
• 5m (17’) from a sewer vent, and
• 600mm (2’) from a wall.
ILL2962-A
Allow adequate access to and around the cooler for
maintenance. Provision must be made for access to electricity,
water supplies and drains.
Note! Do you need to discuss the installation of items like
safety anchor points with the customer?
• The cooler must be mounted at least 3m (10’) (preferably
5m (17’)) away from any TV antenna or antenna cables.
Make sure the cooler is not between the antenna and the
transmission tower that is providing the television signal to the
home.
For side discharge installations, ensure the following
clearances;
• 600mm to wall.
• 350mm to top of elbow.
MOUNTING / SUPPORT
Roofstands, accommodating 0-10 roof pitches, are available for
order via Seeley International. See Optional Components List.
ILL3368-A
ILL3815-A
ILL -A3815
350 (14")mm
WEATHERSEAL SWING
CLEARANCE
600mm 2( 4")
WALL
CLEARANCE
350mm (14”)
WEATHERSEAL
OPENING
CLEARANCE
600mm (24”)
WALL
CLEARANCE

CW-6S INDIRECT COOLER INSTALLATION MANUAL | 9
INSTALLATION
DROPPER DETAILS
Cooler is supported by a 530 x 530mm (20 7/8” x 20 7/8”)
dropper with a minimum metal thickness of 1.0mm (20 gauge).
The dropper duct must have a raw edge or safe edge at the top.
Do not fold in a ange as this may interfere with the transition
and/or the Weatherseal
ILL2774-A
Cut a 50mm diameter cable exit hole in the dropper then t and
screw the cable grommet into position. Locate the hole so the
cables will not interfere with the operation of the Weatherseal.
ILL1646-A
PREPARING THE TRANSITION
The cooler will be accompanied by a separate kit box containing
the dropper transition assembly, ttings and all associated
fasteners.
Begin by dismantling the dropper transition assembly on the
ground. For accessibility purposes, it is best to temporarily
remove both weatherseal aps as shown.
ILL2775-A
Fit the transition onto the dropper, ensuring that it is orientated
correctly, as shown below.
Once level, secure the transition to the dropper using 6 (six) of
the supplied fasteners. There are 2 pilot holes on each side and
a single hole on the front and rear (centre) of the transition.
ILL2776-A
Transport the transition and dropper assembly to the roof.
ILL2971-A
POWER CABLE EXIT
TOWARDS ROOF
RIDGE CAP, HIGH RH
SIDE.
ELECTRONIC BOX
MOUNTS TOWARDS
ROOF GUTTER, LOW
RH SIDE.

10 |
INSTALLATION
MOUNTING THE DROPPER ASSEMBLY
WARNING! The roof must have an adequate load bearing
structure. Please refer to the ‘Assessment of Roof
Structure’ section.
A dropper height template has been provided to accurately set
the height of the dropper. The template is a 25mm x 25mm x
3mm piece of steel angle bar with length of 750mm.
ILL2778-A
The following method of height-setting is only applicable
for roof angles between 15 and 30 degrees.
Install back-ashing into the dropper roof opening. Place a
sheet of cardboard onto the rear of the roof opening as shown
to protect the roof.
ILL2977-A
ILL2978-A
Lower the dropper into the opening in the orientation shown.
Adjust the position of the dropper such that the height tool rests
on the high side of the roof.
Level the dropper, with a spirit level placed across the top of the
transition in both directions.
Once level, secure the dropper to the roof structure using
roong screws. These are not provided.
DO NOT USE THE PROVIDED TEK SCREWS – THESE ARE
FOR USE ELSEWHERE.
Insert 5x fasteners per side to be spaced at 100mm intervals in
the centre of the timber support members. Refer to Appendix A.
Ensure the top of the dropper is level in both directions.
The installer must ensure the dropper is secured adequately
for wind conditions at the site. Additional restraints may be
required if the cooler is more than 200mm (8”) higher than the
roof timbers, or design wind velocity at the site exceeds 43m/s
(141fps). In very high wind areas or areas subject to hurricanes/
windstorms, or where the cooler is located more than 8m (26’)
above the ground, seek advice from a structural engineer.
Remove the height template by sliding it through the front
keyhole of the transition.
ILL2979-A
ILL2980-A
Insert the dropper height template into the keyed opening and
feed through until it sits ush against the opposite side of the
transition as shown..

CW-6S INDIRECT COOLER INSTALLATION MANUAL | 11
INSTALLATION
Insert the four (4) T-Washers and push them down into the
transition piece as shown. The T-Washers should be facing
outwards and will be sitting inside the dropper.
MOUNTING THE DROPPER ASSEMBLY
ILL2782-A
ILL2783-A
FLASHING THE DROPPER
The dropper may now be ashed to the roof. Make sure there is
no chance of water entering the roof space.
Using each T-Washer as a guide, drill 3 (three) 8.0mm (1/4”)
pilot holes through the dropper. This must be completed
before lifting commences.
DO NOT USE ANY OF THE PROVIDED 12g TEK SCREWS
AT THIS STAGE – THESE ARE FOR USE LATER IN THE
INSTALLATION.
WEATHERSEAL
Reinstall the Weatherseal into the dropper as shown. Ensure
they open all the way and do not interfere with the dropper or
any screws.
The aps should move freely through 70º without interference.
ILL2964-A
Important! There must be no obstructions to the Weatherseal
opening fully as it will adversely aect the performance of the
cooler.

12 |
INSTALLATION
CONTROL CABLE INSTALLATION
Your installation kit includes a control cable. This cable must
be routed through this corner recess prior to the cooler
being mounted to the dropper.
ILL3116-A
ILL3029-A
Pass the non-taped end of the control cable up into the dropper
duct, through the grommet. Pull the cable through and position
it in the transition slot. Leave an excess length of the cable
(1.5m or 60” each) hanging out of the roof dropper and not
inside the dropper.
The cooler power cable requires locating before tting the
cooler to the dropper. Remove the pad frame, locate the power
bundle within the tank of the cooler and pull the free length
through the rear access hole.
Tape the cable to to an exterior cooler panel ready for lifting.
POWER CABLE INSTALLATION

CW-6S INDIRECT COOLER INSTALLATION MANUAL | 13
INSTALLATION
PREPARING TO LIFT THE COOLER
IT IS THE RESPONSIBILITY OF THE RIGGER TO
DETERMINE THE APPROPRIATE METHOD AND
EQUIPMENT FOR LIFTING THE COOLER.
The cooler may be lifted by crane via slinging only. Slinging
points have been provided. Slings must comply with National
Standards.
DO NOT LIFT USING ANY CABINET FEATURES,
ALTERNATE SLING LOCATIONS OR BY RETRO-FITTING
LIFTING LUGS.
The cabinet may be damaged and/or lift safety may be
compromised.
DO NOT ATTEMPT TO LIFT THE COOLER WITHOUT THE
FOAM SUPPORTING BLOCKS.
If they are missing or damaged, contact the dealer and/or resort
to the ‘piece-by-piece’ method of installation.
DO NOT ATTEMPT TO LIFT THE COOLER ON THE PALLET.
It is not possible to t the cooler to the dropper if the pallet is
used to sling the cooler.
Before the cooler is lifted:
• Inspect the cooler to make sure it is in good condition.
Ensure all exterior panels and clips are rmly in place.
Contact the dealer if any exterior components appear to be
structurally damaged.
• Ensure the power cable has been passed through the rear
access hole and is taped to an exterior cooler panel.
• Ensure the foam support blocks and cooler have not
moved from their dedicated positions in transit.
• Inspect the structural integrity of the foam support blocks
to ensure they are in good condition. The foam supports
to the tank for lifting and provides retention channels for
slings.
• Make sure the foam support blocks are rmly inserted
upwards into the female openings in the underbody of the
tank.
ILL3026-A
COOLER METHOD OF INSTALLATION
There are two possible methods of installation for the cooler:
1. Installation via crane (preferred) – cooler is lifted from its
pallet on the ground and slung onto the dropper.
2. Piece by piece assembly – cooler is disassembled on the
ground and reassembled on the dropper.
The ideal method of installation will be specic to each
assignment. To determine which method is best suited to your
installation, be sure to consider regulations, location, access
points, potential obstacles and safety.
Discuss the possible options with the customer.
ILL2785-A
ILL3027-A
ILL3028-A
Marrying the cooler and transition:
Important! Two people are required to guide the cooler onto
the dropper.
Lift and suspend the cooler approximately 100mm (4”) above
the transition.
Check the orientation of the cooler to make sure it is in the
correct position with the branding on the front of the cooler
positioned at the front of the dropper.
LIFTING THE COOLER
Place the slings underneath the cooler and through the
dedicated recess channel in the foam supporting blocks.
Rocking, lifting and/or blocking up the front of the cooler will be
required to pass slings beneath cooler while it sits on the pallet.

14 |
ILL2786-A
INSTALLATION
WARNING! BE EXTREMELY CAREFUL NOT TO TRAP
HANDS IN BETWEEN THE COOLER AND TRANSITION.
DO NOT POSITION ANY PART OF YOUR BODY
UNDERNEATH THE COOLER WHILE IT IS SUSPENDED BY
CRANE.
BE EXTREMELY CAREFUL NOT TO DAMAGE THE
TRANSITION STRAPS, COMMUNICATION OR MAINS
POWER CABLES.
Securing the cooler to the dropper transition using the screws
provided. A total of twelve (12) screws are required. Only use
the screws provided.
ILL3030-A
Remove the tape restraining the power cable and allow it to
dangle loosely. Using the height template tool, guide the mains
power cable into the corner recess slot on the transition and
down into the dropper.
ILL3036-B
Identify the white dropper transition straps which
protrude out from the tank. These straps are ared
outwards and should fall outside the edges of the
dropper transition as the cooler is being lowered.
ILL3125-A
Once tted correctly, the white dropper transition straps should
align with the pre-drilled pilot holes in the dropper. Some
transition straps may need to be pulled down to meet with pilot
holes in the dropper.

CW-6S INDIRECT COOLER INSTALLATION MANUAL | 15
CONTROL CABLE PATH
The communications cable should be hanging loose on the
outside of the dropper.
INSTALLATION CABLE CONNECTIONS
ILL3029-B
Feed the control cable through the rear access hole (RHS) from
the underside of the tank.
The control cable needs to be routed though the cable tray on
the inner wall of the tank, and then fed through to the control
module.
Important! Ensure the mains cable is not submerged or
touching the water in the tank at any point along the cable
length. Make use of the resealable cable restraints. Cable
tie to existing looms if necessary.
Remove the Control Module cover.
Connect the Wall Control communications cable to the free
socket labelled “Comms”.
Connect the Drain Valve cable to the connector/pins labelled
“Drain”.
Replace the cover.
Clip the loose cables into the restraint on the rear tank hole
to lock them into place and then insert the plug provided from
inside the tank.
• This will seal the hole in the tank.
Push the remainder of the loose cables back down into
the dropper. Leave some slack on the cables so they sit
comfortably.
ILL3109-A
ILL3110-A
UNDERSIDE VIEW
TOP VIEW
ILL3112-A
UNDERSIDE VIEW
ISOLATION
SWITCH
ILL3111-D
WALL CONTROL CABLE
DRAIN VALVE CABLE
INSTALLATION
CONNECTIONS
ILL3111-D

16 |
ELECTRICAL REQUIREMENTS
ILL2681-D
PUMP
LEFT
(INDIRECT)
PUMP
RIGHT
(DIRECT)
MOTOR
BOTTOM
POWER
ON / OFF
FUSE
250V, 1A0
F2
MODBUS
TERMINATING
RESISTOR
SUPPLY
MOTOR (BOTTOM)
SIGNAL
SUPPLY
MOTOR
EXHAUST
MOTOR (TOP)
SIGNAL
EXHAUST
MOTOR
MOTOR
TOP
AIR
SENSOR
CONTROLLER:
MAGIQTOUCH,
BMS ETC
SOLENOID
WATER
PROBE
DRAIN
CHLORINATOR
ILL2681-D
REST OF WORLD
FIELD WIRING DIAGRAM
CONTROL MODULE WIRING DIAGRAM
ILL2983-A
Terminate the power cable in a junction box installed nearby.
The xed wiring must be tted with an isolation switch that
breaks the active (hot) and neutral (common) in accordance
with local wiring rules. We recommend the junction box be
located and installed on the duct.
Do not penetrate the duct near the Weatherseal.
AUSTRALIA ONLY
A 10A GPO within one metre of the dropper’s cable exit hole is
required.
ILL3102-A
Installation of the cooler must conform to local electrical rules,
regulations and standards.
.Important! It is a requirement of Seeley International that all
coolers be connected to a dedicated circuit to the distribution
board, with a separate circuit breaker and incorporate a separate
isolation switch in accordance with the local wiring rules.
The following specications for the cooler electrical supply
are required: 220 - 240V / 50 or 60Hz Single Phase. (See
nameplate for exact data in cooler)
The electronics module is tted with a replaceable 10A anti-
surge fuse and an isolation switch that is toggled manually.
WARNING! Replacing the fuse exposes the operator to high
voltage components. This operation may only be conducted
by a qualied electrician. To replace the fuse: turn o the main
isolator to the cooler, turn o the electronics isolation switch,
remove the electronics cover and replace the fuse.
WARNING! If the supply cord is damaged, it must be replaced
by the manufacturer, its service agent or similarly qualied
persons in order to avoid a hazard.
Note! The maximum length for the wall control cable to travel
alongside the power cable is 10m (33’)

CW-6S INDIRECT COOLER INSTALLATION MANUAL | 17
Climate Wizard requires a permanent water supply to be
connected.
Installation of the water supply to the cooler must conform to
local plumbing rules, regulations, and standards:
The following specications for water supply are required:
• Water Connections:
½” BSP (Aus/Eur), ½” NPT (USA)
male connection supplied suitable for a compression tting.
• Water Supply:
100kPa (15psi) - 800 kPa (115psi)
10L/min (2.6 gal/min) MINIMUM
20L/min (5.3 gal/min) RECOMMENDED
• Water Supply Temperature:
40°C (105°F) MAXIMUM
• Water Supply Salinity:
100 to 1150μS/cm
Important! Water supply pressures which are lower than
100kPa (15 PSI) and higher than 800kPa (115 PSI) will prevent
the inlet solenoid valve from opening.
Water pressures which are higher than 1200 kPa (175 PSI) and/
or water temperatures which are higher than 40C (105F) risk
inlet solenoid valve failure.
If the water pressure exceeds this maximum specication then
a pressure reducing valve is required and must be supplied and
tted by the Installer.
If a non-return valve is installed in the water supply line, it
is recommended that a suitable pressure relief valve is also
installed between the cooler and non-return valve to limit the
pressure rise associated with the heating eects of ambient
temperature and solar radiation.
WATER REQUIREMENTS
The Installer must provide a manual 1/4 turn ball type shut o
valve (do not use a stop cock) in the water supply line adjacent
to the cooler, subject to local plumbing regulations. This allows
the water supply to be isolated whenever work needs to be
done on the cooler.
In areas where temperatures can cause water supply pipes
to freeze, a drain down facility should be provided during the
installation. This drain down facility must be activated prior to
freezing conditions, to avoid possible damage to the cooler
components.
WATER SUPPLY ISOLATION
ILL3018-A
The cooler is factory tted with an inlet solenoid. A new
detachable hose set is also supplied in the accessory kit. It is a
requirement to t the new detachable hose set supplied. Any old
hose sets should not be re-used.
WATER HAMMER
Secure the Solenoid Cover Plate in place against the cooler
tank by using a TEK screw (supplied). Fit the exible hose
and washer assy to the inlet of the solenoid, checking that the
solenoid strainer is in place.
ILL3019-C
(xscrew to1
secure to tank -
not shown)
SOLENOID
SOLENOID
COVER PLATE
WASHER
NUT
(CONNECTS SOLENOID
TO HOSE ASSY)
FLEXIBLE HOSE ASSY
ILL3019-C
CONNECTION TO MAINS WATER
Not all installation pipeworks are the same, and some may
require additional prevention against water hammer.
If water hammer is a problem, it is the responsibility of the
Installer to t an appropriate water hammer arresting device
external to the cooler.
The Installer must provide an inlet water lter in the water
supply line, external to the cooler to prevent any debris from
entering and damaging cooler components.
Important! Flush the water pipe to remove any contaminants
(swarf, lings or dirt) before nal tting. Contaminants can
lodge in the inlet solenoid valve, preventing it from functioning
correctly.
Climate Wizard’s water management system is designed to
use water that is suitable to be classied as ‘potable’ and t for
human consumption. If alternative water (including rain water) is
to be used that contains high levels of salinity, hardness, acidity
or chemical contaminants, then additional ltration or treatment
systems should be employed to render the water ‘potable’.
WATER SUPPLY FILTRATION
WATER SUPPLY INSTALLATION

18 |
Water drained from the cooler must be carried away to a
suitable discharge point in accordance with local regulations.
Important! Never drain water from the cooler directly on to the
roof.
The drain valve is not factory tted to the cooler. This must be
completed on site.
Assemble the drain valve (1) as shown:
ILL2791-A
INSTALLING THE DRAIN VALVE
Make sure the “O”-ring (2) is tted before placing the drain valve
into the hole. Screw the nut (3) up tightly by hand underneath
to secure the drain valve. Locate the funnel (4) up against the
bottom of the drain valve thread and secure with the second,
larger nut (5).Make sure that you use the correct drain adaptor.
Make sure the drain water discharge ows freely away from the
cooler.
Important! Do not over-tighten plastic ttings.
WATER REQUIREMENTS
Table of contents
Other SEELEY INTERNATIONAL Accessories manuals

