IFM PL205 Series User manual

Operating instructions
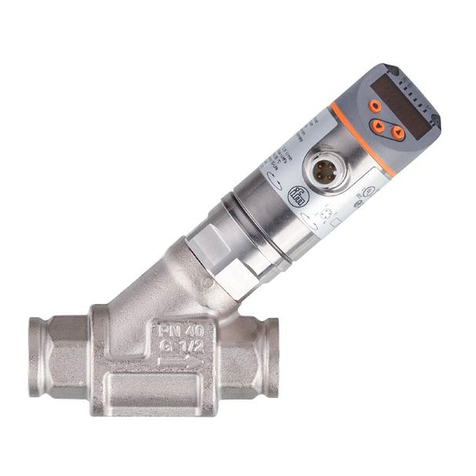
Electronic pressure sensor
PL205x
706069 / 01 06 / 2019
UK

2
1 Preliminary note
1.1 Symbols used
►Instruction
> Reaction, result
[…] Designation of buttons, switches or indications
→Cross-reference
Important note
Non-compliance can result in malfunctions or interference.
Contents
1 Preliminary note...................................................................................................2
1.1 Symbols used ................................................................................................2
2 Safety instructions ...............................................................................................3
3 Functions and features ........................................................................................4
3.1 Applications ...................................................................................................4
4 Function...............................................................................................................5
4.1 Processing of the measured signals..............................................................5
5 Installation............................................................................................................6
6 Electrical connection............................................................................................8
7 Operation.............................................................................................................8
7.1 Cleaning of the filter cover.............................................................................8
8 Parameter setting ................................................................................................9
8.1 Adjustable parameters...................................................................................9
8.2 Setting ranges .............................................................................................10

3
UK
2 Safety instructions
• The device described is a subcomponent for integration into a system.
- The manufacturer of the system is responsible for the safety of the system.
- The system manufacturer undertakes to perform a risk assessment and to
create a documentation in accordance with legal and normative requirements
to be provided to the operator and user of the system. This documentation
must contain all necessary information and safety instructions for the opera-
tor, the user and, if applicable, for any service personnel authorised by the
manufacturer of the system.
• Read this document before setting up the product and keep it during the entire
service life.
• The product must be suitable for the corresponding applications and environ-
mental conditions without any restrictions.
• Only use the product for its intended purpose (→ Functions and features).
• Only use the product for permissible media (→ Technical data).
• If the operating instructions or the technical data are not adhered to, personal
injury and/or damage to property may occur.
• The manufacturer assumes no liability or warranty for any consequences
caused by tampering with the product or incorrect use by the operator.
• Installation, electrical connection, set-up, operation and maintenance of the unit
must be carried out by qualified personnel authorised by the machine operator.
• Protect units and cables against damage.
For the scope of validity cULus: The device shall be supplied from an isolating
transformer having a secondary Listed fuse rated as noted in the following table.
Overcurrent protection
Control-circuit wire size Maximum protective device rating
Ampere
AWG (mm2)
26 (0.13) 1
24 (0.20) 2
22 (0.32) 3
20 (0.52) 5
18 (0.82) 7
16 (1.3) 10
The Sensor shall be connected only by using any R/C (CYJV2) cord, having suit-
able ratings.

4
3 Functions and features
The pressure sensor detects the system pressure of machines and installations.
3.1 Applications
Type of pressure: relative pressure
Order no. Measuring range Permissible
overload pressure Bursting pressure
bar PSI bar PSI bar PSI
PL2053 -1...25 -15...363 100 1 450 350 5 070
PL2054 -0,5...10 -7...145 50 725 150 2 175
PL2056 -0,13...2,5 -1,8...36,3 20 290 50 725
mbar PSI bar PSI bar PSI
PL2057 -50...1 000 -0,7...14,5 10 145 30 450
mbar inH2O bar inH2O bar inH2O
PL2058 -12,5...250 -5,0...100,4 6 2400 30 12 000
MPa = bar ÷ 10 / kPa = bar × 100
Static and dynamic overpressures exceeding the indicated overload pres-
sure are to be avoided by taking appropriate measures.
The indicated bursting pressure must not be exceeded. Even if the burst-
ing pressure is exceeded only for a short time, the unit can be destroyed.
NOTE: Risk of injury!

5
UK
4 Function
4.1 Processing of the measured signals
The unit converts the system pressure into an analogue output signal (4...20 mA).
The measuring range can be scaled to up to 25% of the finalvalue of the measur-
ing range.
• By setting the parameter ASP you define the measured value at which the
output signal is 4 mA.
• By setting the parameter AEP you define the measured value at which the
output signal is 20 mA.
Factory setting Measuring range scaled
P = system pressure, MEW = final value of the measuring range
The output signal is between 4 and 20 mA. It is also indicated:
• System pressure above the measuring range: output signal > 20 mA .
• System pressure below the measuring range: output signal between 4 and 3.2 mA.
The unit is ready for operation when delivered. Factory preset: not scaled (ASP =
0 bar; AEP = 100% of the final value of the measuring range).

6
5 Installation
Ensure that no pressure is applied to the installation while mounting or
removing the sensor.
Aseptoflex adapters ensure that the
sensor can be connected to different
process connections.
(The adapters have to be ordered
separately as accessories.)
Mounting operation:
► Mount the adapter (B) to the sen-
sor.
►Fix sensor + adapter by means of
a coupling nut, a clamp flange or
similar (A) to the process connec-
tion.
If it is not possible to slide the fixing
element (A) down over the top of the
sensor: slide it up over the bottom
of the sensor before the adapter is
mounted.
Mounting the Aseptoflex adapter
►Slightly grease the threads and
sealing areas of the sensor and
adapter with lubricating paste (1).
The paste must be suitable and
approved for the application and
compatible with the elastomers
used.
Recommendation: Klüber paste
UH1 84-201 with USDA-H1 ap-
proval for the food industry.
► Make sure that the O-ring (C) is
correctly positioned.
1

7
UK
►Screw the sensor into the adapter
until it is hand-tight. Do not damage
the sealing chamfers.
►Clamp sensor and adapter into a
clamping device (D). Tighten the
clamping device only slightly so
that the adapter does not warp. The
sealing chamfers (E) must not be
damaged.
►Tighten the sensor using a spanner
until you can feel the end stop (cor-
responding to a maximum tighten-
ing torque of 25 Nm / 18 ftlb). Note:
Do not overtighten. This can have
an adverse effect on the sealing.
NOTE: A guarantee for a long-term stable and maintenance-free fitting with no bug
traps in the hygienic sealing of the metal seal (Aseptoflex connection) is only valid
for once-only mounting.
Welding adapter
First weld the adapter, then mount the sensor. Follow the instructions included
with the adapter.

8
6 Electrical connection
The unit must be connected by a qualified electrician.
The national and international regulations for the installation of electrical
equipment must be adhered to.
Voltage supply to EN50178, SELV, PELV.
►Disconnect power.
►Connect the unit as follows:
2 wire connection 3 wire connection
Core colours of ifm sockets:
1 = BN (brown), 2 = WH (white), 3 = BU (blue), 4 = BK (black)
7 Operation
After power on of the supply voltage the unit is in the Run mode (= normal opera-
tion). It carries out its measurement and evaluation functions and provides an
analogue signal proportional to the system pressure.
7.1 Cleaning of the filter cover
If viscous and residues producing
media clog the filter cover of the sen-
sor (and thus reduce the measuring
accuracy slightly), you can clean it.
► Unscrew the filter cover (B) (use a
pair of pliers with plastic-covered
jaws for this).
►Clean the cover thoroughly.
The vent (A) should only be cleaned by skilled personnel and with utmost care.
Possible medium residues must not be compressed and pressed into the vent.
This could clog the filter system and reduce the measuring accuracy of the
sensor.

9
UK
►Screw the filter cover again tightly.
The sensor is sufficiently protected against harsh ambient conditions (protection
IP 67). The protection rating can be increased by a special accessory (order no.
E30043).
8 Parameter setting
Parameters can be set before installation and set-up of the unit or during opera-
tion.
If you change parameters during operation, the operating principle of the
plant will be influenced.
►Ensure that there will be no malfunctions in your plant.
• Parameter setting with PP2001 →operating instructions enclosed to PP2001.
8.1 Adjustable parameters
ASP Analogue start point
Measured value at which 4 mA is provided.
AEP Analogue end point
Measured value at which 20 mA is provided.
Minimum distance between ASP and AEP = 25% of the span.
HI
LO
Min-Max memory for system pressure
• HI: displays the highest measured pressure.
• LO: displays the lowest measured pressure.
COF Calibration offset
The internal measured value (operating value of the sensor) is offset against the
real measured value.
• Setting range: -5 ... +5% of the value of the span (with scaling as factory setting
(ASP = 0 bar and AEP = final value of measuring range) in steps of 0.1% of the
value of the span.
CAr Calibration reset
Resets the calibration set by COF.
dAA Damping for the analogue output
Pressure peaks of short duration or high frequency can be filtered out.
dAA-value = response time between pressure change and change of the switch-
ing status in milliseconds (ms).
• Setting range: 0 (= dAA is not active) / 0.1 s / 0.5 s / 2 s.
Uni Display unit
The measured values and values for ASP / AEP can be indicated in the following
units:
bar, mbar, PSI, MPa, kPa, inH2O (only PL2058), mmWS (only PL2058).

10
diS Setting of the display
d1 / d2 / d3 = update of the measured value every 50ms / 200ms / 600ms. The
update interval only refers to the display.
ph = display of the measured peak value remains for a short time (peak hold).
8.2 Setting ranges
ASP AEP ΔP
min max min max
PL2053
bar -1,0 18,8 5,3 25,0 0,1
PSI -15 272 76 363 1
MPa -0,10 1,88 0,53 2,50 0,01
PL2054
bar -0,50 7,49 2,00 9,99 0,01
PSI -7 109 29 145 1
kPa -50 749 200 999 1
PL2056
bar -0,13 1,88 0,50 2,50 0,01
PSI -1,8 27,2 7,3 36,3 0,1
kPa -13 188 50 250 1
PL2057
mbar -50 749 200 999 1
PSI -0,7 10,9 2,9 14,5 0,1
kPa -5,0 74,9 20,0 99,9 0,1
PL2058
mbar -12,5 100,0 50,0 250,0 0,5
kPa -1,25 10,00 5,00 25,00 0,05
inH2O
-5,0 40,2 20,2 100,4 0,2
mmWS -125 1020 515 2550 5
ΔP = increments

11
UK
More information at www.ifm.com
This manual suits for next models
5
Table of contents
Other IFM Accessories manuals

IFM
IFM IFS Series User manual

IFM
IFM UGT20 Series User manual

IFM
IFM Efector 200 Series User manual

IFM
IFM O5H5 Series User manual

IFM
IFM PN422 Series User manual

IFM
IFM PI17 Series User manual

IFM
IFM OGP7 Series User manual

IFM
IFM KB User manual

IFM
IFM Efector 500 PI2652 User manual

IFM
IFM Efector500 PY7102 User manual
IFM
IFM LX0020 User manual

IFM
IFM PN00 A Series User manual

IFM
IFM PK752 Series User manual

IFM
IFM Efector 200 O4P5 Series User manual

IFM
IFM OMH551 User manual

IFM
IFM Efector 180 IX5030 User manual

IFM
IFM PN72 Series User manual

IFM
IFM OY Series User manual

IFM
IFM UGR500 User manual

IFM
IFM OGD25 Series User manual