32 33
SELSIUZ 5-IN-1 HANDLEIDING AANVULLING VERSIE: SA.23-1.1
Ⱦ
3. SAFETY INFORMATION
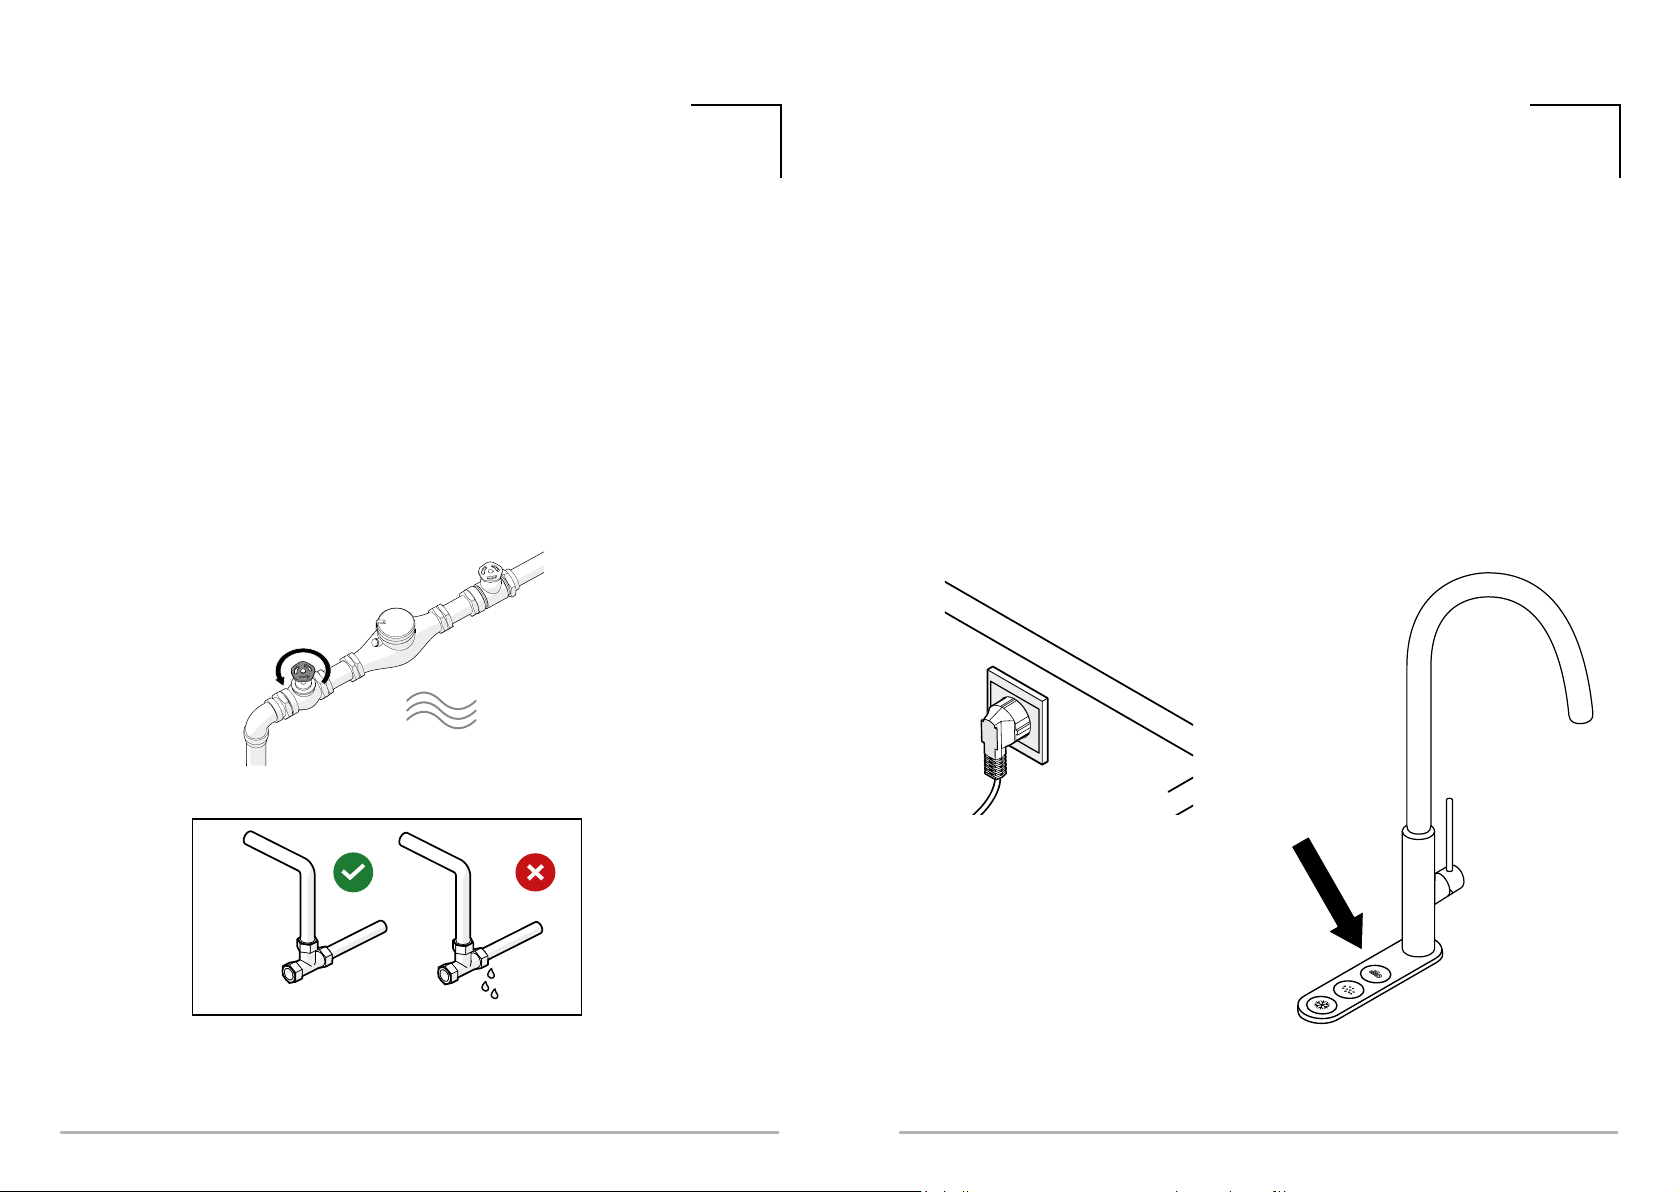
3.3 Installation
• The suitable ambient temperature for the
Cooler is between 10°C and 32°C .
• The applicable line pressure for the Cooler is
between 1.5 Bar 0.15Mpa and 4.5 Bar 0.45Mpa.
• During the installation, always keep the CO
cylinder upright to avoid accidents. Leaking CO
can cause burns.
• Always install and change the COcylinder in a
well-ventilated area.
• Always use a Selsiuz COcylinder, size and
connection.
• The Cooler is only suitable for use when
connected to clean tap/drinking water.
• Always place the Cooler upright on a stable
surface. After transportation or if the Cooler has
been stored on its side or upside down, be sure
to place it in an upright position for 6 hours
before installing it.
• Always allow 5 cm clearance on all sides for
proper ventilation, to prevent overheating.
• Always unplug the system before carrying out
any maintenance, such as replacing the CO
cylinder.
• Always use the parts included, to ensure that
the product will work correctly.
• Always attach the front panel to the cooler
before using it.
therefore always be careful not to damage the
pipes and the cooler itself. The label on the
contains.
3.4 Maintenance and cleaning
• The COpressure regulator should be replaced
at least once every 36 months.
once every 12 months or if it has not been used
for 15 days. If the system has not been used for
of water of each type and discard this water.
• Regularly check the COcylinder to see if it
needs to be replaced.
• Always keep the COcylinder in an upright
position when changing it and never use
these and and cause burns.
• Repairs should be carried out by Selsiuz
not responsible for any damage caused by non-
4. DAILY USE
4.1 Use of the tap
The Selsiuz tap is operated by the control panel
that is mounted next to the tap. There are 2 or 3
buttons on this control panel; bubbles,
Boiling water:
Boiling water can be drawn by pressing the
thermometer button twice in quick succession.
Keep it pushed in to continue drawing. After 10
means the boiling water will continue to run
when the button is released. To stop the tap,
press the red button again.
Sparkling water:
Press and hold the bubbles button to keep
drawing sparkling water. When the button is
released the tap stops. Because there is
stillgas in the pipe, the tap may drip for a
while; this is normal and will stop automatically.
Chilled water:
drawing chilled water. When the button is
released the tap stops.
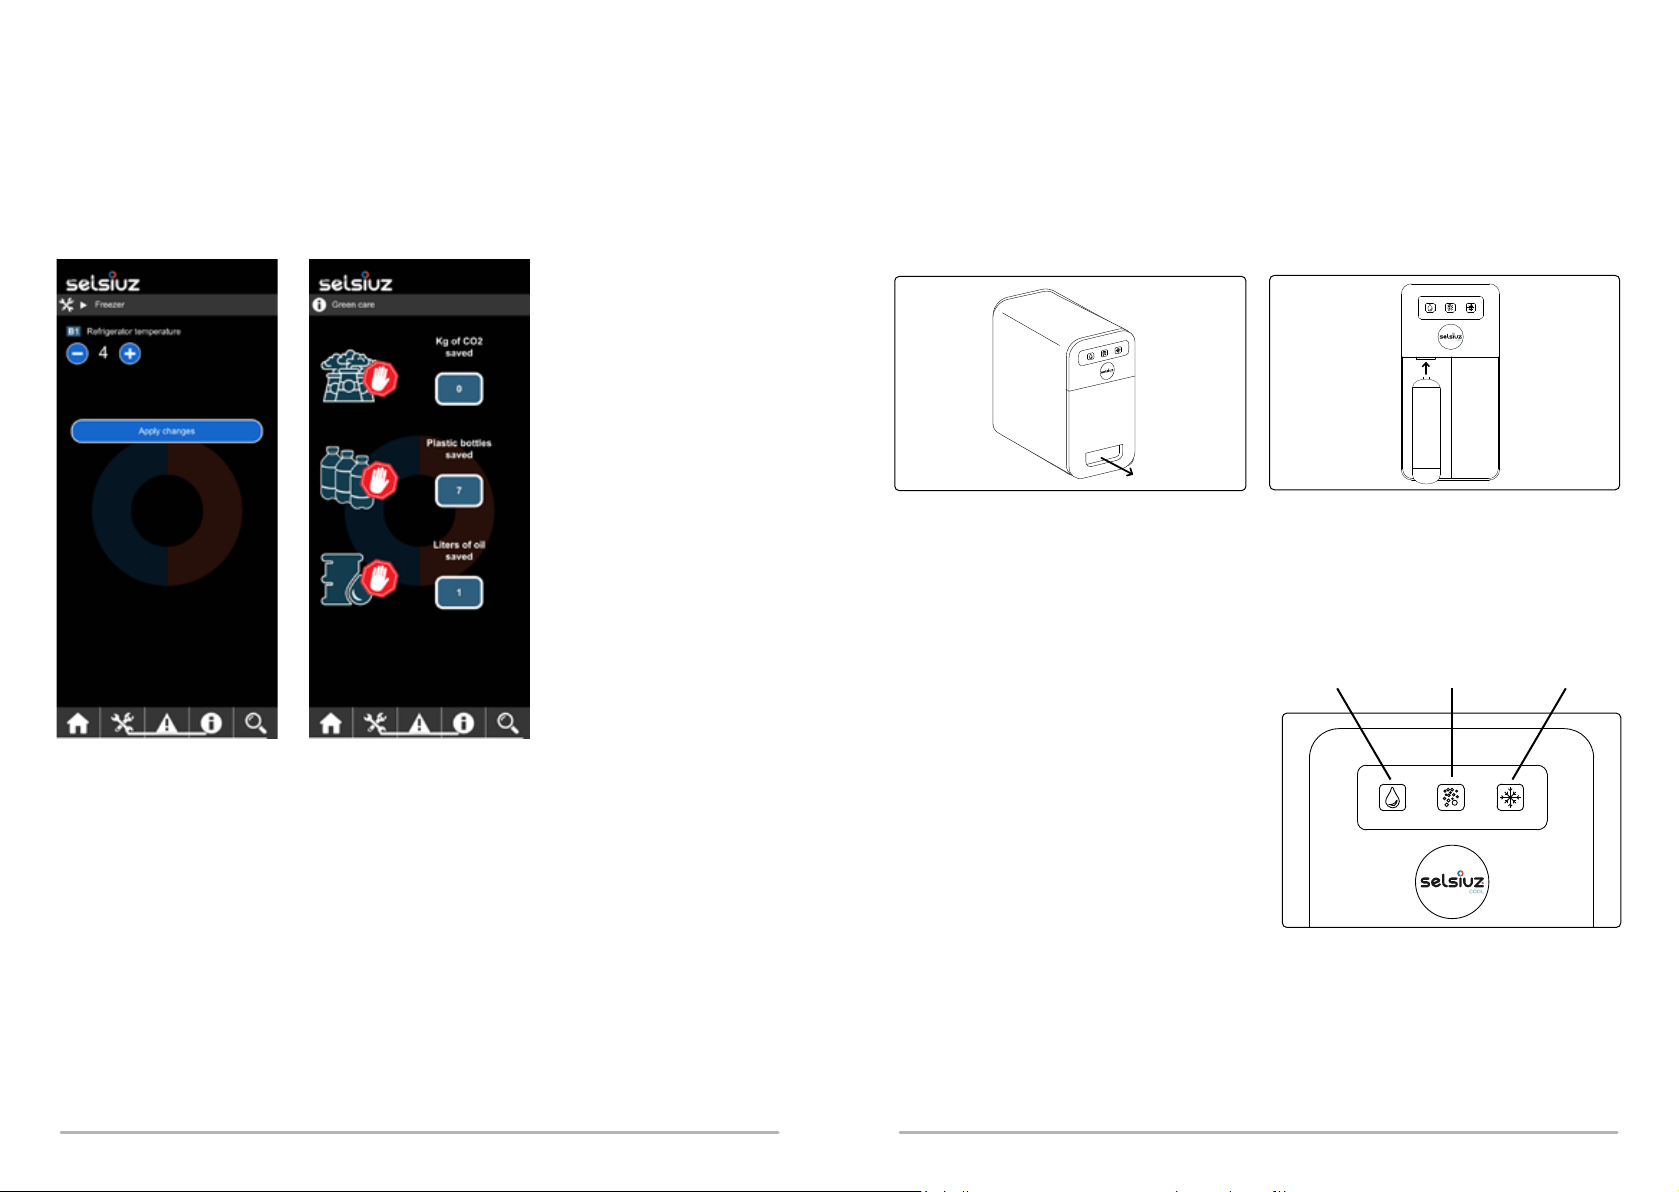
4.2 Rinsing/Cleaning
agent 250ml.
The system should be cleaned once a year.
To clean it, a cleaning set can be ordered at
www.selsiuz.com. This set contains a cleaning
agent, case and funnel.
Fill the case with the cleaning solution, using the
the pressure regulator. Take out the CO2
cylinder by unscrewing it.
If you look into the cooler at the front side, you
it.
button on the front) then 300ml chilled water
(right button on the front of the cooler) and
1000ml sparkling water (centre button on the
front).
Do not use the cooler for 20-30 minutes.
Next, draw 3 litres of each type of water in the
same order: cold, chilled, sparkling (left, right
and centre button on the front of the cooler).
You can now remove the case.
Rinse the system with 3 litres of each type of
water, in the same order as before: cold, chilled,
sparkling (left, right and centre button on the
front of the cooler).
Ⱦ