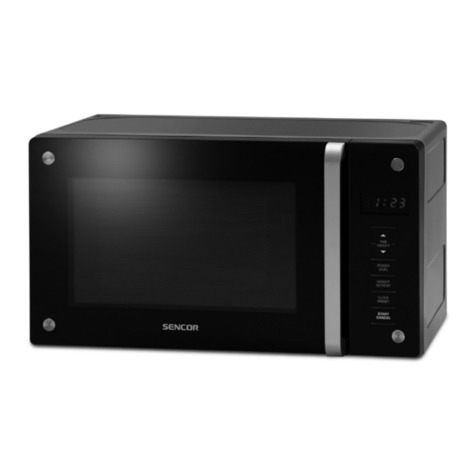
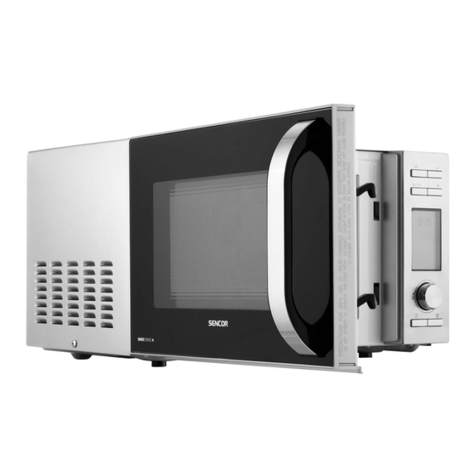
Sencor SMW 7023BK Repair manual

05/2021
- 1 -
© 2021
EN Microwave oven
Translation of the original manual
SMW 7023BK

05/2021
- 2 -
© 2021
EN Microwave oven
Important safety instructions
READ CAREFULLY AND STORE FOR FUTURE USE.
General warnings
■This appliance may be used by children 8 years of age and older
and by persons with physical or mental impairments or by
inexperienced persons, if they are properly supervised or have
been informed about how to use the product in asafe manner
and understand the potential dangers.
■Children must not play with the appliance.
■Cleaning and maintenance performed by the user must not be
performed by unsupervised children.
■In the event that the power cord is damaged, have it repaired
at aprofessional service centre to prevent causing adangerous
situation. It is forbidden to use the appliance if it has adamaged
power cord.
WARNING:
It is dangerous for any untrained person to carry out
any repairs or maintenance whatsoever that leads to
the removal of any cover providing protection against
microwave energy radiation.
WARNING:
If the door or the door gasket seal is damaged then
the oven must not be used until repaired by aqualified
person.
WARNING:
Liquids and other foods must not be heated in closed
containers because they could explode.

05/2021
- 3 -
© 2021
■This appliance is designed for domestic use and similar locations
such as:
–kitchens in stores; offices and other work environments;
– in agriculture;
–guests of hotels, motels and other accommodation
environments;
- in bed and breakfast establishments.
■To ensure sufficient air circulation there must be free space left
around the microwave oven. Allow free space of at least 20 cm
above the top surface of the oven and 10 cm from behind and
on the sides. Do not block any vents of the oven. Do not remove
the feet of the oven.
■Use only containers that are suitable for use in microwave
ovens.
■Do not use metal containers for cooking or heating foods or
liquids unless the manufacturer specifies the size and shape of
metal containers suitable for microwave cooking.
■When heating a meal on plastic or paper dishes, frequently
check the oven to prevent them from catching on fire.
■Themicrowaveovenisdesignedforheatingfoodandbeverages.
Dehydrating food or drying clothes and heating up heating
cushions, home footwear, washing sponges, damp textiles and
similar items may lead to an injury hazard, ignition or fire.
■If smoke is being created, turn off the appliance or pull the plug
out of the power socket and leave the door closed to prevent
any potential fire from spreading.
■Microwave heating of drinks may cause adelayed boil, which
must be considered when holding the container. Be careful
when handling the container.
■The contents of baby bottles and baby food must be stirred
through or shaken up and their temperature must be checked

05/2021
- 4 -
© 2021
prior to consumption to prevent burns.
■Eggs in their shells and whole hard boiled eggs must not be
heated in the microwave oven because they could explode
even after the microwave heating process has finished.
■Regularly clean the door and the window of the oven from both
sides, the door gasket seal and neighbouring parts and any
food remains. For cleaning, we recommend the use of aweak
kitchen detergent. Ensure that remains of the cleaning agent
do not remain on the inner surface of the door.
■Clean the oven regularly according to the above mentioned
instructions and remove any food that remains inside it.
■Failure to keep the oven clean could lead to surface damage,
which could adversely affect the lifetime of the appliance and
could lead to adangerous situation.
■The appliance must not be cleaned using asteam cleaner.
■The microwave oven is intended to be placed on acountertop
at amaximum height of 900 mm.
■This microwave oven is intended for use as a free-standing
appliance. It is not designed to be built-in or installed into
acabinet.
■The microwave oven must not be placed into acabinet.
■ Before connecting the appliance to apower socket, check that the voltage on its rating label matches the electrical voltage in the power socket.
■ Connect the appliance only to aproperly grounded socket.
■ Do not use the microwave oven outdoors or subject it to the effects of the outdoor environment.
■ Do not place the microwave oven on window sills, kitchen sink drainboards or unstable surfaces. Always place it on astable, even and dry surface.
■ This microwave oven is intended for heating and cooking food. Use it only for the purposes described in this user'smanual. Do not use corrosive chemicals
or fumes in it.
■ Never use the microwave oven in the direct vicinity of abath, shower or swimming pool.
■ Do not use the microwave for industrial or laboratory purposes.
■ Kitchen dishes may become hot as aresult of the heat transferred from the heated food. Sometimes it may be necessary to use protective gloves.
■ Do not use the kitchen cookware, tableware and utensils listed below in the microwave oven:
- Metal pans and crockery with metal handles or with metal decorations;
- Clamps on plastic bags;
- dishes with melamine surface treatment;
- Standard thermometers, which are used for measuring the temperature of meat, etc.
■ Do not attempt to use the microwave oven with the door open. You could expose yourself to the harmful effect of microwaves. Do not run the microwave
oven when it is empty.
■ Be especially careful when handling heated beverages and foodstuffs as hot steam may be released from them.
■ Do not fry food in the microwave oven. Hot oil may damage parts of the oven, dishes or may also cause skin burns.
■ Before cooking, prick food that has athick peel, such as potatoes, pumpkins, apples.
■ Prior to moving the oven, always ensure that the turning tray is removed or properly secured in the internal area of the oven. This may damage it.
■ Do not use the oven without the turning tray being correctly installed.
■ Some components of the microwave oven may heat up during operation. Do not touch hot surfaces. There is adanger of aburns.
■ When not using the oven, do not leave paper materials, kitchen dishes or food inside.
■ Keep the inside of the oven clean. If the walls of the oven are splattered with food juices then wipe them away using adamp cloth. If the oven is heavily soiled,
you can use aweak solution of aneutral kitchen detergent.

05/2021
- 5 -
© 2021
■ Do not use the microwave oven if the power cord or power plug is damaged, if it is not working correctly, if it is damaged or if it has been dropped on the
floor. Any repair of the microwave oven or replacement of adamaged power cord may only be carried out by an authorised service centre, as this will prevent
adangerous situation from occurring.

05/2021
- 6 -
© 2021
SMW 7023BK
12
34
A
MICROWAVE
CLOCK
WEIGHT DEFROST
TIME DEFROST
KITCHEN TIMER
STOP/CLEAR
START
+30 SEC/CONFIRM
1
2
3
4
5
6
7
8
9
B

- 7 - 05/2021
© 2021
EN Microwave oven
User'smanual
■ Prior to using this appliance, please read the user'smanual thoroughly, even in cases,
when one has already familiarised themselves with previous use of similar types of
appliances. Only use the appliance in the manner described in this user’smanual.
Keep this user'smanual in asafe place where it can be easily retrieved for future use.
■ We recommend saving the original cardboard box, packaging material, purchase
receipt and responsibility statement of the vendor or warranty card for at least the
duration of the legal liability for unsatisfactory performance or quality. In the event
of transportation, we recommend that you pack the appliance in the original box
from the manufacturer.
DESCRIPTION OF THE APPLIANCE
A1 Safety door closing mechanism
A2 Door window
A3 Internal area of the oven
A4 Control panel
DESCRIPTION OF THE DISPLAY
B1 Button MICROWAVE – serves to set
the microwave power level.
B2 Button CLOCK – serves to set the
clock
B3 Button WEIGHT DEFROST– serves
to select the defrosting program
based on weight
B4 Button +
B5 Button –
B6 Button TIME DEFROST– serves to
select the defrosting program based
on time
B7 Button KITCHEN TIMER – serves to
set the kitchen timer
B8 Button STOP/CLEAR – serves
to pause the operation of the
microwave oven / to delete setting
or to cancel operation
B9 Button START/+30 SEC/CONFIRM –
serves to start the microwave oven
/ to start quick heating / to confirm
settings
BEFORE FIRST USE
■ Before first use, take the appliance and its accessories out of the packaging material
and remove all promotional labels and stickers. Check that neither the appliance nor
any of its parts is damaged.
INSTALLATION
1. Make sure that you have taken all packaging materials, such as plastic bags,
polystyrene, etc. out from inside the oven.
Note:
Do not remove the cover of the magnetron, which is located on the right
side of the inside area of the oven.
Warning:
Check whether the oven is damaged in any way, e.g. whether the
oven door is incorrectly attached or dinted, whether the door
gasket seal is damaged or whether the hinges or locks are loose.
If you discover any damage, do not use the oven and contact
aqualified service technician.
2. The microwave oven must be placed on an even, stable surface, that can bear its
weight even with the food inside.
3. Do not locate the oven near sources of heat, in locations with increased humidity or
near flammable materials.
4. This appliance is designed to be used in open space, it is not designed to be built-in.
Therefore, ensure sufficient free space around the oven. Leave at least 30 cm of free
space above the top of the oven and at least 20 cm around its sides. The rear side of
the oven may be positioned against awall. Do not cover or block the vents. Do not
remove the feet of the microwave oven.
5. Make sure that the power cord is not underneath the oven or in contact with hot or
sharp surfaces.
6. The power socket must be easily accessible to enable the power plug to be quickly
disconnected if necessary.
7. Do not use the microwave oven outdoors
Note:
When the microwave oven is turned on for the first time, you may register
aslight odour and smoke. This is anormal event that will disappear with
use. When using it for the first time, we recommend that you place abowl
of water in the oven, set the oven to the maximum power level and run
the oven for several minutes. The odour is easily eliminated in this way.
GROUNDING INSTRUCTIONS
■ This microwave oven must be grounded. The microwave oven is equipped with
a power cord, which has a grounding wire with a grounded power plug. The
power plug must be connected to apower socket, which is properly installed and
grounded. Grounding reduces the risk of electrical shock. In the case of a short
circuit the electric current is conducted though the grounding wire.We recommend
that the oven be connected to an independent electrical circuit.
Warning:
An incorrectly grounded power socket may present adanger of
electrical shock.
Note:
If you have any questions regarding grounding or electrical instructions,
consult all such matters with aqualified electrician or repair person.
Neither the manufacturer nor the vendor take any responsibility for
whatever damage to the oven or injury resulting from an incorrect
electrical connection.
RADIO WAVE INTERFERENCE
■ The operation of the oven may cause interference to aradio, television or similar
devices. If you register any interference, perform the following steps to limit or
entirely eliminate the interference:
1. Clean the door and the door gasket seals.
2. Move the radio or television antenna to adifferent location.
3. Point the microwave oven away from the receiver.
4. Move the microwave oven farther away from the receiver.
5. Connect the power plug of the microwave oven into adifferent power socket so that
the oven and the receiver have their own separate electrical circuits.
USING THE MICROWAVE OVEN
■ There will be a beep when the appliance's power plug is connected to a power
socket. Set the clock. Proceed according to the instructions in section "Setting
the clock" below in this user'smanual. Nevertheless, it is also possible to control
the microwave oven without the clock being set, however, in order to use certain
programs in real time, it is necessary to set the actual time.
■ In the event that you need to check the status of the cooking / heating process
while the microwave oven is in operation, open the door of the microwave oven.
The operation of the microwave oven will be paused. To continue cooking / heating,
short press button START/+30 SEC/CONFIRM B9, to cancel the cooking / heating
process, press button STOP/CLEAR B8 again.
■ In the event that you perform an incorrect step while setting the microwave oven,
press button STOP/CLEAR B8 to cancel the setting.
■ In the event that you do not press the button START/+30 SEC/CONFIRM B9 within
1 minute of making asetting, then the setting will not be saved and the clock will
appear on the display.
■ Abeep is made each time abutton is pressed.
Setting the clock
■ The clock may be set after inserting the power plug into apower socket, or also
during use.
1. While the microwave oven is in the stand-by mode, short press button CLOCK B2.
The numerical hour value will start flashing on the display.
2. Use the +/- buttons to set the hours.
3. Short press button CLOCK B2. The numerical minutes value will start flashing on the
display.
4. Use the +/- buttons to set the minutes.
5. Short press button CLOCK B2 to confirm, and the set time will be shown on the
display.
Kitchen timer
1. While the microwave oven is in the stand-by mode, short press button KITCHEN
TIMER B7. The display will show "00:00".
2. Use buttons +/- buttons to set the duration of the kitchen timer. You can set up to 95
minutes.
3. Short press button START/+30 SEC/CONFIRM B9 and the countdown will start.
4. Abeep is made when the set time elapses.
Quick heating / cooking
■ The quick heating / cooking function is intended for rapidly heating food at the
maximum power level of the microwave oven.
■ While the microwave oven is in the stand-by mode, press button START/+30 SEC/
CONFIRM B9 and the microwave oven will start running at the maximum power
level for atime of 30 seconds. Each time the button START/+30 SEC/CONFIRM B9
is pressed the cooking / heating time is extended by 30 seconds. The maximum
cooking / heating time is 95 minutes.
Microwave cooking
■ The microwave cooking function is suitable for cooking and heating food.
1. While the oven is in the stand-by mode, press button MICROWAVE B1 and "P100"
will appear on the display.
2. Repeatedly press button MICROWAVE B1 or buttons +/- to select the microwave
power level in the following order: P100 – P80 – P50 – P30 – P10. The set power level
will appear on the display.
3. Press button START/+30 SEC/CONFIRM B9 to confirm the set power level.
4. Use buttons +/- to set the desired duration of cooking / heating in the range 0:05 –
95:00.
Press button START/+30 SEC/CONFIRM B9 to confirm the set duration of cooking /
heating and the microwave oven will start.
Note:
Buttons +/- are used to set the heating / cooking time in the following
steps:

- 8 - 05/2021
© 2021
00:05 – 01:00: settings in 5-second increments
01:00 – 05:00: settings in 10-second increments
05:00 – 10:00: settings in 30-second increments
10:00 – 30:00: settings in 1-minute increments
30:00 – 95:00: settings in 5-minute increments
Defrosting based on weight
■ This function is suitable for defrosting food.
1. While the microwave oven is in the stand-by mode, short press button WEIGHT
DEFROST B3 and "dEF1" will appear on the display.
2. Use buttons +/- to set the desired weight of the food in the range 05 – 2,000 g.
3. Press button START/+30 SEC/CONFIRM B9 to confirm the set weight and the
microwave oven will start.
Note:
During the defrosting process, the microwave oven will automatically
pause operation to enable you to check the food and to rotate it. Then
press button START/+30 SEC/CONFIRM B9, to resume operation of the
microwave oven.
Defrosting based on time
■ This function is suitable for defrosting food.
1. While the microwave oven is in the stand-by mode, short press button TIME
DEFROST B6 and "dEF2" will appear on the display.
2. Use buttons +/- to set the desired defrosting time. The maximum defrosting time is
95:00.
3. Press button START/+30 SEC/CONFIRM B9 to confirm the set defrosting time and
the microwave oven will start.
Note:
During the defrosting process, the microwave oven will automatically
pause operation to enable you to check the food and to rotate it. Then
press button START/+30 SEC/CONFIRM B9, to resume operation of the
microwave oven.
Automatic cooking
■ In the automatic cooking programs, it is not necessary to set the cooking time or
power level. Simply select the type of food that is being prepared, its weight or
number of cups.
1. While the microwave oven is in the stand-by mode, press button + to enter the
automatic cooking program selection.
2. Use buttons +/- to select the desired automatic cooking program. The selected
automatic cooking program will appear on the display.
3. Press button START/+30 SEC/CONFIRM B9 to confirm the selected program.
4. Use buttons + / - to set the weight.
5. Press button START/+30 SEC/CONFIRM B9 to confirm the set weight and the
microwave oven will start.
Automatic cooking program table
Program Weight Shown on the display
A-1
Pizza
200 g 200
400 g 400
A-2
Meat
250 g 250
350 g 350
450 g 450
A-3
Vegetables
200 g 200
300 g 300
400 g 400
A-4
Pasta
50 g (with 450 g of cold water) 50
100 g (with 800 g of cold water) 100
A-5
Potatoes
200 g 200
400 g 400
600 g 600
A-6
Fish
250 g 250
350 g 350
450 g 450
A-7
Drink/
beverage
1 cup (120 ml) 1
2 cups (240 ml) 2
3 cups (360 ml) 3
A-8
Popcorn
50 g 50
85 g 85
100 g 100
Note:
The temperature, weight and shape of food can significantly affect the
cooking/heating time. If the result is unsatisfactory, set ahigher or lower
food weight.
Multi-sequence food cooking
■ To achieve the best results, in certain cases it might be necessary to use various
microwave power output levels. The oven enables up to 2 power levels to be set.
Example: you want to defrost food for 5 minutes and then to cook it at an 80%
microwave power level for 7 minutes. Proceed as follows:
1. While the oven is in the stand-by mode, short press button TIME DEFROST B6 and
"dEF2" will appear on the display.
2. Use buttons +/- to set the defrosting time: 5 minutes.
3. Press button MICROWAVE B1 twice and set the power level "P80".
4. Press button START/+30 SEC/CONFIRM to confirm the settings.
5. Use buttons +/- to set the heating / cooking time: 7 minutes.
6. Press button START/+30 SEC/CONFIRM to confirm the settings and the oven will
start. When one sequence is finished, abeep is made and the oven automatically
transitions to the next sequence.
Note:
It is not possible to select quick heating / cooking or automatic cooking
in amulti-sequence setting.
Child safety lock
■ The child safety lock function enables buttons to be locked to prevent oven settings
from being changed or it being accidentally started when empty.
■Activation of the child safety lock: while the oven is in the stand-by mode,
hold down button STOP/CLEAR B8 for approx. 3 seconds. All the buttons will be
deactivated. " " will appear on the display.
■Deactivating the child safety lock: to deactivate the child safety lock, hold don
button STOP/CLEAR B8 for approx. 3 seconds.
USING THE CORRECT KITCHEN COOKWARE
This general list will help you select the right dishes.
Kitchen dishes Safe use Notes
Special plates for creating
acrust ●Do not use them longer than 8
minutes.
Porcelain and pottery dishes ●
Porcelain, pottery dishes including
glazed dishes and bone porcelain
are suitable if they do not have metal
decorations.
Single use polyester plates ●Plates are used for the packaging of
some frozen foods.
Wrapped ready food
• Polystyrene cups ●
May be used to heat foods.
Overheating may cause the
polystyrene to melt.
• Paper bags or newspapers ×May catch on fire in the oven.
• Recycled paper or metal
edging ×May cause sparks in the oven.
Glass
• Glass cookware ●May be used if it doesn't have metal
decorations.
• Fine glass ●
May be used to heat foods and
beverages. Fine glass may crack,
if it is suddenly heated to ahigher
temperature.
• Glass jars ●Remove the lid. Use only for heating.
Metal dishes
• Plates ×May cause sparks in the oven or food
to catch on fire.
• Metal bag clips ×
Paper dishes
• Plates, cups, napkins and
kitchen paper towels
●
Are appropriate for ashort time for
heating and cooking, likewise for the
absorption of excess moisture.
• Recycled paper ×May cause sparks in the oven.
Plastic dishes
• Dishes ●
Use only heat resistant plastics,
other plastics may due to high
temperatures lose their shape or
colour. Do not use products from
melamine.
• Wrapping foils ●
Use to maintain moisture, should not
come into contact with food. When
removing them be careful of the
escaping steam.
• Bags for frozen foods ▲
Only if intended for cooking or
resistant against high temperatures.
Must not be airtight. If necessary
penetrate using afork.
Waxed paper ●
May be used to maintain moisture in
foods and for preventing drops of fat
and juices from spraying.
recommended use; limited use; x not recommended;
THE BASICS OF COOKING IN AMICROWAVE OVEN
1. Carefully arrange the food. Place the larger food pieces on the perimeter of the dish.
2. Place the food on an appropriate dish before putting it into the oven.
3. Set the correct cooking / heating time. We recommend that you set ashorter time
and extend it if necessary. When cooking foods at ahigh temperature, smoke may be
created or afire may start.
4. Cover the food before cooking. This will prevent juices from splashing and food will
be evenly heated.
5. To speed up the heating of certain types of food, e.g. chicken meat or hamburgers,
flip them once during the heating process. Larger pieces of food, e.g. roasts, must be
flipped several times.

- 9 - 05/2021
© 2021
6. Certain foods, e.g. meat balls or hamburgers should be arranged both top down as
well as from the centre to the edge.
CLEANING AND MAINTENANCE
■ Disconnect the power plug from the power socket and allow the appliance to cool
down before cleaning it.
■ For cleaning, do not use cleaning products with an abrasive effect, solvents, etc. that
could damage the appliance. No part of this appliance is intended for washing in
adishwasher.
Warning:
To prevent the risk of injury by electrical shock, do not submerge
the appliance, power cord or power plug in water or any another
liquid.
■ To prevent damaging the operating components of the oven, make sure that during
cleaning, water does not enter the vents located on the sides of the microwave oven.
■ Keep the microwave oven clean. Clean it regularly according to the instructions
below and remove any food that remains inside it. Failure to do this could damage
the surface of the appliance. This could adversely affect the lifetime of the microwave
oven and result in adangerous situation arising.
Warning:
Do not use steam cleaners to clean the microwave oven.
■ In the event that the inside area of the microwave oven is soiled, wipe the inner walls
using asoft sponge lightly dampened in warm water. Wipe it with adry wiping cloth.
In the event that the inner area is heavily soiled, dip the sponge in warm water with
asmall amount of dishwashing detergent. Wipe dry using aclean wiping cloth. Do
not use any sprays or coarse cleaning agents. These could scratch the surface or leave
stains and marks.
■ Wipe the external surface, including the door and gasket of the, microwave oven
using sponge lightly dipped in warm water. Wipe dry using aclean wiping cloth.
■ When cleaning the control panel A4, leave the door slightly ajar to prevent
accidentally turning on the microwave oven while it is empty. Wipe the control panel
A4 with adry wiping cloth. Prevent any water from entering into gaps between the
buttons.
■ If the door fogs up from the inside or the outside, wipe it using aclean, dry wiping
cloth. This is a normal event, especially when preparing food with a high water
content.
■ To remove unpleasant odours from the inner area of the microwave oven, in adeep
container mix one cup of water with the juice and peel of one lemon. Set the cooking
time to 5–10 minutes. Then wipe out the inner area using aclean, dry wiping cloth.
■ In the event that you need to replace the lighting inside the oven, please contact an
authorised service centre.
■ An unpleasant odour may develop when the microwave oven is not used for an
extended period of time. To eliminate it, you can:
1. Pour water into alarge glass container and add afew lemon slices. Start the oven at
the maximum power level for 2–3 minutes.
2. Place acup with red tea into the oven and start it at the maximum power level.
3. Place orange peel into alarger bowl and start the oven at the maximum power level
for 1 minute.
Storage
■ When not using the appliance for an extended period of time, disconnect the power
plug from the power socket, allow the appliance to cool down and clean it according
to the instructions in chapter "Cleaning and maintenance".
■ Before storing it, check that the appliance and all its accessories are thoroughly clean
and dry.
■ Store the appliance in a dry, clean and well-ventilated location not exposed to
extreme temperatures and out of children'sreach.
TROUBLESHOOTING
■ Before you contact an authorised service centre, please check the following
recommendations below.
Problem Meaning
Operation of the microwave
oven causes interruption to TV
reception.
TV and radio reception may suffer interference
during the operation of the microwave oven.
This interference is similar to that of other smaller
appliances such as blenders, vacuum cleaners or
hair dryers. This is normal.
Reduced light brightness in
the oven
At alow microwave oven power level, the light may
dim. This is normal.
Water accumulates and
condenses on the door and
hot air escapes from the vents.
Steam may escape while food is heated or cooked.
Most is released via the vents, however, some
may accumulate on the door and condense. This
is normal.
The oven was accidentally
started empty.
It is very dangerous to start the oven empty. Turn it
off immediately.
Problem Possible cause Solution
It is not possible
to start the oven.
The power plug is not
correctly inserted in
apower socket.
Disconnect the power plug and then
reconnect it into the power socket.
Burnt fuse or triggered
circuit breaker.
Replace the fuse and reset the
triggered circuit breaker.
Only aqualified electrician or another
professionally competent person is
authorised to replace the fuse.
Problem with the power
socket.
Check whether the power socket is
in order by plugging in adifferent
electrical appliance.
The oven does
not generate
heat.
The door is not closed
properly. Close the door correctly.
Warning:
If the problem persists, stop using the oven, disconnect the power
plug from the power socket and contact an authorised service
centre. Under no condition should you repair the microwave oven
yourself. It does not contain any parts that the user can repair
themselves.
TECHNICAL SPECIFICATIONS
Rated voltage range....................................................................................................................230 V~
Rated frequency.............................................................................................................................. 50 Hz
Rated power input.....................................................................................................................1,270 W
Microwave power output ..........................................................................................................800 W
Operating frequency .......................................................................................................... 2,450 MHz
Noise level....................................................................................................................................63 dB(A)
Volume................................................................................................................................................... 23 l
Outer dimensions............................................................................................... 502 × 406 × 302 cm
Weight.............................................................................................................................................13.5 kg
The declared noise emission level of the appliance is 63 dB(A), which represents alevel
Aof acoustic power with respect to areference acoustic power of 1 pW.
We reserve the right to change text and technical specifications.
INSTRUCTIONS AND INFORMATION REGARDING THE
DISPOSAL OF USED PACKAGING MATERIALS
Dispose of used packaging material at asite designated for waste in your municipality.
DISPOSAL OF USED ELECTRICAL AND ELECTRONIC
EQUIPMENT
This symbol on products or original documents means that used
electric or electronic products must not be added to ordinary
municipal waste. For proper disposal, renewal and recycling, hand
over these appliances to determined collection points. Alternatively,
in some European Union states or other European countries you may
return your appliances to the local retailer when buying an equivalent
new appliance.
Correct disposal of this product helps save valuable natural resources and prevents
potential negative effects on the environment and human health, which could result
from improper waste disposal. Ask your local authorities or collection facility for more
details.
In accordance with national regulations penalties may be imposed for the incorrect
disposal of this type of waste.
For business entities in European Union states
If you want to dispose of electric or electronic equipment, ask your retailer or supplier
for the necessary information.
Disposal in other countries outside the European Union.
This symbol is valid in the European Union. If you wish to dispose of this product,
request the necessary information about the correct disposal method from the local
council or from your retailer.
This product meets all the basic requirements of EU directives related to
it.
Table of contents
Other Sencor Microwave Oven manuals

Sencor
Sencor SMW 3917 User manual

Sencor
Sencor SMW 5120 User manual

Sencor
Sencor SMW 7625 User manual

Sencor
Sencor SMW 6320 User manual

Sencor
Sencor SMW 7325 User manual

Sencor
Sencor SMW 6520DSG User manual

Sencor
Sencor SMW 6021 User manual

Sencor
Sencor SMW 7026 User manual

Sencor
Sencor SMW 5517WH Repair manual

Sencor
Sencor SMW 4217WH User manual

Sencor
Sencor SMW 2320 User manual

Sencor
Sencor SMW 3720 User manual

Sencor
Sencor SMW 6025 User manual

Sencor
Sencor SMW 3620D User manual

Sencor
Sencor SMW 2717 User manual

Sencor
Sencor SMW 1717WH User manual

Sencor
Sencor SMW 6022 User manual

Sencor
Sencor SMW 2917 User manual

Sencor
Sencor SMW 2120SS Repair manual

Sencor
Sencor SMW 3717 User manual