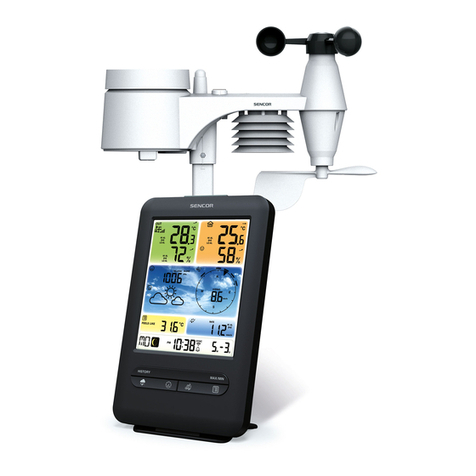
Sencor SWS 135 User manual

SWS 135
USER’S MANUAL WEATHER STATION WITH CABLE
FREE IN-OUT THERMOMETER AND
RADIO CONTROLLED CLOCK

EN - 1
1. INTRODUCTION
The basic package comes with a main unit, which is
the weather forecast station and, a remote unit, the
thermo sensor.
The main unit is capable of keeping track of the
maximum and minimum temperature of different
sites. And no wire installation is required and
operates at radio frequency 433 MHz.
H
G
F

EN - 2
A DISPLAY
Facilitates easy reading of remote and indoors
temperatures and calendar clock
B °C/°F BUTTON
Toggle for setting temperature display unit °C or
°F
C MEMORY [MEM] BUTTON
Recalls the maximum or minimum temperature
of main and remote unit
D MODE BUTTON
Toggles the display modes and confirms entry
while setting the values for display
E ALARM BUTTON
Displays the alarm time or sets the alarm status
F UP BUTTON
Advances the value of a setting
G DOWN BUTTON
Decreases the value of a setting
H BATTERY COMPARTMENTS
Accommodates two UM-3 or "AA" size 1.5V
batteries

EN - 3
MAIN FEATURES: REMOTE UNIT
AB
A BATTERY COMPARTMENT
Accommodates two AAA-size batteries
B WALL-MOUNT RECESSED HOLE
Supports the remote until in wall-mounting
2. GETTING STARTED
2a) BEFORE YOU BEGIN
For best operation,
1. Insert batteries for remote units before doing so
for the main unit.
2. Position the remote unit and main unit within
effective transmission range, which, in usual
circumstances, is 20 to 30 meters.

EN - 4
Note that the effective range is vastly affected
by the building materials and where the main
and remote units are positioned.
Try various set-ups for best result.
Though the remote units are weather proof, they
should be placed away from direct sunlight, rain
or snow.
2b) BATTERY INSTALLATION: REMOTE UNIT
1. Remove the screws on the battery
compartment.
2. Install 2 batteries (UM-4 or "AAA" size 1.5V)
strictly according to the polarities shown.
3. Replace the battery compartment door and
secure its screws.
2c) BATTERY INSTALLATION: MAIN UNIT
1. Open the battery compartment door.
2. Install 2 batteries (UM-3 or "AA" size 1.5V)
strictly according to the polarities shown.
3. Replace the battery compartment door.
2d) LOW BATTERY WARNING: MAIN UNIT
When it is time to replace batteries, the respective
low-battery indicator [ ] next to the time with
seconds will be shown on the main unit‘s display.

EN - 5
2e) GETTING STARTED
Once batteries are in place for the remote unit,
they will start transmitting temperature readings at
around 45 seconds intervals. The main unit will also
start searching for signals for about two minutes
once batteries are installed. Upon successful
reception, the outdoors temperatures will be
displayed .The main unit will automatically update its
readings at about 45-second intervals.
If no signals are received, blanks " " will be
displayed.
Hold [▼] for 2 seconds to enforce another search
for about 2 minutes. This is useful in synchronizing
the transmission and reception of the remote and
main units.
Repeat this step whenever you find discrepancies
between the reading shown on the main unit and
that on the remote unit.
3. WEATHER FORECAST
3a) WEATHER FORECAST
The unit is capable of detecting atmospheric
pressure changes. Based on collected data, it can
predict the weather for the forthcoming 12 to 24
hours.
Indicator
displays
on the
unit
Forecast Sunny Slightly
Cloudy Cloudy Rainy Snowy

EN - 6
NOTE:
1. It is not necessary and not possible to adjust
the altitude of the weather station. After the
initial start-up of the weather station, a first
forecast will be made within the first 24 hours of
operation.
2. In periods of long stable weather conditions, it
becomes difficult to make a reliable forecast.
3. The weather forecast is solely calculated on the
basis of barometric air pressure changes.
4. The probability of a correct weather forecast
is approximately 70% and is valid for an area
of approx. 20-30 km around the location of the
weather station.
5. The forecast "Sunny" means at night "cloudless
weather". Fog is not indicated by the weather
station as this can occur with different weather
conditions.
6. If you travel with the weather station, a reliable
weather forecast will become impossible
due to 24 hour so that the weather station
can calculate a new forecast based on the
conditions at the new location.
3b) ATMOSPHERIC PRESSURE
The atmospheric pressure indicator, in the weather
forecast window, uses arrows to indicate if the
atmospheric pressure is increasing, remaining
stable, or decreasing.
Arrow
indicator
Pressure
Trend Rising Steady Falling

EN - 7
4. THERMOMETER
4a) HOW TO CHECK REMOTE AND INDOOR
TEMPERATURES
The wave display on the outdoors temperature
indicates the reception of the remote unit is in good
order. If no readings are received from the remote
unit for more than two minutes, blanks " " will be
displayed until further readings are successfully
searched. Check the remote unit is sound and
secure. You can wait for a little while or Hold [▼]
for 2 seconds to enforce an immediate search.
If the temperature goes above or below than the
temperature measuring range of the main unit or the
remote unit (stated in specification), the display will
show " "
4b) HOW TO READ THE KINETIC WAVE
DISPLAY
The kinetic wave display shows the signal receiving
status of the main unit. There are three possible
forms:
The unit is in searching mode.
Temperature readings are
securely registered.
No signals.

EN - 8
4c) MAXIMUM AND MINIMUM
TEMPERATURES
The maximum and minimum recorded indoor
temperature, outdoor temperatures will be
automatically stored in memory. To display them,
Press [MEM] once to display the maximum readings
and again the minimum readings. The respective
indicators, [MAX] or [MIN] will be displayed.
To clear the memory, hold down [MEM] for two
seconds. The maximum and minimum readings will
be erased. If you press [MEM] now, the maximum
and minimum readings will have the same values
as the current ones until different readings are
recorded.
4d) DISCONNECTED SIGNALS
If without obvious reasons the display of the outdoor
temperature goes blank, Hold [▼] for 2 seconds to
enforce an immediate search.
If that fails, check:
1. The remote unit is still in place.
2. The batteries of both the remote unit and main
unit. Replace as necessary.
Note: When the temperature falls below freezing
point, the batteries of outdoor units will freeze,
lowering their voltage supply and the effective
range.
3. The transmission is within range and path is
clear of obstacles and interference. Shorten the
distance when necessary.

EN - 9
4e) TRANSMISSION COLLISION
Signals from other household devices, such
as doorbells, home security systems and entry
controls, may interfere with those of this product
and cause temporarily reception failure. This is
normal and does not affect the general performance
of the product. The transmission and reception
of temperature readings will resume once the
interference recedes.
5. RADIO CONTROLLED CLOCK DCF77
5a) HOW TO SET THE RADIO CONTROLLED
CLOCK
✻After the batteries are installed. The clock will
automatically search the radio signal. It takes
about 3-5 minutes to finish this process.
✻If the radio signal is received, the date & time
will be set automatically with radio control signal
icon [ ] turns on.
✻If the clock fails to receive the time signal, it will
be with the [ ] icon turns off. Then user can set
the time manually.
✻Radio-controlled signal will be scheduled to
receive every hour.
- Receiving - Strong - No
singal
No symbol
- signal
reception
disabled

EN - 10
5b) HOW TO SET THE CLOCK MANUALLY
To set the clock manually, hold MODE for two
seconds it will show the year. Use [▼] or [▲] to
change it.
Press MODE to confirm. Repeat the same
procedure to set the month, date, date-month
format, 12/24, hour, minute, display language, zone
time offset.
During the setting, press and hold [▼] or [▲] will
increase or decrease the value rapidly.
For display language, you can choose among
English (EN), German (DE), French (FR), Italian (IT),
Spanish (SP), Dutch (DU) and Swedish (SW) - in
that order.
If there is an item you do not wish to change, simply
press [MODE] to bypass the item.
When you finished the change, press [MODE] to
exit.
The display will return to the clock mode.
5c) CALENDAR CLOCK DISPLAY MODES
The time is displayed in hour-minute format.
The calendar is displayed in a day-month format.
Each press on the MODE button will change the
display between clock with second, clock with day
of week, zone time with day of week, and zone time
with second.

EN - 11
5d) HOW TO SET THE TIME ZONE
To set the zone time,
1. Press [MODE] until at zone time display mode,
2. Hold [MODE] for two seconds, the zone time
offset will be displayed.
3. Enter the offset using [▼] or [▲].
4. Press [MODE] to exit.
The alarm " " " " icons will be displayed
indicating which alarm is armed. You can also arm
or disarm an alarm by pressing the [▲], [▼] button at
alarm display mode.
Press MODE to return to clock display mode.
6. BELL/ALARM
6a) HOW TO SET AND ARM THE ALARM
To set an alarm,
1. Press [ALARM] once to display alarm time. If
the alarm is disarmed, the time will be displayed
as "OFF".
2. Hold [ALARM] for two seconds. The hour digits
will blink.
3. Enter the hour using [▼] or [▲].
4. Press [ALARM]. The minute digits will blink.
5. Enter the minutes using [▼] or [▲].
6. Press [ALARM] to exit.
7. Repeat the same procedure to set single alarm.

EN - 12
6b) ALARM FEATURE
✻Weekday Alarm
The alarm sound will be activated and the icon
will be flashed on weekday when it is armed and
the alarm time is reach.
✻Single Alarm
The alarm sound will be activated and the icon
will be flashed once when it is armed and the
alarm time is reach. Once it finished, it will be
disabled automatically.
6c) HOW TO STOP AN ALARM
Press [ALARM] on the unit to stop an alarm.

EN - 13
7. SPECIFICATIONS
Temperature Measurement
Main unit
Indoor Temperature measurement
Proposed operating range : 0 °C to + 50 °C
Temperature resolution : 0.1 °C
0.2 °F
Remote unit
Proposed operating range : -20 °C to + 60 °C
Temperature resolution : 0.1 °C
0.2 °F
RF Transmission Frequency : 433 MHz
RF Transmission Range : Maximum 30 meters
(in open space without
electromagnetic
interference)
Temperature sensing cycle : around 43~47
seconds
Power
Main unit : use 2 pes UM-3 or
"AA" 1.5 V battery
Remote sensing unit : use 2 pes UM-4 or
"AAA" 1.5V battery
Weight
Main unit : 154g (without battery)
Remote sensing unit : 43g (without battery)
Dimension
Main unit : 86 × 165 × 28 mm
Remote sensing unit : 37.5 × 110 × 23 mm

EN - 14
PRECAUTIONS
This product is engineered to give you years of
satisfactory service if you handle it carefully. Here
are a few precautions:
1. Do not immerse the unit in water.
2. Do not clean the unit with abrasive or corrosive
materials. They may scratch the plastic parts
and corrode the electronic circuit.
3. Do not subject the unit to excessive force,
shock, dust, temperature or humidity, which
may result in malfunction, shorter electronic life
span, damaged battery and distorted parts.
4. Do not tamper with the unit‘s internal
components. Doing so will invalidate
the warranty on the unit and may cause
unnecessary damage. The unit contains no
user-serviceable parts.
5. Only use fresh batteries as specified in the
user‘s manual. Do not mix new and old batteries
as the old ones may leak.
6. Always read the user‘s manual thoroughly
before operating the unit.
CAUTION
- The content of this manual is subject to change
without further notice.
- Due to printing limitation, the displays shown in
this manual may differ from the actual display.
- The contents of this manual may not be
reproduced without the permission of the
manufacturer.

EN - 15
INSTRUCTIONS AND INFORMATION
REGARDING THE DISPOSAL OF USED
PACKAGING MATERIALS
Dispose of packaging material at a public waste
disposal site.
DISPOSAL OF USED ELECTRICAL AND
ELECTRONIC APPLIANCES
The meaning of the symbol on the product,
its accessory or packaging indicates that
this product shall not be treated as
household waste. Please, dispose of this
product at your applicable collection point
for the recycling of electrical & electronic
equipment waste. Alternatively in some states of the
European Union or other European states you may
return your products to your local retailer when
buying an equivalent new product. The correct
disposal of this product will help save valuable
natural resources and help in preventing the
potential negative impact on the environment and
human health, which could be caused as a result of
improper liquidation of waste. Please ask your local
authorities or the nearest waste collection centre for
further details. The improper disposal of this type of
waste may fall subject to national regulations for
fines.
For business entities in the European Union
If you wish to dispose of an electrical or electronic
device, request the necessary information from your
seller or supplier.

EN - 16
2014 07/2014
Disposal in other countries outside the
European Union
If you wish to dispose of this product, request the
necessary information about the correct disposal
method from local government departments or from
your seller.
Changes to the text, design and technical
specifications may occur without prior notice and we
reserve the right to make these changes.
Fast ČR, a.s. declares that the SWS 135
conforms to the basic requirements and
other relevant provisions of the directive
1999/5/ES. The device can be operated in the EU
without restriction. The declaration of conformity is
a part of the user‘s manual or can be found at the
website www.sencor.eu.

EN Warranty conditions
Warranty card is not a part of the device packaging.
This product is warranted for the period of 24 months
from the date of purchase to the end-user. Warranty
is limited to the following conditions. Warranty
is referred only to the customer goods using for
common domestic use. The claim for service can
be applied either at dealer’s shop where the product
was bought, or at below mentioned authorized
service shops. The end-user is obligated to set up
a claim immediately when the defects appeared but
only till the end of warranty period. The end user
is obligated to cooperate to certify the claiming
defects. Only completed and clean (according to
hygienic standards) product will be accepted. In case
of eligible warranty claim the warranty period will
be prolonged by the period from the date of claim
application till the date of taking over the product
by end-user, or the date the end-user is obligated to
take it over. To obtain the service under this warranty,
end-user is obligated to certify his claim with duly
completed following documents: receipt, certificate of
warranty, certificate of installation.

This warranty is void especially if apply as follows:
Defects which were put on sale.
Wear-out or damage caused by common use.
The product was damaged by unprofessional
or wrong installation, used in contrary to the
applicable instruction manual, used in contrary
to legal enactment and common process of use
or used for another purpose which has been
designed for.
The product was damaged by uncared-for or
insufficient maintenance.
The product was damaged by dirt, accident of
force majeure (natural disaster, fire, and flood).
Defects on functionality caused by low duality of
signal, electromagnetic field interference etc.
The product was mechanically damaged (e.g.
broken button, fall).
Damage caused by use of unsuitable media,
fillings, expendable supplies (batteries) or
by unsuitable working conditions (e.g. high
temperatures, high humidity, quakes).
Repair, modification or other failure action to the
product by unauthorized person.
End-user did not prove enough his right to claim
(time and place of purchase).
Data on presented documents differs from data
on products.
Cases when the claiming product cannot be
indentified according to the presented documents
(e.g. the serial number or the warranty seal has
been damaged).

Authorized service centers
Visit www.sencor.eu for detailed information about
authorized service centers.
Table of contents
Other Sencor Weather Station manuals

Sencor
Sencor SWS 4100 User manual

Sencor
Sencor SWS 270 User manual

Sencor
Sencor SWS 280 User manual

Sencor
Sencor SWS 12500 User manual
Sencor
Sencor SWS 100 User manual

Sencor
Sencor SWS 165 User manual

Sencor
Sencor SWS 7300 User manual

Sencor
Sencor SWS 165 User manual
Sencor
Sencor SWS 12500 User manual

Sencor
Sencor SWS 105 User manual