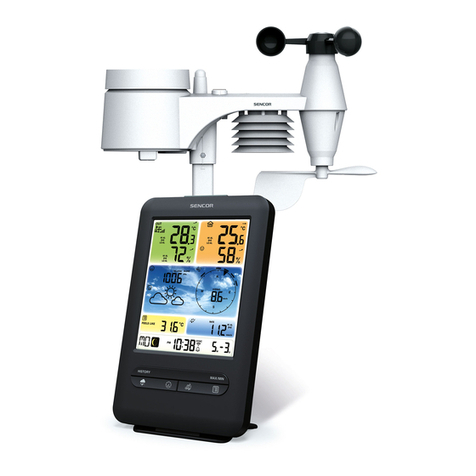
Sencor SWS 4100 User manual

SWS 4100
EN User Manual Color Display Weather Station
CZ Uživatelská příručka Meteorologická stanice
sbarevným displejem
SK Používateľská príručka Meteorologická stanica
sfarebným displejom
HU Felhasználói kézikönyv Meteorológiai állomás színes kijelzővel
PL Podręcznik użytkownika Stacja pogodowa
z kolorowym wyświetlaczem

EN – 2
We thank you for the purchase of our Color Display Weather Station. It has been designed and
constructed using innovative components and techniques to enable the perfect display by this device.
This unit is also equipped with an outdoor sensor.
Please read the entire instruction manual before using the product and then save it for future reference.
We reserve the right for any errors in test or images and any necessary changes made to technical data.
Things to consider:
1. Other wireless equipment using the same frequency band can reduce the transmission range.
2. The range of all wireless equipment depends on the type of obstacles located between the transmitter
and the receiver (e.g. a concrete wall will interfere with the signal much more than a plasterboard
wall).
If you experience problems, try the following:
1. Turn off any other existing wireless equipment to check whether this is the cause of the problem.
2. Move any other existing wireless equipment. Shorten the distance between the sending and receiving
devices and reduce the number of obstacles(walls, furniture,etc.) between them.
3. Try removing and reassembling batteries, if the batteries are old, try new ones.
SAFETY AND GUIDE
Do not clean any part of the product with benzene, thinner or other solvent chemicals. If necessary, clean
it with a soft cloth.
Do not dismantle or modify the product in any way.
Never immerse the product in water, It will damage the product.
Do not subject the product to extreme force, shock, or fluctuations in temperature or humidity.
Do not tamper with the internal components.
Do not use used batteries .
Do not use different types of batteries alkaline, standard or rechargeable batteries with this product.
Remove the batteries if storing this product for a long period of time, otherwise the battery might damage
the product.
Do not dispose of this product as unsorted municipal waste, it’s necessary to separately collect it for
special treatment.
Do not place the main unit in rain or moisture.The transmit range depends on the type of obstacles
located between the transmitter and the receiver (e.g. a concrete wall will interfere with the signal much
more than a plasterboard wall).
Be sure the sensor is mounted vertically, to allow moisture to drain out properly. Place out of direct
sunlight & ensure the sensor is well-ventilated.
The distance between main unit and sensors should be at least 5~ 6.5 feet (1.5~2 meters) away from any
interfering sources such as
computer monitors or TV sets.
The main unit stay away from the metal window frames.
Please do not use other electrical products such as headphones or microphone operating on the
same signal frequency. (433.92MHz), neighbors using electrical devices operating on the same signal
frequency can also cause interference.
Place the main unit in a dry area, free of dirt and dust. To ensure accurate temperature measurement,
place out of direct sunlight and away from heat sources or vents.

EN – 3
PACKAGE CONTENTS
1 x Digital Weather Station
1 x Remote Sensor
1 x User Manual
1*DC Adaptor
(Batteries are not included)
MAIN UNIT INSTALLATION
● RemovetheprotectivefilmthatisappliedtotheLCDscreenpriortousingtheproduct.
● Pluggedinwithpoweradapteranduse,battery-powerisoptional,sinceprevioussettingwillbereset
when plugged out, we recommend install the batteries for the base station.
● Basestationcanstanduprightonthetableormountonthewall.
SENSOR INSTALLATION
Base station supports up to 3 sensors connection, the sensor switch is located inside the battery
compartment, it can be switched 1,2,3, matching the info of Channel 1, Channel 2, Channel 3 that
synchronize on the OUTDOOR position.
1. Remove the battery compartment cover, chose the channel (1,2,3)by switching the channel shift.
2. Insert 2 x AA batteries matching the correct polarity (+ and -), the red led light will flash for once, then
assemble the battery compartment.
3. Put the sensor the position you desire.

EN – 4
Low Battery Indicator
When battery power for main unit is lower than 3.6V,or when the power for remote sensor is lower than
2.5V,thelowbatteryindicatorwilldisplayontheLCD.WhenitispoweredbyDCadaptor,thebatteriesare
for memory function. If the low battery indicator for main unit still shows, that means the batteries’ power
for main unit is lower than 3.6V,please check the batteries situation. To avoid batteries runs out, getting
rotten and damage the units. please change batteries on time when low battery indicator appear. Please
use alkaline dry batteries, do not use rechargeable batteries.
LCD DISPLAY

EN – 5
1. Outdoor temperature and humidity
2. 3 outdoor channels display in loop
3. LowbatteryIndicator(Sensor)
4. Weather Forecast
5. Freezing Alert
6. Indoor temperature
7. LowbatteryIndicator(mainunit)
8. Trends for temperature and humidity
9. Max Min record for indoor temperature and humidity in 24hours
10. Comfortable Indicator for indoor
11. Indoor humidity
12. Calendar
13. Current time
14. Outdoor humidity
15. Comfortable Indicator for outdoor
16. Max Min record for outdoor temperature and humidity in 24hours
17. Outdoor Temperature
18. Touch button - SNOOZE/LIGHT / )
19. Buttons (SET,▲/CH,▼/MEM, ALARM)
20. Hanging hole
21. Stand
22. Battery compartment cover
SENSOR
1. LEDlight
2. Battery compartment Cover
3. Hanging hole
4. Channel shift
5. Rope hanging hole
When the red led light flash, it is sending signal to main unit.

EN – 6
DC ADAPTOR
FEATURES
● TimeandCalendar(Date/Month/Year)
● 12/24hoursformatswitchable
● Alarmwithsnoozefunction
● Weatherforecastwith5status:sunny,partlycloudy,cloudy,rainy,andsnowy
● Indoortemperatureandhumidity
● Outdoortemperatureandhumidity
● Supportupto3sensors(1included)
● Functionautoscrollingmeasureddataofall3outdoorsensors
● Max/Minmemoryrecordsforallindoorandoutdoortemperatureandhumidity
● Trendindex
● C/F(Celsius/Fahrenheit)switchable
● ComfortableIndicator
● Max/Minmemoryrecords
● Lowbatteryindicator
● Toneon/offfunction
● Transmissionrange:upto80metersinopenarea
● 3-modebrightness:Bright/Dim/Off
● Tablestandingorwallhanging
● SensorTransmissionFrequency:433.92MHZ
● MainUnitPower:3*1,5VtypeAAA(BatteriesNotIncluded)&5V1.2ADCAdaptor(Included)
● SensorPower:2*1,5VtypeAA(BatteriesNotIncluded)

EN – 7
OPERATION INSTRUCTION
SET ▲/CH ▼/MEM ALARM SNOOZE/LIGHT
Standard
Mode
Press ----------
Switch CH1/
CH2/CH3 View Max-
Min record
View alarm
time, turn
on/off alarm
*Lightupbacklight
when power by
batteries
*Switch to different
backlight lever
*Snooze when alarm
*Save and exit during
setting
Hold
Start
Time and
Calendar
setting
Clear all
the data on
3 channels,
and re-check
new data
Clear Max/
Min record
for indoor
and outdoor
Start Alarm
Setting --------
Time
Setting
Press Confirm Increase
1 step
Decrease
1 step -------- *Save and exit during
setting
Hold Start time
setting
Increase
Fast Decrease fast -------- --------
ALARMs
Setting
Press -------- Increase Decrease Confirm *Save and exit during
setting
Hold ------- Increase
Fast Decrease fast -------- --------
ALARM
Ring On
Mode
Press Stop alarm
ringing
Stop alarm
ringing
Stop alarm
ringing
Stop alarm
ringing Snooze on
Hold ------- ------- -------- -------- --------
Touch button snooze/light , should be operated for 1 second each operation.
SETTING GUIDE
Press and hold SET button, to enter Tone on/off, 12/24h,C/F switch,time setting mode.
Press ▲/CH button, to switch channel 1/2/3,Press and hold ▲/CH button 3seconds to increase
fast, or clear all the data on 3 channels, and re-register new data
Press ▼/MEM button, to view Max-Min record, Press and hold, ▼/MEM button, to clear Max/Min
record for indoor and outdoor
Press ALARM button, to view alarm time & status,Press and hold ALARM button, to enter Alarm
setting Mode
Press and hold ALARM , enter into alarm time setting mode
Press SNOOZE/LIGHT , backlight will light up for 20 seconds when powered with batteries;The setting
will be saved and exit, the backlight lever will change from high-soft-off in loop.
When it alarms, press any button to stop alarming, press SNOOZE/LIGHT to enter into snooze mode,
then alarm again after 5 minutes, press any button to stop it when alarming or during the period of
snooze.

EN – 8
TIME SETTING
1. In standard mode, press and hold SET key for 3 seconds, Weather Station will start time setting and
thefiguretobesetwillflash,Thesettingorderis:TonevoiceBIon\off→12\24h→hour→minute
→year→DM/MD→month→date→C/F→confirmandexit.
During setting, only the setting figure will display, other parts will be invisible.
2. Press ▲/CH or ▼/MEM to change the setting item to the desired values; Press ▲/CH ,the
value to be set will increase 1, Press and hold ▲/CH ,during setting, the value will increase fast.
Press ▼/MEM ,the value to be set will decrease 1, Press and hold ▼/MEM ,during setting, the
value will decrease fast.
3. The setting will be automatically confirmed and exit if there is no operation within 20seconds.
4. Press SET button to confirm the setting.
5. No operation in 20 seconds, it will save current setting and exit.
ALARM AND SNOOZE
1. Press ALARM button to check alarm time or alarm on/off status. If alarm is on, the alarm icon will
display. It will return to normal time display mode if no operation in 5 seconds.
2. Press and hold alarm to enter alarm setting. The figure to be set will be flashing.
3. Thesettingsequenceis:Hour-Minute-Exit.
4. Press ▲/CH or ▼/MEM to change the setting item to the desired values;
5. The setting will be saved and exit if no other setting within 20 seconds.
6. The alarm sound will last for 2 minutes, and will change as below
0-10seconds:BIpersecond
11-20seconds:BIBIpersecond
21-30seconds:BIBIBIBIpersecond
31-120seconds:KeepBIsound
7. The alarm ring lasts 2 minute and then be canceled automatically. Press any other button to stop
alarm sound, which will activate again after 24 hours.
8. SnoozeFunction:Whenalarmringison,press SNOOZE/LIGHT button to enter into snooze
function for 5 minutes, the snooze icon display.When the snooze time is up, the alarm rings.
The snooze ring lasts 2 minute and then be canceled automatically. press any other bottom except
SNOOZE/LIGHT to turn the snooze ring off.
9. To fully deactivate the alarm, press ALARM button in standard mode, to turn it off, then the icon will
disappear.
TEMPERATURE & HUMIDITY
1. °C/°F Switchable
INDOORtemperaturerange:-9.9°C~50°C(14°F~122°F)
OUTDOORtemperaturerange:-40°C~60~(-40~140°F)
INDOORhumiditydisplayrange:1%RH~99%RH
OUTDOORhumiditydisplayrange:10%RH~99%RH
LL.L&HH.Hwilldisplaywhenoutofrange
2. Trends:
Trends Icon will not display at the moment of powering on.
The trend willdislay,whenthetemperatureincrease1°Ccomparedtolastdata,orincrease1°C
in 1 hour;
The trend willdislay,whenthehumidityvalueincrease3%comparedtolastdata,orincrease3%
in 1 hour;
EN – 9
vice the verse for decrease trends;
whentheincrease/decreaseislessthen1°Cor3%in1hour,notrendiconwilldisplay.
MEMORY
1. Under normal time displaying mode, press ▼/MEM button to check the 3 channel indoor
andoutdoortemperatureandhumidity,therecordsequenceis:Indoor/outdoormaximum
temperature&humidity→Indoor/outdoorminimumtemperature&humidity.Nooperationin5seconds,it
will return to current temperature &humidity display.
2. Max/Min:
Themaximum/minimumrecordswillbeclearedautomaticallyat00:00everyday. Or manually clear
the max/min record by holding ▼/MEM at Time Display mode. It will clear the record, and display
the current value.
RF-OUTDOOR TERPERATURE AND HUMIDITY
1. The weather station will automatically receive signal sending back from the external sensor after
powering on, the receiving status will last for max 3 minutes, the receiving antenna signal will flash, if
no signal received in 3 minutes, receiving signal will exist and stop receiving outdoor signal. Signal re-
synchronization will be reactivated next hour until the signal got and data displayed on the main unit.
2. Under normal time displaying mode, press and hold ▲/CH button more than 2 seconds to
manually start the RF re-registration then.
3. If no signal received within 2 hours, “--.-” will be display in the corresponding CH.
CHANNEL & SENSOR OPERATION
1. The weather station supports max connection with up to 3 sensors.
2. Remove the battery cover of sensor and slide CH switch to CH1/CH2/CH3, make sure each sensor is
assignedtoadifferentCHANNELnumber.
3. It is recommended to put CH1 sensor in outdoor for more accurate weather forecast, and put other
sensors in your desired area.
4. In standard mode, Press ▲/CH button to check the outdoor temperature and humidity of channel
1/2/3. When you switch to the mode, the display will automatically loop 3 sensor’ data.If you want to
reset all the data of sensors, press and hold ▲/CH button 3 seconds, and it will reconnect with the
sensors.
REMARKS
1. The distance between main unit and transmitter should be at least 5~ 6.5 feet (1.5~2 meters) away
from any interfering sources such as computer monitors or TV sets.
2. The main unit cannot stand close to metal window frames.
3. Please do not use other electrical products such as headphones or speakers operating on the same
signal frequency.
4. Neighbors using electrical devices operating on the same signal frequency can also cause
interference.
5. Frequency:433.92mHZ
6. SignalreceiveDistance:80mters

EN – 10
Re-synchronize the devices
When temperature and moisture readings for outdoor sensors are not shown on the main unit, please
try re-synchronize the devices. Make sure main unit is powered on firstly, then assemble the batteries for
sensors, the red light on the sensor will flash and send signal to main unit.
WEATHER FORECAST
WEATHER
ICON
Description Sunny Partly Cloudy Cloudy Rainy Snowy
Weatherforecastin12+Hour:Sunny,PartlyCloudy,Cloudy,Rainy,Snowy
The weather icon displays are based on the hourly calculation of indoor/outdoor temperature &humidity.
Theforecaststationpredictweatherconditionsforthenext12hourswith70-75%accuracy.Theremote
sensor should be put on the outside to have acurate outdoor data. Or it will effect the acurate of weather
forecast.
The default display weather is partly cloudy, the main unit will calibrate the weather report in 1–2 weeks
with the temperature and humidity data changes.
The remote sensor should be place outside to get accurate outdoor data or it will effect the accurate of
weather forecast.
COMFORT LEVEL INDEX
Comfortleveldisplayswith3status:DRY,GOOD,WET
Comfort Level Humidity Range
Dry 1–40%
Good 41–75%
Wet 76%
BACK LIGHT
When the base station powered with batteries only, touch SNOOZE/LIGHT for 1 second at the top,
momentarily light up the screenfor 20 seconds.
When powered by adapter, touch SNOOZE/LIGHT toadjustthebrightnessBRIGHT-DIM-OFF.
LOW BATTERY ALERT
Installthebatterytocheckthestatuseveryminute,theiconLowbatteryindicatorwilldisplaywhenitis
low. We recommend you to replace the batteries, in case that the batteries got rotten and effect the unit.

EN – 11
FREEZING ALERT
Whenthetemperatureis0~2.9°C,thesnowicon will flash;
whentemperaturevalueislowerthan0°C,thesnowicon will display.
POSITIONED METHODS
The weather station can be positioned in 2 ways as desired.
● Takeoutthemetalstandsinthebatterycompartment,assemblethemtothemetalstandholes.
● Hangonthewallbyhanginghole
The sensor can be positioned in below ways,
1. Use the hole at the top to hang your sensor from the back using a nail.
2. Mount your sensor on a north-facing wall or in any shaded area. Under an eave or deck rail is
preferred.
3. The maximum wireless transmission range to the weather station is up to 80 meters in open air, not
including walls or floors.
4. Besureoursensorismountedvertically,toallowmoisturetodrainoutproperly.Keepoutofdirect
sunlight & ensure the sensor is well-ventilated.
PRECAUTIONS
● Donotcleananypartoftheproductwithbenzene,thinnerorothersolventchemicals.When
necessary, clean it with a soft cloth.
● Neverimmersetheproductinwater.Thiswilldamagetheproduct.
● Donotsubjecttheproducttoextremeforce,shock,orfluctuationsintemperatureorhumidity.
● Donottamperwiththeinternalcomponents.
● Donotmixnewandoldbatteriesorbatteriesofdifferenttypes.
● Donotmixalkaline,standardorrechargeablebatterieswiththisproduct.
● Removethebatteriesifstoringthisproductforalongperiodoftime.
● Donotdisposeofthisproductasunsortedmunicipalwaste.Collectionofsuchwasteseparatelyfor
special treatment is necessary.

EN – 12
SPECIFICATIONS
Indoor Temperature Range -9.9°Cto+50°C
Outdoor Temperature Range -40°Cto+60°C
Indoor Humidity Range 1%to99%RH
Outdoor Humidity Range 10%to99%RH
Temperature Display in°C/°FSelectable
Transmission Between Main Unit and Sensor up to 80 m (in Open Area)
Sensor Transmission Frequency 433.92 MHz
Power Adaptor of Main Unit DC5V/1200mA(Included),Consumption:6W
Battery Back-Up of Main Unit 3 x 1,5 V Type AAA (Batteries Not Included)
Power of Sensor 2 x 1,5 V Type AA (Batteries Not Included)
Dimensions of Main Unit (w/h/d) 147 x 74 x 17 mm
Dimensions of Wireless Sensor (w/h/d) 38 x 100 x 22 mm
Weight of Main Unit 173 g (with Battery, without Adapter)
Weight of Wireless Sensor 32 g
ADAPTER TECHNICAL SPECIFICATIONS
Manufacturer’s name or trade mark,
commercial registration number and
address:
DONGGUANSHIJIEHUAXUELECTRONICSFACTORY,
CommercialRegistrationNumber:440429543,
Address:No.200,TechnologyEastRoad,ShijieTownDongguan
City,Guangdong,P.R.China
Modelidentifier: HX075-0501200-AG-001
Inputvoltage: AC100–240V
InputACfrequency: 50/60Hz
Outputvoltage: DC5.0V
Outputcurrent: 1.2A
Outputpower: 6.0W
Averageactiveefficiency: ≥75.00%
Efficiencyatlowload(10%): 71.17%
No-loadpowerconsumption: ≤0.1W

EN – 13
INSTRUCTIONS AND INFORMATION ON THE DISPOSAL OF DISCARDED
PACKAGING MATERIALS
Take the packaging material to a collection yard for disposal.
DISPOSAL OF DISCARDED ELECTRICAL AND ELECTRONIC EQUIPMENT
This symbol on the product, accessory or packaging indicates that the product must not
be treated as normal household waste. Please dispose of this product in a collection yard
designated for the recycling of electrical and electronic equipment. In some EU countries or
in some European countries, you can return your products to your local retailer when you
buy an equivalent new product. Correct disposal of this product helps save valuable natural
resources and prevents possible adverse impacts on the environment and human health
that might be caused by improper waste disposal. Please contact your local authority or the
nearest waste collection yard for further details. Improper disposal of this type of waste may
be subject to a legal fine.
For companies in the European Union
If you need to dispose of electrical or electronic equipment, ask your dealer or supplier for the
necessary information.
Disposal in countries outside the European Union
To dispose of this product, please ask your local authorities or dealer for the necessary
information on correct disposal.
This product complies with EU requirements.
FASTČR,a.s.herebydeclaresthattheradiodevicetypeSWS4100complieswithDirective2014/53/EU.
ForfullversionoftheEUdeclarationofconformity,pleaserefertothewebsite:
www.sencor.cz
Changes in the text, design and technical specifications may be made without prior notice and we reserve
the right to make such changes.
The original version is in Czech.
Manufacturer:FASTČR,a.s.,USanitasu1621,Říčany25101,CzechRepublic
Authorizedservicecenters:Visitwww.sencor.comfordetailedinformationaboutauthorizedservice
centers.

EN – 14
EN Warranty conditions
Warranty card is not apart of the device packaging.
This product is warranted for the period of 24 months from the date of purchase to the end-user. Warranty
is limited to the following conditions. Warranty is referred only to the customer goods using for common
domestic use. The claim for service can be applied either at dealer’sshop where the product was bought, or
at below mentioned authorized service shops. The end-user is obligated to set up aclaim immediately when
the defects appeared but only till the end of warranty period. The end user is obligated to cooperate to certify
the claiming defects. Only completed and clean (according to hygienic standards) product will be accepted.
In case of eligible warranty claim the warranty period will be prolonged by the period from the date of claim
application till the date of taking over the product by end-user, or the date the end-user is obligated to take it
over. To obtain the service under this warranty, end-user is obligated to certify his claim with duly completed
following documents: receipt, certificate of warranty, certificate of installation.
This warranty is void especially if apply as follows:
Defects which were put on sale.
Wear-out or damage caused by common use.
The product was damaged by unprofessional or wrong installation, used in contrary to the applicable
instruction manual, used in contrary to legal enactment and common process of use or used for another
purpose which has been designed for.
The product was damaged by uncared-for or insufficient maintenance.
The product was damaged by dirt, accident of force majeure (natural disaster, fire, and flood).
Defects on functionality caused by low duality of signal, electromagnetic field interference etc.
The product was mechanically damaged (e.g. broken button, fall).
Damage caused by use of unsuitable media, fillings, expendable supplies (batteries) or by unsuitable
working conditions (e.g. high temperatures, high humidity, quakes).
Repair, modification or other failure action to the product by unauthorized person.
End-user did not prove enough his right to claim (time and place of purchase).
Data on presented documents differs from data on products.
Cases when the claiming product cannot be indentified according to the presented documents (e.g. the
serial number or the warranty seal has been damaged).
Manufacturer:
FAST ČR, a.s., U Sanitasu 1621, Říčany 251 01, Czech Republic
Visit www.sencor.com for detailed information about authorized service centers.
The original version of the instructions is in the Czech language, other language versions are made by the
appropriate translation.

CZ–1
Děkujemevámzazakoupenítétometeorologickéstanicesbarevnýmdisplejem.Bylanavržena
asestavenapomocíinovativníchkomponentatechnikumožňujícíchperfektnízobrazeníinformací.Tento
přístrojjerovněžvybavenvenkovnímsnímačem.
Předpoužitímtohotoproduktusiprosímpřečtětecelýnávodkobsluzeauschovejtejejpropozdější
použití.Vyhrazujemesiprávonajakékolichybyvtextechneboobrázcích,aprávonajakékolinezbytné
změnytechnickýchúdajů.
Vezměte prosím v úvahu:
1. Jinábezdrátovázařízenípoužívajícístejnéfrekvenčnípásmomohousnižovatpřenosovýdosah.
2. Dosahvšechbezdrátovýchzařízenízávisínatypupřekážekvyskytujícíchsemezivysílačem
apřijímačem(např.betonovástěnabuderušitsignálvíce,nežsádrokartonovástěna).
V případě problémů zkuste provést následující:
1. Vypnětejakékolijinébezdrátovézařízení,abystezjistili,zdajepříčinouproblému.
2. Přemístětejakékolijinébezdrátovézařízení.Zkraťtevzdálenostmezivysílajícímapřijímacím
zařízenímaomeztepočetpřekážek(stěny,nábytekapod.)mezinimi.
3. Zkustevyjmoutaznovuvložitbaterie;pokudjsoubateriestaré,vyměňtejezanové.
BEZPEČNOST A PRŮVODCE
Nečistětežádnoučásttohotoproduktubenzenem,ředidlem,anijinýmichemickýmirozpouštědly.Pokud
ječištěnínutné,použijtejemnýhadřík.
Nepokoušejtesetentoproduktjakkolirozebíratneboupravovat.
Nikdyneponořujtetentoproduktdovody,jinakhrozínebezpečíjehopoškození.
Nevystavujtetentoproduktpůsobeníextrémnísíly,otřesůnebokolísáníteplotyčivlhkosti.
Nepoškozujtevnitřníkomponenty.
Nepoužívejtevybitébaterie.
Nepoužívejtevtomtoprodukturůznétypybaterií,jakonapříkladalkalické,standardníadobíjecíbaterie.
Pokudchcetetentoproduktnadelšídobuuskladnit,vyjměteznějbaterie,abynedošlokpoškození
produktuelektrolytemzbaterií.
Nevyhazujtetentoproduktdonetříděnéhokomunálníhoodpadu.Odnestejejkekologickélikvidacido
sběrnéhodvora.
Nevystavujtehlavníjednotkupůsobenídeštěnebovlhkosti.Přenosovýrozsahzávisínatypupřekážek
vyskytujícíchsemezivysílačemapřijímačem(např.betonovástěnabuderušitsignálvíce,než
sádrokartonovástěna).
Namontujtesnímačsvisle,abymohlabýtsprávněodváděnavlhkost.Umístětemimopřímésluneční
světloazajistěte,abybylsnímačdobřeodvětrávaný.
Hlavníjednotkaasnímačebymělybýtvzdálenyalespoň1,5–2metryodjakýchkolizdrojůrušení,jako
například
počítačovýchmonitorůnebotelevizorů.
Hlavníjednotkanesmíbýtumístěnavblízkostikovovýchokenníchrámů.
Nepoužívejteprosímdalšíelektronicképrodukty,jakonapříkladsluchátkanebomikrofony,pracující
sestejnoufrekvencísignálu.Rušenímohourovněžzpůsobovatelektronickázařízenívašichsousedů,
pracujícísestejnoufrekvencísignálu(433,92MHz).
Umístětehlavníjednotkunasuchémístobeznečistotaprachu.Abybyloměřeníteplotypřesné,nestavte
tentoproduktnapříméslunečnísvětloaumístětejejdostatečnědalekoodzdrojůteplanebovětracích
otvorů.

CZ–2
OBSAH BALENÍ
1×Digitálnímeteorologickástanice
1×Dálkovýsnímač
1×Uživatelskápříručka
1×Napájecíadaptér
(Baterienejsousoučástípříslušenství)
INSTALACE HLAVNÍ JEDNOTKY
● PředpoužitímtohotoproduktuodstraňtezLCDobrazovkyochrannoufólii.
● Pokudjepřipojennapájecíadaptér,nenínutnopoužívatbaterie.Vpřípaděodpojeníadaptérusevšak
vtakovémpřípaděvynulujenastavení,aprotodoporučujemevložitdozákladnovéstanicebaterie.
● Základnovástanicemůžestátnastolenebojimůžetenamontovatnastěnu.
INSTALACE SNÍMAČE
Základnovástanicepodporujepřipojeníaž3snímačů.Přepínačsnímačůjeumístěnvprostorupro
bateriealzejejpřepnoutdopolohy1,2,3prosynchronizaciinformacízVENKOVNÍHOKanálu1,Kanálu
2aKanálu3.
1. Odstraňtekrytprostoruprobaterieapomocípřepínačekanálůvybertekanál(1,2,3).
2. Vložte2baterieAAsesprávnoupolaritou(+a–).Poté,cočervenýLEDindikátorjednoublikne,
sestavte prostor pro baterie.
3. Umístětesnímačnapožadovanémísto.

CZ–3
Indikátor vybitých baterií
Pokudjenapětíbateriíprohlavníjednotkunižší,než3,6V,nebopokudjenapětíprodálkovýsnímač
nižší,než2,5V,zobrazísenaLCDdisplejiindikátorvybitýchbaterií.Přinapájenípomocísíťového
adaptérusloužíbaterieprozálohovánípaměti.Jestližesezobrazíindikátorvybitýchbateriíprohlavní
jednotku,jenapětíbateriívhlavníjednotcemenšínež3,6V.Zkontrolujteprosímstavbaterií.Abynedošlo
kvybitíazkorodováníbateriíanáslednémupoškozeníjednotek,vyměňteprosímbateriebezprostředně
pozobrazeníindikátoruvybitýchbaterií.Používejteprosímsuchéalkalickébaterie;nepoužívejtedobíjecí
baterie.
LCD DISPLEJ

CZ–4
1. Venkovníteplotaavlhkost
2. Cyklickézobrazení3venkovníchkanálů
3. Indikátorvybitýchbaterií(snímač)
4. Předpověďpočasí
5. Výstrahapředmrazem
6. Vnitřníteplota
7. Indikátorvybitýchbaterií(hlavníjednotka)
8. Trend teploty a vlhkosti
9. Max.amin.záznamvnitřníteplotyavlhkostiza24hodin
10.Indikátorpohodyprovnitřníprostředí
11. Vnitřnívlhkost
12.Kalendář
13.Aktuálníčas
14.Venkovnívlhkost
15.Indikátorpohodyprovenkovníprostředí
16.Max.amin.záznamvenkovníteplotyavlhkostiza24hodin
17.Venkovníteplota
18.Dotykovétlačítko–SNOOZE/LIGHT (Opakované buzení/Světlo) / )
19.Tlačítka(SET (Nastavení),▲/CH (Kanál),▼/MEM (Paměť), ALARM (Budík))
20.Otvorprozavěšení
21. Stojan
22.Krytprostoruprobaterie
SENZOR
1. LEDsvětlo
2. Krytprostoruprobaterie
3. Otvorprozavěšení
4. Přepínačkanálů
5. Otvorprozavěšenínašňůru
KdyžčervenýLEDindikátorbliká,odesílásesignáldohlavníjednotky.

CZ–5
SÍŤOVÝ ADAPTÉR
VLASTNOSTI
● Časakalendář(Den/Měsíc/Rok)
● Volbaformátu12/24hodin
● Budíksfunkcíopakovanéhobuzení
● Předpověďpočasís5stavy:slunečno,částečnězataženo,zataženo,déšť,sněžení
● Vnitřníteplotaavlhkost
● Venkovníteplotaavlhkost
● Podporaaž3snímačů(1součástípříslušenství)
● Funkceautomatickéhocyklickéhozobrazenínaměřenýchdatzevšech3venkovníchsnímačů
● Max./min.paměťovézáznamyprovšechnyvnitřníavenkovníteplotyavlhkosti
● Indextrendu
● VolbaC/F(stupněCelsia/Fahrenheita)
● Indikátorpohody
● Max./min.záznamyvpaměti
● Indikátorvybitýchbaterií
● Funkcezapnutí/vypnutízvuku
● Přenosovýrozsah:až80metrůvotevřenémprostoru
● 3režimyjasu:Vysoký/Nízký/Vypnuto
● Postavenínastůlnebozavěšenínastěnu
● Přenosováfrekvencesnímače:433,92MHz
● Napájeníhlavníjednotky:3×1,5VbaterietypuAAA(nejsousoučástípříslušenství)asíťovýadaptér
5V1,2A(dodávanépříslušenství)
● Napájenísnímače:2×1,5VbaterietypuAA(nejsousoučástípříslušenství)

CZ–6
NÁVOD K OBSLUZE
SET
(Nastavení)
▲/CH
(Kanál)
▼/MEM
(Paměť)
ALARM
(Budík)
SNOOZE/LIGHT
(Opakované buzení/
Světlo)
Standardní
režim
Stisknutí
tlačítka ----------
Přepnutí
CH1/CH2/
CH3
Zobrazení
max. a min.
záznamu
Zobrazení
časubudíku,
zapnutí/
vypnutí
budíku
*Rozsvícení
podsvícenípři
napájenízbaterií
*Přepnutínajinou
úroveňpodsvícení
*Opakovanébuzení
přizvonění
*Uloženíaukončení
běhemnastavování
Podržení
Otevření
nastavení
času
akalendáře
Smazání
všechdat
3kanálů
aopakovaná
kontrola
novýchdat
Smazání
max./min.
záznamu
vnitřní
avenkovní
teploty
Otevření
nastavení
budíku
--------
Nastavení
času
Stisknutí
tlačítka Potvrzení Zvýšenío1
krok
Sníženío1
krok -------- *Uloženíaukončení
běhemnastavování
Podržení
Otevření
nastavení
času
Rychlé
zvýšení
Rychlé
snížení -------- --------
Nastavení
budíku
Stisknutí
tlačítka -------- Zvýšení Snížení Potvrzení *Uloženíaukončení
běhemnastavování
Podržení ------- Rychlé
zvýšení
Rychlé
snížení -------- --------
Režim
zvonění
budíku
Stisknutí
tlačítka
Zastavení
zvonění
budíku
Zastavení
zvonění
budíku
Zastavení
zvonění
budíku
Zastavení
zvonění
budíku
Zapnutíopakovaného
buzení
Podržení ------- ------- -------- -------- --------
Dotykovétlačítko Snooze/Light bymělobýtprokaždouoperacipodrženo1sekundu.
PRŮVODCE NASTAVENÍM
Stiskněteapodržtetlačítko SET prootevřenírežimunastaveníToneon/off(Zapnutí/vypnutízvuku),
12/24h,přepnutíC/Fanastaveníčasu.
Stisknětetlačítko ▲/CH pro přepnutí kanálu 1/2/3, stisknětea3sekundypodržtetlačítko ▲/CH
prorychlézvýšeníhodnotynebosmazánívšechdat3kanálůaopětovnouregistracinovýchdat
Stisknětetlačítko ▼/MEM prozobrazenímax.amin.záznamu,stiskněteapodržtetlačítko ▼/MEM
prosmazánímax./min.záznamuprovnitřníavenkovníprostředí
Stisknětetlačítko ALARM prozobrazeníčasuastavubudíku,stiskněteapodržtetlačítko ALARM pro
otevřenírežimunastaveníbudíku
Stiskněteapodržtetlačítko ALARM prootevřenírežimunastaveníčasubudíku
Stisknětetlačítko SNOOZE/LIGHT prorozsvícenípodsvícenína20sekundpřinapájenízbaterií.
Nastaveníseuložíaprovedeseukončení;úroveňpodsvícenísebudeměnitvcykluvysoká-nízká-
vypnuto.
This manual suits for next models
1
Table of contents
Languages:
Other Sencor Weather Station manuals

Sencor
Sencor SWS 270 User manual

Sencor
Sencor SWS 7300 User manual

Sencor
Sencor SWS 165 User manual

Sencor
Sencor SWS 105 User manual

Sencor
Sencor SWS 9300 User manual

Sencor
Sencor SWS 165 User manual

Sencor
Sencor SWS 280 User manual

Sencor
Sencor SWS 12500 User manual

Sencor
Sencor SWS 12500 User manual

Sencor
Sencor SWS 290 User manual