EN – 8
2. Press the button [▲] or [▼] enter your time zone, then press and hold [CLOCK SET]
for confi rmation and fi nishing. The time will be automatically synchronized from the
Internet time server every day at 12:00 and 24:00. However, you can also press the
button [REFRESH] for manually obtaining Internet time within 1 minute.
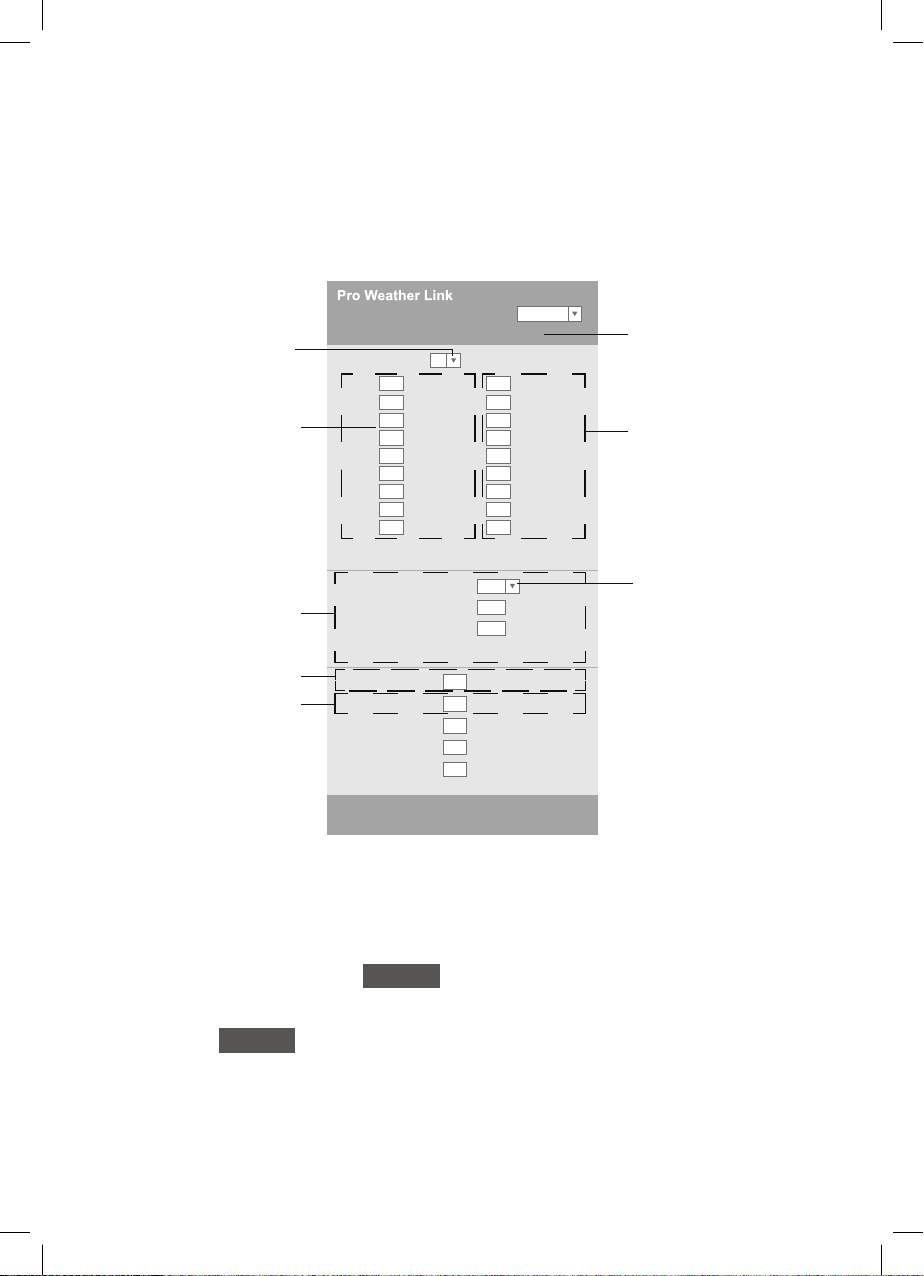
ADVANCED WEB INTERFACE SETTINGS
Press the button “ADVANCED” at the top of the web interface to open the advanced
settings page, where you can set and view device calibration data, as well as update the
fi rmware (available for PC platform only).
-560~ 560hpa / -16.54 ~ 16.54inHg / -420 ~ 420mmHg
Setting Range:
SETUP ADVANCED
Language: English
Temperature oC
Outdoor
Indoor
CH 1
CH 2
CH 3
CH 4
CH 5
CH 6
CH 7
Humidity %
Relative Pressure Offset:
Absolute Pressure Offset:
hpa
Range: -20 ~ 20
(Default: 0.0)
Current offset: 10Current offset: -9
Current offset: -5Current offset: 2
Current offset: -2Current offset: 3
Current offset: -2Current offset: 1.2
Current offset: -5Current offset: -0.2
Current offset: -3Current offset: -20.1
Current offset: -10Current offset: 11.5
Current offset: -3
Current offset: -3
(Default: 0)
Current offset: 10
(Default: 0)
Current offset: 0.2
Current offset: -5Current offset: 1
Pressure
Range: -20.0 ~ 20.0oC
-36.0 ~ 36.0oF (Default: 0.0)
**UV gain: Range: 0.01 ~ 10(Default: 1.00)
Current gain: 1.1
**Light gain: Range: 0.01 ~ 10(Default: 1.00)
Current gain: 1.0
** Depend on the model
**Wind speed gain:
**Wind direction:
**Rain gain: Range: 0.5 ~ 1.5(Default: 1.00)
Range: -10 ~ 10(Default: 0o)
Range: 0.5 ~ 1.5(Default: 1.00)
Current gain: 0.85
Current offset: 2o
Current gain: 0.75
Function firmware version: 1.00
WiFi firmware version: 1.00
Advancd page
Temperature
calibration section
Pressure
calibration section
Wind
calibration section
Press “ADVANCED” icon
to advancd page
Select setting unit
Select setting unit
Humidity
calibration section
Rain
calibration section
Press the "ADVANCED"
icon to open the advanced
settings page
Humidity calibration section
Select the setting unit
Advanced settings page
Wind calibration
section
Rain calibration section
Pressure calibration
section
Temperature
calibration section
Select the setting unit
CALIBRATION
1. Users can enter or change compensation and gain values for various measurement
parameters, while the current compensation and gain values are displayed next to the
appropriate fi elds.
2. When done, press the button Apply na stránce on the SETUP page
The current compensation value will display the previous value you entered. If you want
to change it, just enter a new value in the empty fi eld; the new value takes eff ect when the
icon is pressed Apply on the SETUP page.