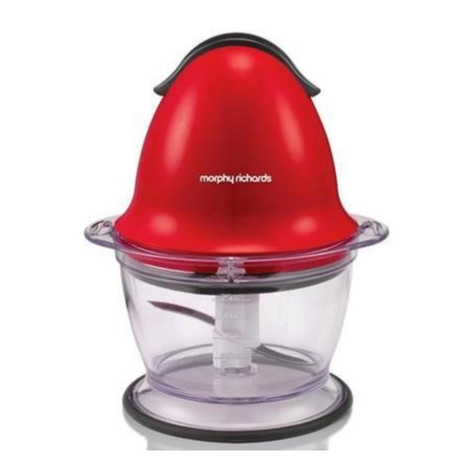
SensioHome SHMINFDCHP User manual

28
Model No. SHMINFDCHP
1
Thank you for purchasing this product
You may already be familiar with using a similar product, but
do please take time to read these instructions - they have been
written to ensure you get the very best from your purchase.
Discover our full range of exceptional Kitchen and Home
products online at www.sensiohome.com

2
SAFETY IS IMPORTANT
To ensure your safety and the safety of others, please
ensure you read the Product Safety and Electrical Safety
Information before you operate this product.
Before using the appliance, read this manual carefully.
This particularly applies to the safety instructions.
Failure to do so may result in personal injury or damage
to the food processor.
The appliance is exclusively designed for chopping small
quantities of food. It is only intended for household use
and not for commercial purposes.
Only use the appliance as described in this manual. Any
other use is considered improper and will invalidate
the guarantee and may result in damage to property or
persons.
Keep these instructions in a safe place for future
reference.
Technical Information
Model: SHMINFDCHP
Maximum capacity: 600ml
Voltage/frequency: 220-240V, 50Hz, 300W
3
CONTENTS
Product Safety . . . . . . . . . . . . . . . . . . 4
Electrical Safety . . . . . . . . . . . . . . . . . 7
Features . . . . . . . . . . . . . . . . . . . . . . 8
Before First Use. . . . . . . . . . . . . . . . . . 9
Using you Mini Food Chopper . . . . . . . . . 10
Tips for your Mini Food Chopper . . . . . . . 11
Cleaning and Maintenance . . . . . . . . . . . 13
Servicing . . . . . . . . . . . . . . . . . . . . 14
Storage . . . . . . . . . . . . . . . . . . . . . 14
Recipes . . . . . . . . . . . . . . . . . . . . . 15
Guarantee . . . . . . . . . . . . . . . . . . . . 23
Disposal Information . . . . . . . . . . . . . . 24

4
PRODUCT SAFETY
1. Please read thee instructions before operating the
appliance
2. Make sure that the voltage indicated on the rating
plate is the same as your household supply. If not,
do not use the appliance and return it to the place
of purchase.
3. A faulty electrical installation, excessive line
voltage, or incorrect operation may result in an
electric shock.
4. Only plug the appliance to an easily accessible
eletrical outlet so that it can be quickly
disconnected from the power supply in the event
of a problem.
5. This appliance can be used by children from
8 years and above and persons with reduced
physical, sensory or mental capabilities or lack
experience or knowlegde if they have been given
supervision or instruction concerning use of the
appliance in a safe way and understand the hazards
involved. Children shall not play with the appliance.
6. Cleaning and user maintenance shall not be made
by children without supervision.
7. Do not leave appliance unattended while in use.
8. Kepp the appliance out of reach of children during
and after use.
9. This appliance must not be placed on or near any
potentially hot surfaces (such as a gas or electric
hob).
10. Do not allow the mains lead to hang over the edge
of the work surface or become tangled or knotted.
11. Do not operate the appliance if the power cable or
plug are damaged, or if the appliance malfunctions
or is damaged in anyway. Check the power cord
5
and plug regularly for any signs of damage.
12. Always switch o and unplug when not in use,
when you intend to clean it, or in the event of a
malfunction.
13. If an extension cord is used, make sure the marked
electrical rating of the extension cord is at least as
great as the electrical rating of the appliance.
14. Do not use the appliance with an external timer or
separate remote control system.
15. Do not immerse the motor unit, or the mains cord
in water or other liquids.
16. Never touch the amins plug with wet or damp
hands.
17. Do not pull the mains plug out of the socket by the
cord; instead, always pull it out by the plug itself.
18. Never move, pull, or carry the appliance by the
mains cord.
19. Keep the appliance and the mains cord away from
open flames and hot surfaces.
20. Lay the mains cord so that it does not become
trapped, pulled or kinked.
21. Do not kink the mains cord and do not lay it over
sharp edges.
22. Only use the appliance indoors. Do not use the
food processor in damp rooms or outdoors.
23. Do not place the appliance so that there is a risk it
of it falling into a tub or sink.
24. Never reach to retrieve an eletrcial device if it
has fallen into water. In such a case, immediately
disconnect the mains plug.
25. Never insert any objects into the housing.

6
26. If the electrical circuit is overloaded with other
appliances, the food processor may not operate
properly. It should be operated on a separate
electrical circuit from other appliances.
27. Improper handling of the appliance may result in
damage to the food processor and may result in
personal injury.
28. Place the appliance on an easily accessible, level,
dry, heat-resistant and suciently stable work
surface.
29. Never place the appliance on or near hot surfaces
(oven tops etc).
30. Ensure that the mains cord does not come into
contact with hot parts.
31. Never expose the appliance to high temperatures
(heaters etc.) or to the eects of the weather (rain
etc).
32. Never attempt to clean the motor unit by
immersing it in water or other liquids and do not
use a steam cleaner to clean it. Otherwise, you
could damage the appliance.
33. Never place the motor base in the dishwasher. It
would be destroyed as a result.
34. Stop using the appliance if parts are cracked,
broken, or deformed. Only place damaged parts
with corresponding original spare parts.
7
ELECTRICAL SAFETY
Read these instructions thoroughly before using this
appliance or connecting it to the mains supply.
A 3 amp BS1362 ASTA approved fuse must be fitted.
The appliance must be earthed.
There are no user serviceable parts inside this appliance.
Always refer servicing to qualified electrical and service
personnel.
The main lead of this appliance is not replaceable by the
user.
If the mains lead of this appliance is damaged, the entire
appliance should be returned to an approved Service
Centre for repair.
Do not allow this appliance to be exposed to rain or
moisture during use or storage.
Before switching on, make sure that the voltage of your
electricity supply is the same as that indicated on the
rating plate. Connecting it to any other power source
may cause damage.
This product may be fitted with a non-rewireable plug.
If it is necessary to change the fuse in the plug, the fuse
cover must be refitted. If the fuse cover becomes lost
or damaged, the plug must not be used until a suitable
replacement is obtained.
If the plug has to be changed because it is not suitable
for your socket, or due to damage, it should be cut o
and a replacement fitted. The old plug must be disposed
of safely because inserting it into a 13-amp socket could
cause an electrical hazard.

8
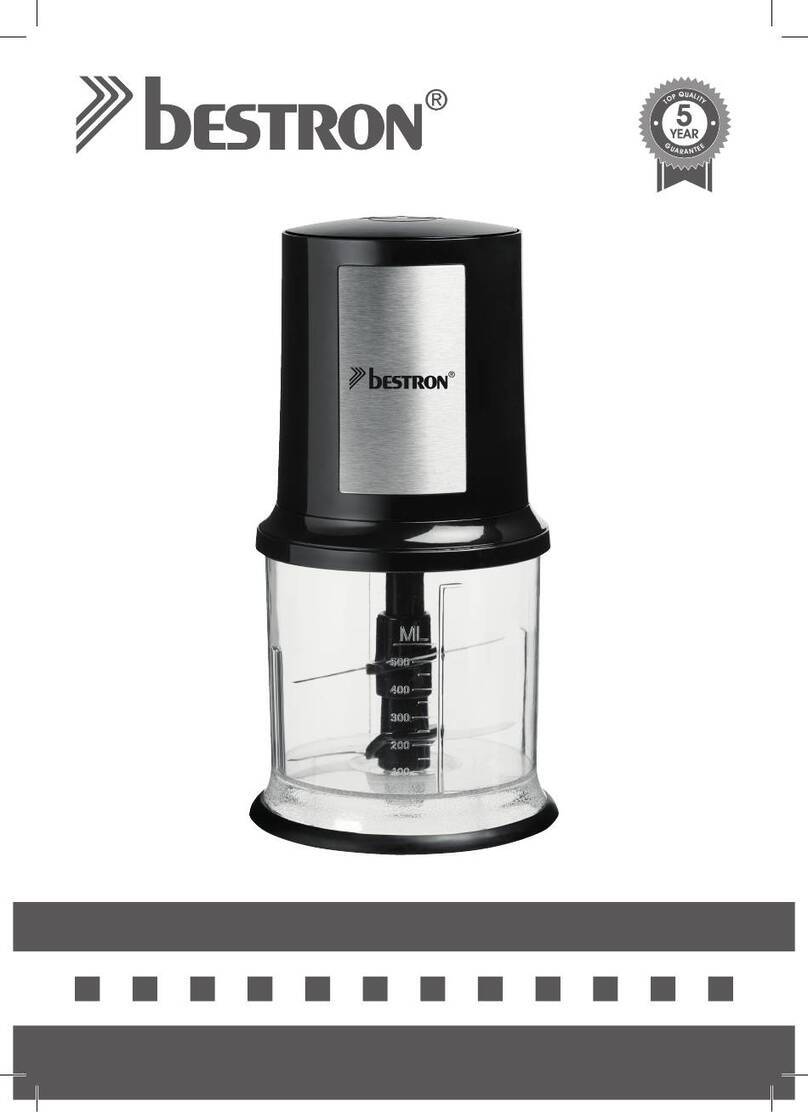
FEATURES
Operating switch
Motor unit
(with inbuilt thermal auto cut o)
Bowl lid
Bowl
Upper chopper blade
Down chopper blade
Base ring
9
BEFORE FIRST USE
Please take a few minutes to read this Instruction
Manual. Keep it handy for future reference
1. Take the mini food chopper out of the packaging.
2. Check to make sure that the all parts are included
(see Features).
3. Check whether the mini food chopper or individual
parts are damaged. If this is the case, do not use
the mini food chopper and contact the customer
helpline.
4. Clean all parts of the mini food chopper before first
use as described in the Cleaning section.

10
USING YOUR MINI FOOD CHOPPER
1. Place the appliance with the non-slip feet base
cover on the base of the bowl on a stable, clean,
dry and level surface.
2. Place the chopping blades into the bowl. Place
the blade with the larger blade stem onto the
central pin inside the bowl first, then followed by
the smaller blade attachment. NEVER TOUCH THE
BLADE - always insert and remove the chopping
blades by using the white blade stem.
3. Always cut the food to be processed into uniform
pieces no larger than 2.5cm.
4. Distribute the food evenly around the chopping
blade for even results.
5. Place the bowl lid onto the bowl. Rotate the lid
anticlockwise until lid will not rotate any further.
6. Plug the motor unit into the mains socket.
7. Press and hold the Operating Switch for 3 to 5
seconds and then release; the motor will stop.
Press and quickly release for a finer consistency. Do
not fill the chopping bowl above the 600ml when
liquid ingredients are being processed.
8. When the desired result is achieved, release the
Operating Switch and the appliance will shut o.
9. Unplug the mains cord from the mains socket.
10. Remove the motor unit up and o the lid.
11. Rotate the bowl lid clockwise to remove the lid and
empty the processed food from the bowl. Use a
spatula to make removing processed food easier
11
TIPS FOR YOUR MINI FOOD CHOPPER
1. For better control, process food by pressing the
Operating Switch briefly. Be careful not to over-
process. Most foods require only 3 to 8 seconds to
process.
2. Regularly check the consistency of processed
ingredients during use and continue if required
until the desired result is achieved.
3. For better results, process only small amounts of
food at a time.
4. To make bread crumbs, tear bread into pieces
before processing. Similarly, break biscuits into
pieces before processing to make crumbs for use in
a cheesecake base.
5. Before processing make sure the bowl, lid and
chopping blades are completely dry.
6. To chop carrots, celery, mushrooms, green peppers,
or onions, cut into 2.5cm chunks before processing
for more uniform consistency.
7. Do not process raw meat.
8. Some ingredients such as coee beans, baking
chocolate, or whole or hard spices may damage
the plastic parts and are not recommended to be
processed by the appliance.
9. For on even chopped result, you should scrape
the sides of the bowl down using a spatula and
continue processing. This should only be done
after the appliance has been switched o and
unplugged.
10. Do not fill the chopping bowl past the 600ml line.
If larger quantities are desired, process in several
small batches.

12
11. Layer foods so that herbs with stems are on the
bottom of the bowl.
12. Do not attempt to process extremely hard food
which is dicult to cut with a kitchen knife, such as
uncooked squash, etc.
13. Make sure to remove any bones, pits, or hard shells
before processing food.
13
CLEANING AND MAINTENANCE
1. Never handle the chopping blades with your
bare hands. They are very sharp. Always grasps
the blade stem when removing and cleaning the
blades.
2. Water or other liquids that have penetrated the
housing may cause a short circuit.
3. Make sure that no water or other liquids penetrate
the housing.
4. Never immerse the motor base in water or other
liquids.
5. Do not use any aggressive cleaners, brushes
with metal or nylon bristles, or sharp or metallic
cleaning utensils such as knives, hard scarpers anf
the like. They could damage the surfaces.
6. Do not put the motor unti in the dishwasher as this
will destroy it.
7. Unplug the appliance and allow the chopping
blades to stop spinning before cleaning.
8. Allow the appliance to cool down completely.
9. Wash the lid, chopping blades, base ring and bowl
in warm soapy water; rinse and dry thoroughly.
Removable parts may also be placed on the top
shelf of the dishwasher.
10. Clean the motor unit with a soft damp cloth and
wipe dry.

14
SERVICING
The Mini Food Chopper requires little maintenance. It
contains no user serviceable parts. Do not try to repair
it yourself. Any servicing requiring disassembly must be
performed by qualified appliance repair technicians.
STORAGE
1. All parts must be completely cleaned and dry
before being stored.
2. Assemble the appliance with the chopping blades,
lid, base ring and motor unit in position.
3. Store the appliance in the box or in a clean, dry
place well out of the reach of children.
15
RECIPES
Griddled Marinated Courgettes with Feta,
Lemon and Herbs
A wonderfully evocative taste of the Mediterranean, this
dish takes no time to prepare. Just leave it for 5 minutes
before serving to allow the flavours to develop.
Serves 2
Ingredients
2 courgettes, sliced lengthways into long strips about
/ cm thick
Good quality olive oil
Small bunch of parsley
Small handful of mint leaves
1 garlic clove, crushed
/ lemon, zest and juice
40g Greek feta cheese
Method
1. Heat a griddle pan until very hot and brush the
courgettes with a little olive oil and season.
2. Fry in batches until the courgettes are soft and tender
with charred grill lines.
3. Add the parsley and mint to the food chopper and
pulse until the herbs are finely chopped.
4. Add the garlic, lemon zest, lemon juice and 4 tbsp
olive oil and blend.
5. When the courgette is tender, arrange on a plate and
drizzle with the dressing, crumble over the feta cheese
and serve.

16
Houmous with Olive Flatbread
These tasty little flatbreads can be made with store
cupboard ingredients and are so quick to prepare. Serve
warm with this delicious homemade houmous.
Serves 2-3
Houmous Ingredients
1 x 400g tin chickpeas, drained
3 tbsp tahini
1 garlic clove, crushed
2 tbsp freshly squeezed lemon juice
Sea salt
100ml good quality olive oil
Olive Flatbread Ingredients
125g plain flour
1 tsp baking powder
/ tsp salt
10 pitted kalamanta olives, sliced
1 tbsp olive oil
Method
1. To make the flatbread, mix together the flour, baking
powder, salt and the sliced olives.
2. Make a well in the centre and add the olive oil and
gradually add up to 4 tablespoons of water to form a
soft dough. Turn the dough out onto a lightly floured
work surface and knead gently until soft and smooth.
3. Divide the dough into three and roll out each piece
to form a thin oval shape. Heat a large griddle pan or
heavy bottom frying pan until very hot. Drizzle the
flatbread with olive oil and place oil side down into the
17
hot pan. Cook for 3 minutes on each side adding more
olive oil if necessary.
4. While the flatbreads are cooking, add the chickpeas,
tahini, garlic, lemon juice, salt and olive oil into the
food chopper and blend until your desired consistency
is reached, process for longer for a smoother dip.
5. Taste and adjust the seasoning accordingly and spoon
into a serving bowl. Drizzle with a little olive oil. Cut
the flatbreads into triangles and serve alongside the
houmous.
Homemade Pesto Genovese
This is such a great versatile sauce that can be used
with pasta, swirled into mash, or used to fill a chicken
breast with some cream cheese. It is so much better than
any jarred variety and it’s so easy to make in the mini
chopper.
Ingredients
50g basil leaves
1 clove garlic, chopped
50g toasted pine nuts
125ml extra virgin olive oil
25g grated pecorino or parmesan cheese
Sea salt
Method
1. Add the basil leaves to the food chopper attach the lid
and pulse.
2. Add the garlic, pine nuts, oil and grated cheese and
pulse again until just combined.

18
3. Taste and adjust the seasoning with a little sea salt if
necessary.
Tip
Any leftovers can be stored in a sterile jar for up to 3
weeks in the fridge, just make sure you top the pesto
with a little extra olive oil to seal it and keep the air out.
Falafel with Halloumi and a sweet chilli drizzle
Full of tempting flavours, Falafels are hugely popular in
the Middle East. Quick and easy to make, Falafels can
be made with store cupboard ingredients, so are a great
standby for a tasty meal.
Serves 2
Ingredients
1 x 400g tin chickpeas, drained and patted dry
1 garlic clove, crushed
1 tsp ground cumin
1 tsp ground coriander
/ tsp cayenne pepper
/ lemon, juiced
1 tbsp plain flour
Small bunch coriander leaves only, chopped
Sea salt and freshly ground black pepper
125g Halloumi cheese, cut into 4 slices
4 tbsp Sweet chilli sauce
2 flatbreads or wraps
Olive oil for frying
19
Serve with Houmous and mixed salad leaves
Method
1. Add the drained chickpeas, garlic, spices, lemon juice,
flour, coriander, salt and pepper into the food chopper
and pulse or blend until thoroughly combined and a
thick paste is formed.
2. Form the mixture into six even sized balls and flatten
into small patties. Heat a non-stick frying pan over
a medium high heat and add some olive oil. Fry the
patties until golden and crisp, turning once during
cooking; this should take about 5-6 minutes. Add
more oil if necessary and when they are golden brown,
remove from the pan and keep warm.
3. Wipe the pan clean and add a little more oil. Add the
sliced Halloumi cheese and fry on both sides until
golden. Drizzle the chilli sauce over each piece of
cheese and turn to coat. Cook until it becomes sticky
and bubbly. Remove from the heat.
4. Warm the flatbread and spread with some houmous,
and add some mixed salad leaves. Place three falafels
on each flatbread and top with the sliced halloumi
cheese. Drizzle with the remaining chilli sauce from the
pan, roll up and serve.
Spiced Lamb with Lime and Coconut
This dish is jam packed with Asian flavours.
Serves 2
Ingredients
1 tbsp vegetable oil
300g Lean lamb leg steaks, diced
1 garlic clove, crushed

20
/ inch ginger, peeled and grated
1-2 tbsp red curry paste, depending on taste (see below)
1 lime, zested and juice of half
1 x 400g tin coconut milk
70g fine beans, sliced in half
Salt and pepper
1 tbsp chopped coriander
Red curry paste
3 shallots, peeled and roughly chopped
3 long red chillies, de-seeded
1 lemongrass stalk, outer layer removed then roughly
chopped
1 kar lime leaf, shredded
/ inch ginger, peeled and grated
1 tbsp Thai fish sauce
1 tsp ground cumin
1 tsp ground coriander
1 tbsp vegetable oil
Freshly ground black pepper
Method
1. To make the red curry paste, place all the ingredients
into the food chopper and blend until the mixture
forms a smooth paste, add a little water if the paste
is too sti, scape down the sides and re-blend if
necessary.
2. Heat the oil in a large frying pan, add the diced lamb
and fry until browned. Add the crushed garlic, grated
ginger, and 2 heaped tablespoons of the curry paste.
21
3. Coat the lamb with the curry paste, and add the lime
zest and lime juice and mix well. Stir in the coconut
milk and season, bring to the boil and add the green
beans and cook for 10 minutes, until the lamb is
cooked and the okra is tender. Sprinkle with chopped
coriander and served with steamed Jasmine rice.
Rib eye steaks with Chimichurri Salsa
Chimichurri salsa is the most popular accompaniment
for grilled meats in Argentina. It can either be used as a
marinade or a salsa. The salsa should be served cold, so
make sure the garlic is very finely crushed to avoid big
chunks of raw garlic.
Ingredients
2 x rib eye steaks
Small bunch flat leaf parsley
/ red onion, roughly chopped
2 garlic cloves, crushed
2 tbsp red wine vinegar
Pinch of crushed chilli flakes
1 tsp paprika
1 tomato, de-seeded and roughly chopped
Salt and freshly ground black pepper
1-2 tbsp Olive oil
Method
1. Place the parsley into the food chopper and pulse until
the herbs are well chopped.
2. Add the onion, crushed garlic, wine vinegar, chilli
flakes, paprika and tomato and blend until coarsely
chopped. Decant into a bowl, season well and add
some olive oil to combine.

22
3. Heat a griddle pan until hot. Rub the steaks with a little
olive oil, season with salt and pepper and add them to
the hot pan. Cook the steaks to your liking. The steaks
will feel very soft when pressed when they are rare, so
continue to cook them if you like them medium or well
done, serve the steaks with the salsa on the side.
Quick Blueberry Cheesecake
A fantastic cheesecake that takes no time at all to whip
up. If you don’t have metal rings, you could always serve
it up in a nice glass. If you don’t like Blueberries, use any
of your favourite berries, strawberries or blackberries
work well.
Serves 2
Ingredients
80g blueberries
1 tsp caster sugar
4 shortbread biscuits
130g full fat soft cheese
6 tbsp double cream
1 tbsp icing sugar
1 lemon, zested
Method
1. Place the blueberries in a small saucepan and add
the caster sugar. Cook for 2-3 minutes until the liquid
is lovely and purple and the blueberries are slightly
broken down. Remove from the heat and allow to cool.
2. Place 2 x 9cm metal rings on serving plates. Add the
shortbread biscuits to food chopper and process the
biscuits until they form crumbs. Remove from the bowl
and divide the mixture between the two rings, press
the mixture down firmly using the back of a spoon.
23
3. Rinse the chopping bowl out and dry. Add the soft
cheese, double cream, icing sugar and lemon zest to
the bowl and, process together until combined. Divide
the mixture between the two rings and spread the
mixture flat, again with the back of a spoon. Chill until
ready to serve.
4. When ready to serve, run a knife round the inside
of the rings very carefully and lift o, spoon the
blueberries and syrup over of the cheesecake and
serve.

24
GUARANTEE
This product is guaranteed for a period of 2 years from
the date of original purchase when you simply register
your product at: www.sensiohome.com
Any defect that arises due to faulty materials for
workmanship during the first 12 months, will either be
replaced or refunded where possible during this period
by the dealer from whom you purchased the unit.
NB: Non-registered products are guaranteed for a period
of 12 months.
If a fault develops after 12 months and within 24
months from the date of original purchase and you
have registered the product online, you should contact
Customer Services quoting the product’s model number
and batch code.
The following conditions apply:
1. The guarantee does not cover accidental damage,
misuse, cabinet parts, knobs or consumable items.
2. The product must be correctly installed and operated
in accordance with the instructions contained within
this manual.
3. It must be used only for domestic purposes.
4. The guarantee will be rendered invalid if the product is
re-sold or has been damaged by inexpert repair.
5. Specifications are subject to change without notice.
6. The manufacturer disclaims any liability for the
incidental or consequential damages.
7. The guarantee is in addition to, and does not diminish
your statutory or legal rights.
8. Valid in the UK only.
25
Customer Helpline: 0345 467 6743
Disposal Information
Waste electrical product should not be disposed on
with household waste.
Please recycle where facilities exist.
Check with your local authority for recycling advise.
MPL Home Ltd, Unit 32784 Courier Point, 13 Freeland Park, Wareham
Road, Poole, Dorset, BH16 6FH, UK
MPL Home Ltd, Unit 5, The Courtyard Business Centre, Orchard Lane,
Blackrock, Co. Dublin. A94 Y6C3

26
27
Table of contents
