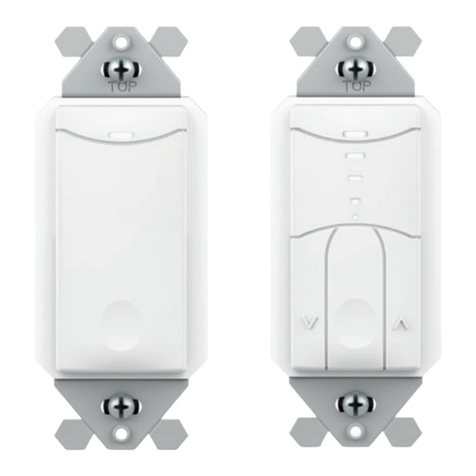
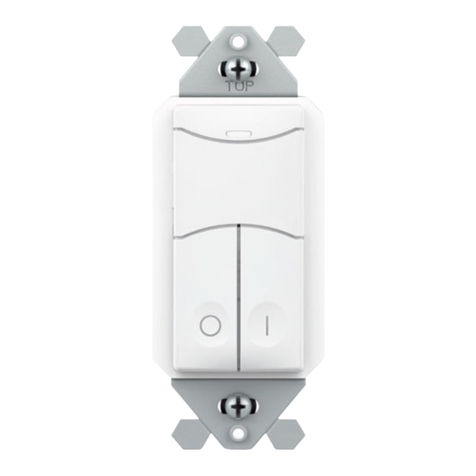
SENSORWORX SWX-851 Series Installation instructions

WIRELESS WALL SWITCH
& LOAD CONTROLLER
INSTALLATION & OPERATION INSTRUCTIONS
MODEL NUMBERS DESCRIPTIONS
SWX-851-xx WIRELESS WALL SWITCH LOAD CONTROLLER,
120/277VAC, NO NEUTRAL REQUIRED
BASIC OPERATION
A received wireless message indicating occupancy from one or more wirelessly linked
sensors will trigger the unit’s integrated relay to close. When congured for Vacancy
operation, lights must be initially switched on by pressing the unit’s button (or by pressing
the ON button on a wirelessly linked wall station). Once closed, line voltage will ow
through the relay and turn on the connected lighting load. This wall switch load controller
maintains a master time delay that is reset every time a linked sensor reports occupancy.
Lights will be switched off once there hasn’t been an occupancy message reported for the
duration of the time delay.
* xx = color (WH, IV, AL, GY)
SPECIFICATIONS
ELECTRICAL
OPERATING VOLTAGE
120-277 VAC, Single Phase, 50/60 Hz
LOAD RATINGS
MAX: 800W @ 120VAC
1200W @ 277VAC
MIN: None
LOAD TYPES
LED Driver/Lamps
CFL, Electronic/Magnetic Ballasts
(Fluorescent)
Tungsten (Incandescent)
ESD IMMUNITY
Tested to withstand electrostatic
discharge without damage or
memory loss.
SURGE IMMUNITY
Tested to withstand surge voltages
without damage or loss of operation.
NON-VOLATILE MEMORY
Saves all settings even if power is
disrupted.
ENVIRONMENTAL
OPERATING TEMP
32°F to 122°F (0°C to 50°C)
RELATIVE HUMIDITY
0-95% Non-Condensing, Indoor Use
Only
OPERATION
OPERATING MODES
Occupancy, Vacancy, Switch Disable
TIME DELAY OPTIONS
1, 5, 10, 15, 20, 30 min.
WIRELESS
RANGE
80’ line of site w/o obstruction (walls)
40’ with obstruction (walls/oors)
FREQUENCY
915 MHz ISM Band
WIRELESS LINKING
Simple 3 sec. Push Button Process
SECURITY
All Wireless Data is Encrypted
PHYSICAL
SIZE
2.74”H x 1.68”W x 1.39”D
(6.96 x 4.27 x 3.53 cm)
<1” Wallbox Mounting Depth
WEIGHT
4.5 oz
MOUNTING
Single Gang Switch Box
LED STATUS INDICATOR
Bi-color White & Blue
CODE COMPLIANCE
These load controllers can be used to
meet ASHRAE 90.1, IECC, & Title 24
energy code requirements.
OVERVIEW
The SENSORWORX wireless wall switch load controller links to remote occupancy
sensors and switches without low voltage wiring in order to provide automatic lighting
control. Designed with contractors in mind, the unit is signicantly shallower than typical
wall controllers, resulting in less crowded wall boxes. Additionally, versatile wiring
enables usage with or without a neutral connection and never requires a minimum load.
This switch also matches the SENSORWORX family of wall switch occupancy sensors
and 0-10V dimming wall switch sensors. All SENSORWORX products are proudly made
in the USA.
FEATURES
ELECTRICAL FEATURES
à Accommodates Neutral (3-Wire) and No-Neutral (2-Wire) Installations
à Electronically Timed Switching Ensures Long Relay Life
à No Minimum Load or External Load Capacitor (MLC) Requirements
à Meets Regulatory Guidelines for Current Leakage
PHYSICAL FEATURES
à Enclosure is 25-40% Shallower than Other Wall Controllers (< 1” Depth into
Wallbox)
à Self-Grounding Mounting Strap
à Modern Look and Intuitive Easy-Tap Button
OPERATIONAL FEATURES
à Pairs in Seconds with Wireless Sensors & Remote Wall Stations
à Configurable Time Delays and Operational Modes (e.g. Occupancy, Vacancy,
Switch Disable)
à Blue Locator LED when Lights are Off
à Settings are Adjustable Without Removing Cover Plate
à Links with up to 30 sensors and/or switches

INSTALLATION INSTRUCTIONS
FRONT SIDE
BREAK-OFF
BRACKET EARS
BREAK-OFF
BRACKET EARS
LED INDICATOR
BUTTON
SENSOR FACE**
2.74”
SUPPLIED MOUNTING SCREWS
FOR MOUNTING TO
SINGLE GANG SWITCH BOX
1.39”
0.94”
1.69”
** SENSOR FACE IS FIELD REMOVABLE IN ORDER TO CHANGE COLORS. CONTACT FACTORY FOR ADDITIONAL FACES
à Designed to mount in 1-gang wall box with
3.28” hole spacing.
à Units can also share multiple gang wall boxes
with other devices.
à Unit face is eld removable in order to change
colors. Contact factory for additional faces.
H
N
GRN
* IF NO NEUTRAL PRESENT, REMOVE WHITE SLEEVE FROM WIRE
& CONNECT GREEN/YELLOW WIRE TO GROUND
LIGHTING LOAD
*
SWX-851
WIRELESS
WALL SWITCH
CONTROLLER
WHT
BLK
SWITCHED OUTPUT
BLU
NEUTRAL TO GROUND CONVERSION DETAIL
à The white wire has a removable sleeve which reveals a green/
yellow wire
NOTE: This product is UL listed and meets NEC
404.2(c) & 404.22 guidelines regarding powering
over ground & current leakage. Device may be
used in replacement or retrofit applications
when no neutral conductor is present.
SLIDE
SLIDE
SLIDE
WHITE SLEEVE OFF
WIRING
à Unit works both in installations where Neutral connection is available as well as installations where only Ground connection is present.
à If no neutral is present, remove the white sleeve from the wire & connect the now Green/Yellow wire to Ground.
à Note, either the white wire or green/yellow wire must be connected. The all green wire is just for safety.
BASIC WIRING
WARNING: TURN POWER OFF AT THE CIRCUIT BREAKER BEFORE WIRING
LINE VOLTAGE
WIRELESS
WALL SWITCH
CONTROLLER
WIRELESS
CEILING
SENSOR
à Small Ofces à Copy Rooms à Private Restrooms
APPLICATIONS
SMALL SPACES
For control of small spaces like a private ofce, a wireless wall switch controller linked
to a single wireless ceiling sensor (SWX-201-B) is recommended (see diagram on right).
Both occupancy (auto-on) and vacancy (manual-on) operation are achievable in order to
meet energy code requirements.
MEDIUM SIZE SPACES
For control of medium size spaces like a conference room or small classroom, a wireless
wall switch controller linked to a single wireless wide view sensor (SWX-401-B) provides
an excellect solution. Linking additional sensors is also an option if necessary. Switching
from a second location (e.g. 3-way) is achieved by linking a remote wireless wall switch
(SWX-852) to the wireless switch controller.
à Small
Classrooms
à Conference
Rooms
à Short Hallways à Break Rooms

COMPATIBLE WIRELESS DEVICES
MODEL # DESCRIPTION WIRELESS TYPE POWER TYPE
SWX-201-B Small Motion 360° Sensor, PIR Transmit Battery
SWX-401-B Wide View Sensor, PIR Transmit Battery
SWX-402-B Long Range Hallway Sensor, PIR Transmit Battery
SWX-851-xx Wall Switch Load Controller, No Neutral Required, <xx = color> Transmit & Receive 120-277 VAC
SWX-852-B-xx Remote Switch (On/Off), <xx = color> Transmit Battery
SWX-854-B-xx Remote Dimming Switch (On/Off, Raise/Lower), <xx = color> Transmit Battery
SWX-950 Power Pack Load Controller, 20A Receive 120/277 VAC
SWX-950-D2 Power Pack Load Controller, 20A, 0-10V Dimming Receive 120/277 VAC
SWX-950-AX Hybrid Wireless/Wired Power Pack Load Controller, 20A Transmit & Receive 120/277 VAC
SWX-950-AX-D2 Hybrid Wireless/Wired Power Pack Load Controller, 20A, 0-10V Dimming Transmit & Receive 120/277 VAC
The below chart lists the devices that can be used in a SENSORWORX wireless application. Note that sensors and remote switch & dimmer devices are transmit only devices and
therefore must be linked to a load controller for switching or dimming of lighting.
WIRELESS LINKING (PAIRING)
Linking a wall switch controller with a sensor, power pack, dimmer, or another wall switch controller is quickly done via the following procedure:
Step 1. Enter pairing mode by holding down the wall switch’s button for 3 seconds until the LED starts alternating blue and white, then release.
Step 2. At the sensor (or other remote device), hold down the programming button for 3 seconds until the LED starts alternating blue and white. Releasing will link the sensor with the
switch in pairing mode (see note 1 below).
Step 3. Repeat step 2 to link another sensor or device.
Step 4. When all devices have been linked, exit pairing mode on the wall switch controller by pressing the button 1 time. Pairing will also be automatically closed after 15 minutes of
no new devices being linked.
Note 1: Once a device(s) is linked, the alternating LED colors on the wall switch controller will periodically pause and blink out total number of linked devices. There will be no blinks
during the pause until after the rst device is linked.
Note 2: Pairing two wall switch controllers (or one wall switch controller and one wireless power pack) can be done by putting each device in pairing mode rst (i.e. Step 1 above) before
continuing to Step 2 for each device. After Step 2 has been completed for each device, continue to Step 3 for each device.
STEP 1
WALL SWITCH
STEP 2 & STEP 3
WIRELESS SENSORS & REMOTE SWITCHES
STEP 4
WALL SWITCH
SWX-851
HOLD
FOR 3 SEC
SWX-851
PRESS ONCE
HOLD
FOR 3 SEC
APPLICATIONS (CONT.)

CONFIGURATION SETTINGS
FUNCTION #2 OCCUPANCY TIME DELAY
Unlike wired occupancy sensor systems, the time frame between when occupancy was detected last and connected lights turning off is a setting that is maintained in the load controller
and not the sensor itself. This arrangement enables the sensors to conserve battery life. See additional notes below for more information on wireless sensor communications to a load
controller.
SETTING # DESCRIPTION FUNCTION #
2 1 Min
3 5 Min
4 10 Min Default for all models
5 15 Min
6 20 Min
7 30 Min
CHANGING THE OCCUPANCY TIME DELAY
1Read through the above list and note the number of the desired setting (e.g. 4 = 10 minutes).
2Enter programming mode by pressing and holding the button for 6 seconds until the LED begins ashing blue only, then release.
3Enter Function #2: Occupancy Time Delay by tapping and releasing the unit’s pushbutton 2 times.
4The LED will blink back white the number of times equal to the current setting (e.g., 4 times for 10 minutes). Following a short pause, this blink back sequence will repeat (3x before
exiting). Interrupt blink back by pressing the button the number of times equal to the new desired setting (e.g. 5 = 15 minutes). The LED will blink back white the new setting number as
conrmation
6To Save and Exit programming mode, press and hold the button until blue LED changes to white, then release. The LED will then blink white twice as conrmation of success.
Note: To Exit without saving during any step, release button and wait until the unit double ashes blue.
ADDITIONAL NOTES ON OCCUPANCY TIME DELAY
à By default, every ~60 seconds wireless sensors transmit a status message whether or not occupancy was detected during the previous period.
à Referred to as the sensor’s “heartbeat”, this period can be reduced to ~30 seconds although this will decrease expected battery life.
à If a sensor transmitted “unoccupied” at its last heartbeat, any new occupancy detection event will be transmitted immediately.
à If a sensor transmitted “occupied” at its last heartbeat, new occupancy events will only be transmitted at the heartbeat interval, thus conserving battery life.
à All wirelessly linked wall switch load controllers and/or power packs have a master time delay that is reset every time a linked sensor reports occupancy. Lights will be switched off
once all linked sensors have continously reported unoccupied for the duration of the time delay.
à If a wall switch load controller does not receive a heartbeat transmission from a linked sensor for 10 minutes it will blink out an error code (4 blue blinks, followed by a pause). If more
than one sensor is linked, the sensor heartbeats from all sensors must have stopped for the error warning to begin blinking.
All conguration settings for the wireless wall switch load controller are organized into several parameter functions with values that can be accessed and changed by pressing the unit’s
push-button and observing the LEDs feedback.
NOTE: A 5-10 second time delay sensor test mode
can be initiated from a sensor in order to test
coverage. Test mode will expire after 10 minutes.

SETTING # MODE DESCRIPTION
2 Vacancy Mode
Pressing the unit’s button (or an ON button push on a linked wireless switch) is required to initially turn lights on. Lights will turn off automatically if
the OCCUPANCY TIME DELAY (Function #2) expires between received occupied messages from a sensor. Lights can also be switched off manually
by pressing the unit’s button (or if an OFF button push on a linked wireless switch is received).
3Occupancy Mode (Override Off)
Lights come on automatically when an occupancy signal is received from a wirelessly linked sensor. Lights will turn off automatically if the
OCCUPANCY TIME DELAY (Function #2) expires between received occupied messages from a sensor. Lights can also be switched off manually by
pressing the unit’s button (or an OFF button push on a linked wireless switch is received). After being switched off manually, lights will not revert to
an Automatic On state (i.e. the must be manually switched back on).
4* Occupancy Mode (Presentation)
DEFAULT SETTING
Lights come on automatically when an occupancy signal is received from a wirelessly linked sensor. Lights will turn off automatically if the
OCCUPANCY TIME DELAY (Function #2) expires between received occupied messages from a sensor. Lights can also be switched off manually by
pressing the unit’s button (or an OFF button push on a linked wireless switch is received). After being switched off manually, lights will revert back to
the Automatic On state once the unit’s time delay exires.
5 Automatic On (Disabled Off Switch)
Lights come on automatically when an occupancy signal is received from a wirelessly linked sensor. Lights will turn off automatically if the
OCCUPANCY TIME DELAY (Function #2) expires between received occupied messages from a sensor. Lights cannot be switched off from its own
button or any wirelessly linked switch.
FUNCTION #3: OPERATIONAL MODES
Wireless wall switch load controllers have several sequence of operation choices.
CHANGING THE OPERATIONAL MODE
1Read through the above list and note the number of the desired setting (e.g. 2= Vacancy Mode).
2Enter programming mode by pressing and holding the button for at least 6 seconds until the LED begins ashing blue only, then release.
3Enter Function #3: Operational Modes by tapping and releasing the unit’s pushbutton 3 times.
4The LED will blink back white the number of times equal to the current setting (e.g., 3 times for Automatic On Occupancy Mode). Following a short pause, this blink back sequence will
repeat (3x before exiting). Interrupt blink back by pressing the button the number of times equal to the new desired setting (e.g. 2 = Vacancy Mode). The LED will blink back white the
new setting number as conrmation
6To Save and Exit programming mode, press and hold the button until blue LED changes to white, then release. The LED will then blink white twice as conrmation of success.
Note: To Exit without saving during any step, release button and wait until the unit double ashes blue.
ADDITIONAL NOTES ON OPERATIONAL MODES
à When runnning in the default operating mode (Setting 3 - Occupancy Mode (Presentation), if the lights are manually switched off when there are still occupants in a space (to
show a presentation for example), the Automatic On operation will be disabled until the sensor time delay expires.
à In applications with wirelessly linked sensors, if the switch is pressed but no occupancy signal is ever received, the lights will come on for 1 minute and then shut off.
à When in Vacancy (Manual On) Mode (Setting #2), there is a 15 second “grace” period after the sensor times out when the sensor will switch lights back on automatically if
occupancy is detected. After 15 seconds the sensor will revert to vacancy (manual on) operation.
CONFIGURATION SETTINGS (CONT.)
SETTING # DESCRIPTION
3 Enter Forget Mode (opposite of Pairing/Linking Mode
4 Forget All Linked Devices
5 Send a “Forget Me” Message
FUNCTION #4: FORGET LINKED DEVICES
To clear the unit’s list of linked wireless devices the following commands can be executed.
FORGETTING LINKED DEVICES
1Read through the above list and note the number of the desired command (e.g. 4 = Forget All Linked Devices).
2Enter programming mode by pressing and holding the button for at least 6 seconds until the LED begins ashing blue only, then release.
3Enter Function #4: Forget Linked Devices by tapping and releasing the unit’s pushbutton 4 times.
4Interrupt blink back by pressing the button the number of times equal to the new desired setting (e.g. 4 = Forget All Linked Devices). The LED will blink back white the new setting
number as conrmation
5To Execute the command and Exit programming mode, press and hold the button until blue LED changes to white, then release. The LED will then blink white twice as conrmation of
success.
Note: To Exit without saving during any step, release button and wait until the unit double ashes blue.

FUNCTION #8: RESTORE FACTORY DEFAULTS
To return a wall switch controller to its original factory default settings, follow the below steps:
1Enter programming mode by pressing and holding the button for at least 6 seconds until the LED begins ashing blue only, then release.
2Press and release the unit’s pushbutton 8 times, wait 2 seconds, then press the button 3 times.
3To Execute the command and Exit programming mode, press and holding the button until the LED changes to blue, then release. The LED will then blink white twice as conrmation of
success.
Note: To Exit without saving during any step, release button and wait until the unit double ashes blue.
FUNCTION #7: LED BEHAVIOUR
When the load controller has switched the lights off, the unit’s LED will be solid blue as a locator. To disable this locator LED functionality, follow the below steps.
SETTING # DESCRIPTION
2 Locator LED enabled (default)
3 Locator LED disabled
CHANGING THE LED BEHAVIOUR
1Enter programming mode by pressing and holding the button for at least 6 seconds until the LED begins ashing blue only, then release.
2Press and release the unit’s pushbutton 7 times, wait 2 seconds, then press the button 3 times to disable location functionality (or 2 times to enable).
3To Execute the command and Exit programming mode, press and holding the button until the LED changes to blue, then release. The LED will then blink white twice as conrmation of
success.
Note: To Exit without saving during any step, release button and wait until the unit double ashes blue.
FUNCTION #5: RELAY ENABLE/DISABLE
If the wall switch load controller is being used as a remote switch for another load controller and not controlling a lighting load of its own, the relay can be disabled. To disable, follow the
below steps.
SETTING # DESCRIPTION
2 Relay enabled (default)
3 Relay disabled (i.e. always closed)
DISABLING THE RELAY
1Enter programming mode by pressing and holding the button for at least 6 seconds until the LED begins ashing blue only, then release.
2Press and release the unit’s pushbutton 5 times, wait 2 seconds, then press the button 3 times to disable the relay (or 2 times to enable).
3To Save the setting and Exit programming mode, press and holding the button until the LED changes to blue, then release. The LED will then blink white twice as conrmation of
success.
Note: To Exit without saving during any step, release button and wait until the unit double ashes blue.
CONFIGURATION SETTINGS (CONT.)

Five-Year Limited Warranty.
Complete Warranty Terms Located at: sensorworx.com/warranty
INS851 | REV 001–200611
SENSORWORX | 3 Essex Sq, Essex, CT 06426
203.678.4224 | www.sensorworx.com
© 2020 BLP Technologies, Inc. All rights reserved.
FCC INFORMATION (FCC ID: 2AVRY-SWX0001)
ISED CANADA INFORMATION (IC: 26012-SWX0001)
This device complies with Part 15 of the FCC Rules. Operation is subject to the following conditions:
1. This device many not cause harmful interference, and
2. This device must accept any interference received, Including interference that may cause undesired operation
Changes and Modications not expressly approved by BLP Technologies can void your authority to operate this equipment under Federal Communications Commission’s rules.
In order to comply with FCC/ISED RF Exposure requirements, this device must be installed to provide at least 20 cm separation from the human body at all times.
This equipment has been tested and found to comply with the limits for a Class B digital device, pursuant to Part 15 of the FCC Rules. These limits are designed to provide reasonable protection against
harmful interference in a residential installation. This equipment generates uses and can radiate radio frequency energy and, if not installed and used in accordance with the instructions, may cause harmful
interference to radio communications. However, there is no guarantee that interference will not occur in a particular installation. If this equipment does cause harmful interference to radio or television
reception, which can be determined by turning the equipment off and on, the user is encouraged to try to correct the interference by one of the following measures:
• Reorient or relocate the receiving antenna.
• Increase the separation between the equipment and receiver.
• Connect the equipment into an outlet on a circuit different from that to which the receiver is connected.
• Consult the dealer or an experienced radio/TV technician for help
This device contains licence-exempt transmitter(s)/receiver(s) that comply with Innovation, Science and Economic Development Canada’s licence-exempt RSS(s). Operation is subject to the following two
conditions:
1. This device may not cause interference.
2. This device must accept any interference, including interference that may cause undesired operation of the device.
In order to comply with FCC/ISED RF Exposure requirements, this device must be installed to provide at least 20 cm separation from the human body at all times.
L’émetteur/récepteur exempt de licence contenu dans le présent appareil est conforme aux CNR d’Innovation, Sciences et Développement économique Canada applicables aux appareils radio exempts de
licence. L’exploitation est autorisée aux deux conditions suivantes :
1. L’appareil ne doit pas produire de brouillage;
2. L’appareil doit accepter tout brouillage radioélectrique subi, même si le brouillage est susceptible d’en compromettre le fonctionnement.
3. An de se conformer aux exigences d’exposition RF FCC / ISED, cet appareil doit être installé pour fournir au moins 20 cm de séparation du corps humain en tout temps
Table of contents
Other SENSORWORX Switch manuals
Popular Switch manuals by other brands

LevelOne
LevelOne Infinity IES-1081 Quick installation guide

Avatar Technologies
Avatar Technologies VS-441S Operation manual
Gira
Gira KNX 5171 operating instructions
THOMSON
THOMSON GRASS VALLEY Triton TTN-BES-1602/110 installation manual
Neol
Neol ePowerSwitch M8 quick start guide
Lenovo
Lenovo IdeaCentre B300 Product guide
