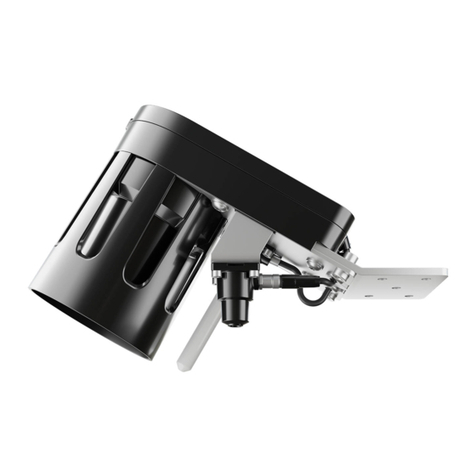
Sentricon Detector Device Manual

The Detector device was designed to locate and identify stations
for the Sentricon®System with Always Active™technology LID top
caps or ESP®technology Transensors When using Sentricon with
ESP technology, the Detector will also determine the station status.
Detector Features
– LCD display — identies station, and indicates station status (with ESP technology
only)
– Proximity sensor — easier to locate stations
– Replaceable, rechargeable Nickel Metal Hydride batteries—commercially available
and easy to replace
– Auto shut off — saves battery life
– Adjustable pole length with ergonomic design — enhanced technician comfort
– No exposed wires — easier to use around landscaping and reduced risk for damage
and repairs
– Light weight — enhanced technician comfort
When You Get the Detector
1. Remove top panel electronics box and insert 8 nickle metal hydride batteries.
2. Use the included charger found in the box to fully charge the batteries.
3. Review instructions for each feature of the auxilary options.
4. Watch the “How-to-Use” video on the “product resources” section of the CSS Resource Center (www.cssresourcecenter.com).
5. Test the device in the ofce to make sure it works properly before going to a job site.
On & Off
To turn the device on, lightly tap the green power button (see photo). To turn the device off, tap the green power button a second time. The
device will automatically turn off after 2 ½ minutes of inactivity. (This time can be adjusted.)
Audible Notications
– Device power on and device power off — brief audible tone
– Station proximity — audible tone increases in frequency as the device gets closer to the station
– Maintenance alert — pulsating audible tone (with ESP technology only)
Light Colors
– Green light — power is on
– Red light — station proximity
– Orange light — batteries are charging
– Yellow light — batteries are no longer capable of accepting a charge; replace the batteries
Pole Adjustments
The length of the pole can be adjusted by loosening the adjustment knob and shortening or lengthening the telescopic pole.
Protective Case
Will be included with the unit to help absorb impact from normal use and prevent scufng.
DETECTOR DEVICE INFORMATION AND USE DIRECTIONS

Battery
The device is designed to read 800 (about 35 average size homes) Always Active LID top caps or ESP Transensors before a recharge is
needed. It is recommended to recharge the device as necessary. The LCD panel does not show battery life percent, but the charge indicator
light will turn off. The 8 commercially available AA rechargeable Nickel Metal Hydride batteries can be easily replaced as needed (see
photo).
Moisture
The Detector is built to be water resistant, but it is not water proof. Care should be taken when used in wet conditions.
Bluetooth
This unit is enabled with Bluetooth 2.0 + EDR. This technology can be used with classic mobile platforms such as handheld devices and
some mobile 2.0 devices. It is important to determine if the Detecctor is compatible with your software equipment devices.
Repairs
For any repairs or maintenance issues, please call 1-800-888-5511 option 1.
NOTE: This equipment has been tested and found to comply with the limits for a Class B digital device, pursuant to part 15 of the FCC Rules. These limits are designed to provide reasonable
protection against harmful interference in a residential installation. This equipment generates, uses and can radiate radio frequency energy and, if not installed and used in accordance with
the instructions, may cause harmful interference to radio communications. However, there is no guarantee that interference will not occur in a particular installation. If this equipment does
cause harmful interference to radio or television reception, which can be determined by turning the equipment off and on, the user is encouraged to try to correct the interference by one or more
of the following measures:
– Reorient or relocate the receiving antenna.
– Increase the separation between the equipment and receiver.
– Connect the equipment into an outlet on a circuit different from that to which the receiver is connected.
– Consult the dealer or an experienced radio/ TV technician for help.
FCC Radiation Exposure Statement
This equipment complies with FCC radiation exposure limits set forth for an uncontrolled environment. This equipment should be installed and operated with minimum distance 20cm between
the radiator and your body. Any changes or modications not expressly approved by the party responsible for compliance could void the user’s authority to operate this equipment.
— 2 —

DETECTOR DEVICE FEATURES – DEFINITIONS
Battery Housing: To install the batteries, rst remove the battery door located at the back end of the reader by removing four screws.
Insert the 1.2V rechargeable batteries into each slot making sure that each battery polarity is in the right orientation by observing that the
spring coils in the battery slots are for the negative side of the batteries (at end of battery) , then replace the battery compartment door by
inserting it back, and securing with the four screws removed initially.
Power Button: Turn on by pressing for one (1) second located on the bottom left side of the reader. A green light will illuminate. The LCD
display will show the message: Portable Reader Model M350. Thereafter, it will change to display a number with a % value and then the
letter M: also with a % value. The rst number with a % value, is the indication of the noise level of the Detector for reading the tags. For
the % value with the letter M indicates the amount of memory space left for recording the tag numbers.
Light Indicators: Immediately after the AC Power is connected, the Charge light will illuminate. When the battery is fully charged the
Charge light will turn off. If the batteries no longer can accept charge, meaning that the batteries have little capacity, the Replace light will
illuminate, now is the time to replace with new rechargeable batteries
AUX Features: Programmable features include
Volume: The volume function will allow changing the volume of the audible from OFF state to seven steps upward volume level. To change
the volume, press momentary the AUX button and the display will indicate the volume level set in the reader. To continue changing, keep
toggling the AUX switch until the desired level, then stop.
Back Light: This function allows turning off the back light of the LCD display in order to minimize power consumption. To turn off the LCD
back light press momentary the AUX button. The LCD display will display the volume level, then press and hold the AUX button until the
back light function appears, release the button, then press and hold again the AUX button to select the function, toggle for the desired
function then press and hold again to set that function until the display will indicates “value changed”
Signal Level: Shut Down time of this function allows to change the automatic shut off time of the reader after initialization or after a tag is
momentary read. The reader has four steps: Off, 60 sec., 150 sec., and 5 min. The best setting for maximum power saving of the batteries
is 60 sec. The Reader automatic default setting shut off time is 150 sec. To change the automatic default time, press momentary the AUX
button, then the LCD display will show the volume level, then press and hold the AUX button until the back light function appears, toggle
the AUX button until the shut off function appears (or desired function), to select this function press and hold again the button until the
shut off values appears (or desired function), toggle for the desired value then press and hold again until the display indicates “Value
changed”
Send tags: This function is only used when the reader is paired with an external storage device via the Bluetooth function. When the reader
is paired with the external device this function allows that the reader may send its memory stored data via the Bluetooth connection
Erase tags: This function allows the reader to erase its memory stored data. Follow Instructions as given above in the Shut Down function.
At the end of this set up function, please wait until the reader nishes erasing the les
BT Pairing: This function allows the reader to set up the pairing with an external storage device compatible with Bluetooth 2.0 EDR. Please
work with your Dow AgroSciences sales representative to determine your hardware/vendor software needs. Additional instructions are
needed for Bluetooth set up.
Unique Mode: In this mode the Detector will remain for 150 seconds (programmable values) and if no tag was read the Detector will shut
off automatically followed by a beep. But if a tag was read or detected, the shut off time is reset and the time count will start at zero value
and shut off automatically at the preset value150 sec.
— 3 —

DETECTOR DEVICE FEATURES – DIAGRAM
®™Sentricon, Always Active, ESP, and the Tri-Bar symbol are trademarks of The Dow Chemical Company (“Dow”) or an afliated company of Dow
®Glad ClingWrap is a trademark of The Glad Products Company
Always read and follow label directions.
Light Indicators
Power Button
Auxillary Programmable
Battery Housing
Speaker
LCD Display
Table of contents
Popular Security Sensor manuals by other brands
INIM Electronics
INIM Electronics Moon 700 Series installation manual
STEINEL
STEINEL HF 360-2 IP manual
INGEGNERIA DEI SISTEMI S.p.A.
INGEGNERIA DEI SISTEMI S.p.A. DETECTOR DUO user manual
ERNITEC
ERNITEC Eagle PIR-100 installation manual
STEINEL
STEINEL DualTech DALI-2 instructions
DELTA DORE
DELTA DORE DMB TYXAL + manual
