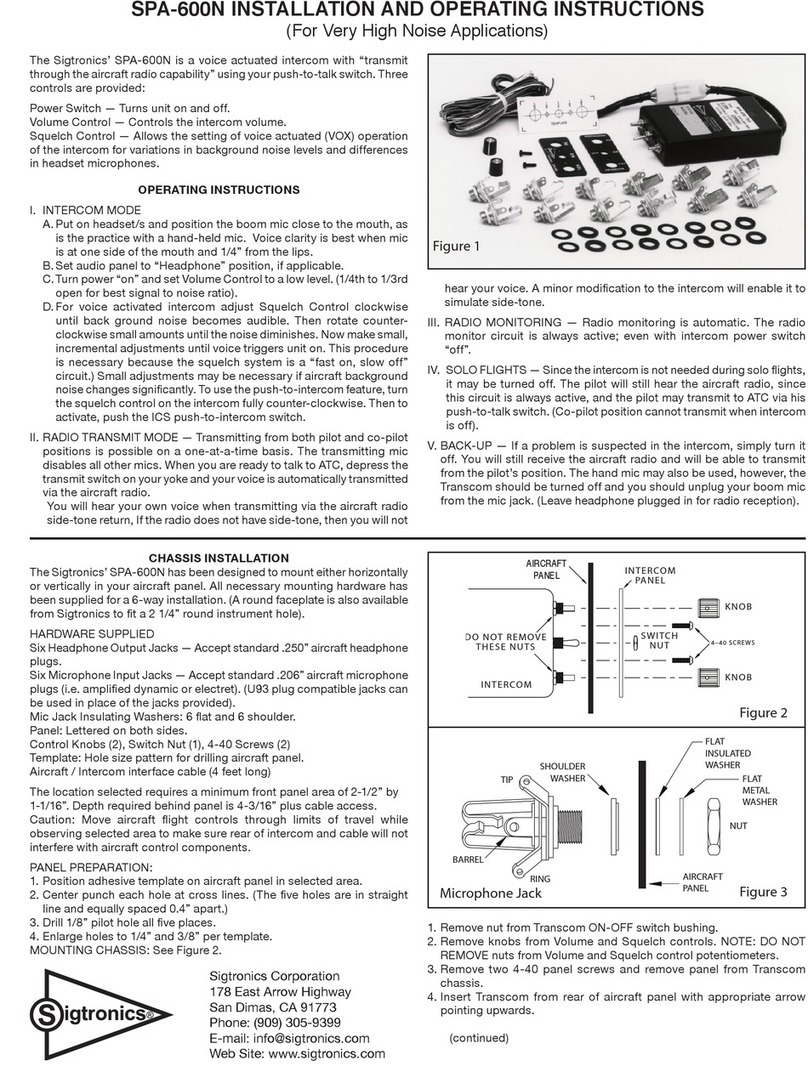
Sentryus GSM-DE2123 User manual

Copyright 2012 by Sentry US. All Rights Reserved. Contents within manual are subject to change without notice. R201210-V31
www.sentryus.com
GSM Door /Gate Intercom Entry System
For 123 Units max.
GSM-DE2123
USER MANUAL
USA VERSION
IP67
Please read this user manual and the quick setup guide completely and keep it for your future reference.
MADE IN TAIWAN
Speaker
LCD Display
Microphone

2
Disposal of Old Electrical & Electronic Equipment (Applicable in the European Union and other European countries with separate
collection systems).
This symbol on the product or on its packaging indicates that this product shall not be treated as household waste. Instead it shall be handed over to
the applicable collection point for the recycling of electrical and electronic equipment. By ensuring this product is disposed of correctly, you will help
prevent potential negative consequences for the environment and human health, which could otherwise be caused by inappropriate waste handling
of this product. The recycling of materials will help to conserve natural resources. For more detailed information about recycling of this product,
please contact your local city office, your household waste disposal service or the shop where you purchased the product.
CAUTION
When using this GSM Door / Gate Intercom Entry System, basic safety precautions should always be followed to reduce the risk of fire, electric
shock and personal injury. Please read the following before using your equipment.
1. Handle this product with care
Avoid any shock or bumping of the product. Improper handling could damage the product.
2. Cleaning
Unplug the product before cleaning. Do not use liquid cleaners or aerosol cleaners. Use a damp cloth for cleaning.
3. Requires a proper operating environment
This product is designed for outdoor use. Do not use this product near water. Do not use this product near an area where there is a potential of
gas leaks or near any fumes that can be explosive. Do not place this equipment near or over a radiator or any other heat source. Avoid using the
equipment during an electrical storm. There is a remote risk of electrical shock from lighting.
4. Check the power source voltage
The power source voltage should be within the specified range (Product must meet the specifications). Do not overload the wall outlet or power
cord where the power adapter is installed. This can result in fire or electric shock.
5. Objects and liquid entry
Never push objects of any kind into this product as this may touch dangerous voltage points of short out parts that could result in a fire or
electric shock. Never spill any kind of liquid on the product.

3
INDEX
CAUTION .................................................................................................................................................................. 2
PACKAGE CONTENTS ................................................................................................................................................ 4
SYSTEM DIAGRAM .................................................................................................................................................... 4
WALL MOUNT BRACKET DIAGRAM .......................................................................................................................... 5
INSTALLATION........................................................................................................................................................... 5
WIRING DIAGRAM & WIRING INSTRUCTIONS .......................................................................................................... 6
OPERATION & SETTINGS ...................................................................................................................................... 6-13
POWERING ON/OFF ...............................................................................................................................................6
MANAGER MODE & FUNCTIONS.............................................................................................................................7
MANAGER SETTINGS ...........................................................................................................................................7-8
VOLUME SETTINGS .................................................................................................................................................9
DOOR SETTINGS ................................................................................................................................................9-10
CALLING SETTINGS ................................................................................................................................................11
SUBSCRIBER ID NUMBER SETTING .......................................................................................................................12
CONTACTING A SUBSCRIBER ...........................................................................................................................12-13
OPEN DOOR REMOTELY .......................................................................................................................................13
BACK TO STANDBY SCREEN AUTOMATICALLY ......................................................................................................13
SIM CARD ..............................................................................................................................................................13
CALL MANAGER ....................................................................................................................................................13
MASTER RESET ......................................................................................................................................................13
SPECIFICATIONS ..................................................................................................................................................... 14
TROUBLESHOOTING ............................................................................................................................................... 14
WARRANTY ............................................................................................................................................................ 14
OPTIONAL NAME DIRECTORIES .............................................................................................................................. 15
RELATED PRODUCTS ............................................................................................................................................... 15

4
PACKAGE CONTENTS
Door/Gate Intercom Unit
Stainless Steel Surface
Mount Panel Housing
Wall Mounting Bracket
Power Adapter
13.5V DC 1000mA
Wire for Power
GSM External Antenna
16.5ft / 5m lead length
Four (4) Screws for
Mounting Bracket
Two (2) Screws for Door Phone
User Manual
For any returns, please include all components listed above with original packaging in Resalable Condition. Absolutely No Returns will be accepted
if any component is missing / damaged.
SYSTEM DIAGRAM
1) 2) 3) 4) 5)
6) 7) 8) 9)
Speaker
LCD Display
Keypad
0~9 Number keys
F1 Menu/Exit key
F2 Delete key
F3 ABC/abc/123 Exchange button
* Volume & select up key
# Volume & select down key
Microphone
Bottom Cover
Opening for
connecting wall
mount bracket
Metal back cover
plate
Opening for
connecting wall-
mount latch
Wiring terminal
SIM Card slot
GSM antenna socket
USB port
GSM antenna
Bottom cover

5
WALL MOUNT BRACKET DIAGRAM
INSTALLATION
1) Take the wall-mount bracket from the package and screw it on proper place (as Step 1 & 2
shown in figure 1).
2) Open the bottom cover of door unit and pass the wires through the hole. Then, refer to the
“Wiring Diagram and Wiring Instruction” to connect wires and insert the SIM card to SIM
card slot (as Step 3 shown in figure 1).
3) Put the bottom cover back (as Step 4 shown in figure 1).
4) Place door unit on the fixed wall-mount bracket (as Step 6 & 7 shown in figure 1).
5) Put the acrylic cover on the door unit when door unit has been screwed (as Step 8 & 9
shown in figure 1).
6) Plug the AC adapter into the AC outlet, then the door unit will go into standby mode (as
shown in figure 2.
Wall mount bracket
Screw connection to
GSM door/gate unit
Latch to connect to back
of the metal cover
Figure 1
Figure 2
WARNING: Only use the original power adapter
supplied. Using any other adapter might damage the
door unit and cause a risk of electric shock.

6
WIRING DIAGRAM & WIRING INSTRUCTIONS
1) System Power Supply Wiring
The system power supply (adapter) AC 120V or 230V / DC 13V is provided along with the system (please note whether it can meet local
voltage specification). The negative wire is connected to Terminal Pin 1 and the positive wire is connected to Terminal Pin 2.
2) Install Door Lock with System Power Wiring
The door lock power may be supplied from the system by connecting the positive wire of the lock to Terminal Pin 4 and the negative wire
to Terminal Pin 5. The ACK wire, if your strike has one, is connected to Terminal Pin 6. (The system will supply 12 volts DC at 1000mA.)
3) Install Door Lock with its own Power Supply Wiring
If the door lock comes with its own power supply or requires more power than what this unit provides, then the power should be
connected as follows:
Remove the jumper wires joining Terminal Pin 2 and Terminal Pin 3. Remove the jumper wires joining Terminal Pin 1 and Terminal Pin 5
as well. The positive wire of the power supply is connected to Terminal Pin 3 and the negative wire to Terminal Pin 5. The door lock’s
positive wire is connected to Terminal Pin 4 and the negative wire is to Terminal Pin 5. The ACK wire, if your strike has one, is connected
to Terminal Pin 6.
OPERATION & SETTINGS
Before operation please make sure the GSM Door Phone is installed correctly. Please also study all button functions before use.
POWER ON/OFF
To turn on the power:
Insert the plug of the power adapter into the DC power jack of door unit and the other end into an AC power outlet. When the power is on, the
system will emit a “beep” sound, show “GSM Door Phone” and software version on screen, then show “Search Network” for a few seconds, and
then go to standby mode.
To turn off the power:
Turn off the door unit by unplugging the power adapter from the AC power outlet.

7
MANAGER MODE & FUNCTIONS
Note: The unit will be time out after 5 seconds if no button is pressed.
Press F1 (MENU) button, and the system will show "Hello! Manager!
"Password: ______".
After entering default password "123456", press CALL button to show the button functions as listed below:
Press any button or wait for 6 seconds, it will show:
MANAGER SETTINGS
Under the Manager section, there are 4 main options: “System Setting”, “Volume Setting”, “Door Setting” and “Calling Setting”.
Press CALL button to enter System Setting.
CHANGE MANAGER PASSWORD:
Manager Setting System Setting Change Password
Note: The Manager Password is the key to enter Programming Mode. Please make sure to keep the Manager Password in a safe place. If you forget
the Manager Password, you’ll have to do a Master Reset which will delete your stored phone numbers and settings.
Under the Manager Menu option, press CALL button.
Select System Setting and press CALL button.
Select Change Password and press CALL button.
Enter new password by Number button (must be 6 digits).
Enter password again to confirm and press CALL button.

8
STORE MANAGER PHONE NUMBER:
Manager Setting System Setting Manager Phone#
Note: This will be the number that is called when the CALL button is pressed in standby mode.
Under the Manager Menu option, press CALL button.
Select System Setting and press CALL button.
Select Manager Phone # by /key and press CALL button.
With cursor on the 1, press CALL button to enter phone number.
Enter phone number with prefix and area code, then press CALL button to save. (If you enter a number incorrectly, use the /button to
move forwards or backwards. The F2 (Delete) button will clear a digit you do not want.)
Press F1 (EXIT) button to return to previous option screen.
SET MINUTES FOR TALKING TIME:
Manager Setting System Setting -Talking Time
Under the Manager Menu option, press CALL button.
Select System Setting and press CALL button.
Select Talking Time and press CALL button.
Input the number for minutes you will need for the intercom to be made without re-dial, then press CALL button to save.
Press F1 (EXIT) button to return to previous option screen.
SET GREETINGS:
Manager Setting System Setting Greetings
Under the Manager Menu option, press CALL button.
Select System Setting and press CALL button.
Select Greetings and press CALL button.
Select the default 1, 2 or User setting.
Enter the Greetings: 1 or 2 screen, then select default 1 or 2, press F1 (EXIT) to confirm and exit.
To set the “Greetings”by user, press *or # key to start the setting.
Press F3 to select ABC, abc or 123. 0 key for space.
After “Greetings” is set, press CALL button to save, press F1 (EXIT) to exit and return to previous option screen.

9
VOLUME SETTINGS
Change Microphone Volume:
Manager Setting Volume Setting Mic. Volume
Note: There are 9 levels of sensitivity for the microphone volume going from left (least sensitive) to right (most sensitive). If the GSM Door Phone is
installed outdoors, please set the microphone level to 3 or 4. This may help to reduce picking up too much background noise and/or feedback from
the speaker.
Under the Manager Menu option, press CALL button.
Select GSM Setting and press CALL button.
Select Mic. Volume and press CALL button.
Press */#(UP/DOWN) buttons to adjust volume.
Press F1 (EXIT) button to return to the previous option screen and the last setting will be saved automatically.
Change Speaker Volume:
Manager Setting GSM Setting Speaker Volume
Note: There are 9 levels of speaker volume from left (lowest) to right (loudest). If the GSM Door Phone is installed outdoors, please set the speaker
level to 4 or 5. Try not to set the speaker volume to the maximum level because it may cause feedback.
Under the Manager Menu option, press CALL button.
Select GSM Setting and press CALL button.
Select Speaker Volume and press CALL button.
Press */#(UP/DOWN) buttons to adjust volume.
Press F1 (EXIT) button to return to the previous option screen and the last setting will be saved automatically.
Change Speaker Volume During Conversation:
At any time during the conversation, if the caller needs to increase speaker volume, he can press */#(UP/DOWN) buttons to make adjustment.
The screen will show the current speaker volume and the microphone will be mute for 1.5 seconds, then the conversation will be continued.
DOOR SETTING
Enable/Disable Door Lock Open by Password:
Manager Setting Door Setting Open by Password
Note: If your GSM Door Phone is connected with an electric door strike, you can activate the password feature to open the door lock with a
password. The default password is “123456”.
Under the Manager Menu option, press CALL button.
Select Door Setting and press CALL button.

10
Select Open by Password and press CALL button.
Press CALL button to toggle between “Enabled” and “Disabled”.
Press F1 (EXIT) button to return to the previous option screen and the last setting will be saved.
Under standby mode, press the password and then press “F1” to open the door.
Change Door Opening Password:
Manager Setting Door Setting Opening Password
Note: This GSM Door Phone system will allow the user to open door by pressing 6-digit password. This feature is designed for easy access control.
We suggest to change the Door Opening Password every month or every two weeks for security concern.
Under the Manager Menu option, press CALL button.
Select Door Setting and press CALL button.
Select Opening Password and press CALL button.
Enter password (must be 6 digits).
Press CALL button to save the new password.
Press F1 (EXIT) button to return to previous option screen.
Door Opening Time:
Manager Setting Door Setting Door Open Time
Note: This GSM Door Phone system will allow the user to set how long the door lock will be opened. Sometimes, the user might need more time to
reach from the door phone unit to the locked main gate. We suggest to set enough time to allow him/her walk in no hurry.
Under the Manager Menu option, press CALL button.
Select Door Setting and press CALL button.
Select Door Open Time and press CALL button.
Enter the number of seconds (from 00 to 99).
Press CALL button to save.
Press F1 (EXIT) button to return to previous options screen.
Door Relay Type:
Manager Setting Door Setting Door Relay Type
Under the Manager Menu option, press CALL button.
Select Door Setting and press CALL button.
Select Door Open Time and press CALL button.
Press */#(UP/DOWN) buttons to select “Normal Open”or “Normal Close”.
Press CALL button to save the setting.
Press F1 (EXIT) button for back to previous option screen.

11
CALLING SETTING
Set Calling Time:
Manager Setting Calling Setting Calling Time
Note: The GSM Door Phone can be set with the calling time by seconds.
Under the Manager Menu option, press CALL button.
Select Calling Setting and press CALL button.
Select Calling Time and press CALL button.
Press Number button to set calling time and press CALL button to save.
Press F1 (EXIT) button for back to the previous option screen.
Changing the Calling by List:
Manager Setting Calling Setting Calling by List
Note: The GSM Door Phone system will allow the user to set the calling by list.
Under the Manager Menu option, press CALL button.
Use */#to select Calling Setting and press CALL button.
Use */#to select Calling by List and press CALL button.
Press button to adjust On or Off for the Calling by List function.
Press F1 (EXIT) button to return to previous option screen.
Set the Incoming Call:
Manager Setting Calling Setting Incoming Call
Note: The GSM Door Phone system will allow the user to set the calling by list.
Under the Manager Menu option, press CALL button.
Use */#button to select Calling Setting and press CALL button to enter.
Use */#button to select Incoming Call and press CALL button.
Press CALL button to adjust On or Off for the Auto Answer function.
Use */#button to select Wait Rings and press CALL button to select the rings from 1~9.
Press F1 (EXIT) button to return to previous option screen.

12
SUBSCRIBER ID NUMBER SETTING
The Subscriber function supports to set up multiple tenants and enable the user to press a subscriber number by the CALL button to connect with
the tenant. A subscriber ID # can be set from 1 to 6 digits in length. There are maximum 123 subscribers which can have 2 phone numbers
programmed for each.
The first registered phone number will be the first number that the GSM Door Phone will call. If the first registered number is busy or no one
answers the call, the door phone will automatically dial the second registered number. We suggest that the first number can be the home phone
number and the second number can be a mobile phone number.
Subscriber Setting Enter Subscriber ID:
Select Subscriber Menu option and press CALL button.
You can choose from 1 digit to 6 digits for the Subscriber ID.
Enter Subscriber ID “_____” and press CALL button.
Press 1button and press CALL button to start input of the first tenant information.
Use */#button to move cursor to “Yes”and press CALL button to confirm.
While the cursor is moved to “N” (Name) position, press CALL button, and then you can enter the tenant’s name by 2~9 Number buttons. (Use
F3 button to select ABC or abc, 0 button = space button).
Move cursor to 1by */#button and press CALL button to enter. Enter the first phone number with area code, then press CALL button
to save.
Move cursor to 2by */#button and press CALL button to enter. Enter the second phone number with area code, then press CALL
button to save.
Press F1 (EXIT) button to exit.
Note: Follow above steps to set the other tenant’s name and phone number.
CONTACTING A SUBSCRIBER
Under the "Welcome!" mode, enter User ID number (from 1 ~ 999999) and then press CALL button.
If the ID exists, the system will start dialing and show “Calling…” on the screen.
When the phone is connected, the screen will show “Talking”.
If the ID does not exist, the screen will show “Incorrect!”.
If the ID exists, but there is no number assigned, the screen will show “Calling…”, but will never connect and then time out after 3 minutes. In order
to avoid this problem, please make sure to input the phone number on each User ID.

13
If the dialing fails, the screen will show “No dial tone” and go back to standby mode.
If the call is not answered within one minute, the screen will show “No answer” and go back to standby mode.
During conversation, if the other party hangs up or the line is cut, the screen will show “No carrier” and go back to standby mode.
During conversation or while dialing, pressing F1 (Menu/Exit) or F2 (Delete/Cancel) button will stop the conversation.
OPEN DOOR REMOTELY
During conversation, the called party can press the *button to open the door. The door-open time can be set by user. The default setting is 3
seconds.
BACK TO STANDBY SCREEN AUTOMATICALLY
If the manager password has been entered and no button is pressed within 30 seconds, the screen will go back to the standby mode –“Welcome!”
If a Subscriber ID is entered and no button is pressed within 6 seconds, the screen will go back to the standby mode.
If no button is pressed within 30 seconds under the Manager or Subscriber option, the screen will go back to the standby mode.
SIM CARD
If the SIM card is not inserted, the screen will show “SIM not Inserted” when the system is turned on.
CALL MANAGER
If “Manager Phone #” has been programmed, the system will directly dial this number while the visitor presses CALL button at the standby
mode.
If “Manager Phone #” is not stored, no action will be taken by pressing the CALL button
MASTER RESET
The following operation will make the unit back to factory default. Please note that this will erase all passwords, phone numbers and subscribers.
At the Standby mode, press F2(C), *(UP), *(UP), *(UP), #(DOWN), #(DOWN), #(DOWN) and CALL buttons in sequence. It will show
“Initial System Please Wait…”, then all is back to default.

14
SPECIFICATIONS
Model
GSM-DE2123
Input Voltage
8V~16V DC
Power Consumption
Standby: <12V, 50mA
Connecting: <12V, 200mA
GSM Frequency
Quad-band GSM 850MHz, EGSM 900MHz, DCS 1800MHz, PCS 1900MHz
Transmitting Power
Class 4 (2W) at GSM 850MHz and 900MHz
Class (1W) at DCS 1800 and PCS 1900
LED Indicators
GSM status display
Speaker Output
9 output levels adjustable
Microphone Input
9 input levels adjustable
Relay Output
1 relay output (normal-close) for door lock
Firmware Upgrade
Support USB firmware ISP update
Operating Temperature
32F ~ 158F / -0C ~ 70C
Dimension (L x W x D)
10.1 x 4.8 x 1.8 inches / 256 x 122 x 47mm
Weight
2.98 lbs / 1350 g
*Specifications are subject to change without notice.
TROUBLESHOOTING
Sentry US Technical Support Line: 1-800-872-9907
Mon.-Fri. 9am –5pm PST
LIMITED ONE (1) YEAR WARRANTY AND EXCLUSIONS
Manufacturer warrants to the original consumer purchaser and not for the benefit of anyone else that this product at the time of its sale by
Manufacturer is free of defects in materials and workmanship under normal and proper use for one (1) year from the purchase date.
Manufacturer's only obligation is to correct such defects by repair or replacement, at its option, if within such one (1) year period the product is
returned prepaid, with proof of purchase date, and a description of the problem. This warrant excludes and there is disclaimed liability for labor for
removal of this product or reinstallation. Warranty is voided if this product is installed improperly or in an improper environment, overloaded,
misused, opened, abused, or altered in any manner, or is not used under normal operating conditions or not in accordance with any labels or
instructions. There are no other implied warranties of any kind, including merchantability and fitness or a particular purpose, but if any implied
warranty is required by the applicable jurisdiction, the duration of any such implied warrant, including merchantability and fitness of or a particular
purpose, is limited to one (1) year. Manufacturer is not liable for incidental, indirect, special, or consequential damages, including without
limitation, damage to, or loss of use of, any equipment, loss sales or profits or delay or failure to perform this warranty obligation. The remedies,
provided therein are the exclusive remedies under this warranty, whether based on contract, tort or otherwise. For damage requiring service,
unplug the product from any power source and refer service to qualified servicing personnel under the following conditions:
a. When the power supply cord or plug is damaged.
b. If liquid has been spilled, or objects have fallen into the product.
c. If the product has been exposed to rain or water.
d. If the product has been dropped or the housing has been damaged.

15
OPTIONAL NAME DIRECTORIES
Durable stainless steel finish
Vandal and weather resistant
Modular system (add additional capacity at any time)
Easily installed over drywall or masonry surfaces with supplied hardware
Low profile: 3/8”
Model
Dimension
# of Names
D6
3” x 4.25” / 76mm x 108mm
6
D10
4.75” x 4.25” / 121mm x 108mm
10
D22
7.75” x 4.25” / 197mm x 108mm
22
D32
10.75” x 4.25” / 273mm x 108mm
32
D44
13.75” x 4.25” / 350mm x 108mm
44
D56
16.75” x 4.25” / 425mm x 108mm
56
Name card dimensions: 3.75” / 95mm wide
RELATED PRODUCTS
Video Intercom System
Security Alert System - Relay and Module
16.5V AC 1.5A Battery Power Charger
MD-BPC612
24V AC 7A Battery Power Charger
MD-BPC61224
High Voltage Relay
MD-HVR
4 Channel Recordable Siren & Voice
Annunciator Module
MD-SVOICE4
8 Channel Recordable Voice Annunciator
Module
MD-VOICE8
365 Days Schedule Timer
MD-T365
Additional Technology Security Inc. dba: Sentry US E-mail: info@SentryUS.com
www.SentryUS.com 5500 Stewart Avenue | Fremont, CA 94538 Tel: 1-800-916-8783
Table of contents
Other Sentryus Intercom System manuals


