Seresco CommandCenter User manual

CommandCenter Operator Panel
Introduction
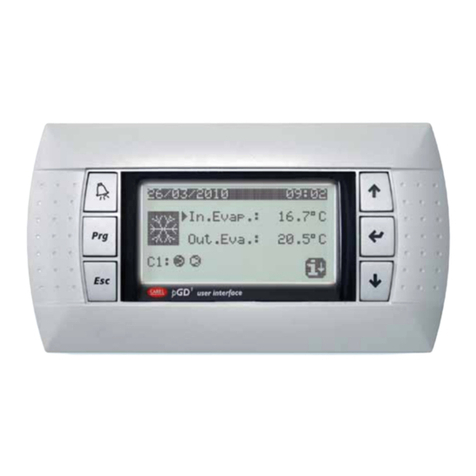
This document describes the different features of the Operator Panel (local or remote)
that is used with the Seresco units.
Startup Screens
When the unit start up you will see the following menu screen. A 6 second timer is
started and if no selection is made before timer expires, Normal Mode will automatically
be selected.
1. Normal Mode
2. Service Mode
Selecting Normal Mode will take you to the main sensor screen. If the voltage monitor
fault signal is not active, blower will start right away. If voltage monitor fault signal is
active, 6 second timer will continue running. When timer expires, the voltage monitor
fault signal will be checked again. If signal now is cleared, the blower will start,
otherwise blower will remain off and there will be a voltage monitor fault alarm.
Navigation Mode and Edit Mode
The menu system implements two different modes where the keys have different
meanings. Navigation mode is used to navigate the menu system and Edit mode is used
when changing data.
The following keys are used in Navigation mode:
•Keys 1-3 (and 4-6) are used to select a menu item. If there are more than 6 menu
items, menu items will be listed 1-3 on every screen.
•Up and Down arrows are used to scroll up or down a page. Arrows at the top right
corner indicates which direction you can scroll. If no more than 6 items either down
or up arrow will be displayed (no scrolling “around corner”). If more than 6 menu
items, both arrows will be displayed and you can scroll “around the corner”.
Obviously no arrows when 3 or less menu items.
•Back key takes you back to previous menu level.
OperatorPanel_4.15.14.doc Page 1 7/12/2 12

•Enter key has a special meaning. From any menu screen it will take you directly back
to the main screen (the sensor screen). If you now press the Back key it will take you
back to the screen where you were before pressing Enter. On the sensor screen you
can still use the Up and Down arrows to scroll up and down a page and the Back key
will still take you back to where you were before pressing Enter. If you press 1
however (Main Menu) the back shortcut is lost (it’s not a true history list yet).
•Key 3 on the sensor screen is another hidden feature. It will toggle sensor readings
between displaying values with a one decimal prevision and no precision. Default is
no precision. This applies to all temperatures and the humidity level.
To enter Edit mode you select the number key corresponding to the data item you want to
edit on a navigation screen with data items. To indicate that you are in edit mode, the data
value is highlighted.
The following keys are used in Edit mode:
•Keys 1-3 are not used.
•Up and Down arrows are used to scroll up and down in the value list. More info
about different types of data items later in this document.
•Back key takes you back to navigation mode and cancel any changed data. Data is
with other words not saved when you press the Back key.
•Enter key will save the data and most of the time take you directly back to
navigation mode (covered under data types).
Data Types
Most of the data (properties) you can change are changed using values in a selection list.
You use the Up and Down arrows to scroll up and down in the selection list. You can
scroll “around the corner”. For data items with only two selection items (e.g. Yes/No),
you can use either the up or down key to toggle between the two values.
Most Integer values are edited as lists with a min and max range. The value might also be
restricted to be changed in specific increments (e.g. 5, 1 , 15, 2 , …). In a few rare cases
integer values are entered one digit a time. When entering edit mode, the integer value
will be displayed as a five digit zero padded number. To enter a number less than 5 digits,
leave the first digits at . Press Enter until all digits are set.
Date and Time values are edited in a special way. Using date as an example, when
entering edit mode, the year (or last two digits of the year) will be highlighted. Use Up
and Down arrows to change year. When done, press Enter. Now the month will be
highlighted and you change it in the same way. Press Enter again and the day is
highlighted. Pressing Enter a final time will save the new date. Pressing Back at any time
when editing the date will cancel the change operation and take you back to navigation
mode.
OperatorPanel_4.15.14.doc Page 2 7/12/2 12

A time value is entered in the same way as a date.
An IP address is entered the same way as date and time except that you edit one digit at a
time.
Passwords are entered one digit at a time pressing Enter after each digit.
Information Messages
Certain actions and certain conditions will generate information messages. Information
messages will popup over current menu screen. The message can be cleared by pressing
either key 1 or 2. Key 1 will clear current message and key 2 will clear all queued
messages. Messages can be of three different types. Short, Long or Confirmed. A short
message will be cleared automatically after 3 seconds (default). A long message will be
cleared after 5 minutes (default). A confirmed message will never be cleared (unless there
is a system restart) and have to be cleared by pressing key 1 or 2.
OperatorPanel_4.15.14.doc Page 3 7/12/2 12

Menu Structure Quick eference
The root menu screen is where you see all the sensors and one menu option that takes you
to the Main Menu. Some menu selections are dependent on current unit configuration
and will not always be displayed. These menu selections are marked as Optional.
For data menu items, the default value is displayed in the summary.
1. Setpoints
1.1. Temperature
1.2. Humidity
1.3. Pool Temp [Optional]
1.4. Economizer [Optional]
1.5. Freeze Stat [Optional]
1.6. Purge Temp [Optional]
1.7. Heat Recovery
2. Schedule
2.1. Empty
2.1.1.Day(s)
2.1.2.On
2.1.3.Off
* 2.2 – 2.3 same as 2.1
3. System
3.1. Ventilation
3.1.1.Blower
3.2. Purge * Purge must be enabled.
3.3. System Restart
3.4. Alarm Log
3.5. System Status
3.5.1.Environment
3.5.2.Compressor
3.5.3.Ventilation
3.5.4.Network
3.5.5.Serial Ports
3.6. System Info
OperatorPanel_4.15.14.doc Page 4 7/12/2 12

4. User Settings
4.1. Display
4.1.1.Backlight
4.1.2.Reset Display
4.2. Date & Time
4.2.1.Date
4.2.2.Time
4.2.3.Zone
4.2.4.Daylight
4.2.5.Date Format
4.2.6.Time Format
4.2.7.Synch
4.3. User Password
4.3.1.Enabled
4.3.2.Password
4.3.3.Retention
4.4. Remote OP * Only visible on Remote OP
4.4.1.Version Info
4.4.2.RS-232 Port
4.4.3.RS-485 Port
5. Factory Settings
5.1. System
5.1.1.Role
5.1.2.Fire Reset
5.1.3.Temp Unit
5.1.4.Rem Control
5.1.5.Rem Cntrl 2
5.2. Ventilation
5.2.1.Purging
5.2.2.Stabilize
5.2.3.Freeze Stat * External freezestat sensor
5.2.4.Frzstat Delay
5.2.5.No Airflow
5.2.6.Dirty Filter
5.2.7.Exhaust OL
5.2.8.BP Damper 5 %
5.2.9.BP Damp Stable
OperatorPanel_4.15.14.doc Page 5 7/12/2 12

5.3. Environment
5.3.1.A/C
5.3.1.1.A/C
5.3.1.2.Deg*Min On
5.3.1.3.Deg*Min Off
5.3.1.4.Learning
5.3.1.5.OACC Off
5.3.2.Heating
5.3.2.1.Type
5.3.2.2.Deg*Min On
5.3.2.3.Deg*Min Off
5.3.2.4.Modulated Step
5.3.2.5.Stage 2 On
5.3.2.6.Heat Off
5.3.2.7.Reset Offset
5.3.2.8.Reset Delay
5.3.2.9.Reset Time
5.3.2.1 .Cold Start
5.3.2.11.Cold Level
5.3.2.12.Save Heating
5.3.2.13.Learning
5.3.2.14.Emergency Heat
5.3.3.Humidity
5.3.3.1.Deg*Min On
5.3.3.2.Deg*Min Off
5.3.3.3.Temp Offset
5.3.3.4.High Humidity
5.3.3.5.Float Setpoint
5.3.4.Pool Heating
5.3.4.1.Enabled
5.3.4.2.2 Pools
5.3.4.3.Comp Heat
5.3.4.4.Waterflow Dly
5.3.4.5.Waterflow Rec
5.3.4.6.Min Out Temp
5.3.4.7.Max Out Temp
5.3.5.Deadbands
5.3.5.1.Air Temp Low
5.3.5.2.Air Temp High
5.3.5.3.Humidity Low
5.3.5.4.Humidity High
5.3.5.5.Pool Temp Low
5.3.5.6.Pool Temp High
5.3.5.7.Heat Rec Low
5.3.5.8.Heat Rec High
OperatorPanel_4.15.14.doc Page 6 7/12/2 12

5.3.6.Sensors
5.3.6.1.Outdoor Air
5.3.6.2.Supply Air
5.3.6.3.Refresh Sens
5.3.6.4.Min Sample
5.4. Compressor
5.4.1.Enabled
5.4.2.Compressors
5.4.3.Refrigerant
5.4.4.Oil Alarm
5.4.5.Partial Mode
5.4.6.Mode Transit
5.4.7.Min Startup
5.4.8.Stabilize
5.4.9.Fault Delay
5.4.1 .Min Run Time
5.4.11.Min Stop Time
5.4.12.Alarm Stop
5.4.13.Anti Block
5.4.14.Wakeup Mode
5.4.15.Wakeup Time
5.4.16.SucTempL Dly
5.4.17.SucTempH Dly
5.4.18.DisTempL Dly
5.4.19.LP Alarm
5.4.2 .LP Start
5.4.21.LP Max
5.4.22.HP Min
5.4.23.HP A/C
5.4.24.LP Pumpdown
5.4.25.PumpDown Count
5.4.26.PumpDown Delay
5.4.27.Superheat
5.4.28.Valve Cycle
5.4.29.Valve Open
5.4.3 .Pump Fault
5.5. Network
5.5.1.TCP/IP
5.5.1.1.DHCP
5.5.1.2.IP
5.5.1.3.Mask
5.5.1.4.GW
5.5.1.5.DNS
5.5.1.6.Time
5.5.1.7.Link Monitor
OperatorPanel_4.15.14.doc Page 7 7/12/2 12

5.5.2.Serial Ports
5.5.2.1.Port B (RS-232)
5.5.2.1.1.User
5.5.2.1.2.Baud Rate
5.5.2.1.3.Databits
5.5.2.1.4.Parity
5.5.2.1.5.Flow Control
5.5.2.1.6.Reply Delay
5.5.2.2.Port C (RS-485)
5.5.2.2.1.User
5.5.2.2.2.Baud Rate
5.5.2.2.3.Databits
5.5.2.2.4.Parity
5.5.2.2.5.Echo Test
5.5.2.3.Port D (RS-485)
5.5.2.3.1.User
5.5.2.3.2.Baud Rate
5.5.2.3.3.Databits
5.5.2.3.4.Parity
5.5.2.3.5.Echo Test
5.5.3.WebSentry
5.5.3.1.Enabled
5.5.3.2.Use DNS
5.5.3.3.IP
5.5.3.4.Port
5.5.3.5.Comm Interval
5.5.3.6.Comm Segment
5.5.3.7.Stay Alive
5.5.4.BACnet [Optional]
5.5.4.1.Enabled
5.5.4.2.Interface
5.5.4.3.Device ID
5.5.4.4.Port
5.5.5.Modbus [Optional]
5.5.5.1.Device ID
5.5.6.LON [Optional]
5.5.6.1.Refresh Rate
OperatorPanel_4.15.14.doc Page 8 7/12/2 12

5.6. IO Configuration
5.6.1.Sensor Calibration
5.6.1.1.Rel Humidity
5.6.1.2.Return Air
5.6.1.3.Supply Air
5.6.1.4.Outdoor Air
5.6.1.5.Pool In
5.6.1.6.Pool Out
5.6.1.7.HP 1
5.6.1.8.LP 1
5.6.1.9.Evap 1
5.6.1.1 .Suction 1
5.6.1.11.HP 2
5.6.1.12.LP 2
5.6.1.13.Evap 2
5.6.1.14.Suction 2
5.6.1.15.Discharge 1
5.6.1.16.Discharge 2
5.6.1.17.Exhaust Air
5.6.1.18.Reheat Temp
5.6.1.19.Pool 2 In
5.6.1.2 .Pool 2 Out
5.6.2.Sensor Type
5.6.2.1.Rel Humidity
5.6.2.2.Return Air
5.6.2.3.Outdoor Air
5.6.2.4.HP 1
5.6.2.5.LP 1
5.6.2.6.Suction 1
5.6.2.7.HP 2
5.6.2.8.LP 2
5.6.2.9.Suction 2
5.6.2.1 .Discharge 1
5.6.2.11.Discharge 2
5.6.2.12.Exhaust Air
5.6.2.13.Reheat Temp
5.6.3.Analog Inputs
5.6.3.1.Samples
5.6.3.2.Sample Rate
5.6.4.Digital Inputs
5.6.4.1.Samples
5.6.4.2.Sample Rate
OperatorPanel_4.15.14.doc Page 9 7/12/2 12

6. Service [Optional]
6.1. Force Demands
6.1.1.Compressor 1
6.1.1.1.Dehumidify
6.1.1.2.A/C
6.1.1.3.Pool Heat
6.1.2.Compressor 2 [Optional]
6.1.3.Compressor 3 [Optional]
6.1.4.Compressor 4 [Optional]
6.1.5.All Compressors
6.1.5.1.Dehumidification
6.1.5.2.A/C
6.1.5.3.Pool Heat
6.2. Force Contacts
6.2.1.Reset All
6.2.2.Ventilation
6.2.2.1.Blower
6.2.2.2.OA Damper
6.2.2.3.Open Damper
6.2.2.4.Close Damper
6.2.2.5.Exhaust Fan 1
6.2.2.6.Exhaust Fan 2
6.2.2.7.OACC
6.2.3.Heating
6.2.3.1.Heater 1
6.2.3.2.Heater 2
6.2.3.3.Mod Heat
6.2.3.4.Pool 1 Heater
6.2.3.5.Pool 2 Heater
6.2.3.6.Heat Recovery
6.2.4.Compressor 1
6.2.4.1.Power
6.2.4.2.Heat Reclaim
6.2.4.3.A/C
6.2.4.4.Pump Down
6.2.4.5.Pool Heat
6.2.5.Compressor 2 [Optional]
6.2.6.Compressor 3 [Optional]
6.2.7.Compressor 4 [Optional]
6.2.8.System
6.2.8.1.System On
6.2.8.2.Aux
6.3. Network
6.3.1.Ping
6.3.2.Console
OperatorPanel_4.15.14.doc Page 1 7/12/2 12

6.4. Clear Alarm Log
6.5. Clear All Logs
6.6. Commission
6.6.1.Tested
6.6.2.Commissioned
OperatorPanel_4.15.14.doc Page 11 7/12/2 12

Menu Structure Description
This is a more detailed description of each menu item.
1. Setpoints
If user password has been enabled, you will need to enter the password before you
can change any setpoint.
2. Schedule
If user password has been enabled, you will need to enter the password before you
can change the schedule.
You can enter up to 3 scheduled items. Each item determines when the room is
Occupied by specifying a start time and a stop time. You also specify which day
of the week the scheduled item applies (Monday-Sunday, Workdays, Weekends
or All).
If there are conflicting items then the priority goes to day items (Monday-Sunday)
followed by Workday and Weekends and last All. Use this to your advantage by
specifying a default schedule using All and then add a schedule item for days
where the default does not apply (e.g. Weekends, Sunday).
3. System
3.1. Ventilation
Currently you can only turn the blower on or off on this screen. Note that
the blower might not come when turning it on. There can be an alarm
condition preventing it from starting (e.g. blower overload, voltage
monitor fault or firestat).
When selecting Normal Mode at startup, the blower will automatically be
set to On. To not run the blower you will have to go to this menu and turn
blower off. There might be up to a minute delay before blower starts due
to the voltage monitor fault signal not begin cleared.
When selecting Service Mode at startup, the blower will be set to Off.
3.2. Purge
By selecting the Purge menu item you will get to the Purge activation
screen. At this screen you can set the length of time the system will purge
and start/stop purging.
At the bottom of the screen you can see the current status. It can show Off,
PendingPurge or number of minutes remaining of ongoing purge.
OperatorPanel_4.15.14.doc Page 12 7/12/2 12

PendingPurge means that we are waiting for the compressor(s) to stop
before we can start purging. The compressors have been notified that they
need to stop
Note that you only can start purge if Purge has been enabled under Factory
Settings.
3.3. System Restart
When selecting System Restart you will see a confirmation screen where
you have to confirm that you want to restart the system. Pressing 2 or the
Back button will cancel this request.
3.4. Alarm Log
This is the alarm log. It lists all alarms since the alarm log last was cleared
(from the Service menu). Last alarm at the top. The top line shows the date
for select alarm. You select an alarm by using the Up and Down arrows.
Selected alarm is indicated by an arrow in the left margin. The alarm log
will scroll one alarm at a time rather than a page at a time.
3.5. System Status
The status screen shows the status for different internal system
components. It’s main purpose is for troubleshooting a running system
where the information here can be passed back to tech support.
The status feature has been grouped into 4 areas. Environment shows
status for the environment control (Air Temp, Humidity and Pool Heat)
including air heater, pool heater and heat recovery.
The compressor area shows the status for all compressors in the system.
Each compressor uses two lines. The first line is the operational status.
The second line (starting with ->) lists the status of the compressor valves
and contactor as a two letter code. The codes are in the following order:
CC Compressor Contactor
PD Pump Down Valve
RH Reheat Valve
AC A/C Valve
PH Pool Heating Valve
The ventilation area shows the status of the different ventilation related
components including the OACC.
The network area shows the status for network related components.
The serial ports area show serial port status.
OperatorPanel_4.15.14.doc Page 13 7/12/2 12

3.6. System Info
The System Info screen lists some useful information when
troubleshooting the system like Software and Board version, current IP
and MAC address and optional configuration settings.
4. User Settings
4.1. Display
Properties controlling the Operator Panel display including backlight.
Reset Display controls how long time the operator panel will wait at a
screen other than the sensor screen before returning to the sensor screen.
4.2. System Clock
System time properties. Here you can set the date, time, time zone and if
daylight savings is in effect. You can also set what date time format that
should be used.
Date is always edited in Year-Month-Day syntax and the time is always
edited in 24-hour clock format not matter what the format settings are.
Time zone can be set to -3:3 , -4: to -1 : and GMT time.
The daylight property only determines if an extra hour should be added to
the current time. No automatic detection if we need to add the extra hour.
If time synchronization is enabled, this property will be set by the
synchronization feature.
The following date formats are supported:
Y-M-D, D/M/Y, M/D/Y and M D, Y.
The last format will be spelled out as Jan 1, 2 6.
Clock is either a 12 or 24-hour clock.
Note that if the unit is connected to the Internet, you do not need to set the
clock. The clock will automatically be synchronized with a time server.
Time zone and date/time formats still needs to be set.
4.3. User Password
Here you can enable user passwords (disabled by default). You can also
change the user password and set for how long the user password
protected menu items should stay open after they have been unlocked
(retention time).
OperatorPanel_4.15.14.doc Page 14 7/12/2 12

4.4. Remote OP
This menu selection is only visible on a remote OP (operator panel
connected to the board using a serial port).
Under version info you can see the software version of the remote OP as
well as the minimum main board software version required to be able to
communicate with a main board.
RS-232 and RS-235 are used to configure the remote OP end of the serial
port interface. Only a subset of the serial port parameters are available
compared to what you can configure from the main board serial port
configuration. See 5.5.2 for description of parameters.
5. Factory Settings
To reach these settings you need to enter a service password.
5.1. System
The Role property is used in units with more than 2 compressor circuits or
when two units control the same space. One unit (or master board) is
configured as Master while second unit (or slave board) is configured as a
slave. Default role is Single Unit.
Fire Reset property controls how the system will recover after a Fire
Alarm. Set to auto, system will automatically go back to normal once the
alarm is cleared. If set to Manual, a System Restart is required to make the
system operational again.
Use Temp Unit property to set temperature unit to be used in the system
(Celsius or Fahrenheit).
Use the Rem Control and Rem Cntrl 2 properties to enable remote
control for a specific device or option. The remote input signal is used to
control the selected device or option.
OperatorPanel_4.15.14.doc Page 15 7/12/2 12

5.2. Ventilation
Purging enables and disables the purging feature.
Stabilize is how long time system will wait for sensors to stabilize after
blower has started. Compressor will not be able to start until sensors are
stable.
Freeze Stat enables detecting freeze status from an external source
connected to a digital input.
Frzstat Delay is the Freeze Stat alarm debounce timer.
No Airflow property is the No Airflow debounce timer.
Dirty Filter property is the Dirty Filter debounce timer.
E haust OL property is used to control for how long the exhaust fan will
be locked out after it trips on an overload alarm.
BP Damper 50% sets the time it takes to open the bypass damper
halfway starting from fully closed.
BP Damp Stable timer is the amount of time the bypass damper will wait
after it has adjusted the damper and checking if it needs to be adjusted
more.
5.3. Environment
5.3.1.A/C
Set the A/C property to No to disable A/C control.
The Deg*Min On/Deg*Min Off properties controls for how long
the control logic will wait until adding or removing a Cooling
stage after a stage has been added/removed.
Use the Learning option to disable the learning feature and just
use deadbands as turning on/off points.
OACC Off controls for how long the OACC will run before
stopping after there no longer is an A/C demand.
5.3.2.Heating
Type sets heating type.
OperatorPanel_4.15.14.doc Page 16 7/12/2 12

The Deg*Min On/Deg*Min Off properties controls for how long
the control logic will wait until adding or removing a Heating stage
after a stage has been added/removed.
Modulated Step defines the increments for the modulated signal
when heater is configured as a modulated heater.
Stage 2 On controls when the second stage digital output will be
turned on for a modulated heater. First stage is turned on when
heating is started.
Heat Off controls the off point for a modulated heater ( or 1
volts).
Use Reset Offset to set number of degrees below setpoint at which
the unit will consider there is a heating problem (heater not
working).
Use Reset Delay to control for how long a heating issue condition
need to last before heating control will be reset and start all over
again.
Use Reset Time to control for how long the heating control will be
in reset mode before starting to heat again.
Cold Start determines under what temperature we consider being
in cold conditions at startup of unit.
Use Cold Level to set the startup heating level when starting up in
cold conditions.
Save Heating determines for how long last heating level will be
saved when a unit is restarted or shutdown.
Use the Learning option to disable the learning feature and just
use deadbands as turning on/off points.
Enabling Emergency Heat will disable normal auxiliary heating
control. Instead the compressor will be started to provide heat if
the space gets too cold.
OperatorPanel_4.15.14.doc Page 17 7/12/2 12

5.3.3.Humidity
The Deg*Min On/Deg*Min Off properties controls for how long
the control logic will wait until adding or removing a
Dehumidification stage after a stage has been added/removed.
Temp Offset property is the offset from the return air temperature
where dehumidification will not operate. If temperature is outside
this range, dehumidification ill not come on even the humidity is
above the high deadband. However, if dehumidification already is
running, the will keep on running even if the temperature moves
outside the range.
High Humidity property is the offset above setpoint at which
dehumidification will start no matter what the return air
temperature is.
Float Setpoint property is used to enable/disable the floating
humidity setpoint feature. This feature dynamically sets the
humidity setpoint based on the outdoor air temperature as follows:
More than 5 F 5 %
Between 3 F and 5 F 45%
Between 1 F and 3 F 4 %
Less than 1 F 35%
There is a 2 degree deadband when moving to a higher setpoint so
that moving from 4 % to 45% will not happen until outdoor air
reaches 32 F.
5.3.4.Pool Heating
Set Enabled property to Yes to enable pool heating.
Set the 2 Pools property to Yes to enable heating of a second pool
using compressor circuit 2. Set to Bypass to support pool bypass
valves on older units.
Comp Heat property controls how compressor pool heating valve
and auxiliary pool heater is being utilized. For Normal setting, unit
will use both heating resources in the most efficient way. Forced
will force compressor on to heat pool even when there is no other
compressor demand. Auxiliary heater will not be used for this
setting. For Disabled setting compressor pool heating is disabled
and only auxiliary heater will be used to heat the pool.
OperatorPanel_4.15.14.doc Page 18 7/12/2 12

Waterflow Dly property is the number of seconds unit will wait
before checking for a waterflow problem after pool water heating
is started (using compressor pool heating valve).
Waterflow Rec property controls for how long a waterflow alarm
will stay active and pool heating will remain in recovery mode.
After this time, the pool heating control will go back trying to heat
pool again if there still is a demand for it and compressor is
running. Note that auxiliary pool heater will still be used when
recovering from a waterflow alarm.
Min Out Temp and Ma Out Temp properties controls the range
in which the Pool Out temperature has to be in relation to the Pool
In temperature when using compressor to heat the pool. If outside
this range, a Waterflow Alarm will be tripped with reason Pool
Out.
5.3.5.Deadbands
This section is used to configure setpoint deadbands. Air
temperature and pool temperature setpoints can be set in 1/1 th of a
degree.
5.3.6.Sensors
Outdoor Air property control whether the outdoor air sensor
should be used in control logic.
Supply Air property control whether the outdoor air sensor should
be used in control logic.
Refresh Sensor property sets how often sensors will be read.
Sensor reading will also be generated when there is a change in
the sensor reading. Refreshing sensors on a regular basis prevents
us from getting stuck with no sensor readings for a long time when
the system is stable.
Min Sample property controls for how many seconds we will wait
at the minimum between two sensor readings before using a new
sensor value sample in our calculations.
5.4. Compressor
Use Enabled property to enable or disable usage of compressors.
Compressors are disabled by default when unit is shipped and still in
Commission mode.
Compressors configures number of compressors used in the system.
OperatorPanel_4.15.14.doc Page 19 7/12/2 12

Accepted values are 1 to 4 and Tandem.
Refrigerant sets the type of Refrigerant used in the system. This will
affect some of the pressure levels used to control the compressors.
Oil Alarm sets if the system supports Oil alarms. Note! This feature is
currently not implemented but will be very soon.
Use the Partial Mode property to control if unit will be using partial
heating mode for compressors. Partial heating mode is when both the
reheat and the A/C valves are open. When this property is set to No for a 2
compressor unit, there still is a partial heating stage when both
compressors are running where one compressor is running in full reheat
and the other compressor is running in full A/C. The only thing this
property is preventing is that one compressor have both valves open at the
same time.
The Mode Transit property should only be changed after talking to a
Seresco engineer. It is used to solve a problem where a solenoid valve is
not closing properly. Using this timer will close both solenoid valves when
one valves needs to be closed. After timeout, the other valve is opened.
Typically you will not set this one to more than 3 seconds.
Set this property to to disable this feature.
Min Startup timer controls the minimum time compressor will wait
before starting compressor even if minimum Low Pressure level is met.
Stabilize timer controls for how long time the compressor will run before
we enable the Low Pressure alarm. During this time the system will still
monitor for a low pressure level reaching vacuum levels using the low
pressure transducer.
Fault Delay timer controls the time between each check to see if Low
Pressure is below maximum allowed and High Pressure is above minimum
allowed. Timer starts when compressor starts and then after every check
for as long as compressor is running.
Min Run Time timer controls the minimum time the compressor has to
run before it can be stopped.
Min Stop Time control the minimum time the compressor has to be
stopped before being started again after a normal stop.
OperatorPanel_4.15.14.doc Page 2 7/12/2 12
Other manuals for CommandCenter
1
Table of contents
Other Seresco Control Panel manuals
Popular Control Panel manuals by other brands
Sices
Sices GC310 Use and maintenance manual
Bosch
Bosch B9512G Installation and system reference guide
Alarm Sense
Alarm Sense CFP 8 ZONE user manual
Marco
Marco SCS 165 20 415 Instructions for use
Ampac
Ampac LoopSense Installation and commissioning guide
Radionics
Radionics D279A Operation and installation guide

