SHANY SNVR-8004ST-1 User manual

Network Video Recorder
SNVR-8004ST-1
Thanks for purchasing our product. Before operating the unit, please read the instructions
carefully and keep this manual for future reference.

Statement:
This manual supports NVR model: 1U 4/8ch and 2U16/32ch.
As product update, the NVR functions might be different from the manual showing, please
follow the product that you got.
Safety Precautions
1. Do not use wet hands or any damp objects to touch the power switch and network digital
video recorder (NVR), in order to avoid electric shock.
2. After installing the host, it must be ensured that the host and the chassis have grounded to
avoid the video, audio signal being disturbed, and to avoid NVR being damaged by static
electricity.
3. The device does not include hard disk. Hard disk should be properly installed before use,
otherwise it could not perform the record and playback.
4. Host system supports format of the hard disk. If the hard disk has been used, please note
whether it is FAT32 format. The embedded network digital video recorder supports only FAT32
format, otherwise there will be a hidden danger.
Note: Please format hard disk when it is the first time for you to use.
``

Table of Contents
1. Hard Disk Installation ............................................................................................................................ 1
2. Rear Panel Interface ............................................................................................................................... 1
3. Host Side Operation ............................................................................................................................... 3
3.1 Start the System........................................................................................................................ 3
3.2 System Login............................................................................................................................ 3
4. System Toolbar....................................................................................................................................... 6
4.1 Display Setting ......................................................................................................................... 6
4.2 PTZ Setting............................................................................................................................... 8
4.3 Setting....................................................................................................................................... 9
4.4 Playback ................................................................................................................................. 26
4.5 Backup.................................................................................................................................... 26
4.6 Record .................................................................................................................................... 27
4.7 Alarm...................................................................................................................................... 27
4.8 Capture ................................................................................................................................... 27
4.9 File Manager........................................................................................................................... 28
4.10 IP Channel Setting .................................................................................................................. 29
5. Preview................................................................................................................................................. 31
5.1 Drag and Drop the Image .......................................................................................................31
5.2 Drag to Change Channel Sequence ........................................................................................ 31
6. IE Viewing ........................................................................................................................................... 32
6.1 User Log In............................................................................................................................. 32
7. Mobile View Operation Instruction...................................................................................................... 32
7.1 Client Software Obtaining ...................................................................................................... 32
7.2 Parameters of the NVR which Supports Mobile Surveillance................................................32
7.3 Android................................................................................................................................... 32
7.4 Blackberry .............................................................................................................................. 33
7.5 Windows Mobile System........................................................................................................ 33
7.6 APPLE iOS............................................................................................................................. 33

1. Hard Disk Installation
Prepare a screwdriver. Take 1U chassis as an example, this series NVR could be installed a hard
disk in the chassis, the largest capacity supports to 4TB.
Hard Disk Installation Steps:
1. Remove four screws on the side of 2. Connect the hard disk data and power
chassis and remove the top cover supply cable
3. Fix the HDD on the bottom plate 4. Put the cover back and fix it with screws
2. Rear Panel Interface
(Note: PoL ports only exist in specific models.)
POWER
HD
MI
Audio
IN
PoL
RS485
(PTZ)/Alarm
DC15V
LAN
USB
VGA
Video
OUT
Audio
OUT

For 4CH/8CH NVR model, the USB ports in front and bottom of the two ports in back(as the
structural diagram show above) share the same channel. If you plug two USB devices into
these two ports at the same time, they would not function normally.

3. Host Side Operation
3.1 Start the System
Plug power cable into the adapter and switch the power on, the power LED will light in red and the
NVR will start. After booting, the video output default to multi-window output mode.
The host side main screen. If you are not login, the system toolbar would show in gray and
the toolbar icons are not selectable.
If the booting time is within the record setting time period, the system will automatically enable the
record function.
Note:
Please use the power supply matching with the NVR instead of any other type or brand.
3.2 System Login
Click “Start”icon,there are five options:
1) User Guide: Setting up the guide language.

You can select the language of the User Guide.
Select the video format and resolution.
Setting up the network.

2) Power Off: Click this button to shutdown the device. You can also press the switch off at the
rear panel to shutdown the device. But we suggest to shutdown the device from the “Power
Off” button to avoid damaging the device from power failure by accident.
Note:
Before changing the HDD operation, please shutdown the device and disconnect the power
supply .
3) Reboot: Click this button to reboot the device.
4) Login: Click this button to login.
User name: admin
Password: blank
Click “Login”, you can find the system toolbar show in color and could be selectable.
5) onLock: Click this button to lock the menu.

4. System Toolbar
4.1 Display Setting
Click “Display Setting”icon to bring the menu below.
1) Language: Select the language you need. Then restart the device
2) AutoLogout: System automatically logout and lock time.
3) TV Adjust: Adjust the display position.
4) Display: Set monitor Brightness, Contrast, Saturation, Hue and Transparency.
5) Resolution: The default resolution is 1024x768, please select the best resolution according
the monitor condition. There are 6 options for selection.
6) Rotation interval: Setup the time interval of rotation. Tick “Enable SEQ” to start rotation.
Display Setting menu
Setting the Display Position

Setting Brightness, Contrast, Saturation, Hue and Transparency.
Note:
You can also right-click in the main screen to access the system toolbar.
Please note the menu order is different from the toolbar in the main screen.

4.2 PTZ Setting
Click “PTZ” icon to open the menu below.
You can Zoom in/out, change Iris and Focus.
Setting the cruise time and speed.
Tips: Digital Zooming
During image preview and playback, roll mouse
roller to do digital zooming, it zoom the image as
mouse pointer as the center. The max can do 15X
zooming. Drag the zoomed image by mouse to see
image detail.
Zoom In
Zoom Out
The channel is recording. Light flashing means frame lost or recording lost.
Magnifying glass: Digital zooming, the red number in the middle is magnification figures, click
this icon, it can change to PTZ control
4.3 Setting
Click “Setting” icon to enter the setting menu. There are six main setting options: Device, Channel,
Network, Alarm, Account, and System.
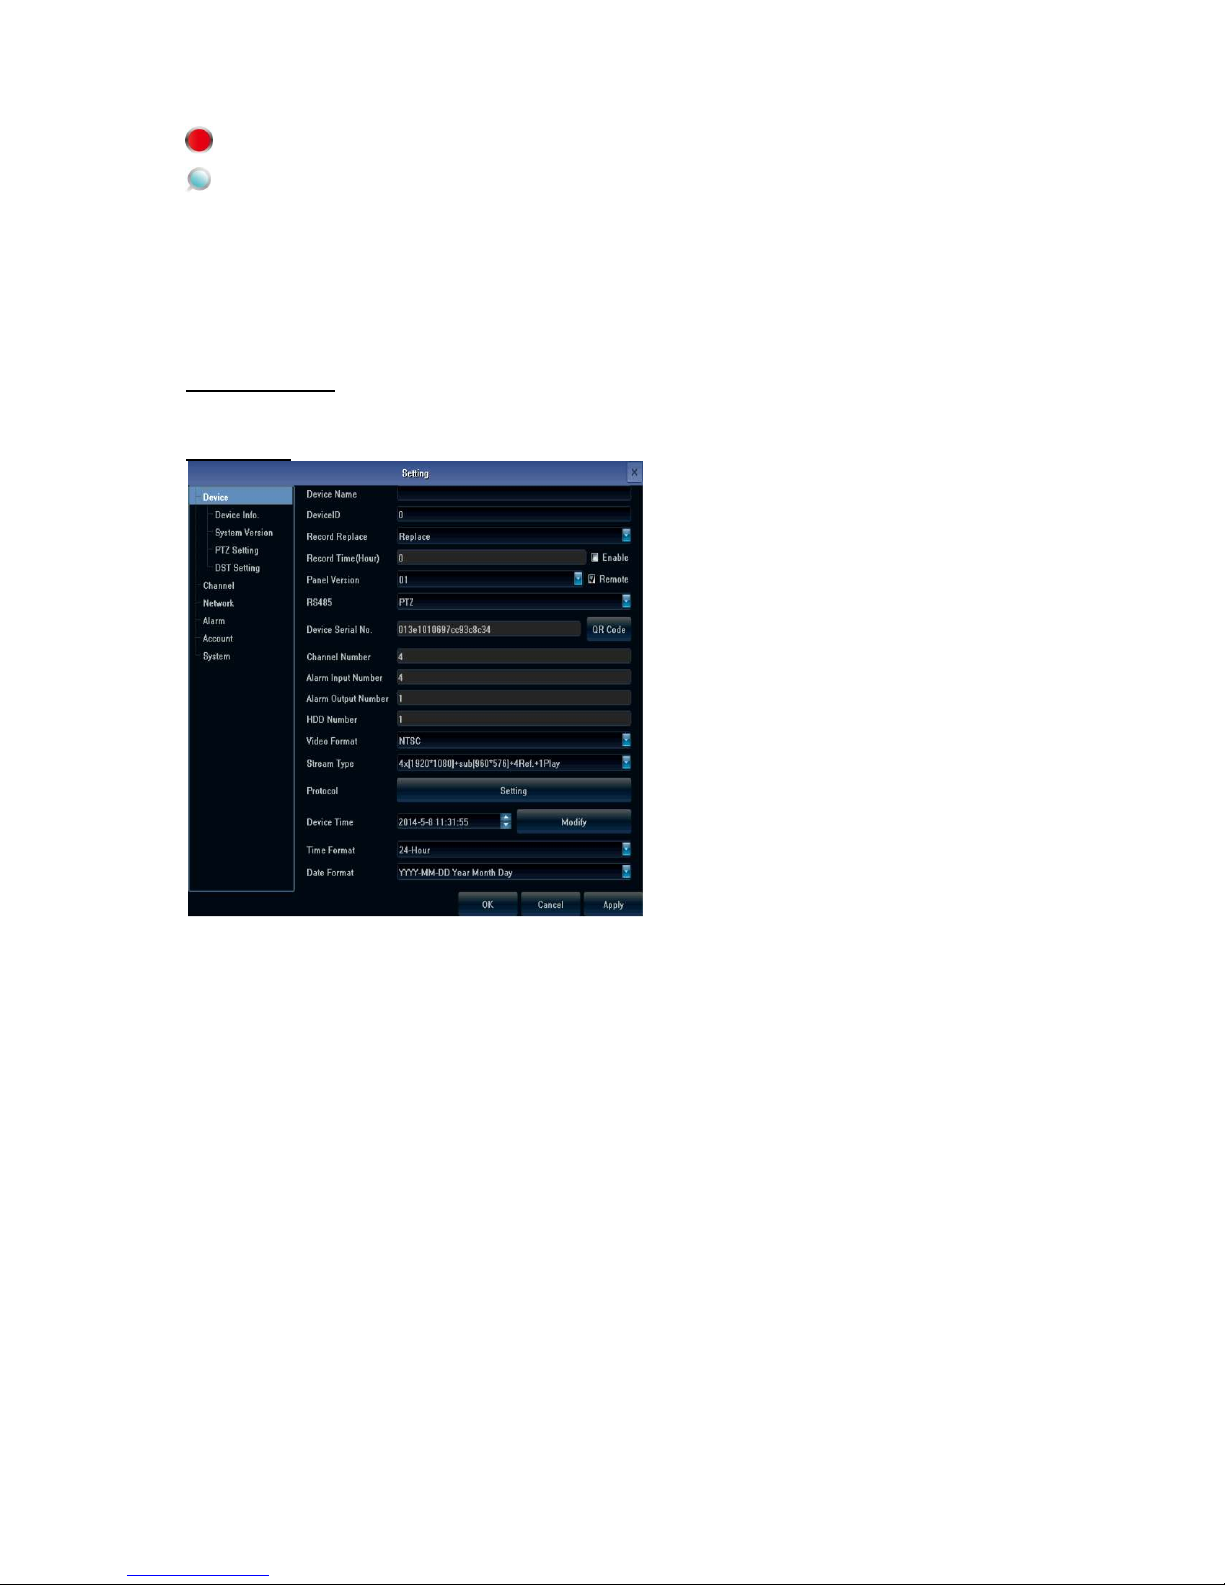
1. Device Setting
There are four sub options for “Device”Setting: Device Info, System Version, PTZ Setting, and
DST Setting.
Device Info
You can check the device information here.
System Version
You can check the system version here. When do software update, you need to check
version first to avoid updating failure and damage the device.
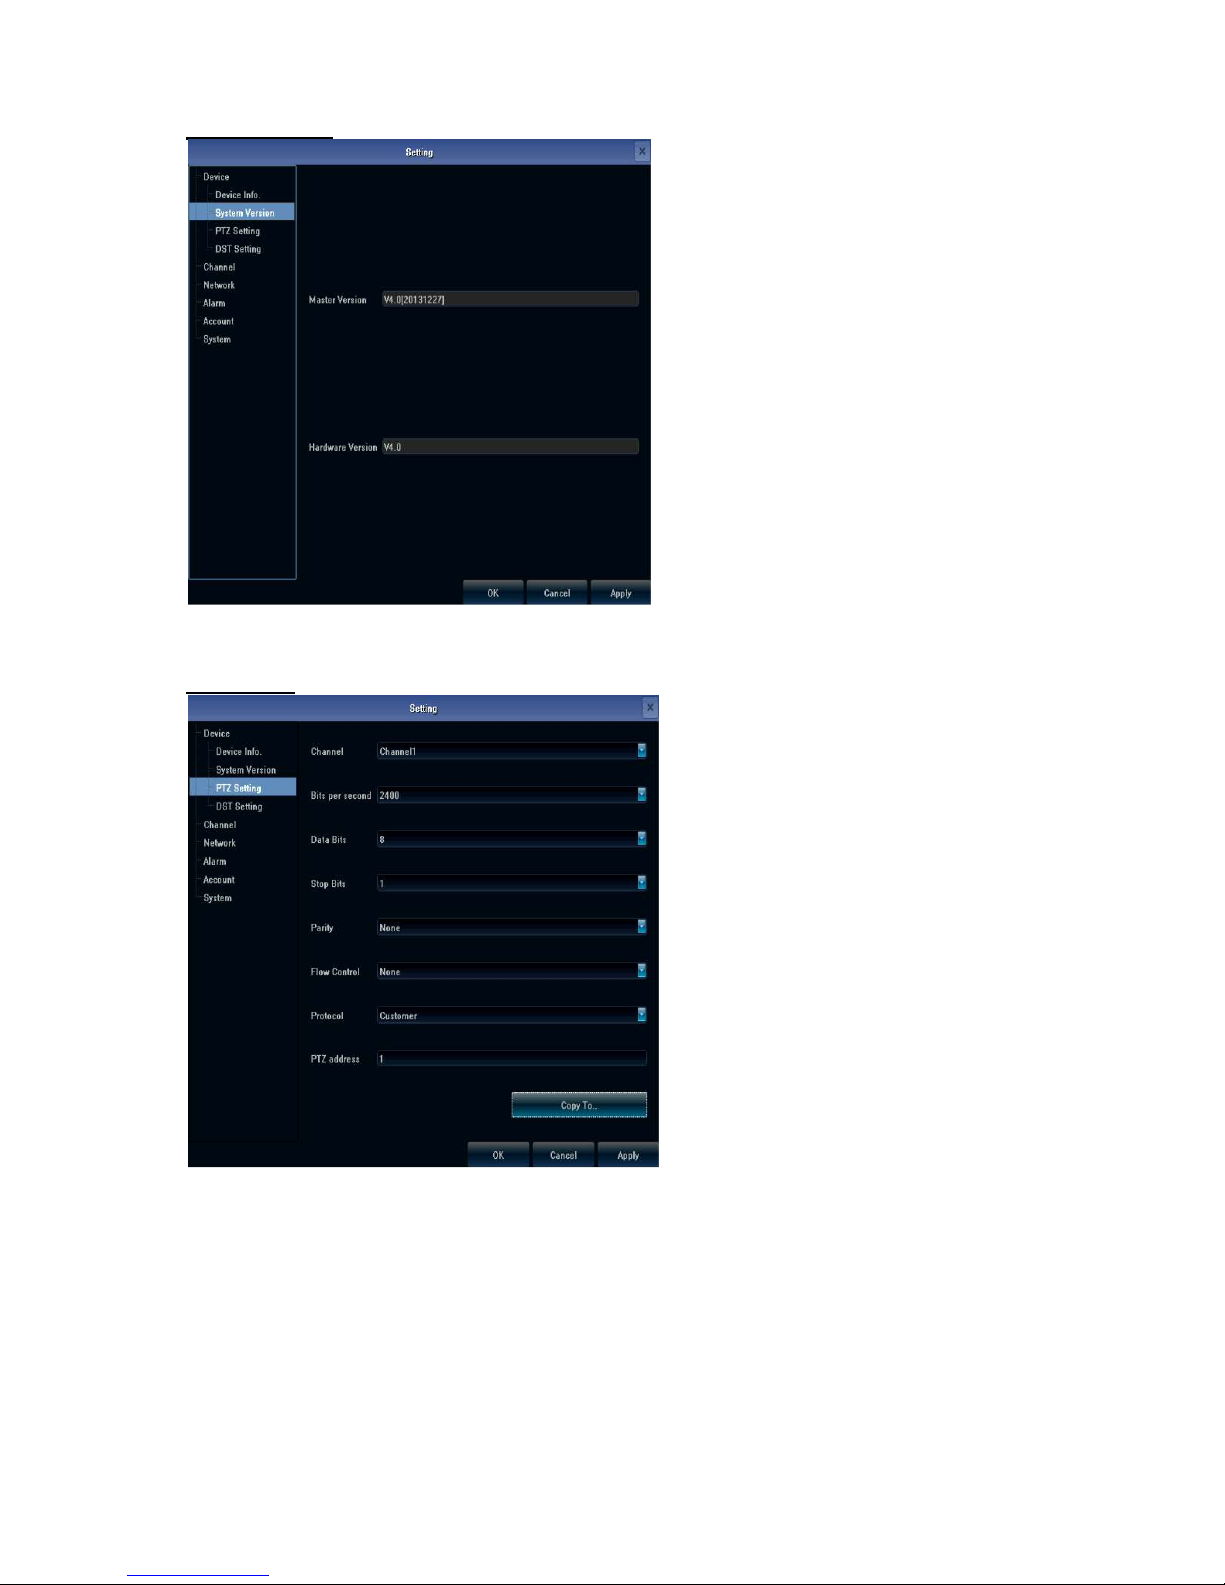
PTZ Setting
PTZ(Pan/Tilt/Zoon) settings.

Click “Copy to” to apply the settings to other channel.
DST Setting
Setting Daylight Saving Time.
2. Channel Setting
There are six sub options for “Channel”Setting: Display Setting, Video Parameters, Schedule
Record, Motion, Video Lost, and Video Mask.

Display Setting
Setting the show name, time, and date format.
Video Parameters
1) Encoding Type:
There are three types: Main Stream (Normal), Sub Stream, Main Stream (Event) for selection.
Main Stream: The channel using main stream could be double clicked to show as single or
full-screen image and for recording playback.
Sub Stream: 9/16/25/36 screens display are using sub stream, IE or mobile viewing are sub
stream, too.
Main Stream (Event): For event such as motion detection and alarm trigger recording.

2) Stream Type: There are video, video & audio, two types for selection.
When connecting with audio, please select video & audio mode, or there will be no audio when
playback.
3) Resolution: NVR will set IP camera main stream and sub stream resolution automatically,
when the image is not good, adjust from here according to necessery.
4) Bitrate Type: Set variable bit rate(VBR) and constant bit rate(CBR).
5) Bitrate: Set the bit rate upper limit for coding.
Main stream are 1080P: 6000kbps, 720P: 4000kbps ;
set the bit rate upper limit for coding sub stream is 512-1024kbps.
6) Frame Rate: Suggest to set full frame 25/30.
7) Video Quality: Suggest to select highest.
When all the IP cameras connected with NVR are the same brand, after finish setting 1st channel,
click “Copy To”to apply the setting to all channels, then click Save.
Schedule Record
Setting schedule record. If you want record in specific time, please do not enable the
default “All Day Recording Schedule”.

Setting weekday and period. The way setting for Motion & Alarm schedule are the same
with Record. And they would all display in the “Schedule Record”menu.
You can set Pre and Post Record time.
Motion
If you want to set video lost, please check “Enable Motion Detection”first.

Settting the motion detection area, left click and drag the area size, right click and drag an
area bigger than left click and drag area to cancel it.
Setting Linkage, in other words, the action to take when detecting the suspicious motion.

Video Lost
If you want to set video lost, please check “Enable Video Lost”first.
Setting Linkage, the action to take when video lost.

Video Mask
If you want to set video mask, please check “Enable Video Mask”first, then click “Setting”
of Area settings.
Left click to drag the mask size and cancel it by right clicking.
Table of contents


