Shaper Image 201396 User manual

Travel Alarm Clock
Item No. 201396
USER’S GUIDE
Thank you for purchasing the Sharper Image Travel
Alarm Clock. Please read this guide carefully and
store it for future reference. We are confident you’ll
enjoy this handy device for many years to come. If you
have any questions, please call our Customer Service
department at 1-877-714-7444, and select Option 3.
(Note: This is the “WWVB” version, which syncs with
the U.S. Atomic Clock near Fort Collins, Colorado).
Getting Started
1. Remove the battery door.
2. Install two new AA size batteries, following
the polarity diagram marked on the battery
compartment.
3. Replace the battery door.
4. Once the batteries are installed, digits will be
displayed on the LCD screen. Then the unit will
enter radio controlled (RC) time reception mode.
5. The RC clock will automatically start scanning for
the radio controlled time signal in 8 seconds.
Note: If no display appears on the LCD screen after
inserting the battery, press the “RESET” button by
using a thin metal wire (such as a paper clip). In some
cases, you may not receive the signal immediately.
Due to atmospheric disturbances, the best reception
often occurs at night.
Function Buttons
CLOCK button:
• In normal time mode, press and hold it for 2 seconds
to enter normal time setting.
• In setting mode, press it to advance the setting
items, or press and hold it for 2 seconds to return
to normal time mode and save the values.
ALARM button:
• In normal time mode, press it to display alarm time
for 5 seconds. Or, press and hold it for 2 seconds to
enter alarm time setting.
• In setting mode, press it to step the setting items.
• After setting, press it again to save the setting
values.
ALARM ON / OFF switch:
• Slide the switch to turn the alarm on or o.
DOWN button:
• In setting mode, press it to decrease the setting
value. Press and hold it to speed up the setting.
UP button:
• In setting mode, press it to increase the setting value.
Press and hold it to speed up the setting.
SNOOZE/LIGHT:
• Press it once to turn on the amber backlight
for 5 seconds.
• When the alarm is sounding, press it to silence the
alarm and enter the snooze mode.
NIGHT LIGHT FUNCTION ON/OFF switch:
• Slide it to the ON position to turn on the night light
function. The backlight will turn on automatically
when the light sensor detects darkness.
• Slide it to the OFF position to disable the night light
function.
RCC button:
• Press it to switch between Celsius and Fahrenheit.
• Press and hold it for 3 seconds to receive the RC
signal for reception testing.
RESET button:
• Press it to set all values to the default values.
(In the rare case of malfunction, this unit may need
to be reset.)
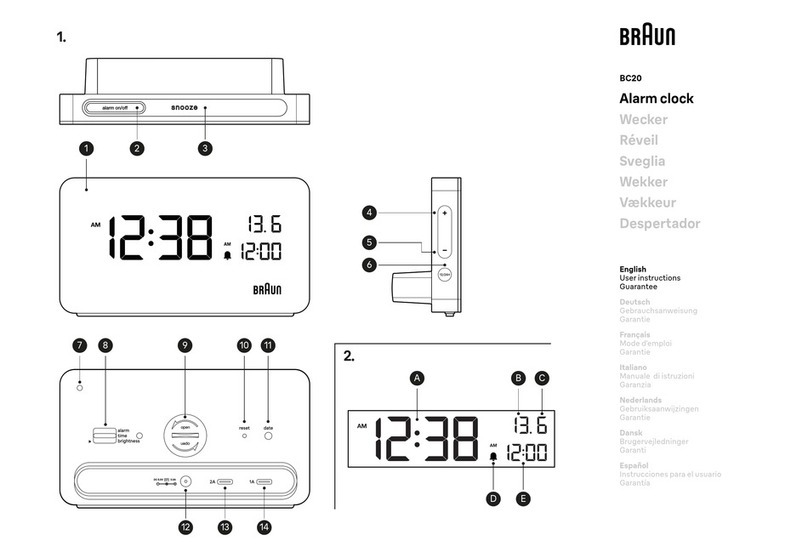
Product Description
Display Symbols
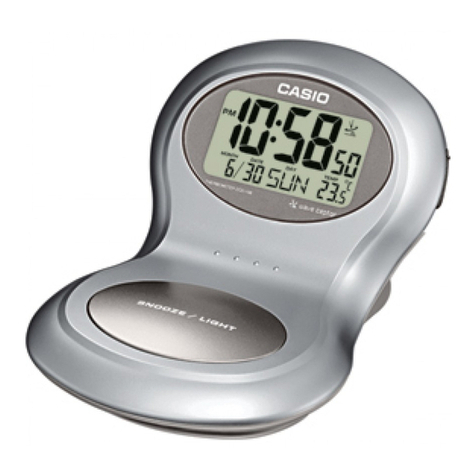
Normal Time Mode
1. Time
2. AM/PM
3. Month
4. Date
5. Day of the Week
6. Temperature
7. Signal Strength
Indication
8. Daylight Saving Time
9. Time Zone Map
1. LCD display
2. CLOCK button
3. ALARM button
4. ALARM ON/OFF switch
5. DOWN button
6. UP button
7. SNOOZE/LIGHT button
8. RESET button
9. RCC button
10. NIGHT LIGHT FUNCTION
ON/OFF switch
11. Battery compartment

Alarm Time Mode
1. Alarm Time
2. AM/PM
3. Alarm Icon
Daylight Saving Time (DST)
This clock has been programmed to automatically
switch when Daylight Saving Time is in eect.
Your clock will show “DST” during the summer.
Signal Strength Indicator
The signal indicator displays signal strength in
4 levels. Wave segment flashing means time
signals are being received. The signal quality could
be classified into 4 types:
No signal quality
Weak signal quality
Acceptable signal quality
Excellent signal quality
If the clock receives the signal successfully,
a sync-time symbol will appear on the LCD.
This indicates that the unit has already received
the time signal. Otherwise, the signal strength symbol
will disappear from the LCD display.
Note: You may use the RCC button to receive the time
signal manually. The unit will exit the receive mode
automatically after 6-12 minutes. However, receive
mode consumes more battery power, and may reduce
battery lifetime.
Time and Calendar Setting
If the clock does not receive the time signal
successfully, you can set the time manually. As soon
as the transmitter is received again, the clock will
automatically synchronize with the received time.
1. In normal time mode, press and hold the CLOCK
button for 2 seconds, until the Time Zone digit flashes.
2. Press the UP or DOWN button to set the desired value
of the flashing digit. Press and hold the UP
or DOWN button to speed up the setting.
3. Press the CLOCK button again until the next digit
flashes. Press the UP or DOWN button to change
its value.
4. Repeat the above operations to set the time and
calendar in this order: Time Zone > Year > Month
> Date > 12/24-Hr. > Hour > Minute > Second >
Language
Note: The language choices are: GB (English), FR (French),
DE (German), ES (Spanish) and IT (Italian).
The time zone choices are Pacific, Mountain, Central
and Eastern.
5. Press the CLOCK button to save and exit the
setting. It will automatically exit in 30 seconds
if you do nothing.
Setting the Alarm Time
1. In normal mode, press and hold the ALARM button
for 2 seconds until the Hour digit flashes.
2. Press the UP or DOWN button to set the desired
value. Press and hold the UP or DOWN button to
speed up the setting.
3. Press the ALARM button again until the Minute digit
flashes. Press the UP or DOWN button to change
its value.
4. Press the ALARM button again to save and exit the
setting. It will automatically exit in 30 seconds if you
do nothing.
Using the Alarm and Snooze Functions
1. Slide the ALARM ON/OFF switch to the ON position
to turn on the alarm. The alarm icon will be
displayed on the LCD screen.
2. Slide the ALARM ON/OFF switch to the OFF position
to turn o the alarm.
3. When the alarm is sounding, press the SNOOZE/LIGHT
button to silence the alarm and enter the snooze
mode. The alarm icon will continue to flash in snooze
mode. If you do not press the SNOOZE/LIGHT button,
the alarm will automatically turn o in 1 minute.
4. Once the snooze function is activated, the 4-step
crescendo alarm will sound 5 times in 5-minute
intervals. The alarm duration is 60 seconds.
Battery Replacement
When the LCD becomes dim, it is time
to replace the batteries. Use 2 new AA
batteries, following the polarity diagram
marked on the battery compartment.
Note: Please dispose of used batteries in an ecologically
safe and responsible manner.
Troubleshooting and Tips
This clock is designed to set itself automatically
by syncing with the U.S. Atomic Clock in Colorado.
However, atmospheric conditions may delay the
syncing process. You may choose to set this clock
manually. Then, when there is less interference
(usually around midnight) the clock will sync
automatically. For best results:
1. Set up the clock at night and let the clock receive
the signal automatically.
2. Place this unit away from interference sources,
such as a TV set or computer.
3. Avoid placing the unit on or near metal plates.
4. Enclosed areas, such as basements, are not
recommended.
5. Do not attempt to set up the unit in a moving
vehicle, such as a car or train.
6. This unit is designed to sync automatically in
4 U.S. time zones only: Pacific, Mountain, Central
and Eastern. This clock can be used in other time
zones, however you must set the time manually.
P17018376A0207100E
