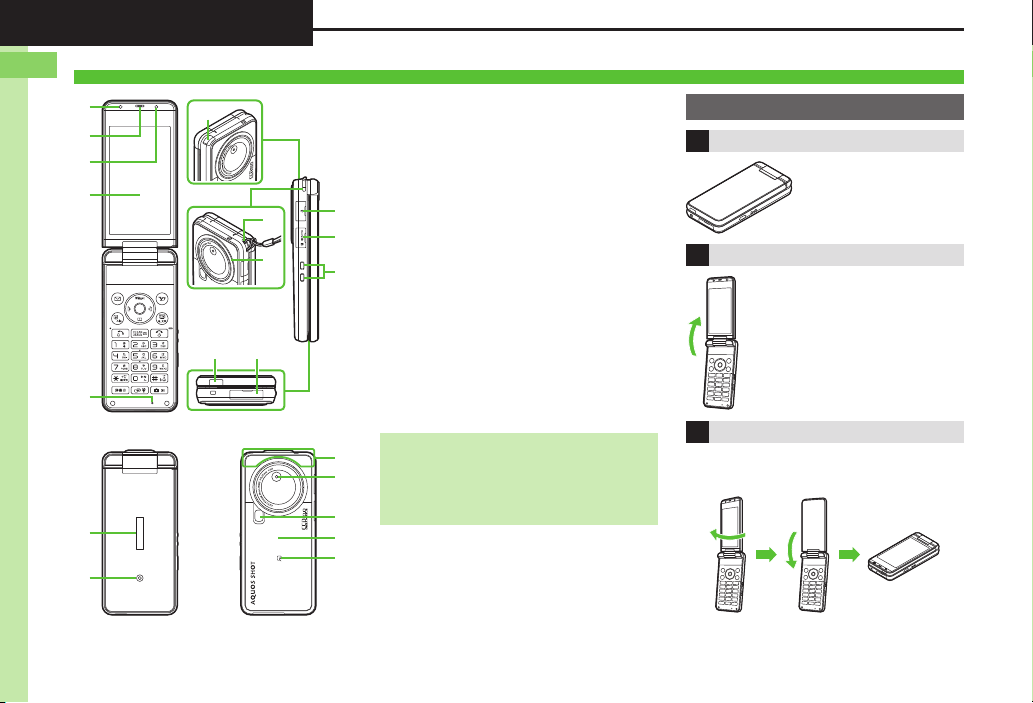
Sharp AQUOS SHOT 933SH User manual

1
1-1
Getting Started
Handset Parts................................. 1-2
Parts & Functions ............................ 1-2
Charging Battery ............................ 1-4
Power On/Off .................................. 1-6
Handset Power On/Off..................... 1-6
Display & Indicators....................... 1-7
Display............................................. 1-7
Indicators ......................................... 1-9
Touch Panel .................................. 1-12
Using Touch Panel......................... 1-12
Accessing Functions ................... 1-14
Main Menu..................................... 1-15
Shortcuts Menu & Key Shortcut .... 1-18
Toggling Active Functions (Multi Job)
....................................................... 1-19
Standby Shortcuts ......................... 1-20
Using Simplified Menus (Simple Menu)
....................................................... 1-22
Viewer Position Setup.................... 1-23
Keypad Lock ................................ 1-24
Activating/Canceling Keypad Lock
.......................................................1-24
Motion Control ............................. 1-25
Mobile Manners............................ 1-27
Security Codes ............................ 1-28
Basic Tools................................... 1-29
My Details & Basic Tools ................1-29
Double Number............................ 1-30
Using Double Number ....................1-30
Modes.............................................1-31
Additional Functions ................... 1-33

Getting Started
1
1-2
Handset Parts
1Light Sensor
2Earpiece
3Internal Camera
4Display
5Microphone
6External Display
7Small Light
8Antenna (for TV reception)
9Strap Eyelet
aSpeaker
bInfrared Port
cExternal Device Port (with Port Cover)
dHeadphone Port (with Port Cover)
eMemory Card Slot (with Slot Cover)
fCharging Terminals
gInternal Antenna Location
hExternal Camera (lens cover)
iMobile Light
jBattery Cover
kmLogo
Keep handset closed
when not in use.
Open handset to place or
answer calls, navigate with
handset keys, etc.
Handset is closed with Display facing
outward.
Do not carry handset with Display in
Viewer position. Display may be damaged.
Parts & Functions
6
7
5
k
h
g
j
i
1
4
2
3
8
d
e
f
b c
9
a
.Do not cover or place stickers, etc. over
Light Sensor or Internal Antenna area.
.
Replace Port/Slot Cover after Port/Slot use.
.Avoid metallic straps; Antenna sensitivity
may be affected.
Display Positions
Clamshell Closed
Clamshell Open
Viewer Position

Getting Started
1
1-3
Handset Parts
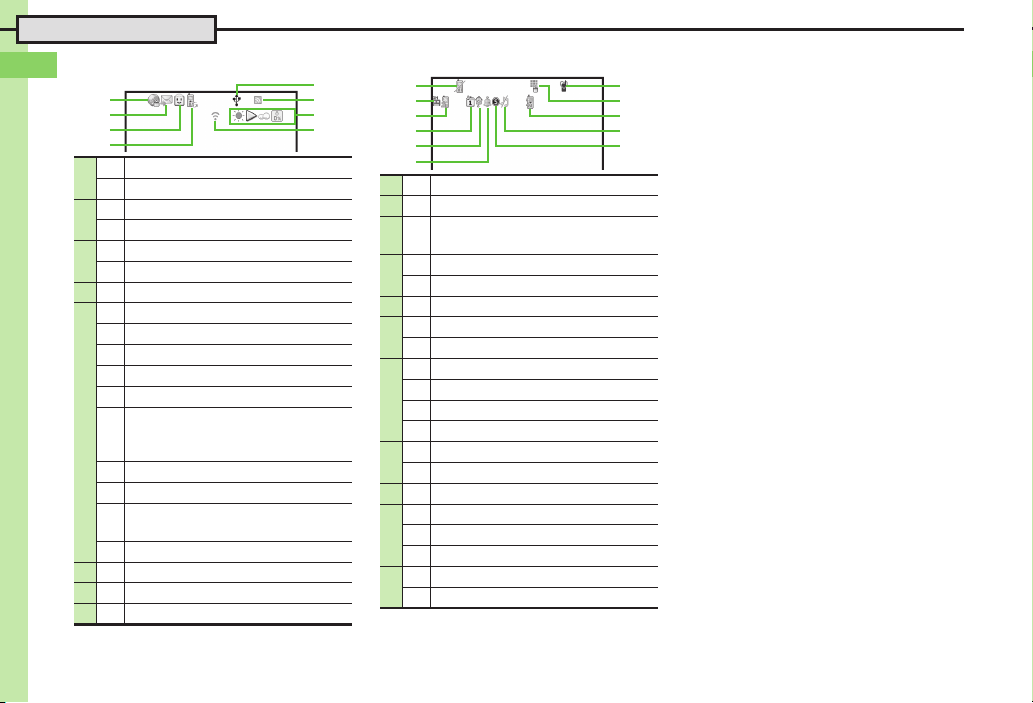
.Keys are indicated in this guide as shown.
.Change functions with *via Set Key
Shortcut as needed.
1Multi Selector (right) d
Open Received Calls. Long Press to
activate/cancel Infrared*.
2Multi Selector (up) a
Open Mobile Widget window. Long Press
to open PC Site Browser menu*.
3Center Key %
Open Main Menu.
4Multi Selector (left) c
Open Dialed Numbers. Long Press to
activate/cancel Bluetooth®*.
5Mail Key B
Open Messaging menu. Long Press to
open S! Mail Composition window*.
6Shortcuts & A/a Key '
Open Shortcuts menu. Long Press to
show active indicators (Status Icon List).
7Clear/Back Key $
Play Answer Phone messages. Long
Press to activate/cancel Answer Phone.
8Start Key !
Open All Calls. Long Press to open
Double Number Mode menu.
9Keypad 0- 9
Enter numbers to place calls or access
functions (Quick Operations). Long Press
to open Phone Book.
anKey (
Enter
n
, +, P, ?and -. Long Press to open
S! Friend's Status member list.
bDictionary Key ~
Open Dictionary. Long Press to activate/
cancel VeilView.
cMulti Job & Manner Key )
Select handset mode. Long Press to
activate/cancel Manner mode.
dYahoo! Keitai Key A
Open Yahoo! Keitai portal. Long Press to
activate Familink Remote*.
eTV & Text Key &
Activate TV. Long Press to open Change
Menu window.
fMulti Selector (down) b
Open Phone Book. Long Press to create
new Phone Book entries*.
gPower On/Off Key "
Toggle Standby display. Long Press to
turn handset power off.
h# Key #
Enter #. Long Press to activate/cancel
Manner mode.
iCamera Key |
Activate mobile camera. Long press to
activate Review.
jVolume Up Key E
Closed: Scroll External Display indicators,
etc. Long Press to activate/cancel Manner
mode.
Open: Long Press to activate Hand Mirror.
Viewer:
Long Press to activate Hand Mirror.
kVolume Down Key F
Closed:
Scroll External Display indicators,
etc. Long Press to check e-money balance.
Open: Show/hide Softkeys.
Viewer: Show/hide Softkeys. Long Press
to check e-money balance.
lKeypad Lock & Camera Key I
Closed: Toggle Clock view. Long Press to
illuminate Mobile Light.
Open:
Long Press to activate mobile camera.
Viewer: Activate/cancel Keypad Lock.
Long Press to activate mobile camera.
Handset Keys
1
2
3
4
5
e
i
f
g
d
6
8
7
9
b
c
a h
j
k
l
Side Keys
Multi Selector & Side Keys
.In this guide, Multi Selector and Side Key
operations are indicated as follows:
Press aor b e
Press cor d f
Press a, b, cor d g
Press Eor F L

Getting Started
1
1-4
Charging Battery
Battery must be inserted in handset to
charge it.
Use specified AC Charger ZTDAA1 (sold
separately).
.In this guide, ZTDAA1 is referred to as "AC
Charger."
.Handset and AC Charger may warm during
charging.
1Open Port Cover as shown
2Connect AC Charger
.With arrows up, insert connector until
it clicks.
3Extend blades and plug AC
Charger into AC outlet
.Small Light illuminates red while
charging.
.
Small Light goes out when battery is full.
4Unplug AC Charger
.Pull AC Charger straight out.
5Disconnect handset
.Squeeze release tabs to remove
connector.
6Fold back blades and
replace Port Cover
Charging Battery
Charging Battery Overseas
.SoftBank is not liable for problems
resulting from charging battery abroad.
AC Charger
AC 100VOutlet
Blades
AC Charger
Small Light
Port Cover
Arrows
Release Tabs
Charger Connector
External Device
Port
Important AC Charger Usage Note
.Fold back blades after charging. Do not
pull, bend or twist the cord.
When Small Light Flashes
.
Battery is unchargeable; may be defective
or simply at the end of its life; replace it.

Getting Started
1
1-5
Charging Battery
Connect handset (with power on) to PC
via USB Cable to charge battery.
.Download and install USB Cable driver
beforehand.
.Handset must be on to charge battery.
.Battery may not charge if handset is
connected through a USB hub.
In-Car Charger may be purchased
separately.
1Open Port Cover
2Connect In-Car Charger
.With arrows up, insert connector until
it clicks.
3Plug Charger into cigarette
lighter socket
4Start car engine
.Small Light illuminates red while
charging.
.
Small Light goes out when battery is full.
5Unplug Charger
6Disconnect handset
.Squeeze release tabs to remove
connector.
7Replace Port Cover
USB Charge
In-Car Charger
Important In-Car Charger Usage Notes
.
Disconnect Charger before leaving vehicle
to prevent charging with engine off.
.Do not use In-Car Charger with Desktop
Holder.
.Avoid charging battery inside extremely
hot vehicles.
Cigarette Lighter Socket
Plug
In-Car Charger
Small Light
External
Device Port
Arrows
Release Tabs
Charger Connector
Port Cover
Advanced
0(Disabling USB Charge (P.1-33)

Getting Started
1
1-6
Power On/Off
Follow these steps when powering on
933SH for the first time:
1"(Long)
.After Power On Graphic, follow the
steps below.
"S"S%SbS%S
設定
S%SLanguage S%SEnglish
S%S"(Long) S"(Long) S
Change Menu window opens
2Select option S%
Guide descriptions are based on
Standard Menu.
.My Details setup starts.
3Enter last name S%S
Enter first name S%
.Change Menu display option
confirmation appears.
4Yes or No S%
Standby
.Choose No to enter Standby
immediately after powering on.
Handset initiates Network Information
retrieval when B, a, %or Ais pressed
for the first time.
Follow these steps to retrieve Network
Information to use Network-related
services and TV; retrieval automatically
sets Clock:
1Yes S%SRetrieval starts
2%
1"(Long)
.After Power Off Graphic, handset
shuts down.
Handset Power On/Off
Power On
When USIM Card is Not Installed
.Insert USIM Card appears; insert the
card to use handset.
Retrieving Network Information
Power Off

Getting Started
1
1-7
Display & Indicators
Hereafter, most screenshots omit Mobile
Widgets and Standby Shortcuts.
Check active indicators and their
descriptions. (Status Icon List)
1'(Long)
.Alternatively, tap indicator area.
.Active indicators are enlarged;
description for selected indicator
appears.
.Use gto select indicators to view
their descriptions.
.Press %to open menu/window
(e.g., Battery Meter window from
battery strength indicator). May be
unavailable for some indicators.
Information window opens at the bottom
for Missed Calls, new mail, etc.
Information Window
Information label (e.g., Message, etc.)
and count appear in Information window.
Select an item and press %to open it.
Display
Standby
Indicator Area
Softkeys
Mobile Widgets/
Standby Shortcuts
Indicator Descriptions Information
Advanced
0(Handling Information list (P.1-33)

Getting Started
1
1-8
Display & Indicators
Functions/operations assigned to B, %
and Aappear at the bottom of Display in
portrait orientation with clamshell open.
In clamshell open (landscape) or Viewer
position, Softkeys (shown right) appear.
Tap a Softkey to execute assigned function/
operation. Some key assignments may vary
with Display position/window content.
[Portrait Orientation
[Landscape Orientation
Display goes dark after Display Saving
time elapses. Press any key to activate it.
Sensor detects handset movement. In
Viewer position, Display orientation
changes with handset orientation.
Display orientation for clamshell open is
fixed by default; set to rotate as needed.
Softkeys
Using Touch Panel
%B A
Display Saving
Backlight
.Backlight turns off after Time Out time
elapses. Press 0- 9to illuminate it
(key press may affect active function).
$B "A
$"' B % A )
Display Rotation
Portrait
Orientation
Landscape
Orientation
Advanced
0(Changing Display rotation method (P.1-34)

Getting Started
1
1-9
Display & Indicators
i, land hindicate line type in Dual
Mode (P.1-30).
[Basic Status
1The more bars the better.
2Battery strength % (appears when Display
activates, etc.) is an approximation.
[Function Status [Notifications
[Warnings
Indicators
Display Indicators
1
jWithin 3G range
kWithin GSM range
oInternational roaming in progress
2!Signal strength1
3DPacket transmission available
4EBattery strength2
41
3
2
1
FActive S! Application
<Paused S! Application
gMusic playback in progress
aTV recording in progress (handset)
bTV recording in progress (Memory
Card)
2
@Memory Card in use
nMemory Card formatting
mTV Timer/TV Recording Timer set
3nCompass Indicator
4rMusic playback in progress (via
Bluetooth®)
57
Multiple functions (Multi Job) active
3
4
1
5
2
1CUnread mail
BUnread Delivery Report
2
:Answer Phone active & message
recorded
lAnswer Phone canceled &
message recorded
3NNew Voicemail
4m
Missed Call or new mail on idle line
5,S! Appli/Mobile Widget Notification
6SContents Key received
7
x
Unread S! Information Channel info
9Software Update result
5Unread S! Quick News info
8l
Unread S! Friend's Status
notification or unanswered
registration request
1kMail memory low
2OMessage delivery failure
3;
Memory Card unusable/misinserted
5
6
1
7
8
3
4
2
31
2

Getting Started
1
Display & Indicators
1-10
[Transmissions
1Hidden while Mobile Widget is in use.
2Flashes while positioning.
[Settings
*Indicator does not appear when Call
Forwarding is set to Video Calls only, with
Voicemail unset.
1lSSL browsing in progress1
CWaiting packet transmission
2CReceiving mail
DSending mail
3*S! Friend's Status online
0Positioning in progress2
48Software Update in progress
5
IUSB Cable connected
:USB transmission in progress
fInfrared transmission in progress
-Infrared file transfer in progress
gBluetooth®transmission ready
h
Bluetooth®transmission in
progress (eappears for multiple
connections)
hBluetooth®talk in progress
cIC Transmission in progress
9S! Addressbook Back-up
transmission in progress
CPC Site Browser in use
60RSS-compatible site
7iWeather Indicator
8%Infrared transmission ready
6
7
1
8
3
4
5
2
1[Offline Mode active
2LAnswer Phone active
3M
Call Forwarding or Voicemail active
(forwarding condition:
Always
)
*
4sSchedule/Task (Alarm set)
tSchedule/Task (Alarm unset)
5IHour Minder active
6PAlarm set
EWakeup TV set
7
JManner mode active
#Drive mode active
]Original mode active
oVeilView active
8`Keypad Lock active
HIC Card Lock active
9b
Auto Answer or Remote Monitor active
a
RRingtone (Silent)
aRingtone (Increasing Volume)
cVibration active
bQShow Secret Data active
$Function Lock active
7
8
1
9
b
a
3
5
4
6
2

Getting Started
1
1-11
Display & Indicators
[Basic Status
*The more bars the better.
[Notifications
[Warnings
[Handset Status
External Display Indicators
1aSignal strength*
23Battery strength
1cMissed Calls
2dAnswer Phone message recorded
3eMissed Call Notification
4fNew Voicemail
5VUnread mail
6hUnread Delivery Report
7iContents Key received
8j
Unread S! Information Channel info
9BWeather Indicator update
aCLocation Info request
bAPedometer target achieved
1 2
1 2 3 4 5 6 7 8 9 a b
1WMessage delivery failure
2mS! Information Channel info
reception failure
3E
Decoration Call transmission failure
4FIP Service connection failure
5DWeather Indicator update failure
1nAlarm
2oSchedule Alarm
3pTask Alarm
4fS! Appli/Mobile Widget Notification
5+
Unread S! Friend's Status notification
6mTV Alarm (watch)
7HTV Alarm (record)
1 2 3 4 5
1 2 3 4 5 6 7
External Display Date & Time
.Press Ito toggle Clock view.

Getting Started
1
1-12
Touch Panel
Using Touch Panel
To uch Display to select menuitems,
move pointer, scroll pages, etc.
Available in clamshell open or Viewer
position (regardless of orientation).
LongTouch Operations
Softkeys
Alternative functions/operations may
be available.
Standby & Function Windows
Long Touch Display to open
function/operation menu.
Internet Pages & Post-Image Capture
Windows
Enlarge specific areas.
Text Entry Windows
Long Touch onscreen hiragana key to open
list of hiragana in that rowwith ゛or ゜, etc.
Selection & Execution
Special Operations (Double Tap)
Tap Display to open windows or execute
Softkey functions/operations.
.Tap twice to execute certain operations.
Tap twice in rapid succession (within
approximately 0.6 seconds) to switch
window size while Multi Job is active, to
enlarge/reduce images, etc.
Touch and hold Display to execute
certain functions/operations.
■Tap ■LongTouch
Advanced
0(Adjusting Touch vibration (P. 1 - 3 3 )

Getting Started
1
1-13
Touch Panel
Move/Draw (Drag) Enlarge/Reduce (Spread/Pinch)
Screen Scroll (Swipe)
Spread
Enlarge
Pinch
Reduce
Touch and dragtarget item to move it;
release your finger to stop/save. Move
icons, scroll lists, etc.
Pinch or spread your fingers to reduce or
enlarge images, etc.
To see items outside Display area, swipe a
finger across Display in opposite direction.
Important Usage Notes
.Touch Panel may not respond in these
situations:
,Use with gloved fingers/fingernails
,Use of pens, pencils or other sharp
objects
,Use with objects placed on/against
Display
.To prevent malfunctions, do not:
,Touch Display with wet fingers
,Subject Display to force/pressure
,Place labels or stickers over Display
.Calibrate Touch Panel (P. 1 - 1 7 ) to
improve response.

Getting Started
1
1-14
Accessing Functions
Use the following methods as needed.
Accessing Functions
Main Menu
Repeat menu item selection.
Quick Operations
Enter numbers to access functions.
To activate functions, press the
correspondingkey.
Use shortcuts
Enter numbers
Select menu
items
Shake handset to access assigned
functions. (Complete setup beforehand.)
■Quick Shortcut
Access assigned functions
(changeable).
■Shortcuts
Save functions to Standby.
■Standby Shortcuts

Getting Started
1
1-15
Accessing Functions
Main Menu
OpeningMain Menu
Main Menu Items
■Touch Panel
Window Description
■Handset Key
%
Messaging
Yahoo! Keitai
S! Appli
TV
Camera
Entertainment
Tools
Data Folder
Media Player
Communication
Phone
Settings
Open/create messages, etc.
Browse the Internet
Use S! Applications including games
Watch/record TVprograms
Capture images or record video
Read e-Books, receive news updates, etc.
Manage schedules, set Alarm, scan QR Codes, etc.
Open files saved on handset/Memory Card
Play/download media files
Communicate with other users in various ways
Search contacts, add entries, etc.
Customize handset interface, sounds, etc.

Getting Started
1
Accessing Functions
1-16
Follow these steps to open World Clock via handset keys or Touch Panel:
(Touch Panel navigation screenshots are based on Viewer position.)
Menu Navigation (Handset Keys)
Use eto select
World Clock
Use fto select
Clock/Gaugetab
Menu Navigation (Touch Panel)
%%
Tap Clock/Gaugetab Tap World Clock
Press %in Standby Use gto highlight
Tools
Open
Main Menu Select Item Open Tab Select Item
Tap MENU in Standby Tap Tools

Getting Started
1
1-17
Accessing Functions
Calibrate Touch Panel to improve response.
Hold handset normally during calibration.
1%SSettings S%
2In Phone menu, Touch
Panel S%
3Correct Touch Panel S%
4Yes S%
.Follow onscreen instructions.
Escape/Return (Handset Keys)
Escape/Return (Touch Panel)
Press "
(Standby returns)
Press $
Navigate
Back
Return to
Standby
Standby returns
Tap W
Tap CLEAR/BACK
Calibrating Touch Panel
Undo Calibration
.
If calibration does not improve response,
follow these steps to restore default setting:
After 4, $

Getting Started
1
1-18
Accessing Functions
Access assigned functions via Shortcuts
menu.
1'
Shortcuts Menu
2Select function S%
.Menu/window opens.
In Standby, Long Press B, gor Ato
access assigned functions.
Follow these steps to assign Calculator to
a
:
1%SSettings S%
2In Phone menu, Set Key
Shortcut S%
Key Shortcut Menu
3Long press|S%
4From Appli S%
5Tools S%SIn PIM/Life
menu, Calculator S%
Shortcuts Menu & Key Shortcut
Shortcuts Menu
Changing Default Shortcuts
In 2, select numbered function S
BSAssign Function S%S
Select menu item S%SSelect
new item S%
,To assign menu items, select one and
press B.
Assigning Files & Folders
In 2, select numbered function S
BSAssign Data S%SSelect
file/folder S%
,For folders, select Set this folder and
press %.
Key Shortcut
BOpen S! Mail Composition window
AActivate Familink Remote
aOpen PC Site Browser menu
b
Create new Phone Book entries
cActivate/cancel Bluetooth®
dActivate/cancel Infrared
Changing Assigned Functions
Bookmark
In 4, From Bookmark S%S
Select title S%SYes S%
Bluetooth®or Infrared On/Off
In 4, From Other S%SSelect
item S%
Canceling Assigned Function
In 4, Off S%
Advanced
0(Changing item order (Restoring default shortcuts (P. 1 -33)

Getting Started
1
1-19
Accessing Functions
Access a function in Shortcuts menu
while another is active.
Multi Job may not activate from some
menus/windows (e.g., ringtone/ringvideo
selection, etc.). Multi Job is disabled while
<(gold) appears.
1In a function window, '
In text entry/dial windows, Long Press
'
.
2Select function S%
.Menu/window opens.
3
To toggle active windows,
)
4"SMulti Job ends
.If a confirmation appears, follow
onscreen prompts.
Toggling Active Functions (Multi Job)
Multi Job Feature
While browsing the Internet
Jot down information
Toggle windows
Open Scratch Pad
①
②
Using Multi Job
S
)
s

Getting Started
1
1-20
Accessing Functions
Paste shortcuts to functions, files, folders,
etc. to Standby for easy access. 1a
2Use gto select #(OPEN)
S%
3f!
4Select item S%
.
Corresponding icon appears in Standby.
.>> appears when more items are
available.
5Use gto specify target
location S%
Standby Shortcuts
Shortcuts
Saving Shortcuts to Standby
Widget Tab
Standby Shortcut Tab
Using Touch Panel
Tap #(OPEN) STap !SDrag icon
to Standby STap $(CLOSE)
,If #(OPEN) does not appear, press a
(tap '(Widget On) in Viewer position).
Saving from Menu/Window
.In Options menu, select Set as
StbyShortcut (may not appear for some
items); select sheet as needed.
Moving Icons with Touch Panel
After 1, Long Touch Display S
Move Mode SDrag icon SConfirm
Using Pointer (X)
.After 1, Long Press Ato activate
pointer navigation; select widgets, etc.
.
To cancel pointer navigation, Long Press
A
.
Advanced
0(Sorting icons (Moving icons (Moving icons to front/back (P.1-33)
Table of contents
Other Sharp Cell Phone manuals

Sharp
Sharp Aquos Xx3 mini User manual

Sharp
Sharp AQUOS SHL25 Installation guide

Sharp
Sharp SX862 User manual

Sharp
Sharp TQ-GX30E User manual

Sharp
Sharp AQUOS PHONE CL IS17SH Service manual

Sharp
Sharp AQUOS Xx User manual

Sharp
Sharp AQUOS C10 User manual

Sharp
Sharp GX-T29 User manual

Sharp
Sharp WX-T71 User manual

Sharp
Sharp AQUOS Crystal Sprint User manual

Sharp
Sharp 902SH User manual

Sharp
Sharp 703SH User manual

Sharp
Sharp Vodafone 802SH User manual

Sharp
Sharp GZ100 User manual

Sharp
Sharp GX15 User manual

Sharp
Sharp NTT docomo SH-06E User manual

Sharp
Sharp Z2 User manual

Sharp
Sharp Aquos R3 User manual

Sharp
Sharp Aquos R compact Quick start guide

Sharp
Sharp SoftBank 203SH User manual