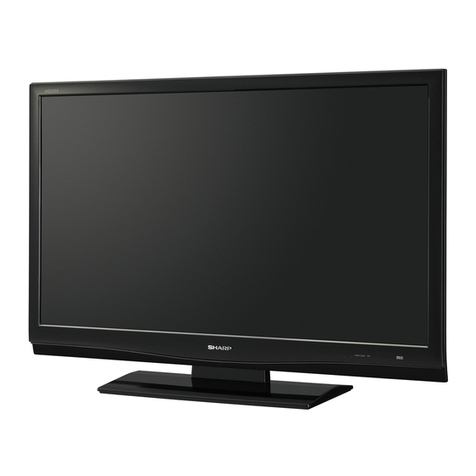
Sharp LC-10A3E User manual

1
LC-10A3E
In the interests of user-safety (Required by safety regulations in some countries) the set should be restored
to its original condition and only parts identical to those specified should be used.
MODEL LC-10A3E
LCD COLOURTELEVISION
SERVICE MANUAL
S51T1LC-10A3H
SHARP CORPORATION
Page
»IMPORTANT SERVICE SAFETY PRECAUTION................................................................................. 2
»SPECIFICATIONS ................................................................................................................................ 3
»OPERATION MANUAL ......................................................................................................................... 4
»DIMENSIONS ....................................................................................................................................... 5
»DISASSEMBLY OF THE SET............................................................................................................... 6
»ADJUSTING PROCEDURE OF EACH SECTION ............................................................................... 9
»TROUBLE SHOOTING TABLE ........................................................................................................... 12
»CHASSIS LAYOUT ............................................................................................................................. 16
»BLOCK DIAGRAM .............................................................................................................................. 18
»DESCRIPTION OF SCHEMATIC DIAGRAM ..................................................................................... 19
»SCHEMATIC DIAGRAM ..................................................................................................................... 20
»PRINTED WIRING BOARD ASSEMBLIES ........................................................................................ 27
»PARTS LIST
ËELECTRICAL PARTS..................................................................................................................... 31
MAIN UNIT ..................................................................................................................................... 31
TERMINAL UNIT............................................................................................................................ 35
OPERATION UNIT ......................................................................................................................... 36
LED UNIT ....................................................................................................................................... 37
ËACCESSORIES PARTS ................................................................................................................. 37
ËPACKING PARTS ........................................................................................................................... 37
ËCABINET PARTS LOCATION ........................................................................................................ 38
ËCABINET AND MECHANICAL PARTS.......................................................................................... 39
»PACKING OF THE SET ...................................................................................................................... 40
CONTENTS
SERVICE MANUAL LCD COLOUR TELEVISION MODEL LC-10A3E
TENTATIVE

2
LC-10A3E
CAUTION: FOR CONTINUED PROTECTION
AGAINST A RISK OF FIRE REPLACE ONLY WITH
SAME TYPE FUSE. F3701 (1.25A, 250V), F3702
(1.25A, 250V), F3751 (2.0A, 250V) FUSE.
12345678901234567890123456789012123456789012345678901234567890121234567890123456789012345678901212
1
234567890123456789012345678901212345678901234567890123456789012123456789012345678901234567890121
2
12345678901234567890123456789012123456789012345678901234567890121234567890123456789012345678901212
12345678901234567890123456789012123456789012345678901234567890121234567890123456789012345678901212
1
234567890123456789012345678901212345678901234567890123456789012123456789012345678901234567890121
2
12345678901234567890123456789012123456789012345678901234567890121234567890123456789012345678901212
SAFETY NOTICE
Many electrical and mechanical parts in LCD television
have special safety-related characteristics.
These characteristics are often not evident from visual
inspection, nor can protection afforded by them be
necessarily increased by using replacement components
rated for higher voltage, wattage and etc.
Replacement parts which have these special safety
characteristics are identified in this manual; electrical
components having such features are identified by “ å”
IMPORTANT SERVICE SAFETY PRECAUTION
ËService work should be perfomed only by qualified service technicians who are thor-
oughly familiar with all safety checks and the servicing guidelines which follow:
and shaded areas in the
Replacement Parts Lists
and
Schematic Diagrams
.
For continued protection, replacement parts must be
identical to those used in the original circuit.
The use of a substitute replacement parts which do not
have the same safety characteristics as the factory
recommended replacement parts shown in this service
manual, may create shock, fire or other hazards.
WARNING
1. For continued safety, no modification of any circuit
should be attempted.
2. Disconnect AC power before servicing.
BEFORE RETURNINGTHE RECEIVER
(Fire & Shock Hazard)
Before returning the receiver to the user, perform
the following safety checks:
1. Inspect all lead dress to make certain that leads are
not pinched, and check that hardware is not lodged
between the chassis and other metal parts in the
receiver.
2. Inspect all protective devices such as non-metallic
control knobs, insulation materials, cabinet backs,
adjustment and compartment covers or shields,
isolation resistor-capacitor networks, mechanical
insulators and etc.
3. To be sure that no shock hazard exists, check for
leakage current in the following manner.
•Plug the AC cord directly into a 110~240 volt AC outlet,
and connect the DC power cable into the receiver's
DC jack.(Do not use an isolation transformer for this
test).
•Usingtwoclip leads,connecta50k ohm,10wattresistor
paralleled by a 0.15µF capacitor in series with all
exposedmetalcabinetpartsand aknownearth ground,
suchas electricalconduitorelectricalgroundconnected
to an earth ground.
•Use an AC voltmeter having with 5000 ohm per volt, or
higher, sensitivity or measure the AC voltage drop
across the resisor.
•Connect the resistor connection to all exposed metal
parts having a return to the chassis (antenna, metal
cabinet, screw heads, knobs and control shafts,
escutcheon and etc.) and measure the AC voltage drop
across the resistor.
All checks must be repeated with the AC cord plug
connection reversed. (If necessary, a nonpolarized
adaptor plug must be used only for the purpose of
completing these checks.)
Any reading of 35V peak (this corresponds to 0.7
milliamp.peak AC.) or more is excessive and indicates
a potential shock hazard which must be corrected
before returning the monitor to the owner.
TO EXPOSED
METAL PARTS CONNECT TO
KNOWN EARTH
GROUND
DVM
AC SCALE
50k ohms.
10W
0.15 µF
TEST PROBE
3
LC-10A3E
Specifications
LCD panel...............................................................................................10.4" TFT LCD
Number of dots ..................................................................................921,600 dots VGA
Video colour systems.......................................................................PAL/NTSC/SECAM
TV FUNCTION
TV Standard (CCIR) .....................................................................................I/DK/BG
TV Tuning System.......................................................................Auto preset 100 ch.
STEREO/BILINGUAL ............................................................................NICAM, IGR
AUTO PRESET...................................................................................................YES
CATV.....................................................................................................~Hyper Band
4-LINE COMB FILTER.............................................................................................. Yes
Luminance ......................................................................................................400 cd/m2
Lamp life ................................................................................................... 60,000 Hours
Viewing angles................................................................................................... H : 120°
V : 100°
Audio amplifier .................................................................................................1.0 W ×2
Speakers................................................................................................ 3 ×4 cm, 2 pcs
Terminals
AV1 .......................................................................................... AV-IN 1, S-VIDEO-IN
AV2 ................................................................................................................AV-IN 2
AV OUT.........................................................................................................AV-OUT
ANT......................................................................................................................DIN
H/P ...........................................................................................3.5 mm ø jack (Rear)
OSD Language .......................English/German/Dutch/French/Italian/Spanish/Swedish
Power supply.............................................................. DC 12 V, AC110-240 V, 50/60 Hz
Weight ........................................................................................ 1.9 kg w/o accessories
Accessories ............................ R/C, Batteries, Wall mount parts, AC adaptor, AC cord,
........................................... AV cable for mini-jack
Design and specifications are subject to change without notice.

4
LC-10A3E
Operation Manual
Main unit (front view)
Main unit (rear view)
Remote control
BRIGHT MENU CH TV/VIDEO MAIN POWER
Power/standby indicator
A green indicator lights when the power is on and a red indicator
lights when in the standby mode (the indicator will not light when
the power is off).
Remote sensor window
(The actual location is not visible)
Top control panel
TV/VIDEO
MAIN POWER
CH (')/(")
MENU
BRIGHT Volume (+)/(–)
DISPLAY
MUTE
Ë
The MUTE, DISPLAY, MENU,Volume (+)/(–), CH (
'
)/(
"
), and TV/VIDEO buttons provide the same
functions as the buttons on the remote control.
(The MENU button has a slightly different function from the remote control button.)
DC12V
AV-OUT
AV-IN2
AV-IN1
AUDIO
AUDIO
AUDIO
V
V
VS
RL
POWER
INPUT
HEADPHONE
Adjust the set stand to an angle so that
the screen is easily visible.The set
stand can be opened up to 80°.
Rear terminal section
AV input 1 terminal
• S-Video input
• Video input
• Audio R/L
AV input 2 terminal
Headphone output
terminal
DC input terminal
Antenna input terminal
AV output terminal
VOL
–
TV/VIDEO
CH
VOL
+
CH
8
9
0
LCDTV
123
456
7
MENU
/
MENU
(POWER)
TV/VIDEO
CHANNEL SELECT
CH (')/("), Cursor control Up/Down
'Selects next higher channel
"Selects next lower channel
FLASHBACK
Returns to previous channel
DISPLAY
Press...Displays receiving channel for 10 seconds.
Channel indication reduces in size after
about 10 seconds.
Press again...Removes display.
MUTE
Press...Stops sound.
Press again...Returns sound to previous level.
SOUND MODE SELECTOR
Switching audio mode.
VOL (+)/( ), Cursor control Right/Left

5
LC-10A3E
Dimensions
(Units: mm)
FrontView
Rear View
Side View
213.2
267 35
43.5
47.5
63.5
193
22 49.5
65
1
1
81.279.2
107.8
123
126.5 105.5
15.5 103
60
177
243.8
90.172 12.5 14 14 14 15
88.5
30.5

6
LC-10A3E
DISASSEMBLY OFTHE SET
1. Remove the five lock screws (1) off the cabinet B.
2. Push on the six hooks (2) of the cabinet B and open it slightly.
3. Disconnect all the connectors (3) from the terminal and operation PWBs. Detach the cabinet B.
4. Disconnect all the connectors (4) from the main PWB.
1
1
2
2
2
2
2
2
1
1
1
P2001
P3203
P3204
SC401
P701
3
3
3
3
P701 P751
P2001
P2002
P752 P401 SC1201
SC1203
P301
4
4
4
4
Cabinet B
Cabinet A
(Main PWB)

7
LC-10A3E
5
7
7
6
5
8
8
8
9
9
10
5. Remove the four lock screws (5) off the main PWB.
6. Peel off the one piece of tape (6) and detach the LC display unit.
7. Remove the two lock screws (7) off the remote control PWB.
8. Remove the four lock screws (8) off the terminal PWB.
9. Remove the two lock screws (9) off the operation PWB.
10.Remove the two lock screws (10) off the flexible shield.
Main PWB
LC display unit
Cabinet A
Cabinet B
LED PWB
Operation PWB
Terminal PWB
Flexible shield
LC display unit
(rear view)

8
LC-10A3E
11
11
11
11
11
12
11
11
11.Undo the seven hooks (11) to release the unit frame.
12.Detach the fluorescent lamp (12).
Panel holder

9
LC-10A3E
ADJUSTING PROCEDURE OF EACH SECTION
The best adjustment is made before shipping. If any position deviation is found or after part replace is performed, adjust
as follows.
1.Preparation for Adjustments
(1)Use the exclusive-use AC adapter or stable DC power supply.
AC adapter: UADP-0225CEPZ
DC power supply: 12 ± 0.5V
2.Special mode setting procedure
(1)Adjustment mode
[Procedure]
• Short-circuit TP2001 to GND, and turn on the power.
• Or short-circuit TP2002 to GND, and turn on the power.
• Or holding down the [TV/VIDEO] key and [MENU] key, turn on the main power, and simultaneously press the
(inspection process) [CH "] key and [VOL– ] key to change the mode to the adjustment mode.
• Each adjustment item is chosen with the [MENU] key, and adjusted with the [VOL] key.
[Description]
The manual adjustment or adjustment through communication with the automatic machine is performed.
(2)Inspection mode
[Procedure]
Holding down the [TV/VIDEO] key and [MENU] key, turn on the power.
[MENU] key is pushed and made inspection mode.
[Description]
• In the ordinary menu select with the [CH] key, and decide with the [VOL] key. Then select “PICTURE”, “TINT (only
NTSC)”, “COLOUR”, “BLACK LEVEL”, “SHARPNESS”, “RED-BLUE”, “GREEN” and “COLOUR SYSTEM” with the
[CH] key, and decide with the [VOL] key. After that, adjust values with the [VOL] key.
• VOLUME, PICTURE, TINT (only NTSC), COLOUR, BLACK LEVEL, SHARPNESS, RED-BLUE, GREEN change as
follows.
(3)Shipping setting mode
[Procedure]
Holding down the [TV/VIDEO] key and [MENU] key, turn on the main power, and simultaneously press the (inspection
process) [CH '] key and [VOL+] key to change the mode to the shipping setting mode.
[Description]
User adjustment and other values are taken as defaults.
If TV is indicated as SETTING COMPLETE, setting has been completed.
3.Cancel of special mode
Turn off the main unit power.
4.Initialization
Here is the procedure of initializing the EEPROM and making model number and size settings.
4-1. Get Pins (81) and (82) of the IC2001 (microprocessor) grounded and turn on the power.
4-2. Select a model number (A1, A2H, A2U, A3E). For Model LC-10A3E select A3E.
4-3. Select a size in inches (10, 12, 15, 20).For Model LC-10A3E select 10.
4-4. Get Pins (81) and (82) of the IC2001 (microprocessor) back to normal.
ûMin.ÛûCenterÛûMax.Û

10
LC-10A3E
5.Reset of lamp error
If the power LED remains red and the power is not turned on, or if repair has been performed, enter the adjustment
mode to reset the lamp error.
For the resetting procedure, refer to " No power" in the "Trouble shooting Table" section.t remote controller:
6.Adjustments
6-1. +B adjustment
Vary the “+B-ADJ”setting on Page 1 of the adjustment process so that the voltage at pin 49 of SC401 be 5.00
±0.02 V.
Note : Adjust precisely to 5.0 V because this level will be used as supply voltage reference.
6-2. Counter-bias adjustment
Vary the “COM BIAS” setting on Page 2 of the adjustment process so that the contrast be sharpest (black
looks most sinking).The adjustment guideline is around 114 for Model LC-10A3E.
6-3. TAMP adjustment
1) Receive the colour bar signal.
2) See if the "Y" reading on page 2 of the adjustment process is somewhere between BO and BA. If not, make
the "PAL TAMP" adjustment to get the "Y" reading in the range of BO thru BA.
(Adjustment process menu on-screen display on page 2)
0 1 2 3 4 5 6 7 8 9 10 11 12 13 14 15 16 17 18 19 20 21 22 23 24 25 26
2COM BIAS 117
PAL 27TAMP
TA PMH AB
TAMP L B0
TV H-PEAKING 3
RCUTOFF 0
GCUTOFF 0
BCUTOFF –1
G3 B3 R3 00 00 00
G1 B4 Y 00 00 B5
0
1
2
3
4
5
6
7
8
9
10
11
12
13
Y Data (75% white )
6-4. White balance adjustment
Vary the “RCUTOFF” and “BCUTOFF” settings to achieve optimum white balance.
Note : For the “RCUTOFF” and “BCUTOFF” settings, keep the readings in the range of -10 to +10.If out of
this range, the user-adjustable range is reduced.

11
LC-10A3E
7.OSD Menu (for pages 1 and 2)
Page Item MIN MAX Remarks
1 +B-ADJ 0 255 160 Refer to 5-1
MODEL A3E Refer to 4-2
INCH SIZE 10 Refer to 4-3
TIMER 1
SYSTEM PAL
NTSC PWM FREQ 000 FFF 0C0
PAL PWM FREQ 000 FFF 0BD
TV GAIN OFF
ERROR NO RESET 0
PMUTE 00
2 COMBIAS 0 255 117 Refer to 5-2
PAL TAMP 0 63 27
TV H-PEAKING 0 63 27
R CUT OFF 0 7 0 Refer to 5-3 (around -5)
G CUT OFF -15 +15 0
B CUT OFF -15 +15 -1 Refer to 5-3
TAMP H 00 FF BA
TAMP L 00 FF B0
G3 -15 +15 0
B3 00 FF 00
R3 00 FF 00
G1 00 FF 00
B4 00 FF 00
Y00FF00
Initial
Setting

12
LC-10A3E
TROUBLE SHOOTINGTABLE
No
No Power (Power LED indicator still in red)
Go to the adjustment process mode.
Move the cursor to ERROR NO RESET
and click on it (to reset to zero).
Turn off the power.
Is the power turned on again?
1+B-ADJ 160
MODEL A3E
INCH SIZE 10
TIMER 1
NTSC PWM FREQ OCO
PAL PWM FREQ OBD
TV GAIN OFF
ERROR NO RESET 5
PMUTE 00
Check the back light lamp, D753, D754, Q757,
Q3600-2 and their peripheral parts as well as pin
(42) of IC2001.
Note:
This model is equipped with the lamp error detection function
that detects the current flowing into the fluorescent lamp and
protects the backlight lamp drive circuit.
If a lamp error is detected, the microprocessor interrupts the
unit and the ERROR NO RESET setting will go up.
When the ERROR NO RESET setting has reached "5", the
microprocessor turns and keeps off the unit's power. To
resume the power, take the above procedure to clear the
ERROR NO RESET setting.

13
LC-10A3E
TROUBLE SHOOTINGTABLE
No picture
at all
Yes
No
Are inputs
and outputs
of IC802 as
specified?
Check all the settings on the microprocessor’s adjust process menu.
No picture
Check IC802
and its
peripheral
parts.
Yes
No
Are inputs
and outputs
of IC1201 as
specified?
Check
IC1201 and
its peripheral
parts.
Check LCD
panel voltage
and
waveform.
NoTV and
VIDEO 1
output
Yes
No
Are inputs
and outputs
of IC402 as
specified?
Check IC402
and its
peripheral
parts.
NO
Is input at Pin
(73) of IC802
as specified?
Check IC802,
AV1 line and
their
peripheral
parts.
NoTV
output
Yes
No
Are voltages
at Pins (6),
(7) and (9) of
tuner as
specified?
Check the
power line.
Yes
No
Is output at
Pin (19) of
tuner as
specified?
Check the
tuner and its
peripheral
parts.
No
Is input at Pin
(1) of IC402
as specified?
Check the
line in
question.
Yes
Check IC402
and its
peripheral
parts.
Yes
No
Are Pins (2)
and (4) of
IC402 at “H”
and “L”
respectively?
Are Pins (65)
and (66) of
IC2001 at “H”
and “L”
respectively?
NoVIDEO
1 output
YES
No
Is input at Pin
(1) of IC402
as specified?
Check the
line in
question.
Yes
No
Are Pins (1)
and (4) of
IC402 both at
“L”?
NoVIDEO
2 output
No
Is input at Pin
(74) of IC802
as specified?
Check J3404,
AV line and
their
peripheral
parts.
No S
VIDEO
output
No
Are inputs at
Pins (71) and
(72) of IC802
as specified?
Check
J3301, SY
line, SC line
and
peripheral
parts.
Are Pins (65)
and (66) of
IC2001 both
at “L”?
Check IC402
and its
peripheral
parts.
Yes
Check the
line in
question.
Yes
Check the
line in
question.

14
LC-10A3E
TROUBLE SHOOTINGTABLE (Continued)
No picture and sound
No colour
NoTV colour No S-VIDEO colour
Yes
No
Do F3701 and F3702
function?
Check all the settings on the microprocessor’s adjust process menu.
No
Are secondary outputs
(+38V, +16V, +9V, +5V, -8V)
of T701 as specified?
Yes
Are the oscillation waveform
at T701’s primary side as
specified?
Yes
No
Disconnect F3701 and
F3702. Is the load side
short-circuited?
Yes
No
Is any of T701’s primary side,
Q701, Q710 and S4701
short-circuited?
Check J3701, its peripheral
parts and connection cable.
Replace F3701 and F3702.
Check S4701 and
connection cable.
Check the secondary-side
load of T701.
Fluorescent lamp failure
Yes
No
Does F3751 function?
Yes
No
Is Pin (34) of IC1201 at “H”?
Yes
No
Are the oscillation waveforms
at the primary side of T751
and T752 as specified?
Yes
Replace F3751.
No
Is input at Pin (71) of IC802
as specified? Check J3301, SC line and
peripheral parts.
Yes
Check the line, IC1201 and
its peripheral parts.
Check Q751, Q752,T751,
T752, Q753 and their
peripheral parts.
Replace the fluorescent lamp
and check the oscillation
waveform again.
NoVIDEO colour
Check all the settings on the microprocessor’s adjust process menu.

15
LC-10A3E
TROUBLE SHOOTINGTABLE (Continued)
No sound
from
speakers
Yes
No
Is Pin (53) of
IC2001 at “L”?
Check all the settings on the microprocessor’s adjust process menu.
No sound
No
Are outputs at
Pins (1) and (7)
of IC903 as
specified?
Yes
No
Are inputs and
outputs of
IC303 as
specified?
Yes
No
Are inputs at
Pins (5) and (8)
as well as
outputs at Pins
(2) and (11), all
of IC301, as
specified?
Muting effect is
on. Check the
FSMU line.
Check IC901,
IC903 and their
peripheral
parts.
Check IC303
and its
peripheral
parts.
Check the line
in question,
IC303 and its
peripheral
parts.
Yes
Check the
speakers and
their peripheral
parts.
No sound
from
headphone
Yes
No
Is Pin (55) of
IC2001 at “L”?
Check the
headphone and
its peripheral
parts.
Check Q306,
J3404 and their
peripheral
parts.
No sound
from output
line
Yes
No
Is Pin (52) of
IC2001 at “L”?
No
Are outputs at
Pins (1) and (7)
of IC902 as
specified?
Yes
Check the line
in question.
Check the
LMUTE line.
Check IC902
and its
peripheral
parts.
TV sound
failure
Yes
No
Is output at Pin
(16) of tuner as
specified?
No
Is input at Pin
(60) of IC901
as specified?
Check the
tuner and its
peripheral
parts.
Check IC901,
Q3301, Q3204,
Q3205 and
their peripheral
parts.

LC-10A3E
A
B
C
D
E
F
G
H
I
J
12345678910
16
CHASSIS LAYOUT
MAIN Unit (Side-A)
MAIN Unit (Side-B)

10 11 12 13 14 15 16 17 18 19
17
LC-10A3E
A
B
C
D
E
F
G
H
I
J
12345678910
TERMINAL Unit
OPERATION Unit (Side-A)
OPERATION Unit (Side-B)
LED Unit

LC-10A3E
A
B
C
D
E
F
G
H
I
J
12345678910
18
BLOCK DIAGRAM

10 11 12 13 14 15 16 17 18 19
19
LC-10A3E
DESCRIPTION OF SCHEMATIC DIA-
GRAM
VOLTAGE MEASUREMENT CONDITION:
1. When the exclusive-use AC adapter is used, the colour
bar signal of colour bar generator for service is input to
get the normal screen.When the audio is minimized,
the voltage value is measured with the 20 kΩ/V tester.
WAVEFORM MEASUREMENT CONDITION:
1. When the exclusive-use AC adapter is used, the colour
density, lightness and colour hue are set to the center
position, and the signal of colour bar generator for
service is observed to get waveform.
The wave form test point is indicated with the mark
( ) in the wiring diagram.
INDICATION OF RESISTOR & CAPACITOR:
RESISTOR
1. The unit of resistance “Ω” is omitted.
(K=kΩ=1000 Ω, M=MΩ).
2. All resistors are ± 5%, unless otherwise noted.
(J= ± 5%, F= ± 1%, D= ± 0.5%)
3. All resistors are Carbon type, unless otherwise noted.
C: Solid W: Cement
S: Oxide Film T: Special
N: Metal Coating
CAPACITOR
1. All capacitors are mF, unless otherwise noted.
(P=pF=mmF).
2. All capacitors are Ceramic type, unless otherwise
noted.
(ML) : Mylar (TA) :Tantalum
(PF) : Polypro Film (ST) : Styrol
CAUTION:
This circuit diagram is original one, therefore there may be a
slight difference from yours.
IMPORTANT SAFETY NOTICE:
PARTS MARKED WITH “
å
”
( )ARE
IMPORTANT FOR MAINTAINING THE SAFETY OF
THE SET. BE SURE TO REPLACE THESE PARTS
WITH SPECIFIED ONES FOR MAINTAINING THE
SAFETY AND PERFORMANCE OFTHE SET.

1234567891011 12 13 14 15 16 17 18 19 20
A
B
C
D
E
F
G
H
I
J
LC-10A3E LC-10A3E
20~21
åAND SHADED COMPONENTS=SAFETY RELATED PARTS
ËMAIN Unit -1/2
Table of contents
Other Sharp LCD TV manuals

Sharp
Sharp AQUOS LC-37HV4M User manual

Sharp
Sharp Aquos LC 65D64U User manual

Sharp
Sharp LC-42D62U User manual

Sharp
Sharp LC-40F22E User manual

Sharp
Sharp AQUOS LC-32D47U User manual

Sharp
Sharp Aquos LC-32GP3UB User manual

Sharp
Sharp LC 10A2U User manual

Sharp
Sharp AQUOS LC-60LE831U User manual

Sharp
Sharp LC-37D63X User manual

Sharp
Sharp LC13-B2E User manual

Sharp
Sharp LC-15S4U User manual

Sharp
Sharp LC-20SH1X User manual

Sharp
Sharp LC-40LE510E User manual

Sharp
Sharp Aquos LC-19D1E User manual

Sharp
Sharp LC-15S4US User manual

Sharp
Sharp Aquos LC 20E1U User manual

Sharp
Sharp LC-32A33T User manual

Sharp
Sharp Aquos LC-40LE700X User manual

Sharp
Sharp LC-22LE240E User manual

Sharp
Sharp Aquos LC 20D30U User manual