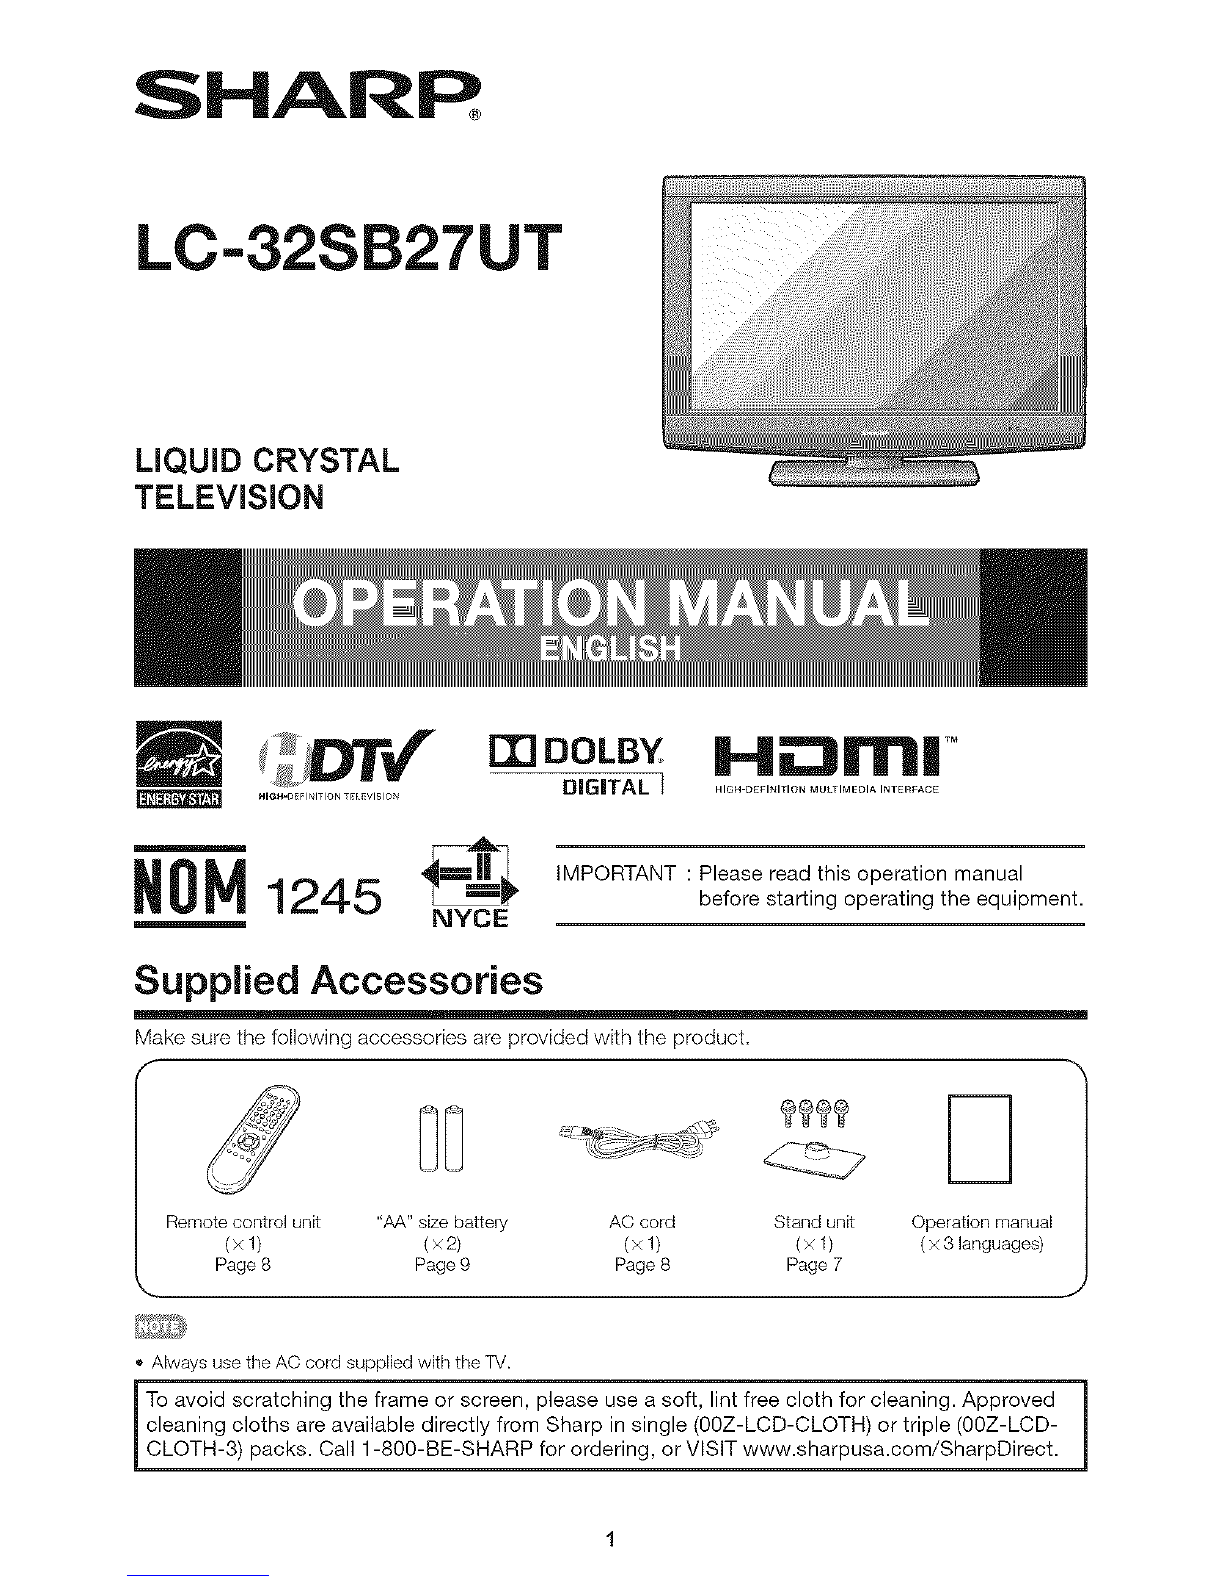
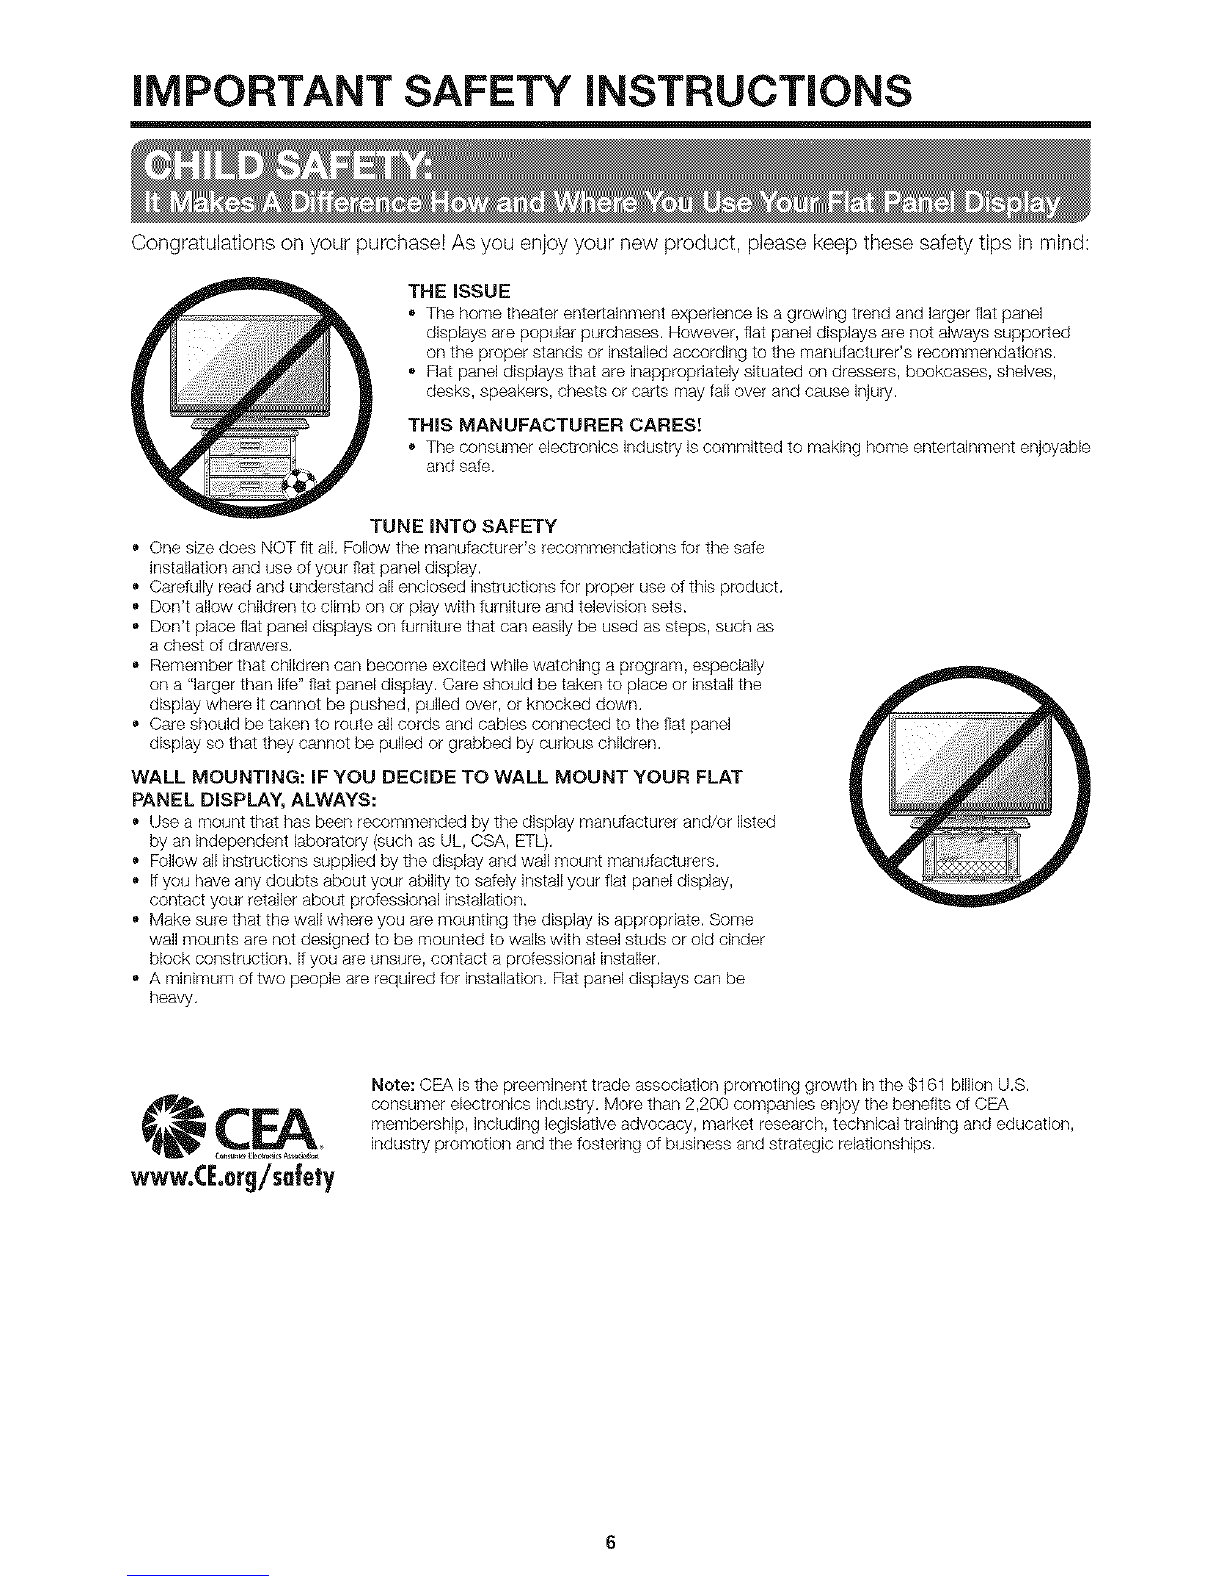
iMPORTANT SAFETY iNSTRUCTiONS
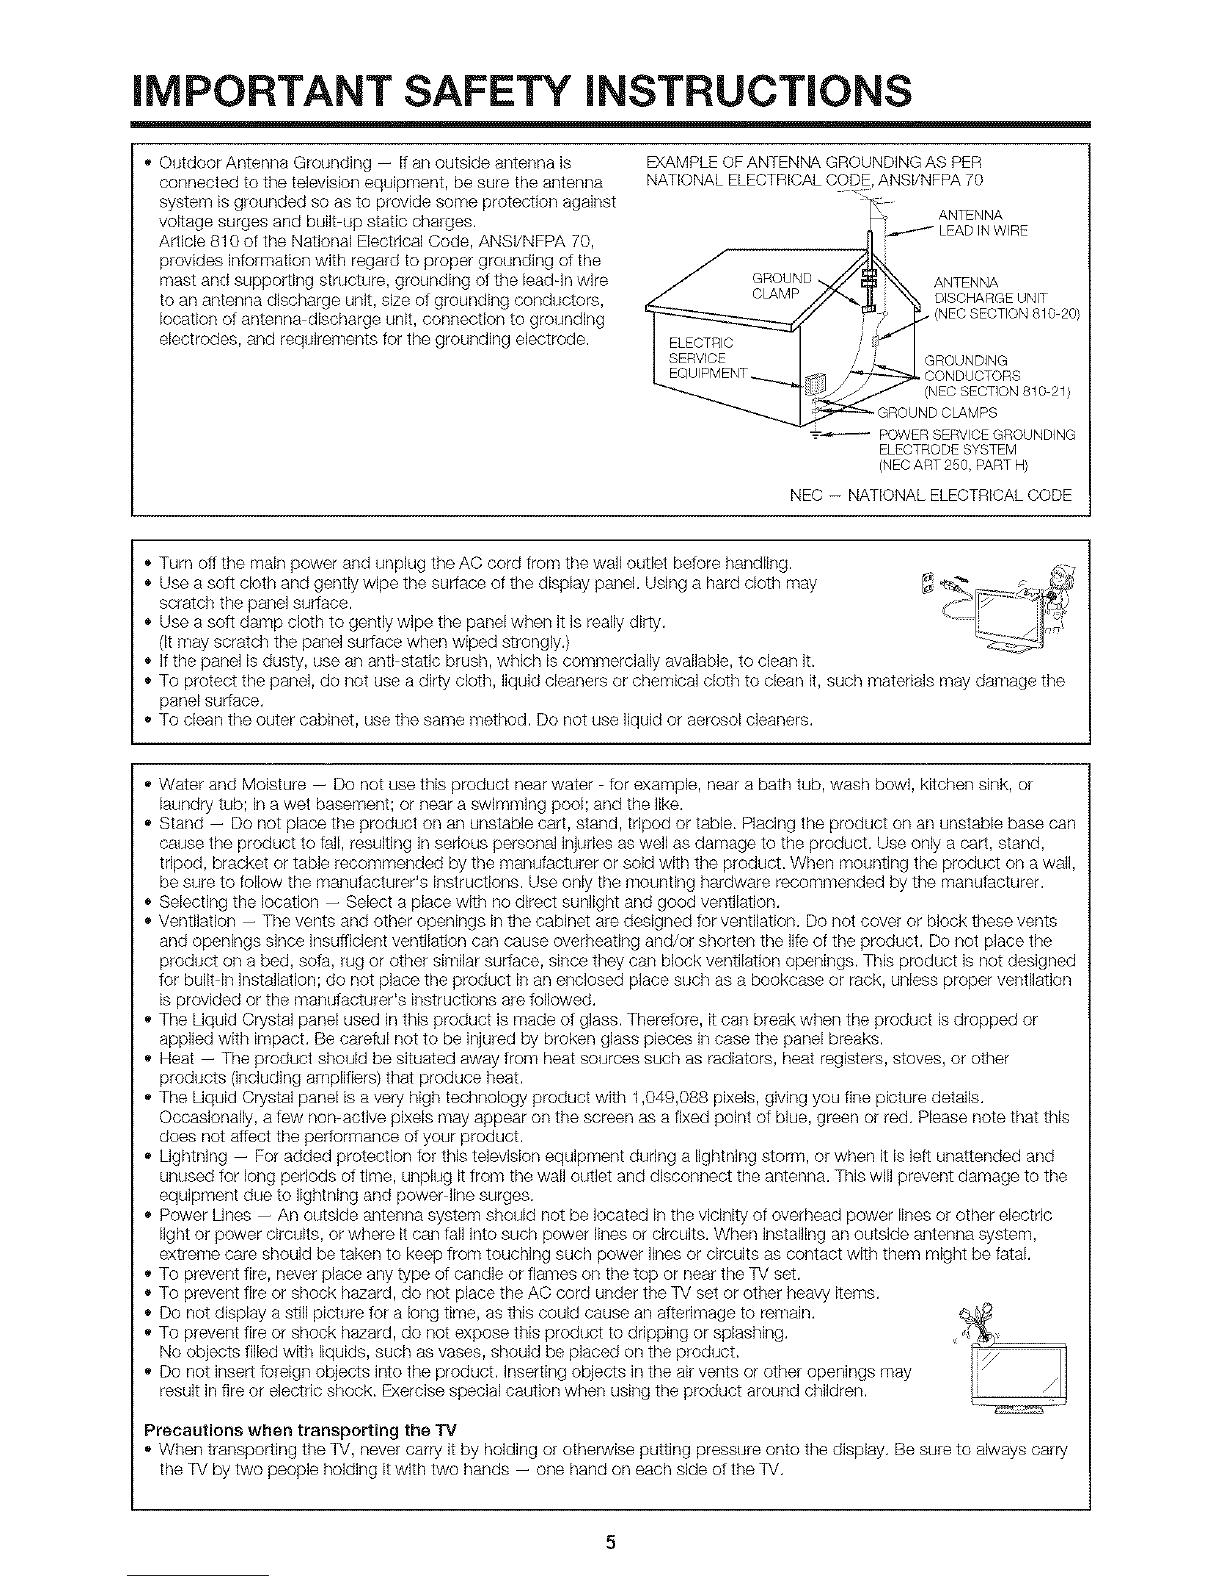
• Outdoor Antenna Grounding -- If an outside antenna is
connected to the television equipment, be sure the antenna
system is grounded so as to provide some protection against
voltage surges and built up static charges.
Article 810 of the National Electrical Code, ANSI/NFPA 70,
provides information with regard to proper grounding o1the
mast and supporting structure, grounding of the leadqn wire
to an antenna discharge unit, size ot grounding conductors,
location ot antenna discharge unit, connection to grounding
electrodes, and requirements for the grounding electrode.
EXAMPLE OF ANTENNA GROUNDING AS PER
NATIONAL ELECTRICAL CODE, ANSVNFPA 70
ELECTRODE SYSTEM
(NEC ART 250, PART H}
NEC -- NATIONAL ELECTRICAL CODE
• Turn off the main power and unplug the AC cord from the wall outlet betore handling.
• Use a sott cloth and gently wipe the surface of the display panel. Using a hard cloth may
scratch the panel suriace.
• Use a sott damp cloth to gently wipe the panel when it is really dirty.
(It may scratch the panel suriace when wiped strongly.)
• If the panel is dusty, use an anti static brush, which is commercially available, to clean it.
• To protect the panel, do not use a dirty cloth, liquid cleaners or chemical cloth to clean it, such materials may damage the
panel surface.
• To clean the outer cabinet, usethe same method. Do not use liquid or aerosol cleaners.
• Water and Moisture -- Do not use this product near water tot example, near a bath tub, wash bowl, kitchen sink, or
laundry tub; in a wet basement; or near a swimming pool; and the like.
• Stand -- Do not place the product on an unstable cart, stand, tripod or table. Placing the product on an unstable base can
cause the product to fall, resulting in serious personal injuries as well as damage to the product. Use only a cart, stand,
tripod, bracket or table recommended by the manufacturer or sold with the product. When mounting the product on a wall,
be sure to follow the manutacturer's instructions. Use only the mounting hardware recommended by the manutacturer.
• Selecting the location -- Select a place with no direct sunlight and good ventilation.
• Ventilation -- The vents and other openings in the cabinet are designed tor ventilation. Do not cover or block these vents
and openings since insufficient ventilation can cause overheating and/or shorten the life of the product. Do not place the
product on a bed, sota, rug or other similar surface, since they can block ventilation openings. This product is not designed
tor built in installation; do not place the product in an enclosed place such as a bookcase or rack, unless proper ventilation
is provided or the mandiacturer's instructions are tollowed.
• The Liquid Crystal panel used in this product is made ot glass. Theretore, it can break when the product is dropped or
applied with impact. Be careful not to be injured by broken glass pieces in case the panel breaks.
• Heat -- The product should be situated away from heat sources such as radiators, heat registers, stoves, or other
products (including amplifiers) that produce heat.
• The Liquid Crystal panel is a very high technology product with 1,049,088 plxels, giving you fine picture details.
Occasionally, a tew non active pixels may appear on the screen as a fixed point of blue, green or red. Please note that this
does not affect the periormance ot your product.
• Lightning -- For added protection for this television equipment during a lightning storm, or when it is lett unattended and
unused tor long periods ot time, unplug it from the wall outlet and disconnect the antenna. This will prevent damage to the
equipment due to lightning and power line surges.
• Power Lines -- An outside antenna system should net be located in the vicinity of overhead power lines or other electric
light or power circuits, or where it can tall into such power lines or circuits. When installing an outside antenna system,
extreme care should be taken to keep from touching such power lines or circuits as contact with them might be fatal.
• To prevent fire, never place any type ot candle or flames on the top or near the TV set.
• To prevent fire or shock hazard, do not place the AC cord under the TV set or other heavy items.
• Do not display a still picture tor a long time, as this could cause an atterlmage to remain.
• To prevent fire or shock hazard, do not expose this product to dripping or splashing.
No objects filled with liquids, such as vases, should be placed on the product.
• Do not insert foreign objects into the product. Inserting objects in the air vents or other openings may
result in fire or electric shock. Exercise special caution when using the product around children.
Precautions when transporting the TV
, When transporting the TV, never carry it by holding or otherwise putting pressure onto the display. Be sure to always carry
the TV by two people holding itwith two hands -- one hand on each side of the TV.