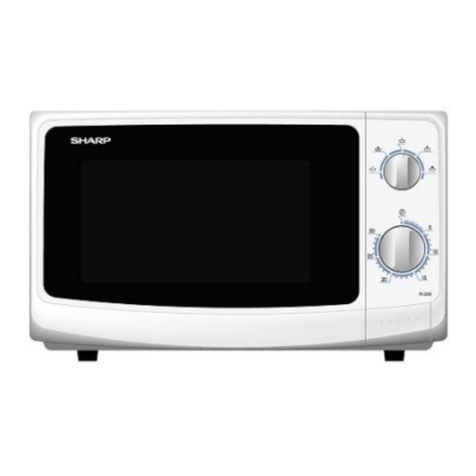
Sharp R-270 User manual

R-270
MICROWAVE OVEN
OPERATION MANUAL
Important
GB
This operation manual contains important information which
you should read carefully before using your microwave oven.
Important: There may be a serious risk to health if this operation
manual is not followed or if the oven is modied so that it
operates with the door open.

GB-1
Attention:Your
product is marked
with this symbol.
It means that used
electrical and
electronic products
should not be
mixed withgeneral
household waste.
There isa separate
collection system
forthese products.
A. Information on Disposal for Users (private households)
1. In the European Union
Attention: If you want to dispose of this equipment, please do not use
the ordinary dust bin!
Used electrical and electronic equipment must be treated separately
and in accordance with legislation that requires proper treatment, re-
covery and recyclingof used electrical and electronicequipment.
Following the implementation by members states private households
within the EU states may return their used electrical and electronic
equipment todesignatedcollection facilities free of charge*.
Insomecountries*yourlocalretailermayalsotakebackyouroldprod-
uct free of charge if you purchase asimilar newone.
*)Pleasecontact yourlocalauthorityforfurther details.
If your used electrical or electronic equipment has batteries or accu-
mulators, please dispose of these separately beforehand according to
local requirements.
By disposing of this product correctly you will help ensure that the
wasteundergoesthenecessary treatment,recovery and recyclingand
thus prevent potential negative eects on the environment and hu-
man health which could otherwise arise due to inappropriate waste
handling.
2. In other Countries outside the EU
Ifyouwishtodiscardthisproduct,pleasecontactyourlocalauthorities
andask for thecorrectmethod ofdisposal.
For Switzerland: Used electrical or electronic equipment can be re-
turned free of charge to the dealer, even if you don’t purchase a new
product. Further collection facilities are listed on the homepage of
www.swico.ch or www.sens.ch.
B. Information on Disposal for Business Users
1. In the European Union
Iftheproduct is usedforbusinesspurposesandyouwanttodiscardit:
PleasecontactyourSHARP dealerwhowill informyouaboutthetake-
back of the product. You might be charged for the costs arising from
take-backandrecycling.Smallproducts(andsmallamounts)mightbe
taken back by your local collection facilities. For Spain: Please contact
the established collection system or your local authority for take-back
of yourused products.
2. In other Countries outside the EU
Ifyouwishtodiscardofthisproduct,pleasecontactyourlocalauthori-
ties and askfor thecorrect methodof disposal.

GB-2
GB
TO REPLACE THE MAINS PLUG..................................................................................................................................2
OVEN AND ACCESSORIES...........................................................................................................................................3
CONTROL PANEL............................................................................................................................................................4
IMPORTANT SAFETY INSTRUCTIONS................................................................................................................5-12
INSTALLATION.........................................................................................................................................................13-14
HOWYOUROVENWORKS .......................................................................................................................................15
MICROWAVE POWER LEVELS ..................................................................................................................................16
BEFORE OPERATION ..................................................................................................................................................16
HOWTO OPERATEYOUR OVEN .......................................................................................................................17-18
AUTO WEIGHT COOK /DEFROST ...........................................................................................................................19
AUTO WEIGHT COOK CHART ..................................................................................................................................20
SPEED DEFROST ..........................................................................................................................................................21
AUTO COOK ..................................................................................................................................................................21
AUTO COOK CHART ...................................................................................................................................................22
CONVENIENT FUNCTIONS .................................................................................................................................23-25
MICROWAVE COOKING ADVICE........................................................................................................................26-27
SUITABLE COOKWARE................................................................................................................................................28
DEFROSTING ADVICE.................................................................................................................................................29
REHEATING ADVICE....................................................................................................................................................30
CLEANING & MAINTENANCE...................................................................................................................................31
TROUBLESHOOTING...................................................................................................................................................32
SPECIFICATIONS...........................................................................................................................................................33
HEATING CATEGORY...................................................................................................................................................34
SERVICE ..........................................................................................................................................................................34
CONTENTS
The wires in the mains cable are colour coded as shown:
Green and yellow stripes = EARTH
Blue = NEUTRAL
Brown = LIVE
As the colours in the mains lead of your oven may not correspond with the coloured marking identifying
theterminalsinyourplug,connectthewiresasdescribed:
•
The green and yellow wire to the plug terminal marked E or or coloured green or coloured
green and yellow.
•
The blue wire to the plug terminal marked N or coloured black or coloured blue.
•
The brown wire to the plug terminal marked L or coloured red or coloured brown.
Make sure the terminal screws are tight and the cable is held securely by the cable grip where it enters
the plug.
Like most appliances in your home, your oven must be connected to a single phase 230-240V~, 50Hz
alternatingcurrentsupply.
If you do not make the proper electrical connections you might damage the oven or injure yourself.
NeitherSHARPnorthesupplier will be liable if this happens.
WARNING: THIS APPLIANCE MUST BE EARTHED
If you have any doubts about your electrical supply ask a qualied electrician.
IMPORTANT
•
The fuse from the cut-o plug should be removed and the plug disposed of in a safe manner.
•
Under no circumstances should the cut-o plug be inserted into a socket outlet as a serious electric
shock may occur.
•
The plug must not be used without the fuse cover tted.
If you have any doubt about your microwave oven obtain the help of a qualified electrician. When
replacing the plug please ensure that you use a BSI or ASTA approved plug to BS1363, this should be
tted with a brown coloured 13 amp fuse approved by BSI or ASTA to BSI 362. If you have any doubt
about electrical connection seek the help of a qualied electrician.
TO REPLACE THE MAINS PLUG
GB-3
OVEN
1. Oven lamp
2. Control panel
3. Door opening button
4. Waveguide cover (DO NOT REMOVE)
5. Oven cavity
6. Coupling
7. Door latches
8. Door hinges
9. Door seals and sealing surfaces
10. Power cord
11. Ventilation openings
12. Outer cabinet
ACCESSORIES:
Check to make sure the following accesso-
ries are provided:
13. Turntable
14. Roller stay
• Place the roller stay in the coupling on the
oven oor, then place the turntable on to
the roller stay, ensuring it is located rmly.
• To avoid turntable damage, ensure dishes
or containers are lifted clear of the turn-
table rim when removing them from the
oven.
OVEN AND ACCESSORIES
9
8
7 10 11
I
•
1
2
0
I
6 5 4 3
•
•
'
• C 0
12
NOTES:
• The waveguide cover is fragile. Care should be taken when cleaning inside the oven to
ensure that it is not damaged.
• Always operate the oven with the turntable and roller stay tted correctly. This promotes
thorough, even cooking. A badly tted turntable may rattle, may not rotate properly and
could cause damage to the oven.
• The turntable rotates clockwise or anti-clockwise. The rotary direction may change each
time you start the oven.This does not aect cooking performance.
• When you order accessories, please quote both the PART NAME and MODEL NUMBER to
your dealer or SHARP approved service facility.
WARNING:
The door, outer cabinet, oven cavity, turntable and dishes will become very
hot during operation. To prevent burns, always use thick oven gloves.

GB-4
GB
CONTROL PANEL
1. DIGITAL DISPLAY
2. TIME keys
3. WEIGHT COOK & DEFROST key
4. LESS/MORE TIME keys
5. POWER LEVEL key
6. START/AUTO MINUTE key
7. STOP/CLEAR key
8. KITCHEN TIMER key
9. WEIGHT keys
10. AUTO COOK key
WEIGHT
TIME
AUTO COOK
SPEED
DEFROST
AUTO
WEIGHT
DEFROST
AUTO
WEIGHT
COOK
RICE
PASTA
POPCORN
FROZEN
MEAL
FRESH
VEGETABLES
PIZZA
FROZEN
VEGETABLES
REHEAT
TEA/
COFFEE
POWER
LEVEL
KITCHEN
TIMER
STOP
CLEAR
START
AUTO MINUTE
8
WEIGHT
COOK &
DEFROST
1 min.
10 min.
10 sec.
JACKET
POTATO
1
2
3
4
10
9
8
7 6
5

GB-5
READ CAREFULLY AND KEEP FOR FUTURE REFERENCE
1. This oven is designed to be used on a countertop only.
It is notdesignedtobe built intoakitchenunit.Do not
place the oven in a cabinet.
2. The oven door may become hot during cooking. Place
ormounttheovensothatthe bottomoftheovenis85
cm or more above the oor. Keep children away from
the door to prevent them burning themselves.
3. WARNING: Do not touch the turntable directly after
cooking as t maybe hot.
4. Ensurethereisaminimumoffreespaceabovetheoven
of 30 cm.
5. This appliance can be used by children aged from 8
years and above and persons with reduced physical,
sensoryormentalcapabilitiesorlackofexperienceand
knowledge if they have been given supervision or in-
struction concerninguseofthe appliance in a safeway
and understand the hazards involved. Children shall
not play with the appliance. Cleaning and user main-
tenance shall not be made by children unless they are
older than 8 and supervised
6. Keeptheapplianceanditscordoutofreachofchildren
less than 8 years.
7. WARNING: Only allow children to use the oven with-
outsupervisionwhenadequateinstructionshavebeen
given so that the child is able to use the oven in a safe
way and understands the hazards of improper use.
8. WARNING: Accessible parts may become hot during
use.Young children should be kept away.
9. WARNING: If the door or door seals are damaged, the
oven must not be operated until it has been repaired
by a competent person.
10. WARNING: Never adjust, repair or modify the oven
yourself. It is hazardous for anyone other than a com-
IMPORTANT SAFETY INSTRUCTIONS

GB-6
GB
IMPORTANT SAFETY INSTRUCTIONS
petent person to carry out any service or repair opera-
tion which involves the removal of a cover which gives
protection against exposure to microwave energy.
11. If the power supply cord of this appliance is damaged,
it must be replaced with a special cord. The exchange
must be made by an authorised SHARP service agent.
12. WARNING: Liquids and other foods must not be heat-
edinsealedcontainerssincethey areliabletoexplode.
13. Microwave heating of beverages can result in delayed
eruptive boiling, therefore care must be taken when
handling the container.
14. Donotcookeggsintheirshells,andwholehardboiled
eggs should not be heated in microwave ovens since
they may explode even after microwave cooking has
ended. To cook or reheat eggs which have not been
scrambledormixed,piercetheyolksand the whites,or
the eggs may explode. Shell and slice hard boiled eggs
before reheating them in the microwave oven.
15. Utensils should be checked to ensure that they are
suitable for use in the oven. See page GB-28. Use only
microwave safe containers and utensils on microwave
modes.
16. Thecontentsoffeedingbottlesandbabyfoodjarsmust
be stirred or shaken and the temperature checked be-
fore consumption, in order to avoid burns.
17. Thedoor,outercabinet,ovencavity,dishes,accessories
will become very hot during operation.
18. Care should be taken to avoid touching these areas.
To prevent burns, always use thick oven gloves. Before
cleaning make sure they are not hot. When heating
food in plastic or paper containers, keep an eye on the
oven due to the possibility of ignition.
19. If smoke is emitted, switch o or unplug the appliance
and keep the door closed in order to stie any ames.
20. Clean the oven at regular intervals and remove any

GB-7
IMPORTANT SAFETY INSTRUCTIONS
food deposits.
21. Failure to maintain the oven in a clean condition could
leadtodeteriorationof the surface that couldadverse-
lyaectthelifeoftheapplianceandpossiblyresultina
hazardous situation.
22. Do not use harsh abrasive cleaners or sharp metal
scrapers to clean the glass on the oven door since they
can scratch the surface, which may result in shattering
of the glass.
23. Steam cleaner is not to be used.
24. See instructions for cleaning door seals, cavities and
adjacent parts on page GB-31.
25. Thisapplianceisintendedtobeusedinhouseholdand
similar applications such as:
-stakitchen areasinshops,ocesandotherworking
environments;
-by clients in hotels, motels and other residential type
environments;
- farm houses;
- bed and breakfast type environments.
26. WARNING: The appliance and its accessible parts be-
come hot during use. Care should be taken to avoid
touchingheatingelements.Childrenless than 8yearsof
ageshallbekeptawayunlesscontinuouslysupervised.
27. During use the appliancebecomeshot.Careshouldbe
taken to avoid touching heating elements inside the
oven.
28. Accessible parts may become hot during use. Young
children should be kept away.
To avoid the danger of re:
1. The microwave oven should not be left unattended
during operation. Power levels that are too high,
or cooking times that are too long, may overheat
foods resulting in a re.
2. The electrical outlet must be readily accessible so that

GB-8
GB
IMPORTANT SAFETY INSTRUCTIONS
the unit can be unplugged easily in an emergency.
3. The AC power supply must be 230-240V~, 50Hz, with a
13A distribution line fuse, or a 13A distribution circuit
breaker.
4. Aseparatecircuitservingonlythisapplianceshouldbe
provided.
5. Donotplacetheoveninareaswhereheatisgenerated.
For example, close to a conventional oven.
6. Do not install the oven in an area of high humidity or
where moisture may collect.
7. Do not store or use the oven outdoors.
8.
Cleanthewaveguidecover,theovencavity,theturntable
and turntable support after use. These must be dry and
freefromgrease.Built-upgreasemayoverheatandbegin
tosmokeorcatchre.
9. Do not place ammable materials near the oven or
ventilation openings.
10. Do not block the ventilation openings.
11.
Remove all metallic seals, wire twists, etc., from food and
food packages. Arcing on metallic surfaces may cause a
re.
12. Donotusethemicrowaveoventoheatoilfordeepfry-
ing.The temperature cannot be controlled and the oil
may catch re.
13. Tomakepopcorn,useonlyspecialmicrowavepopcorn
makers.
14. Do not store food or any other items inside the oven.
15. Check the settings after you start the oven to ensure
the oven is operating as desired.
16. Toavoidoverheatingandre,specialcaremustbetak-
en when cooking or reheating foods with a high sugar
orfatcontent,forexample,sausagerolls,piesorChrist-
mas pudding.
17. See the corresponding hints in the operation manual.
To avoid the possibility of injury

GB-9
IMPORTANT SAFETY INSTRUCTIONS
1. WARNING:
Do not operate the oven if it is damaged or malfunc-
tioning. Check the following before use:
a)Thedoor;makesurethedoorclosesproperlyanden-
sure it is not misaligned or warped.
b)The hinges and safety door latches; check to make
sure they are not broken or loose.
c)Thedoor sealsand sealing surfaces; ensurethatthey
have not been damaged.
d)Insidetheovencavityoronthedoor;makesurethere
are no dents.
e)The power supply cord and plug; ensure that they
are not damaged.
2. Do not operate the oven with the door open or alter
the door safety latches in any way.
3. Do not operate the oven if there is an object between
the door seals and sealing surfaces.
4. Donotallowgreaseordirttobuilduponthedoorseals
and adjacent parts. Clean the oven at regular intervals
and remove any food deposits. Follow the instructions
for“Care and Cleaning’’on page GB-31.
5. Individuals with PACEMAKERS should check with their
doctor or the manufacturer of the pacemaker for pre-
cautions regarding microwave ovens.
To avoid the possibility of electric shock
1. Under no circumstances should you remove the outer
cabinet.
2. Neverspillorinsertanyobjectsintothedoorlockopen-
ingsorventilationopenings.Intheeventofaspill,turn
o and unplug the oven immediately, and call an au-
thorised SHARP service agent.
3. Donotimmersethepowersupplycordorpluginwater
or any other liquid.
4. Donotletthepowersupplycordhangovertheedgeof
a table or work surface.

GB-10
GB
IMPORTANT SAFETY INSTRUCTIONS
5. Keep the power supply cord away from heated surfac-
es, including the rear of the oven.
6. Do not attempt to replace the oven lamp yourself or
allow anyone who is not an electrician authorised by
SHARP to do so. If the oven lamp fails, please consult
your dealer or an authorised SHARP service agent.
To avoid the possibility of explosion and sudden boil-
ing:
1. Neverusesealed containers.Removesealsand lids be-
fore use. Sealed containers can explode due to a build
up of pressure even after the oven has been turned o
.
2. Take care when microwaving liquids. Use a wide
mouthed container to allow bubbles to escape.
Never heat liquids in narrow necked containers
such as baby bottles, as this may result in the con-
tents erupting from the container when heated and
cause burns.
To prevent sudden eruption of boiling liquid and pos-
sible scalding:
1.Do not use excessive amount of time.
2.Stir liquid prior to heating/reheating.
3.It is advisable to insert a glass rod or similar utensil
(not metal) into the liquid whilst reheating.
4.Let liquid stand for at least 20 seconds in the oven at
the end of cooking time to prevent delayed eruptive
boiling.
3. Pierce the skin of suchfoodsaspotatoes, sausagesand
fruit before cooking, or they may explode.
To avoid the possibility of burns
1. Use pot holders or oven gloves when removing food
from the oven to prevent burns.
2. Always open containers, popcorn makers, oven cook-
ing bags, etc., away from the face and hands to avoid
steam burns and eruption of boiling.

GB-11
IMPORTANT SAFETY INSTRUCTIONS
3. To avoid burns, always test food temperature and
stir before serving and pay special attention to the
temperature of food and drink given to babies, chil-
dren or the elderly. Temperature of the container is
not a true indication of the temperature of the food
or drink; always check the food temperature.
4. Alwaysstandbackfromtheovendoorwhenopeningit
to avoid burns from escaping steam and heat.
5. Slicestuedbakedfoodsafterheatingtoreleasesteam
and avoid burns.
To avoid misuse by children
1. Do not lean or swing on the oven door.
2. Children should be taught all important safety instruc-
tions: use of pot holders, careful removal of food cov-
erings; paying special attention to packaging (e.g. self-
heatingmaterials)designedtomakefoodcrisp,asthey
may be extra hot.
Other warnings
1. Never modify the oven in any way.
2. Do not move the oven while it is in operation.
3. This oven is for home food preparation only and may
onlybeusedforcookingfood.Itisnotsuitableforcom-
mercial or laboratory use.
To promote trouble free use of your oven and avoid
damage:
1. Neveroperatethe ovenwhenitis emptyexceptwhere
recommended in the operation manual. Doing so may
damage the oven.
2. When using a browning dish or selfheating material,
always place a heatresistant insulator such as a porce-
lain plate under it to prevent damage to the turntable
and turntable support due to heat stress. The preheat-
ingtimespeciedinthedish’sinstructionsmustnotbe
exceeded.
3. Do not use metal utensils, which reect microwaves

GB-12
GB
IMPORTANT SAFETY INSTRUCTIONS
and may cause electrical arcing. Use only the turntable
and the turntable support designed for this oven. Do
not operate the oven without the turntable.
4. Do not place anything on the outer cabinet during op-
eration.
NOTE:
If you are unsure how to connect your oven, please con-
sult an authorised, qualied electrician. Neither the manu-
facturer nor the dealer can accept any liability for damage
to the oven or personal injury resulting from failure to ob-
serve the correct electrical connection procedure. Water
vapourordropsmayoccasionallyformontheovenwallsor
aroundthe doorsealsandsealingsurfaces.Thisisanormal
occurrence and is not an indication of microwave leakage
or a malfunction.
BUILT-IN KIT
No built-in kit is available for this oven.
This oven is designed to be used on a countertop only.

GB-13
INSTALLATION
1. Removeallpackingmaterialsfromtheinsideoftheoven
cavity and remove any protective lm found on the mi-
crowave oven cabinet surface. Check the oven carefully
for any signs of damage.
2. Place the oven on a secure, level surface, strong enough
totaketheovenweight,plustheheaviestitemlikelytobe
cooked inthe oven.Donotplacethe oveninacabinet.
3. Select a level surface that provides enough open space
fortheintakeand/oroutletvents.Therearsurfaceof ap-
pliance shall be placed against a wall.
•Aminimumspaceof20cmisrequiredbetweentheoven
andanyadjacentwalls.
•Leave a minimum space of 30cm above the oven.
•Do not remove the feet from the bottom of the oven.
•Blocking the intake and/or outlet openings can dam-
age the oven.
•Place the oven as far away from radios and TV as pos-
sible. Operation of the microwave oven may cause in-
terference to your radio orTV reception.
0 cm 30 cm
min
85 cm
20 cm
20 cm
4. The oven door may become hot during cooking. Place
or mount the oven so that the bottom of the oven is
85cmor more abovethe oor.Keep children awayfrom
the door to prevent them burning themselves.
5. Securely connect the plug of the oven to a standard
earthed (grounded) household electrical outlet.

GB-14
GB
INSTALLATION
WARNING: Do not place the oven where heat, moisture or
highhumidityaregenerated,(forexample,near or abovea
conventional oven) or near combustible materials (for ex-
ample, curtains).
Do not block or obstruct air vent openings.
Do not place objects on top of the oven.
ELECTRICAL CONNECTION
• Do not allow water to come into contact with the power
supply cord or plug.
• Insert the plug properly into the socket.
• Do not connect other appliances to the same socket us-
ing an adaptor plug.
• If the power supply cord is damaged, it must be replaced
byaSharpapprovedservicefacilityorasimilarlyqualied
person to avoid a hazard.
• When removing the plug from the socket always grip the
plug, never the cord as this may damage the power sup-
ply cord and the connections inside the plug.
• If the plug tted to your oven is a rewireable type and
in the event of the socket outlet in your home not be-
ing compatible with the plug supplied, remove the plug
properly (do not cut o ).
• If the plug tted to your oven is a nonrewirable type and
in the event of the socket outlet in your home not be-
ing compatible with the plug supplied, cut-o the mains
plug.
• Ret with a suitable type, observing the wiring code giv-
en in‘To replace the mains plug’on page GB-33.
WARNING: THIS APPLIANCE MUST BE EARTHED
To wire an appropriate plug, follow the wiring
code given in‘To replace the mains plug’ on page
GB-33.

GB-15
HOW YOUR OVEN WORKS
Microwaves are energy waves, similar to
those used forTV and radio signals.
Electrical energy is converted into micro-
wave energy, which is directed into the
middle bottom of the cavity via a wave-
guide. Then the microwave stirrer distrib-
ute the microwave energy to every corner
of the cavity evenly.
Microwaves cannot pass through metal,
because of this the oven cavity is made of
metal and there is a ne metal mesh on the
door.
During cooking the microwavesbounceo
the sides of the oven cavity at random.
Microwaveswill passthroughcertainmate-
rials, such as glass and plastic, to heat the
food. (See 'Suitable Ovenware’on page GB-
28).
Water, sugar and fat in food absorb micro-
waves which cause them to vibrate. This
creates heat by friction, in the same way
your hands get warm when you rub them
together.
The outer areas of the food are heated
by the microwave energy, then the heat
moves to the centre by conduction, as it
does in conventional cooking. It is impor-
tanttoturn,rearrangeor stirfoodtoensure
even heating.
Once cooking is complete, the oven auto-
matically stops producing microwaves.
Standing time is necessary after cooking,
as it enables the heat to disperse equally
throughout the food.

GB-16
GB
MICROWAVE POWER LEVELS
Plug in the oven. 1.
1. The oven display will show:
NOTE: Please note that this model does NOT have a clock function.
BEFORE OPERATION
Power Level Press the
POWER
LEVEL key
Percentage
HIGH X1 P100
X2 P90
MEDIUM HIGH X3 P80
X4 P70
MEDIUM X5 P60
X6 P50
MEDIUM LOW
(Defrost) X7 P40
X8 P30
LOW (Defrost) X9 P20
X10 P10
IMPORTANT: The microwave power level will
default to P100 unless you press the POWER
LEVEL key
• Your oven has 10 power levels, as shown.
• To change the power level for cooking,
enter the required time and then press
the POWER LEVEL key until the display
indicates the desired level.
• Power level
Themicrowavepowerlevelisvaried bythe
microwaveenergy switchingon ando.
When using power levels other than
P100 you will be able to hear the micro-
wave energy pulsing on and off as the
food cooks or defrosts.
• Check the power level
To check the microwave power level dur-
ing cooking, press the POWER LEVEL
key. As long as your finger is pressing
the POWER LEVEL key the power level
will be displayed. The oven continues to
count down although the display will
show the power level.
Generally the following recommendations apply:
P100/90 - (HIGH output = 800/720W) used
for fast cooking or reheating e.g. for casse-
roles,hotbeverages,vegetables etc.
P80/70 -(MEDIUMHIGHoutput=640/560W)
used for longer cooking of dense foods such
as roast joints, meat loaf and plated meals,
alsoforsensitivedishessuchasspongecakes.
At this reduced setting, the food will cook
evenlywithout overcooking atthesides.
P60/50 - (MEDIUM output = 480/400W) for
dense foods which require a long cooking
time when cooked conventionally, eg. beef
casserole,itisadvisabletousethispowerset-
tingto ensurethe meatwillbe tender.
P40/30 - (MEDIUM LOW output = 320/240W
Defrost setting) to defrost, select this power
setting,toensure thatthe dishdefrostseven-
ly.This setting is also ideal for simmering rice,
pasta,dumplings and cooking eggcustard.
P20/10 -(LOWoutput=160/80W)ForgentIe
defrosting,eg.creamgateaux orpastry.

GB-17
Opening the door:
Toopen theovendoor, pushthedoor openingbutton.
Starting the oven:
Prepare and place food in a suitable container onto the turntable or place
directly onto the turntable. Close the door and press the START/AUTO
MINUTE key.
START
AUTO MINUTE
Stopping the oven:
If you want to stop the oven during cooking press the STOP/ CLEAR key
once or open the oven door. If you want to cancel the cooking programme,
pressthe STOP/CLEAR keytwice.
STOP
CLEAR
Your oven enables you to cook and defrost
food using the automatic programmes, or to
cookand defrostfoodmanually.
Automaticcookinganddefrostingallowsyou
tocookanddefrostusingpresetprogrammes
where the timings have been calculated for
you, e.g AUTO WEIGHT COOK,SPEED DE-
FROST,AUTOWEIGHTDEFROST.
Manual cooking and defrosting allows you
to cook/defrost foods and weights which are
notincluded in theautomatic programmes.
Following are examples of manual cooking
anddefrosting.
Forautomaticcookinganddefrostingreferto
pagesGB-19- 22.
MANUAL COOKING
• Enter the cooking time and use microwave power levels P10 to P100 to cook (refer to page
GB-16).
• Stir or turn the food, where possible, 2 - 3 times during cooking.
• After cooking, cover the food and leave to stand, where recommended.
Example:
To cook for 2 minutes and 30 seconds on P70 microwave power.
1. Input the power level
by pressing the POWER
LEVEL key 4 times for
70P.
2. Enter the cooking time by
pressing the 1 MIN key
twice and then the 10
SEC key 3 times.
3. Press the START/AUTO
MINUTE key once to start
cooking.
POWER
LEVEL
x4 x2 x3
START
AUTO MINUTE
x1
The display will count down
through the set cooking time.
HOW TO OPERATE YOUR OVEN

GB-18
GB
HOW TO OPERATE YOUR OVEN
MANUAL DEFROSTING
• EnterthedefrostingtimeandusemicrowavepowerlevelsP10orP30todefrost(refertopage
GB-16).
• Stiror turn thefood,wherepossible,2 -3times during defrosting.
• Afterdefrosting,coverthe foodin foiland leaveto standuntil thoroughlydefrosted.
Example:
To defrost for 10 minutes on P 30 microwave power.
1. Input the power level
by pressing the POWER
LEVEL key 8 times.
2. Enter the defrosting time
by pressing the 10 MIN.
key once.
3. Press the START/ AUTO
MINUTE key once to start
defrosting.
POWER
LEVEL
x8 x1
START
AUTO MINUTE
x1
The display will count down
through the cooking time.
NOTES:
• Whentheovenstarts,the ovenlampwilllight andtheturntablewillrotateclockwiseoranti-
clockwise.
• Yourovencan be programmedupto99 minutes,90seconds(99.90).
• When the door is opened during cooking, the cooking time on the display stops automati-
cally. The cooking time starts to count down again when the door is closed and the START/
AUTO MINUTE key ispressed.
• Ifyouwishtoknowthe powerlevelduring cooking,pressthePOWER LEVEL key.As longas
yournger istouchingthe keythe powerlevelwillbe displayed.

GB-19
AUTO WEIGHT COOK/DEFROST enables you to cook or defrost pre-proqrammed meals
listed. Follow the example below for details on how to operate these functions.
AUTO WEIGHT COOK allows you to cook 3 popular menus.
Whencookingbeef,presstheAUTO WEIGHT COOK keyx1
COO1
willappearonthedisplay.
Whencookinglamb.presstheAUTO WEIGHT COOK keyx2
COO2
willappearonthedisplay.
Whencookingpork,presstheAUTOWEIGHT COOK keyx3
COO3
willappearonthedisplay.
Example 1: To cook beef weighing 1.2kg from chilled using AUTO WEIGHT COOK.
1. Press the AUTO WEIGHT
COOK key once. 2. Enter the weight by
pressing the WEIGHT
keys until the desired
weight is displayed.
3. Press the START/AUTO
MINUTE key once to start
cooking.
x1
AUTO
WEIGHT
COOK
x12
WEIGHT
x1
START
AUTO MINUTE
The display will count down
through the cooking time.
Example 2: To defrost a Meat Joint weighing 1.2kg using AUTO WEIGHT DEFROST.
1. Select the menu required
by pressing the AUTO
WEIGHT DEFROST key
once.
2. Enter the weight by
pressing the WEIGHT
keys until the desired
weight is displayed.
3. Press the START/AUTO
MINUTE key once to start
defrosting.
AUTO
WEIGHT
DEFROST
x1 x12
WEIGHT
x1
START
AUTO MINUTE
The display will count down
through the defrosting time.
AUTO WEIGHT COOK/ DEFROST
Other manuals for R-270
3
Table of contents
Other Sharp Microwave Oven manuals

Sharp
Sharp R-232F Instruction Manual

Sharp
Sharp R-872M User manual

Sharp
Sharp Carousel R-312AK User manual

Sharp
Sharp R-8730-A User manual

Sharp
Sharp R-330H User manual

Sharp
Sharp R-330E Use and care manual

Sharp
Sharp YC-MS181AE User manual

Sharp
Sharp R-68ST-A Instruction Manual

Sharp
Sharp R-209EK User manual

Sharp
Sharp YC-MS01U User manual

Sharp
Sharp R-2371KW User manual

Sharp
Sharp R-210A User manual

Sharp
Sharp R-371 User manual

Sharp
Sharp R-239 Instruction Manual

Sharp
Sharp R-20ST User manual

Sharp
Sharp R-2397 User manual

Sharp
Sharp R-331ZS User manual

Sharp
Sharp R-61FBST Instruction Manual

Sharp
Sharp R-333F User manual

Sharp
Sharp R-305M User manual