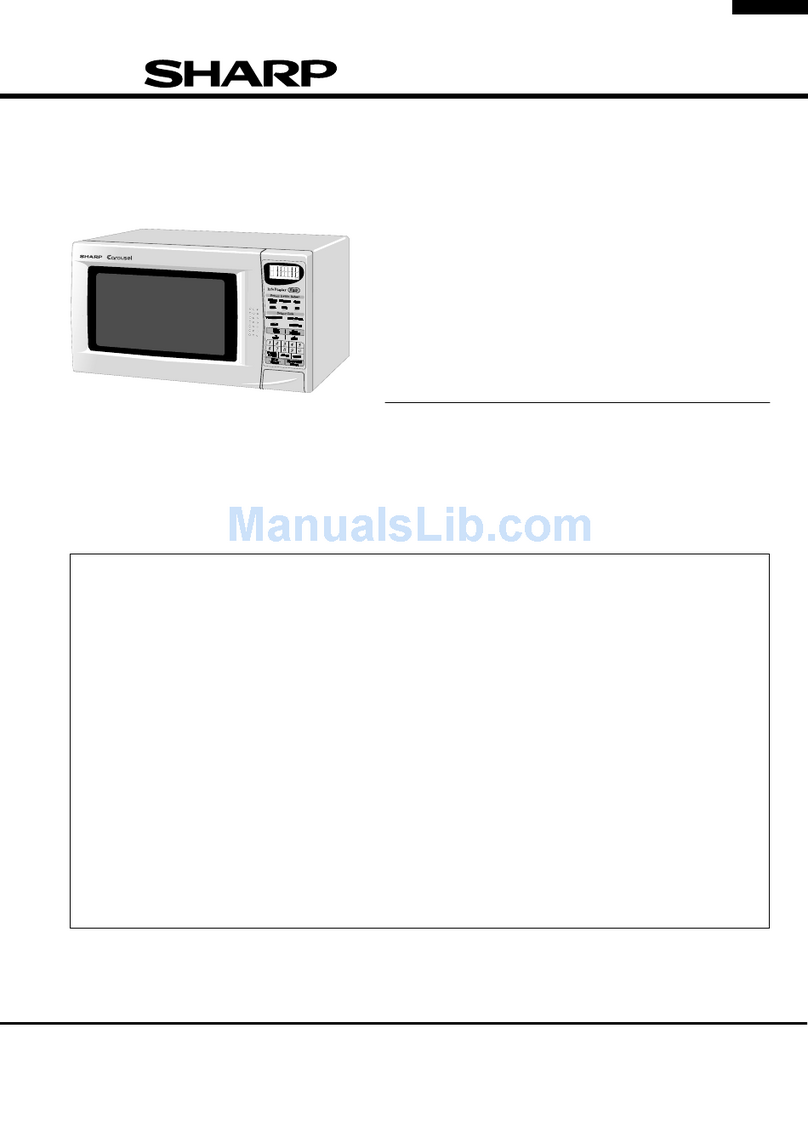
Sharp R-2V54 User manual

SHARP SERVICE MANUAL
MICROWAVE OVEN
-- MODEL R-2V54
In interests of user-safety the oven should be restored to its original
condition and only manufacturer original spare parts must be used.
This is a supplemental Service Manual for Model R-2V54.
This model is quite similar to Base Model R-2V52 (Refer No. is S9003R2V52PJ/).
Use this supplemental manual together with the Base Model Service Manual.
Refer to the Base Model Service Manual for complete operation, service information, etc.
TABLE OF CONTENTS Page
GENERAL IMPORTANT INFORMATION ..,...........,.........,.........,..............................................,....,............... 1
APPEARANCE VIEW ,....,,........................,..................,...........,...............,.............,.............,......... Inside Cover
WARNING ......................................................‘.....................................................................................~............. I
PRODUCT SPECIFICATIONS ..,.......................,..................................................,..................,........................ 2
SERVICING ....................................................................................................................................~................... 3
TEST PROCEDURE ................................................................................................................................~.......... 4
COMPONENT REPLACEMENT AND ADJUSTMENT PROCEDURE ........*...............................................
SCHEMATIC DIAGRAM .,,....,....~..............................,....,..............,.......,....,,...........................,...,,............,...... ;
PICTORIAL DIAGRAM ..................................................................................................................................... 9
PARTS LIST .................................*............*.....................*............................................................................... 10
. SHARP CORPORATION

R-2V54
APPEARANCE VIEW
CONTROL PANEL
+ Place the roller stay on the coupling in the oven and
seat the turntable on the roller stay.
\ VARIABLE COOKING CONTROL
START OPEN DOOR
c ,
0
4
, J
1. Timer (O-60 minutes dual speed timer)
Turn to set cooking time or weight of defrost
food.
2. Meat defrost guide (inner scale}
3. Variable cooking control
There are five power levels Approximate per-
centage of microwave power for each power
level;
HIGH 100%
MED HIGH (MIEIUM HIGH) 70%
MED (MIEIUM) 50%
MED LOW/DEFROST
(MEDIUM LOW/DEFROST 30%
LOW -. 10%
4. Door open button
5. START button
6. Hole of oven cavity
7. Ventilation openings
8. See through door
9. Safety door latches
1O.Hinges
11 .Waveguide cover
12.0ven lamp
13.Roller stay
14.Turntable
15.Access cover for oven lamp replacement
16.Power supply cord

R-2V54
SERVICE MANUAL
SHARP
MICROWAVE OVEN
R-2V54
GENERAL IMPORTANT INFORMATION
This Manual has been prepared to provideSharp Corp. Service
engineers with Operation and Service Information.
It is recommended that service engineers carefully study the
entire text of this manual and base model manual, so they will
be qualified to render satisfactory customer service.
CAUTION
MICROWAVE RADIATION
Service engineers should not be exposed to the micro-
wave energy which may radiate from the magnetron or
other microwave generating devices if it is improperly
used or connected. All input and output microwave
connections, waveguides, flanges and gaskets must be
secured. Never operate the device without a microwave
energy absorbing load attached. Never look into an
open waveguide or antenna while the device is ener-
gized.
WARNING
Never operate the oven until the following points are
ensured.
(A)The door is tightly closed.
(B) The door brackets and hinges are not defective.
(C)The door packing is not damaged.
(D)The door is not deformed or warped.
(E) There is not any other visible damage with the oven.
Servicing and repair work must be carried out only by
trained service engineers.
All the parts marked ‘I*” on parts list are used at voltages
more than 250V.
‘ “w.
J> ”
% PRODUCT SPECIFICATIONS
:~
1
e-1 ” ,
J > ’
,^ “M -. ,“x,
** -_ f” -81. “.j, ; /
b ”
i %-4s\$*p;f? i .,
7 8s
$3
*-‘r _
“4.. SERVICING
.-”
,s;
*’”
~ i
“w-t ” “_ ,* .*. / *
Y ^ ;,~~h. .i:! ’
‘**
i0 ,*
+$i
I”* TEST PROCEDURE
A*
,-“v
*, * _.? **
it
-3 s
. - COMPONEiJT REPLACEMENT
I AND ADJUSTMENT
:
aa> PROCEDURE
”
a‘*
.> WIRING DIAGRAM
1 .
x1.
*?
L.L I
‘:c
^=*~ PARTS LIST
?;’_ L” : ’
,i; I /”2 *”..w,reI.:“i”,* ”c“v+“*-‘*
tpgj *( -
:‘q&p<_ J *;~y;cs<“;_. fL*$: .f.:
.(2r”1.y. ““-
” ”‘i , ^s,‘,;
i”,“‘“:-imb,..?.9JCT&.+1.;
2‘..
.wy+*-+ec*<1I.(
c ,:~a*‘=,s, ‘* ,. ,:SL1
*--@Tir*..“.-.-I“r,“*rw~~‘&,,~,,&..L,
s>
,: I , ; *.I“ “,E^‘- _/,,“,
; 3 ‘.
5 <- -,,^*‘,‘,:.’-,
1 I*
‘,
I” ;>- -
“2 - ~’,.” /.I?%
~-0
r*ij :,3
$“pj%&F *.
’ L2. sI ^”j”‘
*.*,
7 . .>
.I IS, i
.a1<-..
2.4: $*iL ’ ‘.CT“3
t:).‘a*,*r8:.*, - ; 5; 7’
.11 “+‘“-/
“‘i,“tv4‘9;;I
,, :i; 1,y;-j
j.’ I
* i
.1 -*c “ir +&“I eat -4a.i I a. XI*Mt”*r* w If L *LL,,I.. +.a.11 .
SHARP CORPORATION
OSAKA, JAPAN

PRODUCT SPECIFICATIONS
ITEM
Power Requirements j 240 Volts
50 Hertz
DESCRIPTION
Power Consumption
Power Output
Case Dimensions
Cooking Cavity Dimensions
Turntable diameter
Control Complement
Set Weight
Single phase, 3 wire earthed
0.96 kW, Approx. 4.2 Amperes
I 600 watts nominal of RF microwave energy (By method of IEC 705 1988)
500 watts nominal of RF microwave energy (2 litre water load)
Operating frequency of 2450M Hz
Width 450 mm
Height 285 mm including foot
Depth 340 mm
Width 285 mm
Height 185 mm
Depth 313 mm
272mm
60 min. Dual Speed Timer
Microwave Power for Variable Cooking
Repetition Rate;
HIGH ................................. Full power throughout the cooking time
MED HIGH (MEDIUM HIGH)
MED .............. approx. 70% of Full Power
(MEDIUM) ..................................... approx. 50% of Full Power
MED LOW (MEDIUM LOW DEFROST) approx. 30% of Full Power
LOW .......................................................... approx. 10% of Full Power
Start Button
Approx. 13.0 kg
GENERAL INFORMATION
WARNING
THIS APPLIANCE MUST BE EARTHED
IMPORTANT
THE WIRES IN THIS MAINS LEAD ARE COLOURED IN ACCORDANCE WITH THE FOLLOWING CODE:
GREEN-AND-YELLOW : EARTH
BLUE : NEUTRAL
BROWN : LIVE

SERVICING
WARNING TO SERVICE PERSONNEL
Microwave ovens contain circuitry capable of producing very high voltage and current, contact with any part
of the high voltage circuit will result in electrocuition.
REMEMBER TO CHECK 3D
1) Disconnect the supply.
2) Door opened, and wedged open.
3) Discharge high voltage capacitor.
WARNING AGAINST THE CHARGE OF THE
HIGH-VOLTAGE CAPACITOR
The high-voltage capacitor remains charged
about 60 seconds after the oven has been
switched off. Wait for 60 seconds and then
short-circuit the connection of the
high-voltage capacitor (that is, of the con-
necting lead of the high-voltage rectifier)
against the chassis with the use of an insu-
lated screwdriver.
Sharp recommend that wherever possible
fault-finding is carried out with the supply discon-
nected. It may in, some cases, be necessary to
connect the supply after the outer case has been
removed, in this event carry out 3D checks and then
disconnect the leads to the primary of the power
transformer. Ensure that these leads remain isolated
from other components and the oven chassis. (Use
insulation tape if necessary.) When the testing is
completed carry out 3D checks and reconnect the
leads to the primary oEhe power transformer.
REMEMBER TO CHECK 4R
1) Reconnect all leads removed from components
during testing.
2) Replace the outer case (cabinet).
3) Reconnect the supply.
4) Run the oven. Check all functions.
Microwave ovens should not be run empty. To test
for the presence of microwave energy within a
cavity, place a cup of cold water on the oven
turntable, close the door and set the microwave
timer for two (2) minutes. Set the power level to
HIGH and push the START button. When the two
minutes has elapsed (timer at zero) carefully check
that the water is now hot. If the water remains cold
carry out 3D checks and re-examine the con-
nections tothe component being tested.
When all service work is completed, and the oven is fully assembled, the microwave power output should
be checked and a microwave leakaqe test carried out.
TROUBLESHOOTING GUIDE
When troubleshooting the microwave oven, it is helpful
to follow the Sequence of Operation in performing the
checks. Many of the possible causes of trouble will
require that a specific test be performed. These tests
are given a procedure letter which will be found in the
“Test Procedure”section.
IMPORTANT: If the oven becomes inoperative be-
cause of a blown fuse (M6.3A) in the
1st latch switch - 2nd latch switch -
monitor switch - monitor resistor cir-
cuit, check the 1st latch switch, 2nd
latch switch, monitor switch and
monitor resistor before replacing the
fuse (M6.3A).
TEST PROCEDURES
PROCEDURE
LETTER COMPONENT TEST
MAGNETRON TEST
/ NEVER TOUCH ANY PART IN THE CIRCUIT WITH YOUR HAND OR AN INSULATED
i :
TOOL WHILE THE OVEN IS IN OPERATION. 1
CARRY OUT 3D CHECKS
Isolate the magnetron from the high voltage circuit by removing all leads connected to the filament
terminal.
To test for an open circuit filament use an ohmmeter to make a continuity test between the
magnetron filament terminals, the meter should show a reading of less than 1 ohm.
To test for a short circuit filament to anode condition, connect ohmmeter between one of the fil-
ament terminals and the case of the magnetron (ground). This test should be indicated an infinite
resistance. If a low or zero resistance reading is obtained then the magnetron should be replaced.
MICROWAVE OUTPUT POWER (IEC-7054988)
The following test procedure should be carried out with the microwave oven in a fully assembled
condition (outer case fitted). Microwave output power from the magnetron can be measured by
way of IEC 705, i.e. it can be measured by using water load how much it can be absorbed by the
water load. To measure the microwave output power in the microwave oven, the relation of cal-
orie and watt is used. When P(W) heating works for t(second), approximately P x t/4.1 87 calorie
is generated. On the other hand, if the temperature of the water with V(ml) rises AT (“C) during
this microwave heating period, the calorie of the water is V x AT.
The formula is as follows;
/ Pxt/4.187=VxAT P(W)=4.187xVxAT/t
; Our condition for the water load is as follows:
/ Room temperature .....................around 20°C
Water load ........1000 Power supply Voltage .............Rated voltage
g Initial temperature .......10+2”C
P = 60 x AT Heating time ................ 70 sec.
Measuring condition:
1. Container
The water container must be a cylindrical borosilicate glass vessel having a maximum material
thickness of 3 mm and an outside diameter of approximately 190 mm.
2. Temperature of the oven and vessel
The oven and the empty vessel are at ambient temperature prior to the start of the test.
3. Temperature of the water
The initial temperature of the water is (10 + 2)X.
4. Select the initial and final water temperature so that the maximum difference between the final
water temperature and the ambient temperature is 5°C.
5. Select stirring devices and measuring instruments in order to minimize addition or removal of
heat.
6. The graduation of the thermometer must be scaled by 0.1 “C at minimum and an accurate
thermometer.
7. The water load must be (1000 f 5) g.
8. “t” is measured while the microwave generator is operating at full power. Magnetron filament
heat-up time is not included.
NOTE: The operation time of the microwave oven is “t + 2” sec. 2 sec. is magnetron filament
heat-up time.
Measuring method:
1. Measure the initial temperature of the water before the water is added to the vessel.
(Example: The initial temperature Tl = 11 “C)
2. Add the 1 litre water to the vessel.
3. Place the load on the centre of the shelf.
4. Operate the microwave oven at HIGH for the temperature of the water rises by a value A T of
(10 + 2)“C.
5. Stir the water to equalize temperature throughout the vessel.
4

R-2V54
TEST PROCEDURES (CONT’D)
,
rl PROCEDURE
LETTER COMPONENT TEST
6. Measure the final water temperature. (Example: The final temperature T2 = 21 “C)
7. Calculate the microwave power output e in watts from above formula.
Initial temperature ..................................................................................................... Tl =
Temperature after (72 + 2)= 74 sec. 11“C /
.................................................................... T2 =
Temperature difference Cold-Warm 21 “C
....................................................................
Measured output power AT1 = 10°C /
The equation is “P= 60 x AT” ................................................... P= 60 x 10°C = 600 Watts /
JUDGMENT: The measured output power should be at least +15 % of the rated
output power.
CAUTION: 1°C CORRESPONDS TO 60 WATTS. REPEAT MEASUREMENT IF THE POWER IS
INSUFFIClENT.
1ooog
Heat up for 74 sec.
1ooog
d5
3-w.
T2”C
MICROWAVE OUTPUT POWER (2 liter water load)
The following test procedure should be carried out with the microwave oven in a fully assembled
condition (with outer case fitted). Microwave output power from the magnetron can be measured
by way of substitution, i.e. it can be measured by using a water load how much it can be absorbed
by the water load. To measure the microwave output power in the microwave oven, the relation
of calorie and watt is used. When P(W) heating works for t(second), approximately P x t/4.2
calorie is generated. On the other hand, if the temperature of the water with V(ml) rises AT
(“C) during this microwave heating period, the calorie of the water is V x AT.
I
/ The formula is as follows;
Pxt/4.2=VxAT P (W) = 4.2 x V x AT / t I
Our condition for the water load is as follows: I
Room temperature .....................around 20°C I
Water load ......2000 ml Initial temperature Power supply Voltage .............Rated
.......1O&l “C voltage
Heating time ...... 2min. 48 sec. /
P=50xAT 1
Measuring method:
A) Use two 1 litre Pyrex beakers with a diameter of approximately of 12cms.
B) Place 1 litre of 10°C water in each beaker.
C) Mark Tl on the one beaker and mark 12 on the other one. And stir the water and measure the
temperature of water the thermometer and note them. The graduation of the thermometer must
be scaled by O.l”C at minimum and an accurate mercury thermometer is recommended.
D) Place the two beakers as touching each other in the centre of the cavity.
E) Set the timer to 2minute and 48 seconds at 100% power (the time required to raise the water
temperature 10 degrees C.)
F) The time must be measured with stopwatch or wristwatch.
G) After 2minute and 48 seconds stop the oven by opening the door.
H) Remove the two beakers from the oven and measure the temperature of the water by stiring the
water with the thermometer and noting the readings.
5

TEST PROCEDURES (CONT’D)
PROCEDURE
LETTER COMPONENT TEST
Example
Initial
/ temperature ............................................................................... Tl = 10°C T2 = 11 “C
I Temperature after 2min. 48 sec. Tl = 20°C T2 =........................................................ 21 “C
Temperature difference Cold-Warm AT1 = =
I ........................................... 10°C AT2 10°C
/
/ Mean temperature rise AT ........ AT = (AT1 +AT2) / 2 = (10°C + IOOC) / 2 = 10°C
Measured output power
The equation is “P= 50 x AT” =................................................... P= 50 x
I 10°C 500 Watts
NOTE: The measured output power should be at least +I5 % of the rated output
power.
CAUTION: 1“C CORRESPONDS TO 50 WATTS.
REPEAT MEASUREMENT IF THE POWER IS INSUFFICIENT.
(Tl OC) (T2 OC) (T2 OC)
Heat up !or 2min. 48 sec.
6

R -2V54
COMPONENT REPLACEMENT AND ADJUSTMENT PROCEDURE
FAN MOTOR REPLACEMENT
REMOVAL
1.
3’:
4.
5.
6.
CARRY OUT 3D CHECKS.
Disconnect the wire leads from the fan motor.
Remove the two(2) screws (rear side) and the
single(l) screw (top side) holding the fan duct as-
sem bly.
Remove the fan blade assembly from the fan motor
shaft according the following procedure.
I> Hold the edge of the rotor of the fan motor by
using a pair of grove joint pliers as shown Fig-
ure C-l (a)
CAUTION:
2.
3.
Make sure that any pieces do not enter
the gap between the rotor and the
stator of the fan motor. Because the
rotor is easy to be shaven by pliers and
metal pieces may be produced.
Do not touch the pliers to the coil of
the fan motor. because the coil may
be cut or injured.
Do not transform the bracket by
touching with the pliers.
Remove the fan blade from the shaft of the fan
motor by pulling and rotating the fan blade with
your hand.
Now, the fan blade will be free.
CAUTION:
a Do not use this removed fan blade
again. Because the hole(for shaft) of
it may become bigger than a standard
one.
Remove the two(2) screws holding the fan motor
to the fan duct assembly.
Now, the fan motor is free.
Coil, I
St
Axis hese are the
where should positIon
be
pliers.
Figure C-l (b) Side view
INSTALLATION
1.
2.
3.
4.
Install the fan motor to the fan duct assembly with
the two(2) screws.
Install the fan blade assembly to the fan motor shaft
according the following procedure.
1) Hold the center of the bracket which supports
the shaft of the fan motor on the flat table as
shown in Figure C-2.
2) Apply the screw lock tight into the hoie(for
shaft) of the fan blade.
3) Install the fan blade to the shaft of fan motor
by pushing the fan blade with a small, light
weight, ball peen hammer or rubber mallet.
CAUTION:
l Do not hit the fan blade strongly when
installed because the bracket may be
transformed.
l Make sure that the fan blade rotates
smooth after installed.
l Make sure that the axis of the shaft is
not slanted.
Install the fan duct assembly to the oven cavity with
the two(2) screws (rear side) and single(l) screw
(top side).
Connect the wire leads to the fan motor, referring
to the pictorial diagram.
&---Shaft
Figure C-l (a) Rear view Figure C-2.

R -2V54
?.2
4 _1
B 0
z
ZJ
-
;g
DW
2 d
>L---
F
d $ -
Figure O-l. Oven Schematic-OFF Condition
SCHEMATIC
NOTE: CONDITION OF OVEN
1. DOOR CLOSED. /
2. TIMER ON
3. VARIABLE COOKING CONTROL “HIGH*‘;
4. “START” BUTTON PUSHED
‘38
%
“68
4’ ,.
r-U--1 3
+-&& 5
8
mv4 nr,m
Figure O-2. Oven Schc
T 6
IVL i-77
zmatic-ON Condition
8

R-2V54
i 1 I
:
63
.-ii
75
.-
i -
u
a
r
CA
2
z
.-
LA
i 1 I 2 I 3 I 4 5 / 6
9

I?-2V54
PARTS LIST
Note : The voltage supplied to the parts I’** are greater than 250V.
REF. NO. 1 PART NO. I DESCRIPTION 1my ICODE
ELECTRICAL PARTS
l- 1 QSWTEA092WREO Timer motor
I- 2 QFS-TA014WREO Temp. fuse 150°C (MG)
l- 3 QSW-MA007WREO 1st latch & cook switch (V-5230D-069)
l- 4 QSW-MA009WREO Monitor switch (V-5220D-070)
l- 5 QSW-MAOlOWREO 2nd latch switch (V-521OD-068)
l- 6 QFS-TA014WREO Temp. fuse 150°C (OVEN)
-7
i- 8 RC-QZA115WREO High voltage capacitor
RMOTEA208WREO Fan motor
:r,," QACCAAOllWREO Power supply cord
QFS-C0019WREO Fuse M6.3A
l-11 QFS-TAOlOWREO Temp. fuse 115°C
l-13 QSOCLAOllWREO Oven lamp socket
1-14 RLMPTA029WREO Oven lamp
l-15 RMOTDA086WREO TTM: Turntable motor
l-16 RR-WZA003WREO Monitor resistor 0.8n 20W
l-17 RTRN-A293WREO Power transformer
l-18 RV-MZA122WREO Magnetron
l-19 FW-QZAO71WRKO H.V. rectifier assembly
l-20 QFSHDA002WREO Fuse holder
CABINET PARTS
1 BF
1 AG
1 AF
1 AF
1 AF
1 AG
1 AW
1 AZ
AP
i AE
1 AG
1 AH
1 AK
1 AP
1 AG
1 BK
1 BF
1 AH
1 AE
2- 1 FFTASA035WRKO Oven lamp access cover assembly
2- 1-l PCUSGA306WRPO Cushion
2- 2l-2 PSLDPA005WRPO Lamp reflector
GCABUA306WRPO Outer case cabinet
2- 3 FDAI-A135WRWO Bottom plate
2- 4 FHNG-A096WRTO Lower oven hinge
2- 5 GLEGPA023WREO Foot
CONTROL PANEL PARTS
HPNLCB019WRRO Control panel 1 AR
JBTN-A688WRFO Start button 1 AF
;I ; JBTN-A689WRFO Door open button 1 AG
JKNBKA459WRVO Timer knob 1 AK
3- 5 JKNBKA460WRVO Variable cooking control knob 1 AK
I I
3- 6 MSPRPA067WREO Button spring 111 AB
OVEN PARTS
4- 1 FROLPA046WRKO Roller stay 1 AX
4- 2 NTNT-AO34WRFO Turntable - 1 AM
4- 3 MLEVPA167WRFO Switch lever 1 AE
;I fj MSPRTA115WREO Switch lever spring 1 AC
PHOK-A062WRFO Latch hook 1 AP
;r F LBNDKA038WRPO Capacitor holder 1 AH
MHNG-A225WRTO Upper oven hinge 1 AG
4- 8 DOVN-A314WRKO Oven cavity assembly 1 BN
:11: LX-WZA028WREO Washer 1 AA
LSTPPA069WRFO Cord anchorage (upper) 1 AD
4-11 LSTPPA070WRFO Cord anchorage (lower) 1 AC
4-12 PCLIC0026WREO P-clip 2
4-13 PCOVPA208WRFO H.V.C. cover 1 AF
4-14 PCOVPA241WREO Waveguide cover 1 AL
4-15 PCUSGA208WRPO Trans. cushion 1 AC
4-16 PCUSUA190WRPO Cushion 1 AC
4-17 PDUC-A395WRFO Air guide AG
4-18 PDUC-A399WRWO Air duct 1' AP
4-19 PFILWA041WREO Lamp filter 1 AA
4-20 PPACGA097WREO O-ring 1
IO

*
R -2V54
Note : The voltage supplied to the parts “*” are greater than 250V.
REF. NO. PART NO. DESCRIPTION Cm-Y CODE
4-21 PPACGA090WREO Cushion AE
4-22 NFANJA020WREO Fan blade i AG
DOOR PARTS
DDORFA549WRKO
FDORFA199WRTO
GCOVHA229WRFO
HPNL-A404WREO
LSTPPA091WRFO
PSHEPA333WREO
Door assembly complete (Not Replacement Item)
Door panel
Choke cover
Door screen
Latch head
Latch spring
Sealer film
BK
BD
AK
AM
AG
AE
6- 1
6- 2
:I ;
6- 5
MISCELLANEOUS
1
1
1
4
1
1
t
AZ
AH
AH
AD
AA
AF
7- 1
7- 2
;r ;
7- 5
7- 6
;I ;
7- 9
7-10
7-11
7-12
7-13
7-14
SCREWS AND WASHER
XOTSD40P12000 Screw 4mm x 12mm
XHTSD40P08RVO Screw 4mm x 8mm
XHSSE40P08000 Screw 4mm x 8mm
LX-CZA029WREO LHSTIX screw (LHSTIX LR-4)
LX-CZ0052WREO Special screw
LX-EZA036WREO Special screw
XOTSE40P08000 Screw 4mm x 8mm
XWSSD40-10000 Washer
XBTSD40P08RVO Screw
XFPSD30PlOOOO Screw 3mm x 1omm
XFPSD40P08KOO Screw 4mm x 8mm
XFPSD40P08000 Screw 4mm x 8mm
XFTSD40P30000 Screw 4mm x 3omm
XOTSD40P12RVO Screw 4mm x12mm
HOW TO ORDER REPLACEMENT PARTS
To have your order filled promptly and correctly, please furnish the following information.
2
6
1
6
AA
AA
AA
AA
AA
AA
AA
1. MODEL NUMBER 2. REF. NO.
3. PART NO. 4. DESCRIPTION
11

1 2 3 4 5 I 6
- r-
Ai
I
1
1
/
I
B/
1
Cl
y
/
Di
I
E’
I
F’
/
I
G.
I
I
/
I
I
I
Hi
/
I
-
CABINET, UNIT CHASSIS AND OVEN PARTS I
I
I
IA
I
I
/
I
c
I
I
it
c
I(
I
I
i
I
,c
E
I
/
I
I
I
,
,
I
;
I
I
I
/
,
I
/
/
1
I
/
1 2 3 I 4 / 5 I 6
12

R-2V54
1 1 2 3 I 4 5 6
CONTROL PANEL AND DOOR PARTS
c?
3-l
b
3-6
L--, ---------- ---- ------1------ ----- ----------------- ---- ---- ----- -s-J
E
H
1 2 3 4 5 / 6
13

R -2V54
Bl
cl
/
I
Ei
/
I
1
1
I
F/
,
1 / 2 3 / 4 5 6
MISCELLANEOUS /
270mm >
c-3
6-4 /
0
2
I
\I /
I
& : (ZJ
I\
80?5
QI--@
I
it
PACKING AND ACCESSORIES’ 1
/
I
TURKTABLE TRAY
COOKERY E3OOK
ROLLER STAY DOOR PROTECTION SHEET
(SPADPA204WREO)
MICROWAVE OVEN
SHRINK FILM SHEET
(SPAKCB908WREO)
1 /
2 I 3 I 4 5 6
‘92 SHARP CORP. (5U0.75E) Printed in Australia
14
Table of contents
Other Sharp Microwave Oven manuals

Sharp
Sharp R-763IN User manual

Sharp
Sharp R-85STM-A User manual

Sharp
Sharp R-370EZ User manual

Sharp
Sharp R-85ST-AA User manual

Sharp
Sharp R-26ST Instruction Manual

Sharp
Sharp Carousel R-1852A User manual

Sharp
Sharp SMC1162HS User manual

Sharp
Sharp R-402FW User manual

Sharp
Sharp R-1880LS User manual

Sharp
Sharp R-204 User manual