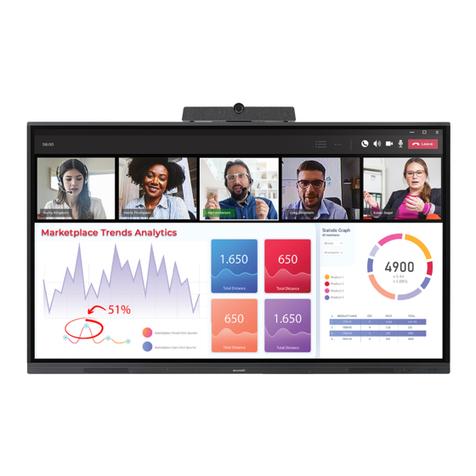
Sharp PN-CD701 Instruction sheet

Confidential Copyright ©All rights reserved, SHARP CORPORATION
<Ver. 1.0>
October 2019
Visual Solutions Unit
Business Solutions Division
SHARP Corporation
PN-CD701
Installation Guidelines
Windows Collaboration Display

Confidential Copyright ©All rights reserved, SHARP CORPORATION 1
About handling of this material / Contents
・Please handle this document very carefully as it includes
know-how of information displays.
・Basic notes of installation to use the display for long term in
good condition is described
Contents
1. Precautions for temperature, clearance and
environment … 2
2. Precautions for opening the package … 3
3. Precautions for installation and handling … 4
4. Conditions of tilt angle … 6
5. Precautions for a stand installation … 7
6. Precautions for transportation of packed display
…11
7. Other precautions …15
8. Option parts list …16
9. System requirement …17
10. USB Cable Connection …18
11. Handling of PN-ZU01 (8m USB-C Cable) …19
12. How to connect using USB-C Out …20
13. Notes on setup …21
14. About HIDDEN MENU …23
About handling of this material
[Warning]
This document describes installation know-how of
information displays for our business partners.
Please be careful not to distribute this document
or part of its contents to other companies, or
divert (use) it for competitors’ models.
Please also be reminded that numerical values
and expressions in this document are subject to
change according to future evaluation without
prior notice.

Confidential Copyright ©All rights reserved, SHARP CORPORATION 2
Temperature and environment of the product (display).
・Using conditions
Temperature :5℃~35℃
Humidity :20%~80%RH (No condensation)
* If it is difficult to secure the sufficient space such as
using in a case, please adjust the surrounding temperature
to 5℃-35℃by using a fan, for example.
If you settle the air flow fan, be careful to prevent the
contamination of the glass surface caused by entering of
the dust and rising the temperature in the case caused by
blocking air flow.
・Installation conditions
・Do not use the product where strong light hits such
as direct sunlight.
Please install display(s) under the environment which meets
these conditions. (Peripheral devices also should be installed
keeping their specifications.)
Temperature and environment(for horizontal installation)
Upward >20cm
Downward >5cm
Backward >5.5 cm
Needed clearance
1. Precautions for temperature, clearance and environment
Unit : cm
20
5
5.5

Confidential Copyright ©All rights reserved, SHARP CORPORATION 3
2. Precautions for opening package
Precautions for opening package
・Please open the package with at least 2 persons.
・Remove the 6 joints attached the lower part of the package.
・Hold the both side of the package and lift it up straight.
Remove the joint downward pinching the inner
side of it.
After removal of the joints, please lift up the both
sides of the carton box straight.
Remove the joints at the bottom of the packing
box along the longest side.
Accessories Packaging
Camera box
IoT sensor box
Back side of inside of the carton box

Confidential Copyright ©All rights reserved, SHARP CORPORATION 4
Precautions when installation and moving
3. Precautions for installation and handling
The display surface of LCD is made of glass. Please hold the side handle and the bottom of the body when installation and
moving. Please do not hold the edges and/ or touch the switches which are in the lower left of the front.
And do not touch the power switch of the rear, terminals at the bottom and around the speakers at the bottom.
It may cause damage, malfunction and/or injury. Please be careful not to slip off the display.
Caution: Caution when installation
Prior to installing this product, please read the following items carefully in order to use it in good condition for long time.
・Please refer to “Mounting precautions (For SHARP dealers and service engineers)” which is described in the operation manual and
“Mounting precautions (For SHARP dealers and service engineers)” which is described in the setup manual.
・Please be careful that the product warranty is not valid if these precautions are not taken.
OK
OK
OK
OK
Front view Rear view
×××
×
×
×
×
×
×
×
×
×
×
OK OK
OK OK
•Please use a mounting bracket which can support 4 times weight of the display.
The wall on which displays are mounted must support 4 times total weight of the display and a mounting bracket (concrete wall, pillar etc).
•Install the display vertical to the level surface.
•Usable ambient temperature range of this display is 5℃-35℃. Using under other condition may cause malfunction. Please keep enough space to avoid heating up.
(Example):When heat is not dissipated and the internal temperature of the unit becomes high, the brightness of the backlight decreases and display of the unit becomes darker.
If the internal temperature increases further more, the unit is turned off and becomes standby mode.
•In case when securing the space is difficult such as the unit is installed inside a case or the unit is installed where the ambient temperature does not range from 5℃to 35℃,
please take measures so as the temperature inside a case or the ambient temperature ranges from 5℃to 35℃by installing a fan, for example.
•Please do not obstruct the ventilation hole. It may cause inner rise of temperature and malfunction.
•Please keep the display away from direct sunlight. It may cause failure and deterioration.
•In dusty areas, it is necessary to take measures against dust such as regular cleaning.
•For safety, please give measures for preventing fall of display.
•The ground connection is necessary when the power plug is connected. 3-pin plug is used for the power plug. Please ask the professional dealer/contractor,
if you are not able to make ground connection.
•When the display is temporary put on the desk etc without a stand, please spread a soft sheet under it because the mounting bracket interfere with the desk.

Confidential Copyright ©All rights reserved, SHARP CORPORATION 5
3. Precautions for installation and handling
Worker position, assignment of work and cautions while lifting up the display
As this product is heavy, please wear gloves and safety shoes when you lift up this display.
In order to lift up the display, such as the move from a packing box to a cart, 4 persons are required.
Please check the position and assignment for each worker by referring to the illustration below.
Do not touch the USB
terminal and the buttons.

Confidential Copyright ©All rights reserved, SHARP CORPORATION 6
4. Conditions of tilt angle
About tilt angle
・Installation angle is only supported vertically(0 degrees). Usable ambient temperature range of this display is 5℃-35℃.
<20 degree
Installation angle is only supported
vertically.
○
45 degree
Usable ambient temperature range
of this display is 5℃-35℃.
Installation methods other than vertical are not supported.
* Portrait installation is not supported.

Confidential Copyright ©All rights reserved, SHARP CORPORATION 7
Recommended working space
We recommend to secure the following space to install the display and the stand.
(Recommended working space considering unpacking and clean up)
Stand installation place
The space shown on the right is necessary to install the stand.
(Sufficient clearance space of the display will be secured when installing
the display on the stand)
The stand must be placed on the flat floor.
Width Depth
Working space > 5,300mm > 2,400mm
Width Depth Height
70” type >1,800mm >1,200mm >2,300mm*
*When installing at maximum height
Stand mounting bracket
5. Precautions for a stand installation
NOTE : Optional stand has NOT been set for PN-CD701. The stand described in chapter 5 is using only
for explanation.

Confidential Copyright ©All rights reserved, SHARP CORPORATION 8
5. Precautions for a stand installation
VESA compliant mounting bracket for the display (M6 screw)
Back of the display
VESA compliant screw
holes
Please pay attention to the following items when using the screw holes on the back of IDP.
1) Please use 4 mounting screws to fix the display.
2) The diameter of screw hole for the mounting bracket should be less than or equal to 7.5mm.
Display may drop with an oversized hole.
3) Please use screws with correct length as described in the operation manual of the display.
Display may drop with a long screw.
4) Please take proper countermeasures to prevent the screws from becoming loose (For example :
using screws with a spring washer).
5) Please tighten screws hardly within 3N*m strength.
* Do not use an impact driver.
使用するネジ長さは、ディスプレイの
取扱説明書を確認してください。
固定用ネジ(M6)
取付金具
ディスプレイ
背面キャビネット
固定ボス
取付金具の固定穴
サイズΦ7.5mm以下
ネジの長さ 8mm-10mm
Captive nut for fixing
Rear cover of
display
Mounting bracket
Screw (M6)
Hole diameter for mounting bracket
(less than or equal to 7.5mm)
Length of screw 8-10mm

Confidential Copyright ©All rights reserved, SHARP CORPORATION 9
Precaution for stand installation
Attach the mounting bracket with 3-point screws (×2) on
the back of the display.
*You can work with the display standing on the bottom
package.
Take care that the display does not fall down.
As this product is heavy, please wear gloves and safety shoes when you lift up this display.
Please work with 4 or more persons when installing the display to the stand.
Referring to the page 4, lift the set and install to the stand.
* Please remove the handles of the display after stand installation.
* When the display is temporary put on the desk etc without a stand, please spread a soft sheet under it because the tray mounting bracket
interfere with the desk.
Lock the stand and lift the set (refer to the page 4).
Hang the mounting bracket to the display bar of the
stand confirming the position.
* Lift it vertically because it becomes hard to hang if
the set inclines
Hang the display to the floor stand.
*Be careful not to pinch your hands or cable.
*Adjust the display position so as the screw and
long hole shares their center.
3-point screw(M6)
Mounting bracket
5. Precautions for a stand installation

Confidential Copyright ©All rights reserved, SHARP CORPORATION 10
Move after installation
When you move after installation, please observe the following notices.
・Turn off the information display and connected equipments and remove connected cables.
・Move the stand with more than 2 persons.
The stand may fall down due to unexpected shocks or the slope way, therefore please hold the left and right
side of the display with two persons.
・You can move the stand with display only indoors. In case there are uneven floor on the pathway,
please take countermeasures to absorb the shock/vibration. They can cause malfunction.
* After move, please confirm that the fixation of stand pillar have not become loose.
* After move, please confirm that the screws attached to the display are tight.
5. Precautions for a stand installation

Confidential Copyright ©All rights reserved, SHARP CORPORATION 11
Transportation of packed display
6. Precautions for transportation of the packed display
×
Hand grip
Cart
W D H
PN-CD701 1,810 298 1,123
<Packing dimension>
(mm)
・More than 4 persons are needed to move the packed display.
・Transport the packed display on a cart.
(In case cart cannot be used (ex. stair steps), move the display with more than 4 persons.)
・Move the packed display in landscape position. Portrait position is not supported in principle.
(Temporary transportation in portrait position in an elevator for example is OK.)
Use the shown handgrip to lift up the packed display.
Hold the side of the package so that it will not fall down. In case a cart cannot be used, move the packed display
by more than 4 persons, with each person holding each
side of the package.
Packed display cannot
be transported in
portrait position. In
case transportation in
landscape position is
impossible, it may be
transported
temporary in portrait
position.
Lift either side of the package in order to place it
onto the cart. Package must be held by other persons
in order to avoid falling down.
(2 persons are holding the package in above illustration)
While transporting the packed display by cart, hold the
all sides of the displays by 4 persons.

Confidential Copyright ©All rights reserved, SHARP CORPORATION 12
Use of elevator
Landscape position
Width Depth Height
PN-CD701 > 1,850mm > 350mm > 1,200mm
(1) Accommodation space
When using an elevator to transport, followings are the minimum size of the elevator.
* In case transportation in landscape position is impossible, it may be transported temporary in portrait position.
Caution : Take care not to hit the package against the elevator door or the wall while carrying the display into the elevator.
In case transportation in landscape position is impossible (the depth of
the elevator is short), it may be transported temporary in portrait
position.
1,200mm
6. Precautions for transportation of the packed display

Confidential Copyright ©All rights reserved, SHARP CORPORATION 13
Carry in space
Wall
Wall
Wall
Wall
Product
Wall Wall
Ceiling
Cart
350mm
1,400mm
Width Height
PN-CD701 > 350mm > 1,400mm
Space
PN-CD701 > 1,000mm
1,000mm
1,000mm
(1) Space to carry in
A cart should be used for transportation.
In order to transport the packed product with a cart, following
space is necessary.
(In case width of a cart is <350mm and height of a cart is <150mm)
(2) Space at a corner
In case there are turns alongside with transportation pathway,
1,000mm < width is necessary.
Caution: Take care not to hit the package against the corner wall.
6. Precautions for transportation of the packed display

Confidential Copyright ©All rights reserved, SHARP CORPORATION 14
Size Angle Position of
the door
Packed Body only
Width Depth Width Depth
70” 45°
0 1,600 1,600 1,400 1,400
150 1,700 1,600 1,500 1,400
250 1,800 1,600 1,600 1,400
Use of elevator
(1) Carry in space
An elevator should have the size that can accommodate the product when using an elevator.
Caution: The packing or the product should not contact with the door and/or the wall when using an elevator.
The following is the list indicating angles and required sizes when the depth is insufficient and carrying diagonally.
Refer to the following list.
奥行き
幅
間口
出入り口位置
本体角
Product
width
dept
h
angle
width of the door position of the door
Depth :Depth of the elevator (length from front to back)
Width :Width of the elevator
Width of the door :Width of the door
Position of the door:Distance between the side wall to the edge of the door
Angle :Tilting angle of the product when carrying in an elevator
* The door should have the same width of the product when the angle is 0 degree. 【mm】
6. Precautions for transportation of the packed display

Confidential Copyright ©All rights reserved, SHARP CORPORATION 15
7. Other precautions
Wireless Windows and Wireless Android
The input of “Wireless Windows” and “Wireless Android”
can be displayed by Windows10 or Android terminal that
supports Miracast transmission.
- Windows: Windows 10 or later
- Android (version 6.0 or later are recommended)
Connection with all devices is not guaranteed.
Because it depends on the hardware of each terminal, it may
not work on supported OS.
Connecting a touch panel
A USB cable should be connected to the computer when you
use the touch panel connected to this product.
1. Boot the computer
2. Terminate all the application software.
3. Connect the USB cable of this product to the computer.
The product is recognized automatically when connected.
Role of LAN1 and LAN2
・Role of LAN1
LAN1 is a terminal for connecting a computer connected to
the product via USB-C or USB-B to the network.
・Role of LAN2
LAN2 is used for WSI service.
Please check the “10.About WSI(Workspace Intelligence)”.
Input terminal which touch operation is available
・USB-C(2) DP Ver.1.4 certification - Max Resolution 4K60p
・HDMI input terminal (1)
Condensation
・Dew condensation can be built up on the display,
either on the surface or internally when bringing
the display from a cold place to a warm one or if
the ambient temperature rises rapidly by air
conditioning for example.
・In case dew condensation occurs not only on the
surface but internally, please do not turn on the
display until they disappear. Otherwise, it may
cause malfunction. (Please raise the ambient
temperature gradually in order to avoid dew
condensation)
Notes: Refer to sections 10, 11, and 12 for USB-C connection.

Confidential Copyright ©All rights reserved, SHARP CORPORATION 16
8. Option parts list
List of compatible option parts
Following is the list of option parts compatible with the product.
・PN-ZR02 (Remote Control Kit)
・PN-ZU01* (8m USB-C Cable)
・PN-ZU02*(USB-C expansion cable for PN-ZU01*)
Available options vary depending on the countries and regions.
*Planning. But Not yet officially announced.
We can’t recommend any parts other than those listed above. Please don’t recommend them for dealers , SIers and end-users.

Confidential Copyright ©All rights reserved, SHARP CORPORATION 17
9. System requirement
System requirement
*MacOS is supported with mouse operation and single touch.
Chrome book is supported multi touch(touch digitizer), but Touch pen does not work.
<Referenced information>
PN-CD701 , because of featuring 4K resolution, should be recommended the controller which has sufficient ability for 4K resolution.
“Sufficient” means
-60Hz refresh rate on 4K resolution.
-Smooth operation on 4K resolution in the application produced by Microsoft(i.e. Windows Ink).

Confidential Copyright ©All rights reserved, SHARP CORPORATION 18
10. USB Cable Connection
USB cable connection
・When a USB-C cable is connected, the following communication is enabled.
*When a LAN cable is connected to the LAN1 terminal and setting of “LAN1 Network” is enabled.
・When USB-B is connected, network* and touch functions can be used.(HDMI connection is mandatory for video.)
Please do not connect all I/F(HDMI, USB-B touch cable and USB-C cables) together when a PC is connected.
The following combinations are available.
Pattern A. USB-C cable
Pattern B. HDMI + USB-B cable
Table. Function of USB-C
Function of USB-C Available / Not Available
DP Alt mode(Video stream) Available
Network * Available
Touch (Data Transport) Available
Power Delivery Available(MAX 60W)

Confidential Copyright ©All rights reserved, SHARP CORPORATION 19
11. Handling of 8m USB-C Cable
Handling of 8m USB-C Cable
The USB-C cable can transmit electric power. Please use with care when handling since it may ignite.
(Example):
•Do not use the USB-C cable rolled/tied up.
•Do not lay the USB-C cable under the carpet.
•Do not to be routed inside the building structure (e.g., walls, ceilings, etc.).
•If a cable is damaged, never use the cable.
•If you connect this cable to PN-CD701, please fix the cable with a clamp.
The USB-C cable has a “SOURCE” connector and a “DISPLAY” connector.
If the “DISPLAY” and “SOURCE” are inserted in the wrong side, the video will not be displayed correctly.
Figure. Fixed the cable
Figure. Connection method
DISPLAY connector SOURCE connector
Monitor PC
Other manuals for PN-CD701
4
Table of contents
Other Sharp Monitor manuals

Sharp
Sharp PN-H701 User manual

Sharp
Sharp PN-CD701 User guide

Sharp
Sharp 8M-B32C1 User manual

Sharp
Sharp PN-V551 User manual

Sharp
Sharp LL-T2000A User manual

Sharp
Sharp PN-70TB3 User manual

Sharp
Sharp PN-R903 User guide

Sharp
Sharp PN-A601 User manual

Sharp
Sharp PN-70TW3 User manual

Sharp
Sharp LL-T1820-H User manual

Sharp
Sharp PN-L803C User manual

Sharp
Sharp PN-R903A User manual

Sharp
Sharp 8M-B70AU User manual

Sharp
Sharp PN-E602 User guide

Sharp
Sharp PN -HY431 User manual

Sharp
Sharp PN-L601B User manual

Sharp
Sharp PN-325 User manual

Sharp
Sharp 8M-B80AX1E User manual

Sharp
Sharp PN-B401 User manual

Sharp
Sharp PN-80TC3 User manual