Sharp 13N-M100 User manual

1
7209 PE
CONTENTS
PAGE
• Important Information ...................................2 ~ 3
• Supplied Accessories .........................................3
• Before OperatingYour Television ........................3
• Antenna Connections ...................................3 ~ 4
• Quick Reference Control Operation..............5 ~ 7
• EZ SETUP during First Power On ...................... 8
• Demo Mode ........................................................9
• Accessing the MAIN MENU screen without
Remote Control ..................................................9
• Language..........................................................10
This operating manual includes basic
operating instructions in Spanish and French.
SPANISH is on page 6, 27.
FRENCH is on page 7.
PAGE
• Sleep Timer ...................................................... 10
• Video Adjust ..................................................... 11
• Closed Caption ................................................. 12
• Parent Control........................................... 13 ~ 19
• V-CHIP .................................................. 13 ~ 19
• Energy Save ..................................................... 20
• Set Up....................................................... 21 ~ 24
• EZ Setup ....................................................... 21
• Channel Setting..................................... 22 ~ 24
• Blue Screen................................................... 24
• Using the Video and Audio Input Jacks ............ 25
• Before Calling for Service ......................... 26 ~ 27
• Calling for Service ............................................ 28
• Limited Warranty............................................... 28
A
s an
E
NERGY
S
TAR
®
P
artner, SHARP has determined that this product meets the
E
NERGY
S
TAR
®
guidelines for energy efficiency.
E
NERGY
S
TAR
®
is a
U.S.
registered
trademark.
LOPERATION MANUAL L
COLORTELEVISION
MODELS
13N-M100
13N-M150
B
01-04 13N-M100/150[B].p65e 02/08/2000, 3:00 pm1

2
Welcome to the SHARP Family.We are pleased that you are now the owner of a SHARP ColorTelevision
– built for outstanding quality, reliability and performance.
Every SHARP Color Television set is tuned and adjusted for proper color and sound, and has passed
throughthemoststringent quality control tests at thefactory.Wehaveprepared thisOPERATIONMANUAL
so that you may adjust the picture and color to your personal viewing preference.
We sincerely hope that you receive the greatest satisfaction and enjoyment from your new SHARP Color
Television set for years to come.
Please read these instructions carefully, and keep them handy for your future reference.
Important Information
There are two important reasons for prompt warranty registration of your new SHARP television set,
using the REGISTRATION CARD packed in with the set.
FIRST – WARRANTY
This is to assure that you will immediately receive the full consumer benefit of the parts, service and labor
warranty applicable to your purchase.
SECOND – CONSUMER PRODUCT SAFETY ACT
To assure that you will promptly receive any safety notification on inspection, modification or recall that
SHARP may be required to give under the 1972 Consumer Product Safety Act. PLEASE READ
CAREFULLY THE IMPORTANT “LIMITED WARRANTY” CLAUSE ON THE LAST PAGE.
WHAT IS ENERGY STAR ®
TVs andVCRs use energy both when they are on and when they are off.Americans spend more than $1
billion a year on energy consumed by TVs and VCRs when they are not in use. The new ENERGY
STAR ®models will reduce that energy“leakage”by up to 75 percent.Ultimately, this will mean more than
$500 million a year in energy savings for consumers.
The energy savings will help reduce the burning of fossil fuels and the related carbon dioxide pollution
that contributes to global warming.If every American family replaced theirTVs and VCRs with ENERGY
STAR ®models, it would reduce carbon dioxide emissions by five million tons every year — equivalent to
eliminating the pollution from more than one million cars.
By using ENERGY STAR ®products, you will save money on your electric bills and use less energy.That
makes good economic sense and it’s good for our environment.
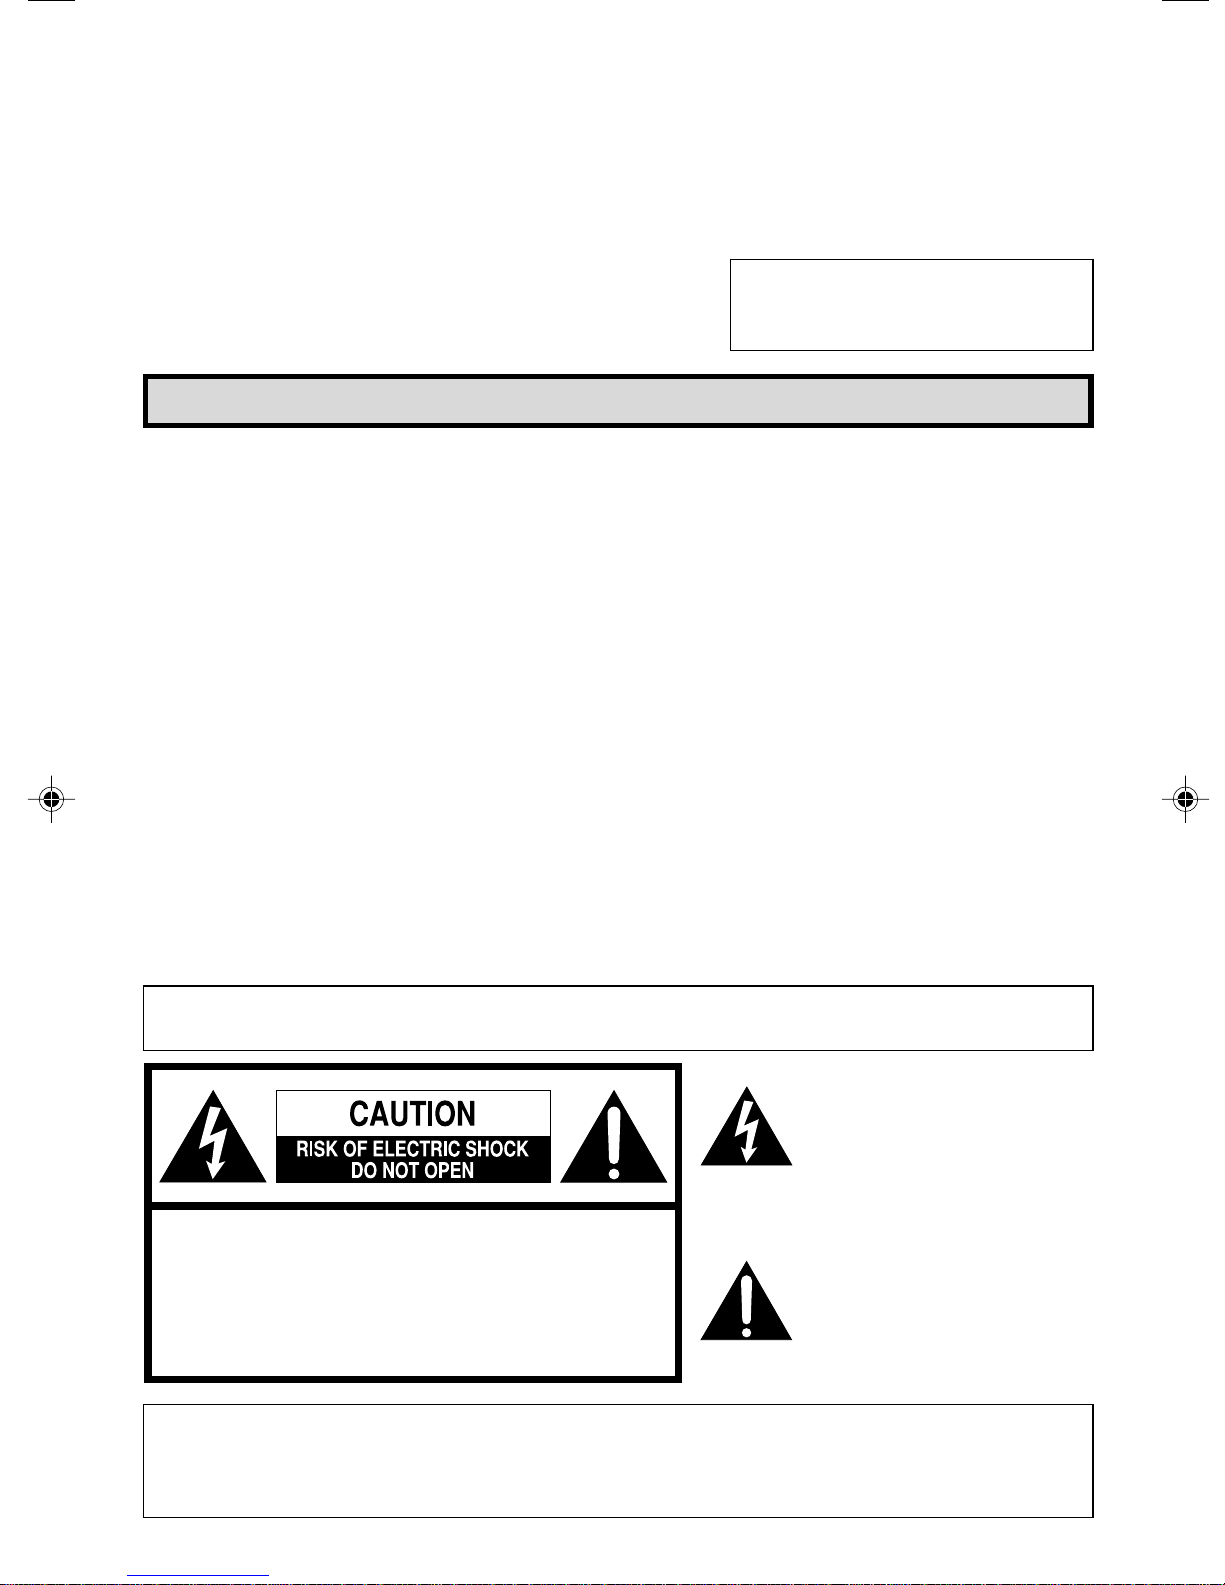
WARNING: TO REDUCE THE RISK OF FIRE OR ELECTRIC SHOCK, DO NOT
EXPOSE THIS APPLIANCE TO WET LOCATIONS.
CAUTION: TO REDUCE THE RISK OF
ELECTRIC SHOCK,
DO NOT REMOVE COVER (OR BACK).
NO USER-SERVICEABLE PARTS INSIDE.
REFER SERVICING TO QUALIFIED SERVICE
PERSONNEL.
The lightning flash with
arrowhead within a triangle is
intended to tell the user that
parts inside the product are a
risk of electric shock to
persons.
Theexclamation point withina
triangle is intended to tell the
user that important operating
and servicing instructions are
in the papers with the
appliance.
“Note to CATV system installer:This reminder is provided to call the CATV system installer’s attention
to Article 820-40 of the National Electrical Code that provides guidelines for proper grounding and, in
particular, specifies that the cable ground shall be connected to the grounding system of the building,
as close to the point of cable entry as practical.”
Model No.:
Serial No.:
IMPORTANT
To aid reporting in case of loss or theft, please record theTV’s
modeland serial numbersin the space provided.The numbers
are located at the rear of the TV.
01-04 13N-M100/150[B].p65e 31/07/2000, 11:50 PM2

3
TV
Location
• Fornormaloperation,yourTVshouldbelocatedinanareaoftheroomwherecooladequateventilation
is provided.Do not place the back of the television set in a place where free airflow will be restricted.
• Any magnetic force may disturb the color picture.Make sure that magnets, electric clocks, toys using
magnets or any other magnetic substance, such as iron are kept well away from this TV set.
Power
Your TV operates on 120Volts, 60 Hertz (normal household current) and has a polarized plug.If you
are unable to insert the plug fully into the outlet, try reversing the plug. Should it fail to fit, contact an
electrician. Do not defeat the safety feature of the polarized plug.
Note:
• If the set will not be used for a long period, such as during a vacation, unplug the set from the wall
outlet to economize power. (If the TV set is plugged in, a slight current still flows, even with the
POWER BUTTON in the OFF position.)
• Lines and other noise may appear inTV broadcast images when an FM tuner or radio is located near
the TV and both radio and TV broadcasts are being received. Should such noise appear, turn off
either the TV or the radio.
• If you are listening to an AM broadcast, turn the TV off. AM broadcast signals may not be received
due to the interference of the TV.
LBefore using the television, prepare the Remote Control
To use the remote control, insert batteries first.
Insert the batteries
• With your thumbnail, pull up the slit as indicated by the arrow to remove the back cover. Insert two
batteries (size “AA”). Be sure to match the battery e/dterminals with the e/dmarks inside the
compartment.
Before OperatingYourTelevision
Battery
Cover
Pull up
Supplied Accessories
Size AA
Dry Batteries
Infrared Remote Control/Part Number
RRMCG1324CESA (13N-M100)
RRMCG1324CESB (13N-M150)
Important Information (Continued)
WARNING - FCCRegulations statethatanyunauthorizedchangesor modifications tothisequipment
not expressly approved by the manufacturer could void the user’s authority to operate
this equipment.
Antennas
• The antenna requirements for good color television reception are more important than those for
black & white television reception. For this reason, a good quality outdoor antenna is strongly
recommended.
The following is a brief explanation of the type of connections that are provided with the various
antenna systems:
Antenna Connections
01-04 13N-M100/150[B].p65e 31/07/2000, 11:50 PM3

4
CAUTION
RISKOF ELECTRIC SHOCK
DONOT OPEN
CAUTION
RISKOF ELECTRIC SHOCK
DONOT OPEN
75-ohm
coaxial cable
300-ohm
twin-lead
VHF/UHF ANTENNA
VHF/UHF ANTENNA
REAR OF TV
300/75-ohm
ADAPTOR
(Not supplied)
or
CAUTION
RISKOF ELECTRIC SHOCK
DONOT OPEN
CAUTION
RISKOF ELECTRIC SHOCK
DONOT OPEN
300-ohm
twin-lead
300-ohm
twin-lead
75-ohm coaxial
cable
IN OUT
VHF
ANTENNA UHF
ANTENNA
COMBINER
(not supplied)
or
REAR OF TV
OUT A
IN
B
A. CombinationVHF/UHF Antennas
OUTDOOR ANTENNA CONNECTION
• Use one of the following two diagrams if you connect an outdoor antenna.
A: Using a VHF/UHF combination outdoor antenna.
B: Using separate VHF and/or UHF outdoor antenna.
• Connect an outdoor antenna cable lead-in to the COAXIAL CABLE CONNECTOR on the rear of the
TV set.
CABLETV (CATV) CONNECTION
• A 75 ohm coaxial cable connector is built into the set for easy hookup. When connecting the 75 ohm
coaxial cable to the set, screw the 75 ohm cable to the COAXIAL CABLE CONNECTOR.
• Some cable TV companies offer “premium pay channels”. Since the signals of these premium pay
channelsare scrambled,a cableTV converter/descrambleris generallyprovided tothe subscriberby
the cableTV company.This converter/descrambler is necessary for normal viewing of the scrambled
channels.(Set yourTV on channel 3 or 4.Typically one of these channels is used.If this is unknown,
consult your cable TV company.) For more specific instructions on installing cable TV, consult your
cable TV company. One possible method of utilizing the converter/descrambler provided by your
cable TV company is explained below.
Please note: RF switch equipped with position A/B (not provided) is required.
“A” position on the RF switch (not supplied) : You can view all unscrambled channels using theTV’s
channel keys.
“B” position on the RF switch (not supplied) : Youcan viewthescrambledchannelsviatheconverter/
descrambler using the converter’s channel keys.
Note:
• Consult your SHARP Dealer or Service Center for the type of splitter, RF switch or combiner that
might be required.
B. SeparateVHF/UHF Antenna
Cable TV converter/
descrambler
(not supplied)
Two-set
signal
splitter
(not
supplied)
Cable TV Line
RF switch (not supplied)
OUT IN
F-type connector
75-ohm coaxial cable (round)
300-ohm twin-lead cable (flat)
1. A 75 ohm system is generally a round cable
with F-type connector that can easily be
attached to a terminal without tools (not
supplied).
2. A 300 ohm system is a flat “twin-lead” cable
that can be attached to a 75 ohm terminal
through a 300-75 ohm ADAPTOR (not
supplied).
Antenna Connections (Continued)
01-04 13N-M100/150[B].p65e 31/07/2000, 11:51 PM4

5
TV
–
VOL
+
POWER VIDEO IN AUDIO
MENU
–
VOL
+
POWER CH
MENU
CH
Infrared Transmitter Window
INPUT
Press →Switch to external video input
mode.
Press again →Switch to TV mode.
See page 25.
CHANNEL UP/DOWN
(8) Selects next higher channel.
(9) Selects next lower channel.
• See pages 22 ~ 24 for channel
presetting.
• Moves the “ ” mark of the MENU
screen.
MENU
Press →Accesses MAIN MENU.
Press again →Exits MAIN MENU.
DISPLAY
Press→Displaysreceivingchannel for
four seconds.
Press again →Removes display.
• Temporarily displays receiving
channel when in Closed Caption
mode.
Basic Remote Control Functions
Quick Reference Control Operation
LLocation of Controls (ENGLISH)
Front Panel
Quick Reference Control Operation
CHANNEL UP/DOWN – MENU
(8) Selects next higher channel.
(9) Selects next lower channel.
• Press both at the same time to
access the MAIN MENU screen.
SENSOR AREA FOR
REMOTE CONTROL
VOLUME UP/DOWN
(+) Increases sound.
(–) Decreases sound.
POWER
Press →On.
Press again →Off.
VIDEO/AUDIO INTERMINALS
POWER
Press →On.
Press again →Off.
REMOTE KEYPAD
Accesses any channel from keypad.
FLASHBACK
Returns to previous channel.
VOLUME UP/DOWN
(+) Increases sound.
(–) Decreases sound.
• In menu mode, changes or selects
the TV adjustments.
MUTE
Press →Mutes sound.
Press again →Restores sound.
• CLOSED CAPTION appears when
sound is muted.
05-09 13N-M100/150[B].p65e 31/07/2000, 11:51 PM5

6
–
VOL
+
POWER VIDEO IN AUDIO
MENU
–
VOL
+
POWER CH
MENU
CH
TV
LUbicación de los controles (ESPAÑOL)
Panel Delantero
Referencia rápida de los controles de operación
Ventanilla del transmisor de infrarrojos
ENTRADA (INPUT)
Pulsando →Cambìa al modo de
entrada de video externo.
Pulsando nuevamente →Cambìa al
modo de TV.
CANAL SUPERIOR/INFERIOR
(CHANNEL UP/DOWN)
(8) Selecciona el siguiente canal
superior.
(9) Selecciona el siguiente canal
inferior.
• En el modo de MENU, mueve la
marca “ ”.
MENU (MENU)
Pulsando →Accede al MENU PRIN-
CIPAL.
Pulsando nuevamente →Sale del
MENU PRINCIPAL.
VISUALIZACION (DISPLAY)
Pulsando →Aparece el canal de re-
cepción por cuatro segundos.
Pulsando nuevamente →Elimina la
visualización.
• En el modo de “Closed Caption” se
muestra el canal de recepción por
un corto tiempo.
Funciones Basicas Del Control Remoto
ALIMENTACION (POWER)
Pulsando →Enciende (On).
Pulsando nuevamente →Apaga
(Off).
TECLADO A DISTANCIA
Para tener acceso a cualquier canal
empleando las teclas.
RETORNO AL CANAL
ANTERIOR (FLASHBACK)
Para volver al canal anterior.
AUMENTO/DISMINUCION
DELVOLUMEN
(VOLUME UP/DOWN)
(+) Aumenta el sonido.
(–) Disminuye el sonido.
• En modo de MENU cambia o
selecciona el ajuste del televisor.
SILENCIAMIENTO (MUTE)
Pulsando →Silencia el sonido.
Pulsando nuevamente →Restaura el
sonido.
• CLOSED CAPTION aparece
automáticamente cuando el sonido
es silenciado. Siempre y cuando la
transmisión tenga esta señal.
CANALSUPERIOR/INFERIOR(CH) –
MENU
(8) Selecciona el siguiente canal
superior.
(9) Selecciona el siguiente canal
inferior.
• Pulse ambos al mismo tiempo para
acceder a la pantalla de MENU
PRINCIPAL.
ZONA DEL SENSOR DEL
MANDO A DISTANCIA
AUMENTO/DISMINUCION
DELVOLUMEN (VOL)
(+) Aumenta el sonido.
(–) Disminuye el sonido.
ALIMENTACION (POWER)
Pulsando →Enciende (On).
Pulsando nuevamente →Apaga (Off).
TERMINALES DE ENTRADA
VIDEO/AUDIO
05-09 13N-M100/150[B].p65e 31/07/2000, 11:51 PM6

7
TV
–
VOL
+
POWER VIDEO IN AUDIO
MENU
–
VOL
+
POWER CH
MENU
CH
LEmplacement des touches (FRANÇAIS)
Panneau Avant
Référence rapide sur les commandes
Fonctions de base de la télécommande
Fenêtred’émissiondusignalinfrarouge
ENTRÉE (INPUT)
Appuyer pour sélectionner le mode
vidèo externe.
Appuyerdenouveaupour sélectionner
la télévision.
TOUCHES DES CANAUX CROIS-
SANT/DÉCROISSANT
(CHANNEL UP/DOWN)
(8) Sélectionne le canal supérieur
suivant.
(9) Sélectionne le canal inférieur
précédent.
• Déplace le curseur “ ” sur l’écran
du MENU.
RÉGLAGE (MENU)
Appuyer →Accès au MENU
PRINCIPAL.
Appuyer de nouveau →Sortie du
MENU PRINCIPAL.
AFFICHAGE (DISPLAY)
Appuyer pour afficher le canal reçu
pendant quatre secondes.
Appuyer de nouveau pour faire
disparaître le canal.
• Pour afficher temporairement le
canal reçu en le mode Sous-titres.
ALIMENTATION (POWER)
Appuyer pour mettre sous tension.
Appuyer de nouveau pour mettre hors
tension.
PAVE NUMERIQUE DE
COMMANDE A DISTANCE
Sélectionne directement le canal
voulu sur le pavé numérique.
RETOUR (FLASHBACK)
Rappelle le canal regardé précédent.
AUGMENTATION/RÉDUCTION DU
VOLUME SONORE
(VOLUME UP/DOWN)
(+) Pour augmenter le volume du son.
(–) Pour diminuer le volume du son.
• Pour changer ou sélectionner les
réglages du téléviseur en mode
menu.
SOURDINE (MUTE)
Appuyer →Mise en sourdine du son.
Appuyer de nouveau →Rétablisse-
ment du son.
• CLOSEDCAPTION apparaîtlorsque
le son est mis en sourdine.
TOUCHES DES CANAUX
CROISSANT/DÉCROISSANT (CH) –
MENU
(8) Sélectionne le canal supérieur
suivant.
(9) Sélectionne le canal inférieur
précédent.
• Appuyezsimultanémentsurces deux
touches pour accéder à l’écran
MENU PRINCIPAL.
AUGMENTATION/RÉDUCTION
DU VOLUME SONORE (VOL)
(+) Pour augmenter le volume du son.
(–) Pour diminuer le volume du son.
PRISES D’ENTRÉE VIDÉO/AUDIO
ALIMENTATION (POWER)
Appuyer pour mettre sous tension.
Appuyer de nouveau pour mettre
hors tension.
ZONE DE DETECTION DU
CAPTEUR
05-09 13N-M100/150[B].p65e 31/07/2000, 11:51 PM7

8
POWER
FR NCAIS
ENGL I SH
ESPAÑOL
LANGUAGSELECT E
A
SE ECT :CH8/9
VO
L
SE :TL+–/
FR NCAIS
ENGL I SH
ESPAÑOL
LANGUAGSELECT E
A
SE ECT :CH8/9
VO
L
SE :TL+–/
OR CABLE .
TS ART SETUP?ZE
ANTENNCONNECT A
YE :VOL+
VOL–
S
NO :
AU
18
TO RGGAMMI NORP
WA I TPLE EAS
VOL–
TSOP:
2
(Remote Control)
POWER
CHANNEL
UP (8)/
DOWN (9)
MENU
VOLUME
(+)/(–)
(On the Set)
(EZ SETUP mode)
LWhen you turn on the TV for the first time, it will automatically
memorize the broadcasting channels.
Please perform the following instructions before you press the
power button.
(1) Insert the batteries into the remote control. (See page 3)
(2) Connect the antenna cable to theTV set. (See page 3 ~ 4)
(3) Plug in the AC POWER cord to the wall outlet.
1Press the
POWER
button on theTV set or on the Remote Control
to turn on the TV. The SELECT LANGUAGE mode will be
displayed.
2Press
CH UP
(
8
)or
DOWN
(
9
)to select “ENGLISH”, “SPANISH
(ESPAÑOL)” or “FRENCH (FRANÇAIS)”.
3Press
VOL (+)
or
(–)
to access EZ SETUP mode.
4Press
VOL (+)
.
The tuner will automatically search for the
broadcastingandcableTV channels.(The CHNo.
will automatically increase when it appears.)
If you want to stop the EZ SETUP process once it
has started, press
VOL (–)
and it will be canceled.
If you want to SETUP again, please refer to page
21 on SETUP.
5Once EZ SETUP is completed, the lowest channel number
memorized will be displayed.
Note:
• If EZ SETUP does not memorize all the channels in your region, please refer to page 22 for more
information on manually memorizing the channels using CHANNEL SETTING.
• It may be difficult to PRESET when the broadcasting signals are weak, the channel cycle frequency
is incorrect or the frequency jamming is occuring around the area. Please refer to pages 22 ~ 24 for
more information on manually memorizing the channels using CHANNEL SETTING.
EZ SETUP during First Power On
(SELECT LANGUAGE mode)
05-09 13N-M100/150[B].p65e 31/07/2000, 11:51 PM8

9
Demo Mode
• To quickly learn more about the TV set, press and hold for more than
three seconds both
CH UP (
88
88
8
)
and
DOWN (
99
99
9
)
on theTV set.TheTV
set will go into DEMO mode and briefly explain the various features.
• To cancel DEMO mode, again press both
CH UP (
88
88
8
)
and
DOWN (
99
99
9
)
on the TV set.
Example:
DEMO mode display
Accessingthe MAINMENU screenwithout Remote Control
• IfyoumisplacedyourRemote Control youcanstillaccess most settings
via the MAIN MENU screen when you press both
CH UP (
88
88
8
)
and
DOWN (
99
99
9
)
on the TV set.
• Somefeatures ofyourTVsetwillnotbe accessiblewithouttheRemote
Control. If you lost your Remote Control, contact a Sharp Service
Center for a replacement.
MENU
CH
(On the Set)
CHANNEL
UP (
88
88
8
)/DOWN (
99
99
9
)
buttons
C
F
o
r
m
o
e
m
SHARP
SHARP
P
M
ri
o
n
dd
uc
t
s
s
MENU
CH
(On the Set)
CHANNEL
UP (
88
88
8
)/DOWN (
99
99
9
)
buttons
05-09 13N-M100/150[B].p65e 31/07/2000, 11:51 PM9

10
SL EP TIMER
SET UP
E
VIDEO ADJUST
CAPT IONCLOSED CONTROLPARENT
ENERGY SAVE
SL EP TIMER
SET UP
E
VIDEO ADJUST
CAPT IONCLOSED CONTROLPARENT
ENERGY SAVE
SL EP TIMER
SET UP
E
VIDEO ADJUST
CAPT IONCLOSED CONTROLPARENT
ENERGY SAVE
FR NCAIS
ENGL I SH
ESPAÑOL
LANGUAGE
A
FR NCAIS
ENGL I SH
ESPAÑOL
IDIOMA
A
SL EP TIMERE120 RE AIMN
BL E SCREENU
LANGUAGE
INGCH SETT
LThe language for the ON SCREEN DISPLAY can be set to ENGLISH, SPANISH or FRENCH.
LSetting the ON SCREEN DISPLAY Language.
1Press
MENU
to access MAIN MENU screen.
2Press
CH UP
(
8
)or
DOWN
(
9
)
to move the “ ” mark to “SET UP”.
3Press
VOL (+)
or
(–)
to access SET UP mode, then press
CH UP
(
8
)
or
DOWN
(
9
)
to move the “ ” mark to “LANGUAGE”.
4Press
VOL (+)
or
(–)
to access LANGUAGE change mode.
5Press
CH UP
(
8
)or
DOWN
(
9
)to select “ENGLISH”, “SPANISH
(ESPAÑOL)” or “FRENCH (FRANÇAIS)”.
6Press
MENU
to exit.
SleepTimer
LYou can set the number of minutes for yourTV to automatically turn off.
1Press
MENU
to access MAIN MENU screen.
2Press
VOL (+)
or
(–)
to access TIMER SET mode.
3Press
VOL (+)
or
(–)
to set a sleep time of 30, 60, 90 or 120 minutes.
4Press
MENU
to exit.
Note:
• To turn off the SleepTimer, repeat the above SLEEPTIMER steps and select “– – – REMAIN”during
step 3.
• While SLEEP TIMER is active, the time remaining will be briefly displayed on-screen at regular
intervals or when the remote’s Display key is pressed.
(MAIN MENU screen)
(TIMER SET mode)
(LANGUAGE change mode)
(MAIN MENU screen)
→
→
Language
(SET UP mode)
→
10-11 13N-M100/150[B].p65e 31/07/2000, 11:51 PM10

11
SL EP TIMER
SET UP
E
VIDEO ADJUST
CAPT IONCLOSED CONTROLPARENT
ENERGY SAVE
ICTURE
–+
P27
ICTURE
–+
P27
Selected VOL UP (+) button VOL DOWN (–) button
item
PICTURE To increase contrast To decrease contrast
TINT To make skin tones greenish To make skin tones purplish
COLOR To increase color intensity To decrease color intensity
BRIGHT To increase brightness To decrease brightness
SHARP To increase sharpness To decrease sharpness
FAVORITE To choose a RED, BLUE or STANDARD COLOR TONE.
COLOR
RESET To return all adjustments to factory preset levels.
Description of Adjustment Items
1Press
MENU
to access MAIN MENU screen.
2Press
CH UP
(
8
)or
DOWN
(
9
)
to move the “ ”mark to “VIDEO
ADJUST”.
3Press
VOL (+)
or
(–)
to access PICTURE adjust mode.
4Press
CH UP
(
8
)or
DOWN
(
9
)
to select the desired mode.
(Refer to the diagram below.)
5Press
VOL (+)
or
(–)
to adjust the setting.
6Repeat steps 4to 5to adjust other settings.
7Press
MENU
to exit.
(PICTURE adjust mode)
→
VOL UP (+)
increase contrast
VOL DOWN (–)
decrease contrast
(MAIN MENU screen)
Video Adjust
VOLUME
(+)/(–)
CHANNEL
UP (8)/
DOWN (9)
MENU
PICTURE TINT COLOR
SHARP
FAVORITE COLOR
RESET
: CH DOWN (9): CH UP (8)
BRIGHT
10-11 13N-M100/150[B].p65e 31/07/2000, 11:51 PM11

12
CAPT IONCLOSED
MODE : CAP
DATA :CH 1
TION
CAPT IONCLOSED
MODE : CAP
DATA :CH 1
TION
CAPT IONCLOSED
MODE : CAP
DATA :CH 1
TION
CAPTION
TEXT
OFF
CH 1
CH 2
→
SL EP TIMER
SET UP
E
VIDEO ADJUST
CAPT IONCLOSED CONTROLPARENT
ENERGY SAVE
LHOWTO SET CLOSED CAPTION
• YourTV is equippedwithan internal Closed Captiondecoder.“Closed
Caption”is a system whichallowsyoutoviewconversations,narration,
and sound effects in TV programs and home videos as subscript on
your TV screen as shown on the right.
• Not all the programs and videos will offer closed caption.Please look
for the “ ” symbol to ensure that captions will be shown.
• Closed Caption broadcast can be viewed in two modes: CAPTION
andTEXT.Foreach mode,twochannelsare available,CH1 and CH2:
The [CAPTION] mode subscripts dialogues and commentaries ofTV
dramas and news programs while allowing clear view of the picture.
The [TEXT] mode displays over the picture other various information
(such as TV program schedule, weather forecast, etc.) that is
independent of the TV programs.
1Press
MENU
to access MAIN MENU screen.
2Press
CHUP
(
8
)or
DOWN
(
9
)
tomovethe“ ”markto“CLOSED
CAPTION”.
3Press
VOL (+)
or
(–)
to access CLOSED CAPTION setting mode.
4Press
CH UP
(
8
)or
DOWN
(
9
)
to move the “ ” mark to either
“MODE” or “DATA”.
5Press
VOL (+)
or
(–)
to change the CLOSED CAPTION setting.
6Press
MENU
to exit.
Note:
• If a broadcast has CLOSED CAPTION and the
MUTE
button is pressed, the set enters [CAPTION]
mode automatically. Pressing
MUTE
again will return the set to its previous condition.
• Closed Caption may malfunction (white blocks, strange characters, etc.) if signal conditions are poor
or if there are problems at the broadcast source.This does not necessarily indicate a problem with
your set.
• If any button is pressed to call up the ON SCREEN DISPLAY while viewing a CLOSED CAPTION
broadcast, the closed captions will disappear momentarily.
• When viewing inTEXT mode, if noTEXT broadcast is being received, for some programs the screen
may become dark and blank. Should this occur, set the Closed Caption mode to “OFF”.
(MAIN MENU screen)
(CLOSED CAPTION setting mode)
MODE : DATA :
Closed Caption
VOLUME
(+)/(–)
CHANNEL
UP (8)/
DOWN (9)
MENU
12-16 13N-M100/150[B].p65e 31/07/2000, 11:51 PM12

13
Parent Control (V-CHIP Operation)
LV-CHIP
• This function allows you to restrict TV programs and also allows you to control TV usage based on
FCC data.This function is to prevent your children from watching violence or sexual scenes that may
be harmful.
• Restriction ofTVprogramsincludestwocharacters that containinformation aboutthe program’s MPAA
rating and theTV Parental Guidelines.MPAA is restricted by age.TV Parental Guidelines are restricted
by age and contents.
• Since a TV program may use either the MPAA rating or the TV Guidelines you should adjust both for
complete control.
[1] MPAA RATING
RATING
G GENERAL AUDIENCES.All ages admitted.
PG PARENTAL GUIDANCE SUGGESTED. Some material may not be suitable for
children.
PG-13 PARENTAL STRONGLY CAUTIONED. Some material may be inappropriate
for children under 13.
R RESTRICTED. Under 17 requires accompanying parent or adult guardian.
NC-17 NO ONE 17 AND UNDER ADMITTED.
X X Rating is an older rating that is unified with NC-17 but may be encoded on
older movie’s data.Note:
•MPAA RATING (Example)
Example 1.
“PG-13” in the age based RATING is blocked,
this will automatically block the high ratings “R”,
“NC-17”, “X” also.
age
base
1. User setting 2. Block table
PG
age
base
not to
block
not to
block
not to
block
Select
block
auto-
block
auto-
block
G
G
PG
PG-13
R
NC-17
X
–– – ––
–– – ––
–– – ––
BLOCK
BLOCK
BLOCK
PG-13
R
NC-17
X
1. User setting 2. Block table
PG
age
base
not to
block
not to
block
Select
block
auto-
block
auto-
block
auto-
block
G
G
PG
PG-13
R
NC-17
X
–– – ––
–– – ––
BLOCK
BLOCK
BLOCK
BLOCK
PG-13
R
NC-17
X
Note:
• MPAA RATING is only age based ratings.
[2] TV PARENTAL GUIDELINES
ycontent base x
AGE D L S V FV
(Sexually (Adult (Sexual (Violence) (Fantasy
Suggestive Language) Situation) Violence)
Dialog)
TV-Y (All children) V–––––
TV-Y7 (Direct to Older Children) V––––V
TV-G (General Audience) V–––––
TV-PG (Parental Guidance VV V V V –
Suggested)
TV-14 (Parents Strongly VV V V V –
Cautioned)
TV-MA (Mature Audience Only) V–VVV –
V: Content Rating can be set.
–: Content Rating can not be set (not normally broadcast by TV station).
Example 2.
“R” in the age based RATING is blocked, this will
automaticallyblock the high rating “NC-17”, “X” also.
RATING
E
age
base
D
12-16 13N-M100/150[B].p65e 31/07/2000, 11:51 PM13

14
Parent Control (V-CHIP Operation Continued)
•TV PARENTAL GUIDELINES (Example)
Example 1.1 : Age Based setting
Go through all select ratings and select unblocked for “AGE”.
This will automatically unblock everything.
Example 1.2 : Age Based setting
For “TV-G” select “BLOCK” for “AGE”.This will automatically block the
higher age ratings “TV-PG”, “TV-14” and “TV-MA” as well as “TV-G”.
Furthermore,thecontent ratings “D”, “L”,“S”, “V”,“FV” areautomatically
blocked as well for “TV-PG”, “TV-14” and “TV-MA” as well as “TV-G”.
Example 2.1 : Content Based setting
For “TV-PG”, “TV-14” and “TV-MA” select unblocked for each content
ratings (“D”, “L”, “S”, “V”, “FV”) by leaving “AGE” unblocked for “TV-
PG”, “TV-14” and “TV-MA”. If you choose to unblock for each one in
content base.
Example 2.2 : Content Based setting
Then for “TV-PG” and select “BLOCK” for only “V” (Violence). This will
automatically block the higher ratings “TV-14-V” and “TV-MA-V” (“TV-
14” and “TV-MA” for Violence content only).
Please note that with these settings blocking does NOT occur. If a
programis ratedonly“TV-MA”;it mustbe rated“TV-MA-V”to beblocked.
Example 3 : Reset an Age Based setting
For “TV-14” and select again “BLOCK” for “AGE”.
This will again automatically block the content ratings “D”, “L”, “S”, “V”,
“FV” for “TV-MA” as well as “TV-14”.
Please note that the lower age rating “TV-PG” did not change from its
previous settings.
Note:
• Content ratings can be modified but only in the combinations indicated by an Vin the table left.
• Changing a lower age rating’s content setting to “BLOCK”automatically changes the same higher age
rating’s content setting to “BLOCK” regardless of their previous settings.
• Changingalowerrating’s“AGE”setting to“BLOCK”automatically changes allhigher ratingsto“BLOCK”
regardless of their previous settings.
• Any rating’s “AGE” set to unblocked must have its content settings individually set.
[3] ADDITIONAL MODE
Besides the above “MPAA RATINGS” and “TV PARENTAL GUIDELINES” new ratings system’s data
can be downloaded when they become available. (See page 18.)
TV–Y
TV–Y7
TV–G
TV–PG
TV–14
TV–MA
MENU : RETURN
G
AE
–
–
–
–
D
–
–
–
L
–
–
–
S
–
–
–
V
–
–
–
–
–V:
:
BLOCK
VIE
W
FV
TV–Y
TV–Y7
TV–G
TV–PG
TV–14
TV–MA
MENU : RETURN
G
AE
–
–
–
D
–
–
–
L
–
–
–
S
–
–
–
V
–
–
–
–
–V
VVVV
VVVV
VVV
V
V
V
V:
:
BLOCK
VIE
W
FV
–
TV–Y
TV–Y7
TV–G
TV–PG
TV–14
TV–MA
MENU : RETURN
G
AE
–
–
–
–
D
–
–
–
L
–
–
–
S
–
–
–
V
–
–
–
–
–V:
:
BLOCK
VIE
W
FV
TV–Y
TV–Y7
TV–G
TV–PG
TV–14
TV–MA
MENU : RETURN
G
AE
–
–
–
–
D
–
–
–
L
–
–
–
S
–
–
–
V
–
–
–
–
–V:
:
BLOCK
VIE
W
FV
V
V
V
TV–Y
TV–Y7
TV–G
TV–PG
TV–14
TV–MA
MENU : RETURN
G
AE
–
–
–
–
D
–
–
–
L
–
–
–
S
–
–
–
V
–
–
–
–
–V:
:
BLOCK
VIE
W
FV
V
V
V
V
V
V
VV
V
12-16 13N-M100/150[B].p65e 31/07/2000, 11:51 PM14

15
LHOW TO SET V-CHIP
[1] MPAA RATING
1Press
MENU
to access MAIN MENU screen.
2Press
CHUP (
8
)
or
DOWN (
9
)
tomovethe“ ”markto“PARENT
CONTROL”.
3Press
VOL (+)
or
(–)
to access PARENT CONTROL mode, then
“PARENT CONTROL V-CHIP BLOCK” is displayed.
4Press
VOL (+)
or
(–)
to access V-CHIP select mode, then press
VOL (+)
or
(–)
to select “MPAA RATING”.
5Press
CH UP (
8
)
or
DOWN (
9
)
to move the “ ” mark to "PG",
then press
VOL (+)
or
(–)
to select BLOCK. If you set “PG” to
BLOCK,“PG-13”, “R”,“NC-17” and“X”are automatically blocked.
6Repeat pressing
MENU
to return V-CHIP select mode exit.
Note:
Ex.
• If you set “G” to BLOCK , all RATING are automatically blocked.
• If you set “X” to BLOCK, “G”, “PG”, “PG-13”, “R” and “NC-17” are not blocked.
VOLUME
(+)/(–)
CHANNEL
UP (8)/
DOWN (9)
REMOTE
KEYPAD
SL EP TIMER
SET UP
E
VIDEO ADJUST
CAPT IONCLOSED CONTROLPARENT
ENERGY SAVE
MENU
SL EP TIMER
SET UP
E
VIDEO ADJUST
CAPT IONCLOSED CONTROLPARENT
ENERGY SAVE
IP BLOCK
V–C
H
PARENT CONTROL
(PARENT CONTROL mode)
MP AA
TV GUIDELINES
AD:OFFDO
W
NLO
STATUS :OFF
(V-CHIP select mode)
G
PG
PG–13
R
NC–17
XB:LOCK
B:LOCK
B:LOCK
B:LOCK
B:LOCK
–: ––––
MENU : RETURN
→
→
Parent Control (V-CHIP Operation Continued)
(MAIN MENU screen)
12-16 13N-M100/150[B].p65e 31/07/2000, 11:51 PM15

16
MP AA
TV GUIDELINES
AD:OFFDO
W
NLO
STATUS :OFF
→
→
[2]TV PARENTAL GUIDELINES
1Repeat steps 1to 3of [1] MPAA RATING.
2Press
CH UP (
8
)
or
DOWN (
9
)
to move the “ ” mark to “TV
GUIDELINES”.
3Press
VOL (+)
or
(–)
to access TV GUIDELINES mode.
4To change CONTENT SETTING, press
CH UP (
8
)
or
DOWN (
9
)
to move the “ ” to the desired rating and then press
VOL (+)
or
(–)
to select.
5Press
CH UP (
8
)
or
DOWN (
9
)
to move the “ ” to the desired
content and then press
VOL (+)
or
(–)
to select either“BLOCK”or
unblock (“– – – –”).
6Press
MENU
to return to TV GUIDES mode.
7Repeat steps 4to 5until all ratings and their contents are set.
8When done, press
MENU
to exit.
Parent Control (V-CHIP Operation Continued)
TV–Y
TV–Y7
TV–G
TV–PG
TV–14
TV–MA
MENU : RETURN
G
AE
–
–
–
D
–
–
–
L
–
–
–
S
–
–
–
V
–
–
–
–
–V
VVVV
VVVV
VVV
V
V
V
V
VV
:
:
BLOCK
VIE
W
FV
–
(TV GUIDELINES mode)
A
TV–Y7
DGE
L
S
VV
F:
:
:
:
:BLOCK
BLOCK
:
–––––
–––––
–––––
–––––
MENU : RETURN
TV–Y
TV–Y7
TV–G
TV–PG
TV–14
TV–MA
MENU : RETURN
G
AE
–
–
–
D
–
–
–
L
–
–
–
S
–
–
–
V
–– –
–
–
–V
VVVV
VVVV
VVV
V
V
V
V:
:
BLOCK
VIE
W
FV
(CONTENT RATING mode)
12-16 13N-M100/150[B].p65e 31/07/2000, 11:51 PM16

17
• ACTIVATE ONTOTURN ON V-CHIP BLOCK
1Press
CH UP (
8
)
or
DOWN (
9
)
to move the “ ” mark to
“STATUS”, then press
VOL (+)
or
(–)
to activate ON the V-CHIP
BLOCK.(If STATUS is OFF,V-CHIP BLOCK will not be operated.)
2Press
MENU
, then “INPUT SECRET No.” will be displayed.
3Enter the 4-digit SECRET No. using the
REMOTE KEYPAD
.
4Press
MENU
and SECRET No. is registered.
• To cancel the V-CHIP BLOCK screen whileV-CHIP BLOCK has been activated.
1“V-CHIP HAS BEEN ACTIVATED” will be displayed if you watch
theprogramwithProgramRating dataas sameas youconfigured.
Note:
• “V-CHIP HAS BEEN ACTIVATED” will not be displayed if STATUS is not configured to “ON”.
2Press
MENU
, then “INPUT SECRET No.” will be displayed.
3Enter the 4-digit SECRET No.using the
REMOTE KEYPAD
, then
V-CHIP BLOCKtemporarilywillbecanceled.IfthewrongSECRET
No. is chosen, “SECRET No. IS INCORRECT” will be displayed.
Input the SECRET No. again in this case.
Note:
•If you change Power from OFF to ON, then V-CHIP BLOCK will be activated ON again.
→
MP AA
TV GUIDELINES
AD:OFFDO
W
NLO
STATUS :ON
– – –
–
NI PUT SECRET No .
2 3 4
1
NI PUT SECRET No .
Parent Control (V-CHIP Operation Continued)
AC IVATEDT
V–CH HIP AS BEEN
23
TV–Y7
FV
– – –
–
NI PUT SECRET No .
∗
∗
∗
∗
NI PUT SECRET No .
17-19 13N-M100/150[B].p65e 31/07/2000, 11:51 PM17

18
• To change the V-CHIP BLOCK setting. (Secret No. is registered.)
1Repeat steps 1to 3of [1] MPAA RATING, then “INPUT SECRET
No.” will be displayed.
2Enter the 4-digit SECRET No. using the
REMOTE KEYPAD
and the V-CHIP select mode will be displayed. Repeat
configuration of the V-CHIP BLOCK.
• If you intend to change or forget your Secret No.,clear the original Secret No.and set
up a new one.
1Repeat steps 1to 3of [1] MPAA RATING, or 1to 2of [To cancel
the V-CHIP BLOCK screen while V-CHIP BLOCK has been
activated], then “INPUT SECRET No.” will be displayed.
2Pressandholdboth
VOL (+)
and
CH DOWN (
9
)
ontheTVset
simultaneously until the message “INPUT SECRET No.”
disappears.
3Press
MENU
two times to exit.
[3] ADDITIONAL MODE (DOWNLOAD)
There will be an additional new rating system.In that case, please set up as follows.
Subsequently the new rating system will set up automatically.
1Repeat steps 1to 3of [1] MPAA RATING.
2Press
CH UP (
8
)
or
DOWN (
9
)
to move the “ ” mark to
“DOWNLOAD”.
3Press
VOL (+)
or
(–)
to “DOWNLOAD : ON”.
4Repeat pressing
MENU
to return exit.
(On the Set)
VOL (+)/CHANNEL
DOWN (
99
99
9
) buttons
Parent Control (V-CHIP Operation Continued)
– – –
–
NI PUT SECRET No .
∗
∗
∗
∗
NI PUT SECRET No .
MP AA
TV GUIDELINES
AD:OFF
OFF
DO
W
NLO
STATUS :
MP AA
TV GUIDELINES
AD:ON
OFF
DO
W
NLO
STATUS :
MENU
VOL
+ CH
17-19 13N-M100/150[B].p65e 31/07/2000, 11:51 PM18

19
VOLUME
(+)/(–)
CHANNEL
UP (8)/
DOWN (9)
REMOTE
KEYPAD
MENU
NO
W
DOLADINGN
W
O
V–CH TAADPI
WA I TPLE EAS
(DOWNLOAD screen)
MPAA
TV GUI
Cdn .
DO
W
NL
nEglis Rhatinsg
Cdn . rFenchRatinsg
EDLINES
OAD : ON
STATUS:ON
(After download the rating data)
C
C8+
G
PG
14+
18+
INDIV
B:LOCK
–: ––––
B:LOCK
–: ––––
B:LOCK
–: ––––
IDUAL BL
MENU : RETURN
OCK
(ENGLISH INDIVIDUAL BLOCK mode)
G
8+
13+
16+
18+
INDIV
–: ––––
B:LOCK
–: ––––
B:LOCK
–: ––––
IDUAL BL
MENU : RETURN
OCK
(FRENCH INDIVIDUAL BLOCK mode)
→
Parent Control (V-CHIP Operation Continued)
• DOWNLOADV-CHIP DATA
1If you watch the program with “New Rating System Data”,
DOWNLOAD screen will be displayed.
2DOWNLOADscreenwilldisappear, if DOWNLOAD is finished.
Note:
•DOWNLOADwould not be started, if youdon’t watch the programwith“NewRatingSystem
Data”.
• ADDITIONAL MODE (Example)
1Repeat steps 1to 2of [3] ADDITIONAL MODE.
2Press
CH UP (
8
)
or
DOWN (
9
)
to move the “ ” mark to “Cdn.
English Ratings”, then press
VOL (+)
or
(–)
.
3Youcan select“BLOCK”or“– –– ––”(unblock) fromeach RATING
mode by pressing
CH UP (
8
)
or
DOWN (
9
)
and
VOL (+)
or
(–)
.
4Youcan select“BLOCK”or“– –– ––”(unblock) fromeach RATING
mode by pressing
CH UP (
8
)
or
DOWN (
9
)
and
VOL (+)
or
(–)
if
you select “Cdn. French Ratings” in step 2.
Note:
•In additional mode
Including two types (English mode, French mode), altogether you are able to download 4 kinds
of mode.
17-19 13N-M100/150[B].p65e 31/07/2000, 11:51 PM19

20
Energy Save
LThis feature lets you lower the power consumption of your TV
set which in turn saves you money and minimizes the impact on
the environment. When this feature is turned on, it reduces the
brightness of the TV to a level that consumes approximately 20
percent less energy than when the feature is turned off.
The reduction in brightness will be less noticeable under low
room lighting conditions.
1Press
MENU
to access MAIN MENU screen.
2Press
CHUP
(
8
)or
DOWN
(
9
)
tomove the“ ”mark to“ENERGY
SAVE”.
3Press
VOL (+)
or
(–)
to access ENERGY SAVE select mode.
4Press
VOL (+)
or
(–)
to select “ON”.
5Press
MENU
to exit.
→
SL EP TIMER
SET UP
E
VIDEO ADJUST
CAPT IONCLOSED CONTROLPARENT
ENERGY SAVE
:OFF
EN REGYSAVE
:ON
EN REGYSAVE
VOLUME
(+)/(–)
CHANNEL
UP (8)/
DOWN (9)
MENU
(MAIN MENU screen)
(ENERGY SAVE select mode)
20-22 13N-M100/150[B].p65e 31/07/2000, 11:52 PM20
Other manuals for 13N-M100
1
This manual suits for next models
1
Table of contents
Other Sharp TV manuals

Sharp
Sharp 8C221 User manual

Sharp
Sharp LC-65D93U User manual

Sharp
Sharp Aquas LC-52LE920UN User manual

Sharp
Sharp Aquos LC 32D50U User manual

Sharp
Sharp 50DL1KA Technical manual

Sharp
Sharp 54CS-05S User manual

Sharp
Sharp 32U-S50B User manual

Sharp
Sharp AQUOS LC-40UI7252E User manual

Sharp
Sharp 28JF-76E User manual

Sharp
Sharp CX68LF5 User manual

Sharp
Sharp LC-20S5X User manual

Sharp
Sharp 14D1-S User manual

Sharp
Sharp 29E-S1F User manual

Sharp
Sharp 32UC4 User manual

Sharp
Sharp 36R-S60 User manual

Sharp
Sharp 29MU70 User manual

Sharp
Sharp DV-7035S User manual

Sharp
Sharp SX76NF8 User manual

Sharp
Sharp 21JF2-GA User manual

Sharp
Sharp SV-2588H(BK) User manual