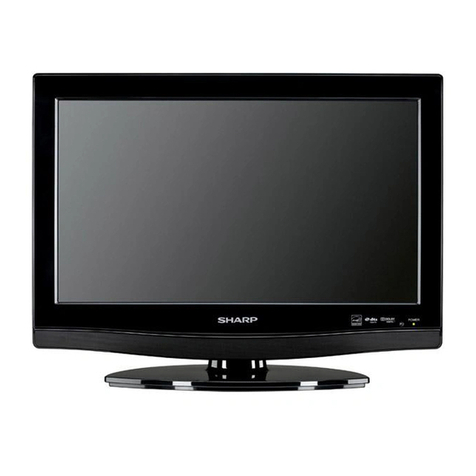
Sharp LC-32LE175H User manual

1
Dear SHARP customer
Contents
Thank you for your purchase of the SHARP LCD colour TV product. To ensure safety and many years of
trouble-free operation of your product, please read the Important Safety Precautions carefully before
using this product.
OPERATION MANUAL
Introduction
Dear SHARP customer ................................................................................................................. 1
Contents......................................................................................................................................... 1
Precautions for daily use.............................................................................................................. 3
Important safety precautions....................................................................................................... 4
Trademarks.................................................................................................................................... 5
Accessories ................................................................................................................................... 5
Preparation
Attaching the stand unit ............................................................................................................... 6
Handling and precautions with the wall-mounted TV ............................................................... 7
Part names..................................................................................................................................... 8
TV (Front/Rear)................................................................................................................. 8
Remote control unit ......................................................................................................... 9
Before turning on the power ...................................................................................................... 10
Connecting external devices ..................................................................................................... 11
Connecting a PC ......................................................................................................................... 12
PC compatibility chart ................................................................................................................ 12
Inserting the batteries ................................................................................................................ 13
Using the remote control unit .................................................................................................... 13
Cautions regarding the remote control unit................................................................... 13
Turning the TV on/off.................................................................................................................. 14
Turning on the power..................................................................................................... 14
Turning off the power..................................................................................................... 14
Initial auto installation................................................................................................................. 14
Watching TV
Channel Setting........................................................................................................................... 15
Auto Tuning ................................................................................................................... 15
DTV Manual Tuning ....................................................................................................... 15
ATV Manual Tuning........................................................................................................ 15
Programme Edit............................................................................................................. 16
Signal Information.......................................................................................................... 16
Picture Setting............................................................................................................................. 17
Picture Mode ................................................................................................................. 17
Color Temperature......................................................................................................... 17
Aspect Ratio .................................................................................................................. 17
Noise Reduction ............................................................................................................ 18
Screen (VGA Mode )..................................................................................................... 18
Sound Setting .............................................................................................................................. 19
Sound Mode .................................................................................................................. 19
Balance.......................................................................................................................... 19
Auto Volume .................................................................................................................. 19
Surround Sound............................................................................................................. 19
SPDIF Output................................................................................................................. 19
Time Setting................................................................................................................................. 20
Clock.............................................................................................................................. 20
Off Time ......................................................................................................................... 20
On Time ......................................................................................................................... 20
Sleep Timer.................................................................................................................... 20
Auto Sleep ..................................................................................................................... 20
ENGLISH
M3H_EN_160126.indd 1 2016/1/27 22:58:37

2
Contents
Watching TV (Continued)
Option Setting.............................................................................................................................. 21
Language /語言............................................................................................................. 21
PVR File System ............................................................................................................ 21
Restore Factory Default................................................................................................. 21
OSD Time Out................................................................................................................ 21
Blue Screen ................................................................................................................... 21
OSD Transparency ........................................................................................................ 21
EPG............................................................................................................................................... 22
The added instruction for R/C buttons ..................................................................................... 22
FREEZE.......................................................................................................................... 22
( Flash Back )............................................................................................................ 22
e( Mute )...................................................................................................................... 23
MPX .............................................................................................................................. 23
SLEEP............................................................................................................................ 23
DISPLAY ........................................................................................................................ 23
CH.LIST ......................................................................................................................... 23
TIMESHIFT..................................................................................................................... 24
RECORDING.................................................................................................................. 24
PVRLIST......................................................................................................................... 24
TEXT .............................................................................................................................. 24
Connecting a USB memory device
Connecting a USB memory device............................................................................................ 25
Playing back files on a USB memory device ............................................................................ 25
List of file formats compatible with USB mode ....................................................................... 25
Buttons for USB media operation ............................................................................................. 26
Other useful features
Using a Smartphone with the TV ............................................................................................... 27
Appendix
Troubleshooting .......................................................................................................................... 28
Dimensional drawings ................................................................................................................ 29
Specifications.............................................................................................................................. 30
M3H_EN_160126.indd 2 2016/1/27 22:58:38

3
Observe the following items
Maintenance of the cabinet
•When cleaning the cabinet, use a soft cloth (made of cotton, floss, etc.) to clean gently.
Do not use a dry or damp rag mixed with chemicals, as this could cause the ingredients of the cabinet body to deteriorate or crack.
• Becarefulnottouseanabrasiveclothforcleaningorcleanwithexcessiveforce,asthiscouldscratchthesurfaceofthecabinet.
• Ifthecabinetisgreatlysoiled,cleanwithasoftcloth(madeofcotton,oss,etc.)soakedwithasmallamountofdilutedneutral
detergent and wrung out, and then clean with a soft dry cloth.
• Becausethecabinetismadeofplastic,solventssuchasbenzene,alcoholorthinnercouldcauseittodeteriorate,ormakeits
coatingcomeoff.Thereforedonotusesuchsolventstocleanthecabinet.
• Becauseplasticizerisincludedintheplastics,deteriorationorthecoatingpeelingoffcouldoccurwhenthecabinetcomesinto
contactwithsomesubstances.Thereforekeepitawayfromvolatilesubstancessuchasinsecticide.Inaddition,donotletitcome
into contact with objects made of rubber, resin, etc. for a long time.
Maintenance of the LCD panel
• BeforecleaningtheLCDpanel,besuretoturnofftheTVsetandunplugthepowercordfromtheoutlet.
• WhencleaningtheLCDpanel,useadryandsoftcloth(madeofcotton,oss,etc.)tocleanthesurfaceoftheLCDpanelgently.For
protectingtheLCDpanel,donotcleanwithadirtycloth,detergent,oradryordampragmixedwithchemicals,asthiscouldcause
peeling of the panel surface.
• Becarefulnottocleanwithanabrasiveclothorwithexcessiveforce,asthiscouldcausethepanelsurfacetobescratched.
• IftheLCDpanelisgreatlysoiled,cleanitgentlywithasoftcloth(madeofcotton,oss,etc.)soakedwithasmallamountofwater(Do
notcleanwithexcessiveforce,soastoavoidthescratchofthepanelsurface).
• IfduststicksonthesurfaceoftheLCDpanel,cleanthepanelwithacommerciallyavailablecleaningbrush(anti-staticbrush).
Precautions for daily use
M3H_EN_160126.indd 3 2016/1/27 22:58:38

•Do not place the product underneath the
air-conditioner or nearby the humidifier,
and the other situation with water. The
water may spill into the product causing
fire or electric shock fault. Please keep
more than 1 m distance with the air
outlet of air conditioner.
more than 1 m
4
Important safety precautions
• Waterandmoisture—Donotusethe
product near water, such as bathtub,
washbasin, kitchen sink, laundry tub,
swimming pool and in a wet basement.
• Donotplacevasesoranyotherwater-lled
containers on this product.
The water may spill onto the product
causing fire or electric shock.
• Stand—Donotplacetheproducton
an unstable cart, stand, tripod or table.
Doing so can cause the product to fall,
resulting in serious personal injuries as
well as damage to the product. Use only
a cart, stand, tripod, bracket or table
recommended by the manufacturer or
sold with the product. When mounting
the product on a wall, be sure to follow
the manufacturer’s instructions. Use only
the mounting hardware recommended
by the manufacturer.
• Whenrelocatingtheproductplacedona
cart,itmustbemovedwithutmostcare.
Suddenstops,excessiveforceanduneven
floor surface can cause the product to fall
from the cart.
• Ventilation—Theventsandotheropenings
inthecabinetaredesignedforventilation.
Donotcoverorblocktheseventsand
openingssinceinsufcientventilation
cancauseoverheatingand/orshorten
the life of the product. Do not place the
product on a bed, sofa, rug or other
similar surface, since they can block
ventilationopenings.Thisproductis
notdesignedforbuilt-ininstallation;do
not place the product in an enclosed
place such as a bookcase or rack,
unlessproperventilationisprovidedorthe
manufacturer’s instructions are followed.
• TheLCDpanelusedinthisproductismade
of glass. Therefore, it can break when the
product is struck forcefully or with a sharp
object.IftheLCDpanelisbroken,be
careful not to be injured by broken glass.
• Heatsources—Keeptheproductaway
from heat sources such as radiators,
heaters,stovesandotherheat-generating
products (including amplifiers)
• Topreventre,neverplaceanytypeof
candle or naked flames on the top or near
theTVset.
• Topreventreorshockhazard,donot
placetheACpowercordundertheTVset
orotherheavyitems.
• Donotplaceheavyobjectsonthis
product or stand on it. Doing so
could cause injury if the product
overturns.Takespecialcarenear
children and pets.
TheLCDpanelisaveryhightechnologyproduct,in which
LC-32LE175H with 2,073,600 pixels.
Duetotheverylargenumberofpixels,occasionallyafew
non-activepixelsmayappearonthescreenasaxed
point of blue, green or red.
This is within product specifications and does not
constitute a fault.
• Donotdisplayastillpictureforalongtime,asthiscouldcause
an afterimage to remain.
• InstalltheproductontheplacewheretheACcordcanbe
unpluggedeasilyfromtheACoutlet.
Precautions when transporting
the TV
• WhentransportingtheTV,nevercarry
it by holding or otherwise putting
pressure onto the display.
BesuretoalwayscarrytheTVbyat
least two people holding it with two
hands—onehandoneachsideof
theTV.
• Incasetheproductisdroppedandthe
cabinet is damaged, be sure to turn off
the power of the product, and unplug
thepowercord.Ifyoucontinuetouse
the product, it may cause fire or electric
shock.
• Donotopentherearcoverofthecabinettoreconstructthe
circuits.Thereexistshighvoltagewithinthecabinetanditmay
causeelectricshockandinjury.Ifmaintenanceisrequired,
contact your dealer.
• Unplugthepowercordbeforeyoumove
theTVset.Ifnotunpluggedbeforehand,
the power cord may become damaged and
cause electric shock.
NOTE
• Theabovearepicturesforreferenceonly;theactualitemmightbe
different.
• Cleaning—UnplugtheACcordfrom
theACoutletbeforecleaningthe
product. Use a damp cloth to clean the
product. Do not use alcohol cleaners,
spray cleaners or chemical cloth
when cleaning because these types of
materials may damage the product.
M3H_EN_160126.indd 4 2016/1/27 22:58:40

Accessories
5
Makesurethefollowingaccessoriesareprovidedwiththeproduct.
Remote control unit
“AAA”sizebattery
(g2)
Used with batteries inserted.
Page13 Page13
Standunit Operation manual
Page6
Supplied accessories
Screws(g4)
Stand
Trademarks
• The terms HDMI and HDMI High-Definition Multimedia Interface, and the HDMI Logo are trademarks or
registered trademarks of HDMI Licensing LLC in the United States and other countries.
• MHL and the MHL logo are a trademark, registered trademark or service mark of MHL, LLC in the United
States and/or other countries.
• MPEG Layer-3 audio coding technology licensed from Fraunhofer IIS and Thomson.
• Manufactured under license from Dolby Laboratories.
Dolby and the double-D symbol are trademarks of Dolby Laboratories.
• Theillustrationsandon-screendisplaysinthisoperationmanualareforexplanationpurposesandmayvaryslightlyfromthe
actual operations.
M3H_EN_160126.indd 5 2016/1/27 22:58:40

6
Preparation
•Wheninstallingthestand,youneedtoputyourTVonaatsurface.Beforethat,putasoft cushion on the surface.
•Beforeattaching(ordetaching)thestand,unplugtheACpowercordfromtheACpoweroutlet.
•
Beforeperformingwork,spreadcushioningoverthesurfaceonwhichyouwillbelayingtheTV.Thiswillpreventitfrombeingdamaged.
CAUTION
• Attach the stand in the correct direction.
•
Be sure to follow the instructions. Incorrect installation of the stand may result in the TV falling over.
2
Attaching the stand unit
NOTE
•Todetachthestandunit,performthestepsinreverseorder.
•Theangleofthestandisnotadjustable.
•Ascrewdriverisnotsuppliedwiththisproduct.
•Duringinstallation,pleasebecarefultoavoidgettingyour
handtrappedbetweentheTVbottomandthefloor.
1
Conrmthattherearescrewswiththestandunit.
( Four screws)
(Willbeusedinstep2)
1
Insert the base into the openings on the bottom of the TV(while holding the base to avoid it from falling
over).
2 Insert the four screws into the four holes on the bottom of the TV, and tighten them.
2
1
Softcushion
Screwdriver
Screws
M3H_EN_160126.indd 6 2016/1/27 22:58:42

7
Preparation
Handling and precautions with the wall-mounted TV
• YoucanmounttheTVonthewallusingtheoptionalbracket.
• Fordetails,refertotheinstructionssuppliedwiththeoptionalbracket.
CAUTION
• This TV should be mounted on a wall only with a wall mount bracket recommended by SHARP. The use of other wall
mount brackets may result in an unstable installation and may cause serious injuries.
• Installing the TV requires special skills that should only be performed by qualified service personnel. Customers
should not attempt to do the work themselves. SHARP bears no responsibility for improper mounting or mounting
that results in accident or injury.
Using a SHARP recommended bracket to mount the TV
• YoucanaskaqualiedserviceprofessionalaboutusingaSHARPrecommendedbrackettomounttheTVtothewall.
• Carefullyreadtheinstructionsthatcomewiththebracketbeforebeginningwork.
NOTE
• IfyouwanttomounttheTVonthewall,usethescrewsprovidedwiththewall-mountbrackettoafxthebrackettotherearof
theTV.
M3H_EN_160126.indd 7 2016/1/27 22:58:42

8
Preparation
Part names
TV (Front/Rear)
POWER indicator
Remote control sensor
HDMI1
HDMI3
Y Pb Pr
COMPONENT IN
USB1 ANT PC AUDIO IN
HDMI2(MHL)
(DC5V 900mA)
YPbPr AUDIO IN
AV1 IN AV2 IN
COAXIAL
AUDIO OUT
USB2
USB2terminal
USB1
terminal
AV2inputterminal
HDMI3terminal
Headphone
AV1inputterminal*1
AUDIOOUTterminal
(COAXIAL)
HDMI1
terminal
HDMI2/MHL
terminal*2PCIN
terminal
COMPONENTIN
terminal*1ATV/DTV
terminal
AUDIOINjack
(Ø3.5mm)
VOL k/l(Volumeup/down)
buttons
INPUT button
MENU button
POWER (On/Off) button
* 1ThecomponentterminalandAV1terminalsharethesameAudioterminal.
* 2MobileHigh-DenitionLink(MHL)canalsobeused.(seepage27.)
CH r(Channelup)/
CHs(Channeldown)buttons
M3H_EN_160126.indd 8 2016/1/27 22:58:43

9
Preparation
Remote control unit
8 MENU
Display the menu screen.
9 PMODE
Selectapicturemode
.(Seepage17.)
10 VOLk/l
Setthevolume.
11 DTV (Digital TV)/ATV (Analogue TV)
Press to switch between digitalTV mode and analogueTV
mode.
12 USB
DirectlyselecttheUSBinput.
13 FREEZE
Freezeamotionpictureonthescreen.(Seepage22.)
14 PVRLIST
DTVonly:Todisplaytherecordedprogrammelist.
(Seepage24.)
15 REC
DTVonly:Torecordtheprogrammeyoudesired.
(Seepage24.)
16 TEXT
ForMHEG5applicationwhenwatchingavailabledigital
channels. (Seepage24.)
17 Mute
Mutethesound.(Seepage23.)
18 Flash Back
Toreturntothepreviousviewingchannel.(Seepage22.)
19 MPX
To selectthesoundmultiplexmode.(Seepage23.)
20 DISPLAY
Display the channel or input information.(Seepage23.)
21 EXIT
TurnofftheOn-ScreenDisplay.
22 SMODE
Selectasoundmode.
(Seepage19.)
23 SLEEP
Setthesleeptimer.(Seepage23.)
24 CH+/-
TVinputmode:Selectthechannel.
25 FAVORITE
Displaytheyourfavoritechannellist.(Seepage16.)
26 CH.LIST
DisplaythechannellistofDTVandATV.(Seepage23.)
27 SUBTITLE
DTVonly:ToDisplaysubtitlelanguageselectionmenu.
28 EPG
DTVonly:TodisplayEPG(ElectronicProgrammeGuide)
screen.(Seepage22.)
29
UsedfortheUSBMediaPlayer.
30 Colour (Red/Green/Yellow/Blue)
Followtheonscreeninstructionstousethecolourbutton.
1 POWER (Standby/On)
Toswitchthepoweronandoff.(Seepage14.)
2 0
-9
Setthechannel.
3 TIMESHIFT
DTVolny:PressbuttontostartTimeshift.(Seepage24.)
4 PC
DirectlyselectthePCinput.
5 INPUT
Selectaninputsource
.
6 WIDE
Changethewideimagemode.(Seepage17.)
7 a/b/c/d(Cursor)
Selectadesireditemonthesettingscreen.
OK
Executeacommand.
POWERMUTE
OK
EXIT
VOL
CH
DTV/ATV
FREEZE
TEXT
SUBTITLE
EPG
PC WIDEMPX
INPUT DISPLAY
MENU
USBCH.LIST
FAVORITE
TIMESHIFT
PMODE
SMODE
SLEEP
REC
PVRLIST
1
2
3
4
5
6
7
8
10
11
12
13
14
15
16
17
18
19
20
21
22
23
24
25
26
27
28
29
30
9
M3H_EN_160126.indd 9 2016/1/27 22:58:43

Preparation
10
ANT
1
Before turning on the power
Notes on installing the TV
• AvoiddirectsunlightandplacetheTVinawell-ventilatedlocation.
• PlacetheTVinalevellocation.
• DonotturnonthepoweroftheTVbeforeconnectingtheACcord.
• IfthereareanyprotectiveplasticsheetsontheTVcabinet,pleasetakethemoffbeforeconnection.
CAUTION
• To prevent risk of electric shock, do not touch un-insulated parts of any cables with the AC cord connected.
Plug the AC cord into the AC outlet.
Bundling the cables
Asthepictureillustrated,insertthecableclipintotheholeontheTV,andputthecableintothecableclip
for banding.
• PlacetheTVclosetotheACoutlet,andkeepthepowerplugwithinreach.
• DisconnecttheACcordfromtheACoutletiftheTVwillnotbeusedforalongperiodoftime.
TV (rear view)
Connecting the antenna cable
To enjoy a clearer picture, use an outdoor antenna. The following is a brief explanation of the types of
connections that are used for coaxial cable.
Standard
DIN45325plug
(IEC169-2)
75-ohmcoaxial
cable (round cable)
Room antenna terminal
(75-ohmtype)
Antenna cable
(commerciallyavailable)
Connecting external devices
Seepage11forconnectingexternalequipment,suchasaVCRandDVDplayer.
2
3
4
To antenna
terminal
ACcord
ACoutlet
1 FixACcordandotherwireswithawireholder.
2 Pull the band through the hole to adjust the degree
of tightness.
Ifthebandistoolong,
pull it through the other hole.
To loosen the wire holder,
pull the button.
M3H_EN_160126.indd 10 2016/1/27 22:58:45

11
YPbPr AUDIO IN
AV1 IN
AV2 IN
R– AUDIO – L
Y Pb Pr
COMPONENT IN
YPbPr AUDIO IN
AV1 IN
Preparation
CAUTION
• Toprotectallequipment,alwaysturnofftheTVbeforeconnectingtoaVCR, game console, camcorder,DVDplayer,Digital
TVSetTopBox(STB),PCorotherexternalequipment.
• Refertotherelevantoperationmanual(VCR,DVDplayer,etc.)carefullybeforemakingconnections.
Connecting external devices
YoucanconnectmanytypesofexternalequipmenttoyourTV,likeaVCR,gameconsole,camcorder,DVD
player,DigitalTVSetTopBox(STB)andPC.Toviewexternalsourceimages,selecttheinputsourcefrombon
the remote control unit or INPUTontheTV.
When using component cable* (commercially available)
When using composite cable* (commercially available)
Digital TV STB/VCR/Game
Console/Camcorder/DVD Player
Digital TV STB/VCR/Game
Console/Camcorder/DVD Player
OR
When using HDMI cable (commercially available)
Digital TV STB/VCR/Game
console/Camcorder/DVD
Player/PC
HDMI3
HDMI1 HDMI2(MHL)
(DC5V 900mA)
Audio-L(White)
Audio-L(White)
Audio-R(Red)
Audio-R(Red)
Y(Green)
PB(Blue) PR(Red)
Video(Yellow)
* ThecomponentterminalandAV1terminalsharethesameAudioterminal.
NOTE
•WhenusingaTVset-topboxtowatchTVprograms.usetheset-topboxremotecontroltoswitchchannels.
NOTE
•Inserttheterminalsbycolour.
M3H_EN_160126.indd 11 2016/1/27 22:58:47

12
Preparation
Connecting a PC
UsethePCterminalstoconnectaPC.
PC compatibility chart
When using VGA cable
Signal names for 15-pin mini D-sub connector
PC OUT
AUDIO
(L/R)
PC
PC AUDIO IN
VGA
1
6789
10
1112131415
2345
Pin No. Signal name Pin No. Signal name Pin No. Signal name
1R6GND(Ground) Notconnected
2G7GND(Ground) SDA
3B8GND(Ground) HD
4Notconnected 9+5V VD
5CSYNC 0GND(Ground) SCL
• MacintoshadaptormayberequiredforuseforsomeMacintoshcomputers.
• ThisTVhasonlylimitedPCcompatibility,correctoperationcanonlybeguaranteedifthevideocardconformsexactlytothe
VESA60Hzstandard.Anyvariationsfromthisstandardwillresultinpicturedistortions.
NOTE
NOTE
Resolution
Horizontal Frequency Vertical Frequency
Analogue (D-Sub) Digital (HDMI) VESA Standard
VGA 640x480 31.469kHz 60Hz 333
SVGA 800x600 37.879kHz 60Hz 333
XGA 1024x768 48.363kHz 60Hz 333
WXGA 1360x768 47.720kHz 60Hz 333
SXGA 1280x1024 63.981kHz 60Hz 333
SXGA+ 1440x900 55.935kHz 60Hz 333
UXGA 1600x1200 75.0kHz 60Hz 333
1080p 1920x1080 67.5kHz 60Hz 3 3 -
VGA, SVGA, XGA, WXGA, SXGA, SXGA+ and UXGA are registered trademarks of International Business Machines Corporation.
M3H_EN_160126.indd 12 2016/1/27 22:58:48

13
Preparation
CAUTION
Improperuseofbatteriescanresultinchemicalleakageorexplosion.Besuretofollowtheinstructionsbelow.
• Donotmixbatteriesofdifferenttypes.Differenttypesofbatterieshavedifferentcharacteristics.
• Donotmixoldandnewbatteries.Mixingoldandnewbatteriescanshortenthelifeofnewbatteriesorcausechemical
leakage in old batteries.
• Removebatteriesassoonastheyhavewornout.Chemicalsthatleakfrombatteriescancausearash.Ifyoundany
chemical leakage, wipe thoroughly with a cloth.
• Thebatteriessuppliedwiththisproductmayhaveashorterlifeexpectancyduetostorageconditions.
• Ifyouwillnotbeusingtheremotecontrolunitforanextendedperiodoftime,removethebatteriesfromit.
• Batteriesshallnotbeexposedtoexcessiveheatsuchassunshine,reorthelike.
Remote control sensor
1 Openthebatterycover.
• Placebatterieswiththeirterminals
corresponding to the (e) and (f)
indications in the battery compartment.
2Insertthetwosupplied“AAA”size
batteries.
3Closethebatterycover.
Use the remote control unit by pointing it towards the
remote sensor window.
Objects between the remote control unit and sensor
windowmaypreventproperoperation.
Cautions regarding the remote control unit
• Donotsubjecttheremotecontrolunittoshock.
Inaddition,donotsoaktheremotecontrolunitwithliquidsorplaceitin
an area with high humidity.
• Donotinstallorplacetheremotecontrolunitunderdirectsunlight.
The heat may cause deformation of the unit.
• The remote control unit may not work properly if the remote sensor
window of the TV is under direct sunlight or strong lighting. In such
cases, change the angle of the lighting or TV, or operate the remote
control unit closer to the remote sensor window.
Inserting the batteries
BeforeusingtheTVforthersttime,inserttwo“AAA”sizebatteries(supplied).Whenthebatteriesbecome
depletedandtheremotecontrolfailstooperate,replacethebatterieswithnew“AAA”sizebatteries.
Using the remote control unit
POWERMUTE
OK
EXIT
VOL
CH
DTV/ATV
FREEZE
TEXT
SUBTITLE
EPG
PC WIDE MPX
INPUT DISPLAY
MENU
USBCH.LIST
FAVORITE
TIMESHIFT
PMODE
SMODE
SLEEP
REC
PVRLIST
5m
M3H_EN_160126.indd 13 2016/1/27 22:58:49

14
Preparation
Turning the TV on/off
Press POWERontheTV.
• Theinitialautoinstallationwizardappears.
1
Initial auto installation
WhentheTVpowersonforthersttimeafter
purchase,theinitialautoinstallationwizardappears.
Followthemenusandmakethenecessarysettings
one after another.
Confirm the following before turning on the
power
• Istheantennacableconnected?
• IstheACcordpluggedin?
Press c/dto select the desired language.
2
Press a/bto select “Auto Tuning”, and then
press d.TheTVsearchesfor,sortsandstores
allthereceivableTVstationsaccordingtotheir
settings and the connected antenna.
3
• To abort the initial auto installation in progress,
press EXIT.
NOTE
• Ifyouselectaborttheinitialautotuning,theinitialautoinstallation
wizarddoesnotappear.Youcanexecutetheautotuningagain
from the “ChannelSetting”menu.(Seepage15.)
NOTE
• IfyouarenotgoingtousethisTVforalongperiodoftime,besure
toremovetheACcordfromtheACoutlet.
• AsmallamountofelectricpowerisstillconsumedeventheTV
is in standby mode or switch off by pressing POWERontheTV.
• IfTVlosespowerinspecialcircumstancessuchaspoweroutage
orgriductuationsetc.),TVmaynotworkwellwhenTVisswitched
onagain.PleasetrytopowerofftheTV(bythePOWER key in
theTV'sboby)orunplugandreplugtheACcordtorestartthe
TV.
• ItisanormalphenomenonwhentheTVtemperaturerisesin
theprocessofwatchingTV.
• Pleasedonotcutthepoweroffcasuallyintheprocessofswitching
onorswitchingofftheTV,runningupdating,otherwiseTV
system could not work rightly.
Press POWERontheTVafterinsertingthepowerplug.
• Thepowerindicatorwillturnblue,TVisswitched
on(afterseveralseconds,animageappearswith
sound).
• YoucanswitchtheTVtostandbybypressing
POWER on the remote control, the power indicator
turns red.
• Pleasereferpage8.
IftheTVis switched on, press POWER on the remote
control.
• TheTVbeswitchedtostandby,theimagewill
disappear on the screen.
• SwitchontheTVafterpressPOWER on the remote
control again, the power indicator turns blue.
Turning on the power
Turning off the power
Power indicator
light(Blue) Power on.
light (Red) TVisstandby.
M3H_EN_160126.indd 14 2016/1/27 22:58:49

15
NOTE
• Bad,NormalandGoodmeanssignalintensity.
Channel Setting
DTV Manual Tuning
Auto Tuning
YoucansetsomeDTVchannelitemsmanually.
Press MENUandtheMENUscreendisplays.
1
Press c/dto select the desired menu item,
and then press OK.
4
Press a/btoselect“DTVManualTuning”,
and then press OK.
2Press c/dtoselect“CHANNEL”.
Press MENUandtheMENUscreendisplays.
1
TheTVsearchesfor,sortsandstoresallthe
receivableTVstationsaccordingtotheirsettingsand
the connected antenna.
• Toaborttheinitialautoinstallationinprogress,
press EXIT.
4
Press a/bto select “Auto Tuning”, and then
press OK.
3
3
2Press c/dtoselect“CHANNEL”.
Youcanrunautoinstallationagain,evenaftersetting
up the preset channels.
YoucansetyourTVasyourdesiredbypressing MENU. ATV Manual Tuning
YoucansetsomeATVchannelitemsmanually.
Press MENUandtheMENUscreendisplays.
1
Press a/bto select the desired menu item,
and then press OK.
4
Press a/btoselect“ATVManualTuning”,
and then press OK.
3
2Press c/dtoselect“CHANNEL”.
CHANNEL
Auto Tuning
DTV Manual Tuning
ATV Manual Tuning
Programme Edit
Signal Information
Watching TV
Press a/bto select your desired item, and then press
c/dto adjust the settings.
Item Description
Storage to
[1~100]
Saveprogrammetoyourdesired
channel number. Press Rtosave.
System Selecttheoptimumsoundsystem
(Broadcastingsystem)toreceive.
(B/G,D/K,I,M)
Press Rtosave.
Current CH Selectthechannelyouwanttoedit.
•Selectedchannelwillbeautomatically
reflected in the background.
Search Startsearchingfromcurrentchannel.
•Insteadofpressingc/dto adjust
thefrequency,youcansetbydirectly
enteringthefrequencynumberofthe
channel with 0—9, and then press
OK.
Press Rtosave.
Fine-tune Tunethefrequencyofthestoredchannel
to your desired position.
•Adjustwhilecheckingthebackground
picture as a reference.
Press Rtosave.
NOTE
• Thefrequencyshownbelowisthereal-timefrequencyof
the displayed channel.
M3H_EN_160126.indd 15 2016/1/27 22:58:49

16
Programme Edit Signal Information
Press a/bto select the desire programme.
4
Usethismenutodelete,rename,move,skiporassign
anyprogramsasyourfavoritechannels.
TodisplaythedetailinformationofprogrammeinDTV.
Press MENUandtheMENUscreendisplays.
11
Press a/bto select “Programme Edit”, and
then press OK.
Press a/btoselect“SignalInformation”,and
then press OK to select the information of
programme.
33
22
Press c/dtoselect“CHANNEL”.
wDelete
Channelscanbedeletedindividually.
Press R(Red) to erase the selected channel.
wRename
wSkip
Channelnames can be renamed freely.
Press G(Green) to select the channel you want to
rename.
Press c/dto select the letter, and press a/b to
change the letter.
Channelswith“Skip”setto“On”arepassedoverwhen
using CH+/-(on remote) or CHr/s(onTV)evenif
selectedwhilewatchingtheimagefromtheTV.
Press B(Blue) to skip the selected channel, will be
showed on the right side of the program. Press B(Blue)
again to cancel the skip, will be disappeared.
wMove
wFavorite
Changethepositionofchannel.
Press Y(Yellow) to select the channel you want to
move.
Press a/btomoveittothedesiredposition,and
then press Y(Yellow) again.
Addthechannelintoyourfavoritechannellist.
Press a/bto select the channel you want to add, then
press FAVORITE toadditintofavoritechannellist,
will be showed on the right side of the program. Press
FAVORITE again to cancel, will be disappeared.
NOTE
• YoucanrenamethechannelinATVonly.
Watching TV
M3H_EN_160126.indd 16 2016/1/27 22:58:49

17
Watching TV
Picture Setting
Picture Mode
The “Picture Mode” function enables you to select
appropriatesettingsforaudioandvideotoaccountfor
thesystemenvironmentwhichcanvaryduetofactors
like room brightness, type of programme watched or
thetypeofimageinputfromexternalequipment.
Press MENUandtheMENUscreendisplays.
1
Press a/bto select “Picture Mode”, and then
press OK.
Or you can press the PMODEkeyoftheR/C.
3
2Press c/dto select “PICTURE” .
Selected item Description
Standard Forahighlydenedimageinanormally
bright room.
Mild Suitablefordarkerenvironments.The
contrastoftheTVdisplaywillbeadjusted
tolowerlevelforbetterview.
User AllowstheusertoadjustContrast,
Brightness,Color,SharpnessandTint
levelsindependently.
Dynamic Foraclear-cutimageemphasisinghigh
contrastforsportsviewing.
NOTE
• Youcanselectadifferent“PictureMode”itemforeach
inputmode.(Forexample,select“Standard”forATVinput
and “Dynamic”forVIDEOinput.)
Press MENUandtheMENUscreendisplays.
1
Press c/dto select “PICTURE”.
Press c/dto select the desired setting. There
are4colortemperaturemodes:Cool,Medium,
Warm and User.
4
Color Temperature
You can adjust the color temperature to your preference.
2
Press a/btoselect“ColorTemperaure”,and
then press OK.
3
PICTURE
Picture Mode Standard
Color Temperature
Aspect Ratio
Noise Reduction
Screen
Aspect Ratio
Youcanselectdifferentpicturesizesthataccountfor
the kind of each picture.
Press MENUandtheMENUscreendisplays.
1
Press c/dto select “PICTURE”.
2
Press a/bto select “Aspect Ratio”, and then
press OK.
3
4Press a/bwhile the “Aspect Ratio” menu
displays on the screen.
• Asyoutoggledowntheoptions,eachmodeis
immediatelyreectedontheTV.
Selected item Description
Auto Adjust the ratio of image automatically.
Full For16:9squeezepictures.
4:3 For4:3standardpictures.Asidebarappears
on each side.
Just Scan DisplaywiththeHigh-Denitionimageadjusted
optimally.Noisemayappearontheedgeofthe
screen with some programmes.
4:3
Full
NOTE
• Somepicturesizesmaynotbedisplayabledependingon
the input signal.
M3H_EN_160126.indd 17 2016/1/27 22:58:50

18
Watching TV
Noise Reduction
Reducenoiseonscreenandproducesaclearervideo
image.
Screen ( VGA Mode )
Thescreenoptionisonlyavailablewhentheinput
sourceisPCviaVGAandyourTVisreceivinga
computersignal.SelectAutoAdjustforadjusting
thesettingsautomatically,orselectHorizontal
Pos.,VerticalPos.,SizeorPhaseandadjustyour
preference.
Press MENUandtheMENUscreendisplays.
1
1
Press c/dto select “PICTURE”.
Press a/btoselect“Off”,“Low”,“Middle”or
“High”.
Press a/b, c/d or OK to select and adjust
thehorizontalposition,verticalposition,size
and phase here.
4
4
2
2
Press a/btoselect“NoiseReduction”,and
then press OK.
Press a/btoselect“Screen”,andthenpress
OK.
3
3
NOTE
• ScreenonlyavailableinPCmodeviaVGA.
M3H_EN_160126.indd 18 2016/1/27 22:58:50

19
Watching TV
Sound Setting
Sound Mode
You can select sound mode.
Balance
Adjust the balance between left and right speakers to
adapt to your listening position.
Press MENUandtheMENUscreendisplays.
1
1
Press c/dto select “SOUND”.
Press c/dtoselect“SOUND”.
2
2
Press a/btoselect“Balance”,andthen
press OK.
Press a/btoselect“SoundMode”,andthen
press OK.
Or you can press the SMODEkeyoftheR/C.
Press c/dto adjust the balance between left
and right speakers.
3
3
4
SPDIF Output
The SPDIFoutputfunctionallowsusertoselectthe
digital audio output mode.
Press MENUandtheMENUscreendisplays.
1
Press c/dtoselect“SOUND”.
Press a/btoselect“PCM”,“Auto”or“Off”.
4
2
Press a/btoselect“SPDIFOutput”,and
then press OK.
Surround Sound
The surround sound function produces a surround
effect from the speakers.
Press MENUandtheMENUscreendisplays.
1
Press c/dtoselect“SOUND”.
2
Press a/btoselect“SurroundSound”,and
then press OK to select “Off”or“Surround”.
3
3
SOUND
Sound Mode Standard
Balance
Auto Volume
Surround Sound
SPDIF Output
Auto Volume
Press MENUandtheMENUscreendisplays.
1
Press a/bto select “Auto Volume”, and then
press OK to select “On” or “Off”.
3
Press c/dtoselect“SOUND”.
2
Differentsoundsourcessometimesdonothavethe
samevolumelevel,suchasaprogrammeandits
commercialbreaks.Theautomaticvolumecontrol
(Autovolume)reducesthisproblembyequalizing
levels.
Selected item Description
Standard Balancestrebleandbass.Thissettingis
goodforwatchingstandardTVbroadcasts.
Music Preservestheoriginalsound.Thissetting
is good for listening to music.
Movie Enhancestrebleandbassforarich
sound experience. This setting is good for
watchingDVDs,Blu-raydiscs,andHDTV.
Sports This setting is good for watching sports
programme.
User Allows the user manually adjust sound
settings.
M3H_EN_160126.indd 19 2016/1/27 22:58:50

20
Watching TV
Time Setting
TIME
Clock
Off Time
On Time
Sleep Timer
Auto Sleep
Clock
You can set the current clock.
Allowstosetthetimetopower-offtheTVautomatically.
AllowstosetthetimetoturnontheTVautomatically.
Autopower-offatadesignatedtime.Thisfunctionis
convenientlyusedwhen,forinstance,goingtobed
whilewatchingTV.
Allows to turn on or turn off the auto sleep. If"Auto
Sleep"issettoon,theTVwillbeautomatically
poweredoffifthereis nosignalwithin5minutes.
IncaseofUSBmode,theTVwillbeautomatically
poweredoffifthereisnosignalwithin30minutes.
Press MENUandtheMENUscreendisplays.
1
1
1
1
1
Press a/btoselect“Clock”,andthenpress
OK.
Press a/bto select “Off Time”, and then
press OK.
Press a/bto select “On Time”, and then
press OK.
Press a/btoselect“SleepTimer”, and then
press OK.
Press a/btoselect“AutoSleep”,andthen
press OK to select the “Off” or “On”.
3
3
3
3
3
Press a/band c/dto set the current clock.
Press a/band c/dto set the off time.
Press a/band c/dto set the on time.
Press a/bto select the sleep time.
4
4
4
4
Press c/dto select “TIME”.
2
2
2
2
2
Off Time
On Time
Sleep Timer
Auto Sleep
NOTE
• TheclocktimewillbesetautomaticallyaftertheDTVChannelsare
tuned.
M3H_EN_160126.indd 20 2016/1/27 22:58:50
Table of contents
Other Sharp TV manuals

Sharp
Sharp 32C231 User manual

Sharp
Sharp 20AG1-F User manual

Sharp
Sharp 29L-FG1BV User manual

Sharp
Sharp 55BJ4K Technical manual

Sharp
Sharp AQUOS LC-32LE700UN User manual

Sharp
Sharp LC-22CFE4000E User manual

Sharp
Sharp 21HT-15C User manual

Sharp
Sharp 21FL91 User manual

Sharp
Sharp LC-24CHG6001KF Technical manual

Sharp
Sharp 55BJ2K User manual

Sharp
Sharp 27SC260 User manual

Sharp
Sharp 28LW-92E User manual

Sharp
Sharp LC-32CHE5100E User manual

Sharp
Sharp 26SL72M User manual

Sharp
Sharp 21GT-22 User manual

Sharp
Sharp 27SF560 User manual

Sharp
Sharp Aquos LC 32GD6U User manual

Sharp
Sharp LC-45GD6U - AQUOS - 45" LCD TV User manual

Sharp
Sharp LC-32FI5342KF User manual

Sharp
Sharp 27U-S650 User manual