5
LED TV
Important Safety
Instructions
1Read these instructions.
2Keep these instructions.
3Heed all warnings.
4Follow all instructions.
5Do not use this apparatus near water.
6Clean only with dry cloth.
7Do not block any ventilation openings. Install in accordance
with the manufacturer's instructions.
8Do not install near any heat sources such as radiators, heat
registers, stoves, or other apparatus (including amplifiers)
that produce heat.
9Do not defeat the safety purpose of the polarized or
grounding-type plug. A polarized plug has two blades with
one wider than the other. A grounding type plug has two
blades and a third grounding prong. The wide blade or the
third prong are provided for your safety. If the provided
plug does not fit into your outlet, consult an electrician for
replacement of the obsolete outlet.
10 Protect the power cord from being walked on or pinched
particularly at plugs, convenience receptacles, and the
point where they exit from the apparatus.
11 Only use attachments/accessories specified by the
manufacturer.
12 Use only with the cart, stand, tripod, bracket,
or table specified by the manufacturer, or
sold with the apparatus. When a cart is used,
use caution when moving the cart/apparatus
combination to avoid injury from tip-over.
13 Unplug this apparatus during lightning storms or when
unused for long periods of time.
14 Refer all servicing to qualified service personnel. Servicing
is required when the apparatus has been damaged in any
way, such as power-supply cord or plug is damaged, liquid
has been spilled or objects have fallen into the apparatus,
the apparatus has been exposed to rain or moisture, does
not operate normally, or has been dropped.
15 The wall plug is the disconnecting device. The plug must
remain readily operable.
16 Remote control batteries should not be exposed to
excessive heat such as sunshine, fire, or the like.
17 The apparatus should not be exposed to dripping or
splashing, and no objects filled with liquids, such as vases,
should be placed on the apparatus.
18 Your TV has four VESA mounting holes on the back. If you
attach a wall-mount bracket or TV stand to the back of your
TV, the bracket or stand must be securely attached
using all four holes. If you do not use all four mounting
holes, your TV may fall and cause property damage or
personal injury. See the documentation that came with
your wall mount or TV stand for complete mounting
instructions.
WARNING
Electric shock hazard
To reduce the risk of fire or electric shock, do not remove any
cover or expose the device to rain or moisture. No
user-serviceable parts are inside. Refer servicing to qualified
service technicians.
Lightning
For added protection for your device receiver during a
lightning storm, or when it is left unattended and unused for
long periods of time, unplug it from the power outlet and
disconnect any antenna or cable system. This helps prevent
property damage and personal injury from lightning and
power line surges.
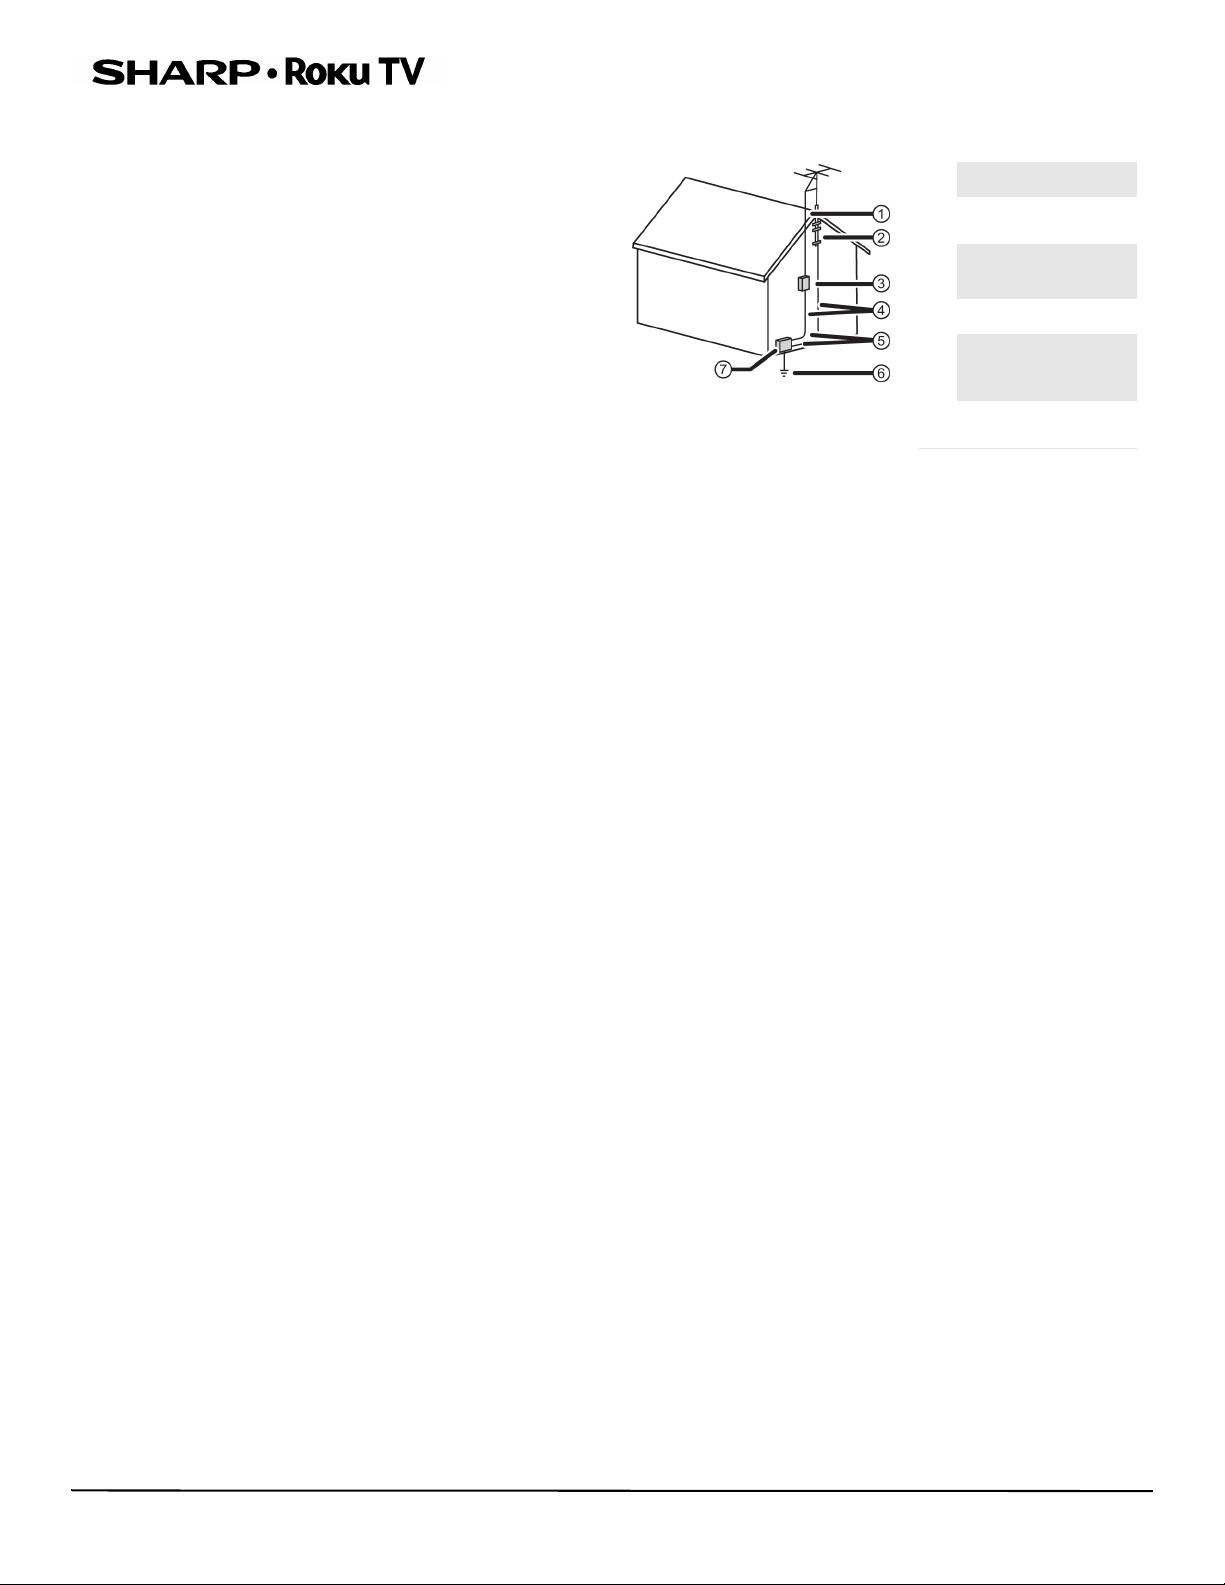
Power lines
An outside antenna system should not be located in the
vicinity of overhead power lines or other electric light or power
circuits, or where it can fall into such power lines or circuits.
When installing an outside antenna system, take extreme care
to keep from touching such power lines or circuits as contact
with them might be fatal.
Handling the LCD panel
• Your TV’s screen is made of glass. Do not drop your TV or
hit, jolt, or press hard against the LCD panel. If the screen
breaks, be careful of broken glass.
• If the LCD panel is broken, make absolutely sure that you do
not touch the liquid in the panel. This may cause skin
inflammation.
• If the liquid gets in your mouth, immediately gargle, rinse,
and consult with your doctor. Also, if the liquid gets in your
eyes or touches your skin, consult with your doctor after
rinsing for at least 15 minutes or longer in clean water.
CAUTION
RISK OF ELECTRIC SHOCK
DO NOT OPEN
This symbol indicates that
dangerous voltage
constituting a risk of electric
shock is present within your TV.
This label is located on the
back of your TV.
This symbol indicates that
there are important operating
and maintenance instructions
in the literature accompanying
your TV.
This symbol indicates that this
product incorporates double
insulation between the
hazardous main voltage and
user accessible parts. When
servicing, use only identical
replacement parts.